background image

BEDIENUNGSANLEITUNG

USER MANUAL

MODE D‘EMPLOI

www.geo-fennel.de

www.geo-fennel.com

www.geo-fennel.fr

DE | EN | FR

FL 150H-G

Summary of Contents for FL 150H-G

Page 1: ...BEDIENUNGSANLEITUNG USER MANUAL MODE D EMPLOI www geo fennel de www geo fennel com www geo fennel fr DE EN FR FL 150H G ...

Page 2: ...radition Inhaltsverzeichnis 1 Lieferumfang A 2 Stromversorgung B 3 Bedienelemente C 4 Bedienfeld D 5 Bedienung E 6 Empfänger FR 45 F 7 Empfänger FR 77 MM G 8 Sicherheitshinweise H FUNKTIONEN UND EIGENSCHAFTEN Horizontaler 2 Achsen Neigungslaser Digitale Neigungseinstellung Überwachte Neigung Automatische TILT Funktion VWS Funktion kombiniert mit TILT Funktion Beleuchtetes Display 2 Wege Funkfernbe...

Page 3: ...serklasse 2 oder 3R Neigung horizontal X Achse 10 bis 10 Y Achse 10 bis 10 Beide Achsen X Y 14 Stromversorgung Li Ion Akku alternativ Alkalinebatterien Betriebsdauer 30 h Reichweite Funkfernbedienung 80 m Temperaturbereich 20 C bis 50 C Staub Wasserschutz IP 65 Gewicht nur Gerät 2 1 kg Horizontaler 2 Achsen Neigungslaser FL 150H G Empfänger mit Halteklammer Fernbedienung Li Ion Akku Internationale...

Page 4: ...zeigt an dass der Akku voll geladen ist Der Akkupack kann auch außerhalb des Gerätes geladen werden Ladezustandsanzeige Wenn die AN AUS LED am Gerät blinkt muss der Akku geladen werden Alkaline Batterien Der Laser kann alternativ mit Alkaline Batterien betrieben werden Verschluss des Batteriefachs aufschrauben und Akkupack herausnehmen Alkaline Batterien in das da für vorgesehene Fach einlegen Pol...

Page 5: ...eypad LCD display Laseraustrittsfenster Tastatur Rotorkopf Griff Display Battery box Battery cover screw 5 8 thread Batteriefachverschluss 5 8 Gewinde Batteriefach BATTERIEZUSTANDSANZEIGE Akku voll geladen Normale Akkuleistung Niedrige Akkuleistung Akku fast leer Akku leer ...

Page 6: ...DIENUNG On off button Channel setting button AN AUS Schalter Kanalwahlschalter GERÄT TILT mode indication VWS mode indication Remote status indication Remote channel indication Y axis grade value X axis grade value Rotating speed indication Power indication Anzeige TILT Funktion Anzeige VWS Funktion Anzeige FB aktiv inaktiv Anzeige Kanalwahl Fernbedienung Batteriezustandsanzeige Anzeige Neigung X ...

Page 7: ...lang gedrückt halten 2 Sek um die Displaybeleuchtung der Fernbedienung ein auszuschalten GERÄT EINSCHALTEN Gerät mit der An Aus Taste einschalten Nach dem Einschalten zeigt das Display automatisch an den Batteriezustand des Gerätes das Anlaufen des TILT Modus TILT LED blinkt langsam wenn das Gerät 30 Sek lang keiner Erschüt terung ausgesetzt ist ist der TILT MODUS aktiv siehe hierzu auch TILT Funk...

Page 8: ...ON Taste drücken um die VWS Funktion zu aktivieren Die VWS Funktion erlaubt Arbeiten während starker Winde Vibrationen und Stöße Geringe Bewegungen werden ignoriert Bei bedeutenden Bewegungen stoppt automatisch die Rotation und der Laserstrahl blinkt Da mit dem VWS Modus auch die TILT Funk tion aktiviert wird blinkt auch die TILT LED Wenn VWS Alarm ausgelöst wurde mit der VWS Taste den VWS Modus w...

Page 9: ...estört Kanäle von Gerät und Fernbedienung stimmen nicht überein Das Symbol zeigt an dass eine Verbindung zwischen Gerät und Fernbedienung besteht Mit dem An Ausschalter der Fernbedienung kann nur die Fernbedienung an und ausgeschaltet werden nicht das Gerät Die Batteriezustandsanzeige der Fernbedienung zeigt ebenfalls nur die Batterieleistung der Fernbedie nung an SLEEP Stand by MANUELL FUNKTION T...

Page 10: ...sertrahl auf der Wand mit Punkt A markieren und durch A eine Vertikallinie ziehen Abstand H1 zwischen Geräteboden und Laserebene messen Gerät nacheinander um je 90 drehen und die weiteren Messpunkte B C und D auf der Vertikallinie markieren Abstand h zwischen dem höchsten und dem niedrigsten Punkt messen und den Mittelpunkt als O festlegen Wenn h 2 mm ist die Genauigkeit in Ordnung wenn die Abweic...

Page 11: ...ANG Empfänger FR 45 Batterie Halteklammer Bedienungsanleitung 1 2 1 7 5 8 3 4 6 9 10 11 11 12 Technische Daten Anzeige Display vorn Genauigkeit grob 10 mm Genauigkeit normal 4 mm Genauigkeit fein 2 mm Arbeitsbereich Klasse 2 Laser Ø 800 m Arbeitsbereich Klasse 3R Laser Ø 1200 m Signaltöne 3 Betriebsdauer 400h Stromversorgung 1 x 9V Wellenlänge 635 nm SYMBOLE 1 Empfänger an aus 2 Batteriezustandsan...

Page 12: ...ur Verlängerung der Lebensdauer der Batterie schaltet sich der Empfänger nach ca 5 Min ohne Anwendung automatisch ab EINSCHALTEN Knopf 5 drücken Zum Empfangen des Laserstrahls den Empfänger langsam auf und ab bewegen A Empfänger nach unten bewegen Akustisches Signal schneller Piepton B Empfänger nach oben bewegen Akustisches Signal langsamer Piepton C Korrekte Bezugshöhe Akustisches Signal Dauerto...

Page 13: ...ßeinheiten mm cm in in Bruch Signaltöne 3 Display Anzeige vorn hinten LED Anzeige vorn hinten seitlich Stromversorgung Betriebsdauer Alkaline 110 h Temperaturbereich 10 C bis 50 C Displaybeleuchtung ja Magnete oben seitlich Libellen oben seitlich Staub Wasserschutz IP 67 Abmessungen 170 x 77 x 32 mm Gewicht 0 5 kg EIGENSCHAFTEN Extra langes Empfangsfeld mm Anzeige der Differenz zwischen Laserebene...

Page 14: ...belle Libelle Empfangsfeld 0SET Taste Offset LCD Anzeige Einheiten umstellen EIN AUS Taste Lautsprecher Arretierung für Halteklammer Gewinde für Halteklammer Markierung Nullposition LCD Anzeige Rückseite Magnet LED Anzeige seitlich LED Anzeige hinten Batteriefachdeckel BEDIENELEMENTE ...

Page 15: ...zeige Anzeige Genauigkeit Anzeige Beleuchtung Anzeige Ton EIN AUS Taste Schaltet den Empfänger EIN AUS Taste Empfangsgenauigkeit Auswahl der Empfangsgenauigkeit Taste Einheiten Auswahl der Einheiten Taste Ton Beleuchtung Ein Ausschalten von Ton und Beleuchtung 0SET Taste Setzen der relativen Null Position ...

Page 16: ...atterien herausnehmen Bei nachlassender Leistung Batterien rechtzeitig wechseln BATTERIEZUSTANDSANZEIGE Das Display des FR 77 MM zeigt vier verschiedene Batteriezustände an Sind die Batterien leer schaltet das Gerät automatisch ab AUTOMATISCHE ABSCHALTUNG Wenn das Gerät für 10 Min keinen Laserstrahl empfängt und keine Taste betätigt wird schaltet es sich automatisch aus 100 power 70 power 30 power...

Page 17: ...NAUIGKEIT EINSTELLEN Gerät einschalten und mit der Taste Empfangsgenauigkeit auswählen fein mittel grob Jetzt wird im Display das jeweilige Genauigkeitssymbol und der numerische Wert angezeigt TON EINSTELLEN Gerät einschalten und durch kurzes Drücken der Taste Ton Beleuchtung Lautstärke einstellen Das Symbol im Display zeigt die jeweilige Einstellung an grob 9 mm mittel 5 mm fein 1 mm 9 5 1 leise ...

Page 18: ...rundbeleuchtung Taste Ton Beleuchtung gedrückt halten UMSCHALTEN DER EINHEITEN Gerät einschalten und zum Auswählen der Einheiten Taste UNITS so oft drücken bis die gewünschte Einheit eingestellt ist Das Symbol im Display zeigt die jeweilige Einstellung an Millimeter Zentimeter Inch Inch Bruch ...

Page 19: ...er Abstand zwischen dem Rotationslaser und dem Empfänger weniger als 1 m beträgt kann das Messergebnis verfälscht werden Anzeige 1 LED Laserstrahl hoch leuchtet Akustisches Signal langsamer kurzer Piepton Empfänger nach oben bewegen Anzeige 2 LED Laserstrahl tief leuchtet Akustisches Signal schneller kurzer Piepton Empfänger nach unten bewegen Anzeige 3 LED 0 Position leuchtet korrekte Bezugshöhe ...

Page 20: ... angenommen Durch erneutes Drücken der Taste 0SET gelangt man zurück in den normalen Anzeigemodus MM ANZEIGE Wenn sich die Nullmarkierung des Empfängers z B 18 mm unterhalb des Laserstrahls befindet wird dies durch den genauen Zahlenwert im Display angezeigt siehe linke Grafik weitere Beispiele Der Laserstrahl ist genau auf der Nullmarkierung Der Laserstrahl ist 19 mm oberhalb der Nullmarkierung E...

Page 21: ...trahls die Libelle zentrieren um die Genauigkeit zu erhöhen Der Empfänger kann in Verbindung mit der Halteklammer aus dem Lieferumfang an einer Nivellierlatte befestigt werden SPEZIALHALTERUNG Zur vielseitigen Befestigung z B am Schnurgerüst ...

Page 22: ...terliegen nicht der Garantie Der Garantieanspruch erlischt wenn das Gehäuse geöffnet wurde Der Hersteller behält sich vor im Garantiefall die schadhaften Teile instand zusetzen bzw das Gerät gegen ein gleiches oder ähnliches mit gleichen technischen Daten auszutauschen Ebenso gilt das Auslaufen der Batterie nicht als Garantiefall HAFTUNGSAUSSCHLUSS 1 Der Benutzer dieses Produktes ist angehalten si...

Page 23: ... der Lasereinrichtung mitzugeben Bitte unbedingt beachten Wenn Sie Geräte zur Reparatur zur Justage an uns zurücksenden entnehmen Sie bitte unbedingt aus Sicherheitsgründen Akkus oder Batterien aus dem Gerät Danke BESTIMMUNGSGEMÄSSE VERWENDUNG Das Gerät sendet einen sichtbaren Laserstrahl aus um z B folgende Messaufgaben durchzuführen Ermittlung von Höhen rechten Winkeln Ausrichtung von horizontal...

Page 24: ...ebrauchsanleitung ist aufzubewahren und bei Weitergabe der Lasereinrichtung mitzugeben Bei Nichtgebrauch ist das Lasergerät gegen Zugriff Unbefugter gesichert aufzubewahren Kennzeichnen Sie den Bereich in dem das Messwerkzeug verwendet wird mit geeigneten Laser Warnschildern So vermeiden Sie dass sich unbeteiligte Personen in den Gefahrenbereich begeben Sorgen Sie dafür dass der Bereich der Lasers...

Page 25: ...25 DE ...

Page 26: ...e adjustment Monitored grade Automatic TILT function VWS function combined with TILT function Illuminated display 2 way RF remote control Remote control screen Li Ion battery technology International charger with adapter for car lighter socket Contents 1 Supplied with A 2 Power supply B 3 Features C 4 Keypad D 5 Operation E 6 Receiver FR 45 F 7 Receiver FR 77 MM G 8 Safety notes H CONFIGURATION FL...

Page 27: ...rizontal slope setting X axis 10 to 10 Y axis 10 to 10 Both axes X Y 14 Power supply Li Ion rechargeable battery alternatively Alkaline batteries Operating time 30 h RF remote control range 80 m Temperature range 20 C to 50 C Dust water protection IP 65 Weight instrument only 2 1 kg Horizontal Dual Grade Laser FL 150H G Receiver with clamp for levelling staff Remote control Li Ion battery Internat...

Page 28: ...tteries are fully charged The Li Ion battery pack can be charged outside of the laser Battery status indication If the ON OFF LED is blinking the battery must be charged Alkaline batteries The instrument can be used with alkaline batteries alternatively Unscrew the lock of the battery door and remove the Li Ion battery case Insert alkaline batteries into the alkaline battery case encure correct po...

Page 29: ...CD display Laser emitting window Keypad Rotating head Handle Display Battery box Battery cover screw 5 8 thread Battery case lock 5 8 thread Battery case BATTERY STATUS INDICATOR battery fully charged normal battery power low battery power very low battery power battery empty ...

Page 30: ...button ON OFF button Channel selection INSTRUMENT DISPLAY INDICATION TILT mode indication VWS mode indication Remote status indication Remote channel indication Y axis grade value X axis grade value Rotating speed indication Power indication TILT function indication VWS function indication Indication of remote control active inactive Channel selection indication remote control Battery status indic...

Page 31: ...is active see also TILT function status SLOPE 00 000 if a remote is active and can receive a signal the indication if no remote is active the indication is the remote control channel selected last At the same time the self levelling procedure starts If the self levelling procedure is completed the laser starts rotating with 600 rmp SELF LEVELLING PROCEDURE DISPLAY ILLUMINATION If the TILT function...

Page 32: ... is completed after 90 sec approx TILT is indicated perma nently Press button to switch this function on off When the TILT function is active If the laser is disturbed the rotation stopps and the laser beam and TILT will flash The laser will not re level automatically If required self levelling procedure can be reactivated with button This instrument has three TILT status Activation TILT flashes s...

Page 33: ... and from A to F 14 channels The channels of the remote can be changed in order to avoid that several units on one construction site disturb each other REMOTE CONTROL When the remote control is switched on the display automatically shows the channel that was selected last With the button the channels of the remote can be selected circularly from CH2 to CH9 and from A to F 14 channels are available...

Page 34: ... 20 m apart from a wall the X axis showing to the wall Switch on the instrument and let the laser complete the self levelling process Mark the laser beam on the wall with point A Turn the instrument in 90 steps and mark the points B C and D accordlingly Measure the distance h between the highest and lowest point from A B C and D If h 2 mm the accuracy is okay If the difference is beyond please hav...

Page 35: ...de SUPPLIED WITH Receiver FR 45 battery clamp user manual 1 2 1 7 5 8 3 4 6 9 10 11 11 12 Technical Data Indication Front display Accuracy coarse 10 mm Accuracy normal 4 mm Accuracy fine 2 mm Working range laser class 2 laser Ø 800 m Working range laser class 3R laser Ø 1200 m Tones 3 Operating time 400h Power supply 1 x 9V Wave length 635 nm SYMBOLS 1 Power ON OFF 2 Battery status indicator 3 Det...

Page 36: ...rder to save battery power the receiver will automatically turn off if it has not received laser scan ning singal for 5 minutes USE OF RECEIVER Press the button 5 to switch the unit on Move the receiver up and down carefully to detect the laser beam A Move the receiver down Acoustic signal ultra short requent beep B Move the receiver up Acoustic signal short requent beep C On level Acoustic signal...

Page 37: ... in in fraction Signal tones 3 LCD display front rear LED height indicators front side rear Power supply Operating times Alkaline 110 h Temperature range 10 C to 50 C Display illumination yes Magnets top side Bubble vials top side Dust water protection IP 67 Dimensions 170 x 77 x 32 mm Weight 0 5 kg FEATURES Extra long receiving window mm indication of height difference between the laser plane and...

Page 38: ...ear LCD Display Magnetic strip Side LED indicators Rear LED indicatiors Battery compartment cover Magnetic strip LED indicators Sound illumination ON OFF button Accuracy button Bubble vial Bubble vial Receiving window 0SET button Offset Front LCD Display Units Power ON OFF FEATURES ...

Page 39: ...l indication 0SET symbol Accuracy symbol Illumination symbol Sound symbol ON OFF button Power ON OFF the receiver Accuracy button Select accuracy setting UNITS button Select units of measure Sound illumination button Sound and or illumination ON OFF 0SET button Set a relative ZERO position ...

Page 40: ...tment cover Always remove the batteries if the receiver will not be used for a long period of time to avoid leakage BATTERY STATUS INDICATOR The FR 77 MM front LCD display has four power status symbols The receiver will automatically power off when the batteries are empty AUTOMATIC POWER OFF If the receiver does not receive a laser beam or is not operated for 10 minutes it will automatically power...

Page 41: ...ram right SELECT ACCURACY SETTING Power on the unit and select the receiving accuracy fine normal or coarse by pressing the accuracy button The default accuracy setting following Power is Fine SWITCH ON OFF THE SOUND Power on the receiver and press the button Sound illumination to select the sound and volume required The symbols in the LCD display show the status of the sound and volume coarse 9 m...

Page 42: ... receiver and keep the button Sound illumination pressed until the illumination is on SELECT THE UNITS Power on the receiver and press the UNITS button sucessively until the required unit symbol appears in the display Millimetre Centimetre Inch Inch fraction ...

Page 43: ...ance between the rotating laser and the receiver is less than 1 m erroneous measurements may occur Indication 1 The laser beam is high arrow is illuminated Acoustic signal Slow beep Move the receiver up Indication 2 The laser beam is low arrow is illuminated Acoustic signal Fast beep Move the receiver down Indication 3 The LED 0 position bar is illuminated Acoustic signal Continuous beep On level ...

Page 44: ...ser beam is now set as the relative 0 position on the receiver Press the 0SET button to return to the default mode MM INDICATION If the reference level of the receiver is e g 18 mm below the laser beam this height difference will be displayed by an exact numerical value see the left diagram further examples The laser beam is exactly on level The laser beam is 19 mm above the reference point move t...

Page 45: ...with a laser pole levelling staff or similar accessory For optimum accuracy always level the bubble vials on the receiver before taking measurements SPECIAL MOUNT To increase the versatility and scope of the receiver a special mount is provided see illustrations ...

Page 46: ... for either parts or labour In case of a defect please contact the dealer where you originally purchased this product The warranty will not apply to this product if it has been misused abused or altered Without limiting the foregoing leakage of the battery bending or dropping the unit are presumed to be defects resulting from misuse or abuse EXCEPTIONS FROM RESPONSIBILITY 1 The user of this produc...

Page 47: ... environment The user manual must always be kept with the instrument Please note If you return instruments for repair for adjustment to us please disconnect batteries or rechargeable batteries from the instrument this is for safety reasons Thank you INTENDED USE OF INSTRUMENT The instrument emits a visible laser beam in order to carry out the following measuring tasks depending on the instru ment ...

Page 48: ... radiation is potentially dangerous to the eye The use of class 3R laser products may require registration with a local authority and the appoint ment of a laser protection official Do not operate the laser without first reading and understanding all the safety and technical data in the user manual The user manual must always be kept with the instrument The instrument should be kept from unauthori...

Page 49: ...49 EN ...
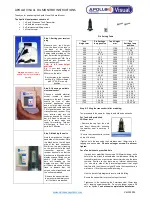
Page 50: ...double pente horizontal à deux axes Réglage digital de la pente Inclinaison côntrolée Fonction TILT automatique Fonction VWS protection contre les vibrations et le vent combinée avec la fonction TILT Écran rétroéclairé Télécommande radio à 2 voies Possibilité de désactivation de la télécommande Technologie d accu Li Ion Chargeur international avec prise allume cigare pour voitures Contenu 1 Livré ...

Page 51: ...aser 2 ou 3R Inclinaison mode horizontal Axe X 10 à 10 Axe Y 10 à 10 Les deux axes X Y 14 Alimentation en courant Accu Li Ion ou piles alcalines Autonomie 30 h Portée télécommande radio 80 m Plage de température 20 C à 50 C Étanchéité IP 65 Poids seul l instrument 2 1 kg A LIVRÉ COMME SUIT Laser horizontal à pente à deux axes FL 150H G Cellule de réception avec support Télécommande Accu Li Ion Cha...

Page 52: ...ccumulateurs peuvent être chargés hors de l instrument Voyant d état de charge Lorsque le voyant DEL de MARCHE ARRET situé sur l instrument commence à clignoter il faut recharger les accumulateurs Piles alcalines 3 x D Le laser peut fonctionner alternativement avec des piles alcalines Dévisser le couvercle du logement de piles et retirer le bloc d accumulateurs Mettre en place piles alcalines dans...

Page 53: ...ge normal Accu faible Accu presque vide Accu vide Handle Laser output window Rotary head Operation keypad LCD display Fenêtre de sortie du faisceau laser Clavier Tête de roton Poignée Écran Battery box Battery cover screw 5 8 thread Fermeture du logement de piles Adaptateur 5 8 Logement de piles ...

Page 54: ...ication VWS mode indication Remote status indication Remote channel indication Y axis grade value X axis grade value Rotating speed indication Power indication Affichage fonction TILT Affichage fonction VWS Affichage télécommande active inactive Affichage choix de canal télécommande Affichage témoin des piles Affichage inclinaison axe X Affichage inclinaison axe Y Affichage vitesse de rotation AFF...

Page 55: ... la fonction TILT l état d inclinaison 00 000 si une télécommande est activée c à d en mesure de recevoir un signal l affichage est si aucune télécommande n est activée l affichage est le canal choisi la dernière fois La fonction d autonivellement est aussi insérée automatiquement Si l autonivellement est terminé l appareil tourne à une vitesse de 600 trs FONCTION D AUTONIVELLEMENT ECLAIRAGE DE L ...

Page 56: ...ne modification de position la rotation s arrête le faisceau laser et TILT cligno tent pas de rajustement automatique Si TILT a été déclenché il est possible de redémarrer l autonivellement à partir de cette position à l aide de la touche L instrument présente trois phases TILT Phase d activation le symbole TILT clignote lentement l instrument n est pas encore prêt Fonction activée le symbole TILT...

Page 57: ...trument et ceux de la télécommande ne concordent pas Le symbole indique qu une liaison existe entre l instrument et la télécommande L interrupteur MARCHE ARRÊT de la télécommande ne permet de commander que la télécommande et non pas l instrument De même l indicateur d état de charge de l accumulateur de la télécommande ne se réfère qu à la puis sance de cet accumulateur FONCTION SLEEP MANUELLE Pre...

Page 58: ... un point A la position du laser sur la paroi et tracer une ligne verticale passant par A Mesurer la hauteur H1 entre la base de l instrument et le plan horizontal du faisceau laser Faire tourner successivement l instrument de 90 et marquer les points B C et D obtenus chaque fois sur la ligne verticale de la paroi Mesurer la hauteur h entre les points le plus haut et le plus bas puis détermi ner l...

Page 59: ...Cellule FR 45 support de cellule pile mode d emploi 1 2 1 7 5 8 3 4 6 9 10 11 11 12 Données techniques Affichage Écran Précision grossière 10 mm Précision normale 4 mm Précision fine 2 mm Portée avec le laser de classe 2 Ø 800 m Portée avec le laser de classe 3R Ø 1200 m Son signal 3 plages Durée de marche 400h Alimentation de courant 1 x 9V Longueur d onde 635 nm SYMBOLE 1 Cellule ON OFF 2 Indica...

Page 60: ...n utilisation la cellule s arrête automatiquement après 5 min env afin de prolonger la durée de vie des piles TRAVAIL SUR DÉTÉCTEUR Presser le bouton 5 Pour capter le faisceau laser faire monter et descendre lentement la cellule A Déplacer la cellule vers le bas Signal acoustique Bipe sonore rapide B Déplacer la cellule vers le haut Signal acoustique Bipe sonore lent C Hauteur de référence correct...

Page 61: ...e 20 mm Unités de mesure mm cm in in fraction Signaux sonores 3 Écran de lecture devant derrière Indications lumineuses devant derrière du côté Alimentation autonomie alcaline 110 h Plage de température 10 C à 50 C Écran rétro éclairé oui Aimants en haut à côté Nivelles en haut à côté Etanchéité IP 67 Dimensions 170 x 77 x 32 mm Poids 0 5 kg CARACTÉRISTIQUES Fenêtre de réception très grande Possib...

Page 62: ... réception Bouton définition du point 0 Offset Écran Sélection des unités Bouton ON OFF Haut parleur Blocage du support Filetage du support Marque du point 0 point de référence Écran de derrière Aimant Voyants lumineux du côté Voyants lumineux de derrière Couvercle comparti ment piles CARACTÉRISTIQUES ...

Page 63: ...Indication 0SET Indication du niveau de précision Symbol retro éclairage Symbole du son Bouton ON OFF Allumer l appareil ON OFF Bouton précision Sélection de la précision Bouton unité Sélection des unités Bouton Son retro éclairage Activer désactiver son ou retro éclairage Bouton 0SET Paramétrer le point ZERO ...

Page 64: ...es si vous n utilisez pas le récepteur pendant une longue période Si le niveau des piles devient faible les piles doivent être échangées INDICATION NIVEAU DES PILES L écran de la cellule FR 77 MM indique quatre statuts différents Si les piles sont vides l instrument s éteint automatiquement ARRÊT AUTOMATIQUE Si l appareil ne détecte pas un rayon laser ou n est pas utilisé pendant 10 minutes il s é...

Page 65: ...age de droite SÉLECTIONNER LE NIVEAU DE PRÉCISION Allumez l appareil et sélectionnez le niveau de précision de réception fine normale grossière avec le bouton Sélection de précision ALLUMER LE SON Allumez l appareil et appuyez sur le bouton Son rétroeéclairage rapidement pour basculer sur le son et régler le volume Le symbole sur l écran affiche les informations désirées grossière 9 mm normale 5 m...

Page 66: ...enez le bouton Son rétro éclairage enfoncée jusqu à ce que le rétro éclairage soit allumé SÉLECTION DES UNITÉS Allumez le récepteur et appuyez sur le bouton unités plusieurs fois jusqu à ce que l unité souhaitée s affiche à l écran Millimèetre Centimètre Inch Inch fraction ...

Page 67: ...UE Si la distance entre le laser et le récepteur est inférieure à 1 m le résultat de la mesure peut être erroné Indication 1 Le voyant monter vers le laser est allumé Signal acoustique Petit bip lent Monter la cellule vers le haut Indication 2 Le voyant descendre vers le laser est allumé Signal acoustique Petit bip rapide Déscendre la cellule Indication 3 Le voyant position 0 est allumé Signal aco...

Page 68: ...laser est considérée comme la position 0 relative Appuyez sur le bouton 0SET pour revenir au mode standard MM INDICATION Si le point 0 de référence du récepteur est par exemple de 18 mm au dessous du faisceau laser alors une valeur numérique exacte sera affichée voir le graphique de gauche Plusieurs exemples Le faisceau laser est exactement de niveau Le faisceau laser est 19 mm au dessus du point ...

Page 69: ...son support Ainsi la cellule peut être fixée sur des mires ou tout autre équipement Afin d augmenter la précision de la cellule centrer la nivelle avant de détecter le faisceau laser SUPPORT SPÉCIAL Pour différentes fixations par exemple sur un échafaudage ...

Page 70: ... prévues Le droit à la garantie n est valable que si l utilisation du niveau a été conforme aux préscriptions En sont exclus l usure mécanique et un endommagement externe par suite d usage de la force et ou d une chute Le droit à la garantie prend fin lorsque le boîtier a été ouvert Dans un cas couvert par la garantie le fabricant se réserve le droit de remettre en état les éléments défectueux ou ...

Page 71: ...ons d avertissement et de sécurité portées sur le niveau Éviter que l instrument ne soit touché ou manipulé par des enfants Ne pas utiliser le niveau dans un milieu à risque d explosions Merci de respecter le suivant impérativement Si vous retournez des instruments pour réparation ajustage vous devez pour des raisons de sécurité impérativement enlever les accus Merci UTILISATION CONFORME AUX PRÉSC...

Page 72: ...quelconque intervention de l appareil L entretien et la réparation de l appareil ne peut être effectuée par une société spécialisée Appareil de classe 3R selon la norme DIN IEC 60825 1 2014 Cet appareil doit être utilisé par une personne ayant l habitude de ce type d instrument en accord avec la nome EN 60825 1 2014 Selon cette norme cela comprend entre autre la connaissance des effets biologiques...

Reviews: