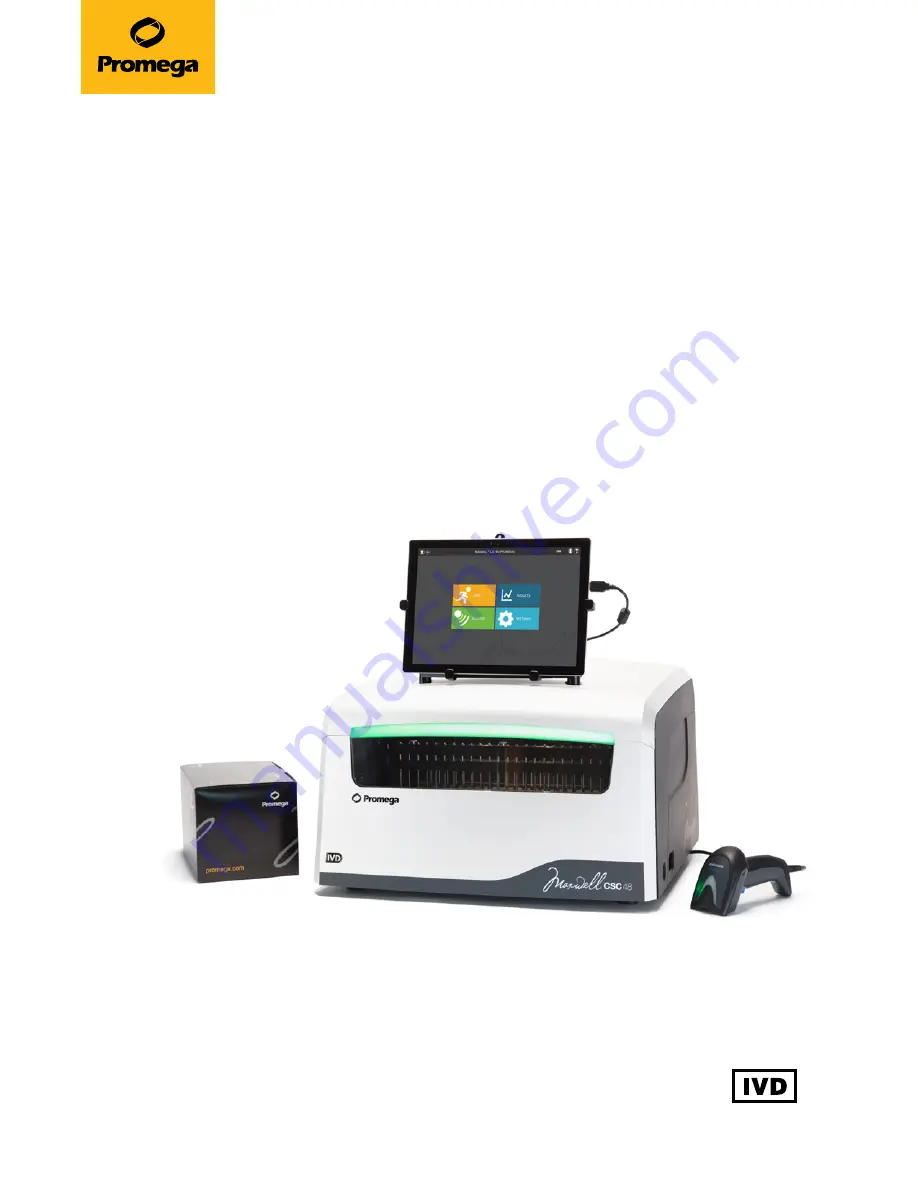
background image

Maxwell

®

 CSC 48 Instrument IVD Mode 

Operating Manual

Instructions for use of the Maxwell

®

 CSC 48 Instrument when running IVD Mode, 

Model Number AS8000

TM623 | Revised 6/20

For use in RUO Mode, see the 

Maxwell

®

 CSC 48 RUO Mode Operating Manual

 #TM628.  

Ensure that all sealing tape and any residual adhesive are removed from the Maxwell

®

 CSC reagent  

cartridges before placing the cartridges into the instrument.

instructions


for


use


of


product


AS8000

Summary of Contents for AS8000

Page 1: ... IVD Mode Model Number AS8000 TM623 Revised 6 20 For use in RUO Mode see the Maxwell CSC 48 RUO Mode Operating Manual TM628 Ensure that all sealing tape and any residual adhesive are removed from the Maxwell CSC reagent cartridges before placing the cartridges into the instrument instructions for use of product AS8000 ...

Page 2: ... Limitations 5 1 4 Maxwell CSC 48 Instrument Features 5 1 5 Maxwell CSC 48 Instrument Specifications 6 1 6 Product Components 6 1 7 Inspection 7 1 8 Precautions 8 1 9 Safety Symbols and Marking 9 1 10 Environmental Requirements Operating Shipping and Storage Conditions 11 2 Hardware Overview 12 3 Unpacking the Maxwell CSC 48 Instrument 14 3 1 Setting Up the Maxwell CSC 48 Instrument 15 ...

Page 3: ...he Tablet PC 19 5 Maxwell CSC 48 User Interface 20 5 1 Home Screen 20 5 2 User Interface Settings 22 5 3 Administrator Settings 29 6 Operating the Maxwell CSC 48 Instrument 44 6 1 Preprogrammed Methods 44 6 2 Starting a Method 44 6 3 Clean Up 57 6 4 Results 58 6 5 Running Reports 61 6 6 Sanitizing 63 7 Cleaning and Maintenance 66 7 1 General Care 66 7 2 Cleaning the Hardware 67 7 3 Dealing with Sp...

Page 4: ... Agreements and Related Products 80 10 1 Warranty 80 10 2 Warranty and Service Agreement Options 80 10 3 Related Products 83 11 Certificate of Decontamination 84 12 Summary of Change 86 All technical literature is available at www promega com protocols Visit the Web site to verify that you are using the most current version of this Technical Manual E mail Promega Technical Services if you have que...

Page 5: ...interface running on a Tablet PC The Maxwell CSC 48 Instrument has the ability to record and report sample tracking and method run data A bar code reader is supplied with the Maxwell CSC 48 Instrument and is used for selecting methods and capturing bar code information for samples and reagents The Maxwell CSC 48 Instrument provides reports of the data gathered for instrument operations reports can...

Page 6: ...ell CSC 48 Instrument is only available in certain countries When used in IVD mode the Maxwell CSC 48 Instrument is not intended for use with reagent kits other than Maxwell CSC reagent kits or with samples other than those defined within the intended use and product limitations of the specific Maxwell CSC reagent kit being used The user is responsible for establishing performance characteristics ...

Page 7: ...current 42V spectral peak F 253 7 UV output 1 7W Installation Category II Pollution Degree 2 1 6 Product Components P R O D U C T C AT Maxwell CSC 48 Instrument AS8000 For In Vitro Diagnostic Use Includes 1 Tablet PC preloaded with Maxwell CSC 48 Application Software 1 USB Cable for connection of the Maxwell CSC 48 Instrument to the Tablet PC 1 Power Cable for Maxwell CSC 48 Instrument 1 Power Cor...

Page 8: ...nt has not been damaged in shipping If any item is damaged contact Promega Technical Services e mail techserv promega com Included components are shown in Figure 1 Figure 1 Maxwell CSC 48 Instrument Components shown include Deck Tray Front A Deck Tray Back B Tablet PC C USB Cable D Tablet PC Power Adapter E communication cable for the Bar Code Reader F Power Cord for Table PC G and Bar Code Reader...

Page 9: ...s and elution tubes Do not reuse cartridges plungers or elution tubes If the equipment is used in a manner other than that specified by Promega the protection provided by the equipment may be impaired Keep hands clear of instrument platform as it moves in and out of the instrument During elution the heated elution blocks at the front and middle of the platform become hot Do not touch To avoid musc...

Page 10: ...or or a safety hazard to the instrument or surrounding area Avertissement Risque de préjudice corporel pour l opérateur ou risque de danger pour l appareil ou la zone environnante Warning Pinch point hazard Avertissement Risque de pincement Warning Hot surface Burn hazard Avertissement Surface chaude Risque de brûlure 6422MA Warning Biohazard Avertissement Risque biologique Warning UV light hazard...

Page 11: ... Number Manufacturer 10928MA 95 240 VAC z 1 0A 0V 2 5A g 5x20mm AS4000 123456789 Made in USA 050 9800 Rev D Maxwell CSC Promega BioSystems Sunnyvale Inc 645 N Mary Ave Sunnyvale CA 94085 USA 249469 It is important to understand and follow all laws regarding the safe and proper disposal of electrical instrumentation Please consult your local Promega representative regarding instrument disposal Lot ...

Page 12: ...y level surface Avoid dusty areas Choose a location that has good air circulation and is not exposed to direct sunlight Avoid electrically noisy power sources e g power generators Do not install in a location where there is large temperature variability or high humidity Do not position the instrument so that it is difficult to unplug from the power source Do not place next to heat sources Do not u...

Page 13: ...de and Rear views of the Maxwell CSC 48 Instrument Panel A The side of the instrument showing the On Off switch and the 3 port USB hub for accessories such as the Bar Code Reader Panel B The rear of the instrument showing the power cable connector and USB communication port for the Tablet PC Hardware Overview 2 A B ...

Page 14: ... 20 Hardware Overview Figure 4 Magnetic assembly components and platform The hardware components inside the Maxwell CSC 48 Instrument The magnet and plunger bars which are used for sample processing and the platform which holds the deck trays are evident ...

Page 15: ...er plastic pieces of the clip and pivot the inner portion of the clip vertically then pull the entire plastic clip out from the base of the box Slide the top portion of the shipping box off the base Remove the side foam pieces from the instrument Carefully remove the instrument from the box Figure 6 Figure 6 Remove the upper packing material 5 Place the instrument on a flat stable surface Leave at...

Page 16: ...lf automatically 2 Unscrew the four shipping screws from the sides of the front magnet and plunger bar Figure 7 Panel B 3 Slide the magnet and plunger bars downward and remove the top foam piece from the instrument Figure 8 Figure 7 Removing the two foam pieces from inside the instrument Panel A Remove the front foam piece Panel B Remove the four shipping screws from the sides of the front magnet ...

Page 17: ... PC from the accessories box 3 Raise the tablet holder as shown in Figure 9 Figure 9 Tablet PC Holder 4 Using the 2 5mm Hex Wrench remove the Tablet Mount Attachment Piece from the top of the tablet holder Slide the Tablet PC into the tablet holder Secure the Tablet PC in the tablet holder by using the 2 5mm Hex Wrench to screw the Tablet Mount Attachment Piece into place at the top of the tablet ...

Page 18: ...trument 6 Connect the Maxwell CSC 48 Power Cable to the back of the Maxwell CSC 48 Instrument Figure 10 Connect the Bar Code Reader to a USB port on the right front side of the Maxwell CSC 48 Instrument Optional To connect the Maxwell CSC 48 to an internal network plug a USB Ethernet Adapter Cat AS8403 into a USB port on the right front side of the Maxwell CSC 48 Instrument Connect an ethernet cab...

Page 19: ...tion 1 5 for power requirements We recommend connecting the Maxwell CSC 48 Instrument to an uninterruptible power supply Switch the rocker switch on the back of the instrument to the On position Press the power button on the right front side of the Maxwell CSC 48 instrument to turn the instrument On Press the Tablet PC power switch located on the top of the Tablet PC to turn the Tablet PC On Start...

Page 20: ... 3 Shut down the Tablet PC using the Windows 10 shut down procedure Touch the Windows icon in the lower left corner of the screen touch the power icon on the left side of the Windows menu and choose Shut Down Storing the Tablet PC When not in use for a prolonged period of time the Tablet PC should be unplugged 4 4 Configuring the Tablet PC The Maxwell CSC 48 Instrument is controlled by Maxwell CSC...

Page 21: ...time specified in the administrator settings see Sanitization Settings in Section 5 3 During the sanitization procedure it is possible to access reports settings and even start the procedure of setting up a new extraction method run as long as these functions do not proceed to an interruption of the sanitization procedure Functions that are not allowed during sanitization include opening the door ...

Page 22: ...rface to the screen accessed prior to the current screen Running When visible this icon indicates that the instrument is currently performing a process e g system protocol extraction method run The time to completion of the current process is indicated in the center of the icon Sanitization Done After UV sanitization is complete this icon will be displayed in the title bar Touch the icon to view t...

Page 23: ...button on the Home Screen Figure 13 The appearance of the Settings screen is tailored to the Maxwell CSC 48 software access level assigned to the Windows user account see the Maxwell CSC Tablet PC Configuration Manual TM484 for information on configuring user accounts A Windows user account with user level access to the Maxwell CSC 48 software will see the following buttons Instrument Info Self Te...

Page 24: ...lled on the Tablet PC Instrument Name the name that an administrator has assigned to this instrument Serial Number the serial number of the Maxwell CSC 48 Instrument connected to the Tablet PC Firmware ID the current firmware version installed on this Maxwell CSC 48 Instrument Firmware Revision the revision number of the firmware version installed on the Maxwell CSC 48 Instrument FPGA ID the curre...

Page 25: ...rument TM623 Revised 6 20 5 2 User Interface Settings continued Figure 15 About Maxwell CSC 48 screen Instrument and software specific information is displayed on the About Maxwell CSC 48 screen 16966TA Maxwell CSC 48 User Interface ...

Page 26: ...ding initialization of the deck tray plunger bar and magnet bar motion of these systems and the instrument heater are operating within acceptable performance ranges Performing the Self Test will result in the generation of a system report that details the Pass Fail status of the tests that are performed Following the Self Test the software automatically opens this report Figure 16 Maxwell CSC 48 S...

Page 27: ...plunger properly during the run On touching the Clean Up button you will be presented with a Clean Up Checklist screen Figure 18 This screen presents you with a checklist of items that must be performed before attempting to unload plungers Cartridges are present at positions for which plungers are still present on the plunger bar Plungers are not present in any cartridges in the deck tray Deck tra...

Page 28: ...his screen you can press Clean Up to unload any plungers left on the plunger bar after an unsuccessful method run 16967TA Figure 18 Clean Up Checklist screen This screen presents you with a checklist of items that must be performed and confirmed before attempting to unload plungers Maxwell CSC 48 User Interface ...

Page 29: ...port logs to the specified path or touch Cancel to return to the Settings screen without exporting logs 4 After pressing Save the Export screen will be displayed indicating that the log files were successfully exported to the path that was specified Figure 19 Panel B 5 On the Export screen you can press Open to open a Windows File Browser showing the folder location of the exported files Press Don...

Page 30: ...xwell CSC 48 Instrument The behavior of each button on the Administrator Page screen is detailed below Follow the instructions to adapt the behavior of the Maxwell CSC 48 software to the needs of the laboratory or refer to any individual subsection to address a specific setting Note Administrator settings made within the IVD Mode are only applied when running the Maxwell CSC 48 software in IVD Mod...

Page 31: ...e Administrator button to proceed to the Administrator Page screen Figure 22 Figure 21 Maxwell CSC 48 Settings screen The Administrator button will only be visible if the currently logged in operator has administrator level rights within the Maxwell CSC 48 software Note If the Administrator button is not visible log out of the Windows operating system with this user and log in with user credential...

Page 32: ...d 6 20 16968TA Figure 22 Maxwell CSC 48 Administrator Page screen The Administrator Page screen is only visible to administrators and gives access to customize the behavior of several aspects of the Maxwell CSC 48 system Maxwell CSC 48 User Interface ...

Page 33: ... extraction To configure the bar code entry options for the software perform the following steps 1 From the Maxwell CSC 48 software Administrator Page screen Figure 22 touch the Sample Entry button 2 The Sample Entry screen is shown in Figure 23 The options for Sample ID and Kit Lot Number are always checked on this screen because these are mandatory settings Choose whether to require the entry of...

Page 34: ... the user if duplicate bar codes are detected within a run The warning does not prevent the user from processing samples but identifies potential errors in bar code scanning for the user To enable this feature check the Warn on duplicates checkbox 4 After the Sample Entry settings are configured as desired touch the Save button to save these settings and return to the Administrator Page screen San...

Page 35: ...anitization button on the Home screen is pressed Touch the OK button on the on screen number pad to accept the duration value or touch the Cancel button on the on screen number pad to discard changes 4 To enable either of the additional UV sanitization options touch the checkbox next to the desired option A checkmark will be visible in the checkbox next to the enabled option and the text box assoc...

Page 36: ... software firmware maxwell maxprep maxwell csc 48 methods Methods are provided as files with a package extension Follow the instructions below to import a method into the Maxwell CSC 48 software 1 Save the method package file on the Tablet PC attached to the Maxwell CSC 48 2 If not already running start the Maxwell CSC 48 software in either IVD Mode or RUO Mode by double touching the software icon...

Page 37: ...list entry to delete it A Warning screen will be shown asking whether the file should be permanently deleted Select Delete to permanently remove the file from the Maxwell CSC 48 software or Cancel to return to the Methods screen without deleting the method Figure 25 Methods screen This screen displays a list of the methods currently installed in the Maxwell CSC 48 software For each method you can ...

Page 38: ...ungers in cartridge well 8 presence of open elution tubes In the checked state the Vision system camera function is on while in the unchecked state the camera is turned off Auto Export Report files can be automatically exported to an administrator defined location at the end of instrument runs Check the Auto Export box to enable this function and then touch the text box below this option to specif...

Page 39: ... when an extraction method run is completed Use the increase decrease volume rocker switch on the edge of the tablet to adjust the Tablet PC volume Play sound on error Check this box to have the Tablet PC generate a sound if an error occurs during an extraction method run on the instrument Use the increase decrease volume rocker switch on the edge of the tablet to adjust the Tablet PC volume When ...

Page 40: ...hat the Tablet PC has network access to the e mail server in order to use e mail notifications Required e mail server information on the left side of the screen includes User Name The name of the user for the e mail account from which e mail notifications will be sent E mail The e mail account from which e mail notifications will be sent Password The password for the e mail account from which e ma...

Page 41: ... you can test the validity of the settings by pressing the Test Connection button Pressing this button will attempt to send a test e mail to the e mail account and e mail recipients designated by the settings on this page When navigating away from the Preferences screen a prompt is displayed allowing the administrator to save any changes that have been made Touch the Save button to save any change...

Page 42: ...cifying a location to which the exported information should be saved 16974TA Figure 29 Audit Records screen A user readable record of events that have occurred in the Maxwell CSC 48 software can be viewed by the administrator and exported to a specified drive location from the Audit Records screen 1 Touch the Export button on the Audit Records screen 2 Using the Yellow and Red rectangle buttons yo...

Page 43: ...and IVD Mode for a single Maxwell CSC 48 instrument 1 From the Administrator Page screen touch the Instrument Name button to open the Instrument Name screen Figure 31 2 On the Instrument Name screen touch the text box to enable the on screen keyboard 3 Use the on screen keyboard to manually enter the desired name for this instrument The instrument name should be entered following the procedures an...

Page 44: ...nges to the instrument name press the Cancel button to return to the Administrator Page screen Figure 31 Instrument Name screen Use this screen to manually enter a name for this Maxwell CSC 48 Instrument Saving the instrument name will enforce a restart of the Windows Operating System 16975TA ...

Page 45: ... kit as well as confirm that the kit being used is within its expiration date Based on the administrator settings in the user interface the user is required to enter sample ID information prior to initiating sample processing If you are using sample identifiers on cartridges and elution tubes we recommend that you enter or scan the optional user supplied bar codes for each one immediately before p...

Page 46: ...e following format Product Catalog Number Kit Lot Number Expiration Date in year month format example AS17803221872018 05 where the product catalog number is AS1780 the kit lot number is 322187 and the expiration date is 2018 05 Only if the bar code entered has this format will the the OK button become active The text to enter is shown to the right of the method barcode in the top right corner of ...

Page 47: ...compatible with the current software mode To run this method shut down the Maxwell CSC 48 RUO software and double tap the Maxwell CSC 48 IVD software icon to use with the desired purification kit c If the product catalog number does not have a purification method associated with it on this instrument a user prompt will appear indicating that the software does not have a method for this catalog num...

Page 48: ...formation for a cartridge is entered the software will automatically move to the next cartridge with empty bar code fields If cartridge and elution tube bar codes are required we recommend that these are scanned immediately before placing the cartridge or elution tube in the deck tray Touch the Sample ID and additional required sample tracking information text boxes to enter or scan the sample inf...

Page 49: ...allows the user to select which cartridge positions will be processed To select deselect a cartridge position touch the long rectangle for any given position Use the Front and Back buttons to toggle between views of the front positions 1 24 and back positions 25 48 deck trays Important There are two bar codes on the kit label When entering product and lot information use the data contained in the ...

Page 50: ...ll move to the next available cartridge position Selecting multiple positions can be used to enter kit lot information for multiple cartridge positions 5 After all required information has been entered for the cartridges and samples that will be processed touch the Proceed button to display the Door prompt Figure 37 Press the OK button to open the Maxwell CSC 48 Instrument door Figure 37 Door scre...

Page 51: ...in the Technical Manual for the specific Maxwell CSC reagent kit Place cartridges at the selected positions in the deck trays Figure 39 Press down firmly to snap the cartridges in place at both ends There should be an audible click Figure 38 Extraction Checklist screen This screen indicates the steps that must be performed to prepare the deck trays prior to processing the selected samples Individu...

Page 52: ...to the elution tube of each cartridge Place the deck trays in the instrument with the Back tray on the back deck position and Front tray on the front deck position as shown in Figure 41 The deck trays for the instrument are keyed so that they will only fit in their appropriate deck position within the instrument Hold the deck tray by the sides to avoid dislodging cartridges from the deck tray Ensu...

Page 53: ... the Cartridge Setup screen any positions of concern will be noted with an exclamation mark in a red circle The Front and Back buttons on the screen will also display the exclamation mark in a red circle to indicate if there are issues on either deck tray Touch the exclamation mark in the red circle at any cartridge position to display a message indicating the issues that were observed by the Visi...

Page 54: ...e method If you wish to abort the current run touch the Abort button 8 Method runs can end through one of three mechanisms The method completes successfully The method is aborted by the user An instrument error occurs that aborts the method Method Completes Successfully When the method completes successfully the method Running screen will indicate that the extraction method has been completed Figu...

Page 55: ...nger in well 8 Remove the deck trays by gripping them firmly by the elution tube position lifting up and pulling each tray out see Figure 45 The deck trays may be warm to the touch after a run is completed Exercise caution while removing the deck trays If there were cartridges missing plungers proceed to Section 6 3 to remove them by running the Clean Up method The extracted material is present in...

Page 56: ...f the administrator has required that UV sanitization be performed after a purification run the user will be prompted to confirm that no samples or eluates are present in the instrument prior to the UV sanitization see Section 6 6 Sanitizing Figure 46 Report View screen A run report is displayed after the completion of an extraction run 16983TA Operating the Maxwell CSC 48 Instrument ...

Page 57: ...borted by the user the Protocol Running screen will display a progress bar of 100 and Current Step is shown as Aborted by user After a method is aborted press the Open Door button Instrument Error If the method is aborted due to instrument error the Protocol Running screen will change to indicate that the method has been aborted and will display an error message After a method is aborted the Curre...

Page 58: ...If an extraction method is aborted by the user or due to an instrument error and the Vision system has been disabled the Clean Up screen is displayed and asks you to Start Clean Up or Skip Clean Up depending on whether the plungers are still engaged on the plunger bar If some or all of the plungers are still engaged on the front or back plunger bar you must perform the following steps to remove th...

Page 59: ...d the length of time the method took to process the operator ID and the Maxwell CSC 48 Instrument details software version firmware version instrument name serial number etc 16983TA Figure 49 Report View screen The Report View screen displays the sample tracking and method specific information for the current instrument run Included in this report are the sample tracking information recorded prior...

Page 60: ...tons you can select the folder location where the reports will be saved The current path is indicated by the yellow rectangles at the top of the Export Folder screen Any folders present within the selected directory are displayed as red rectangles in the main portion of the screen Touch the Drive button to navigate to the drive location of the desired folder Touch red folder buttons to navigate to...

Page 61: ...trument Cartridges with seals completely removed placed at posi ons 1 8 Samples have been placed in well 1 of each cartridge Elu on tubes placed at posi ons 1 8 with caps opened and facing away from the cartridges Appropriate volume of elu on reagent has been added to each elu on tube Plunger has been placed in well 8 of each cartridge Plungers are not present on instrument plunger bar Posi on Cat...

Page 62: ...o filter the list of displayed reports by time period Use the Extraction System and All Types buttons on the left side of the screen to filter the displayed reports by report type Touch the column headers to sort the reports based on column contents Touch the desired row to see a detailed view of the report data from that method run Figure 55 The Export All button in the lower left corner of the s...

Page 63: ...method run Filter the displayed results using the Extraction System or All Types buttons on the left side of the screen Selecting a date range button on the left side of the screen will filter the reports displayed based on their date Press the Export All button to export all displayed reports to a user specified drive location Figure 55 Extraction report An example of the sample tracking informat...

Page 64: ...nitization will take It will also ask you to confirm that no samples or eluates are present in the instrument prior to running Sanitization Once you confirm the Start button is enabled Touch the Start button to start UV sanitization Figure 56 Home screen Selecting the Sanitize button begins the process for UV treatment of the Maxwell CSC 48 Instrument Figure 57 Sanitize Checklist screen The saniti...

Page 65: ...itization Touch the icon to view the Sanitization report Note UV radiation is useful in decontamination due to its ability to inactivate biological molecules UV treatment is not a substitute for cleaning Using the UV Sanitization protocol alone may not provide sufficient decontamination Follow the cleaning guidelines in Section 7 Figure 58 Example Sanitization Report The sanitization report will b...

Page 66: ...65 Promega Maxwell CSC 48 Instrument TM623 Revised 6 20 Notes Operating the Maxwell CSC 48 Instrument ...

Page 67: ...y plunger bar inside platform and the outside of the instrument using cloths dampened with 70 ethanol Do not use other solvents or abrasive cleaners Clean the Maxwell CSC 48 Instrument after every use Keep the vents in the back of the machine clear of dust Do not remove the Maxwell CSC 48 Instrument case for cleaning This will void the warranty Do not use a spray bottle to soak instrument surfaces...

Page 68: ...he front of the instrument Figure 59 to remove the magnet bar Slide the magnet and plunger bar upward so you have access to the back magnet rod assembly 6 To clean the magnetic rod assemblies wipe with a soft cloth dampened with 70 ethanol Removal of paramagnetic particles from the magnetic rod assembly will require multiple wipes The damp cloth may be wrapped around a magnet to facilitate removal...

Page 69: ... material is removed In case of spills in the instrument where there is a potential biohazard wipe up the spill with paper towels and wash the spill area with a detergent solution such as Steris LpH following the manufacturer s instructions Dispose of towels used according to your institutional guidelines for biohazardous waste Important Bleach reacts with guanidine thiocyanate which may be used i...

Page 70: ...69 Promega Maxwell CSC 48 Instrument TM623 Revised 6 20 Notes Cleaning and Maintenance ...

Page 71: ...et PC and launch Maxwell CSC 48 software If the issue is not resolved contact Promega Technical Services for further assistance Cannot change the sanitization time or import new methods Only operators with administrator level access to the Maxwell CSC 48 software have the ability to change certain functions If you do not have administrator level access contact your site administrator Power failure...

Page 72: ...e aborted and samples will be lost If error persists contact Promega Technical Services Protocol Aborted By User User aborted the method An aborted run initiated by the user will result in the loss of all the samples Do not attempt to repurify samples from an aborted run An error occurred during cartridge placement verification Ensure cartridges are fully seated Instrument detected cartridges were...

Page 73: ...n change has been detected Contact Promega Technical Services 8 1 Use of a USB Flash Drive When using a USB flash drive insert it before running any method and do not remove it until the method is finished Do not insert or remove a USB flash drive while instrument is running Since USB flash drives may vary from vendor to vendor or from type to type incompatibilities can occur If your USB flash dri...

Page 74: ...73 Promega Maxwell CSC 48 Instrument TM623 Revised 6 20 Notes ...

Page 75: ...y Promega is not responsible for instrumentation returned without an authorization number When you ship the instrument for service please remember to Obtain return authorization from Promega Decontaminate the instrument see Section 11 for decontamination instructions Include a signed and dated Certificate of Decontamination inside the package in which the instrument is returned see Section 11 Fail...

Page 76: ...e that Tablet PC and bar code reader are disconnected Repacking the Maxwell CSC 48 Instrument Note If you do not have the original Maxwell CSC 48 Instrument packaging please contact Promega Technical Services or your local Promega representative to order Maxwell CSC 48 Instrument packaging Ship the Maxwell CSC 48 Instrument only with Promega packaging to avoid any damages 1 Turn the instrument off...

Page 77: ... cut foam 5 Manually move the plunger bar and magnet bar Figure 62 up to attach the shipping screws Figure 62 Placement of plastic stoppers Move the magnet and plunger bars up and secure the four shipping screws on both sides of the magnet and plunger bars 6 Secure the four shipping screws by screwing them in on both sides of the magnet and plunger bars as shown in Figure 62 Instrument Service ...

Page 78: ...rods Figure 63 Figure 63 Insert the front die cut foam Make sure the serrated edge covers the magnet rods 8 Place the instrument in the plastic bag 9 Place the instrument in the bottom foam packaging material The instrument will only fit properly into the bottom foam piece in one orientation Figure 64 Figure 64 Maxwell CSC 48 Instrument in correct orientation in the box ...

Page 79: ...to the clip to secure it Figure 65 Figure 65 Placement of the four plastic clips around the base of the shipping box 11 Place the accessories box on top of the packing foam Figure 66 Affix the Certificate of Decontamination on top of the accessories box Figure 66 Maxwell CSC 48 Instrument repackaged in the shipping box 12 Close the flaps on the shipping container top and secure them with packing t...

Page 80: ...trument Disposal Contact your local Promega Representative for disposal of the instrument Please follow your institutional and country specific requirements to handle the disposal of accessories Instrument must be decontaminated prior to disposal Instrument Service ...

Page 81: ...in 1 business day where available or on site service visit by a factory trained service technician within 2 business days where available Additionally it includes one annual Preventive Maintenance PM visit per year which can be performed by returning the instrument to an authorized service center or by an on site visit by a service technician Additional PM visits are available separately Maxwell C...

Page 82: ... and replace them as needed Additionally the system is aligned and functionality is verified Documentation for your files is provided The preventive maintenance service is performed by returning the instrument to an authorized service center Maxwell CSC 48 Installation Qualification and Operational Qualification Cat SA1457 SA1458 SA1459 The Installation Qualification service product includes a ser...

Page 83: ...nit to you at Promega s expense within 3 business days after the repair is complete This Warranty may be renewed in one year terms provided the renewal is requested prior to the expiration of the current Warranty or Service Agreement Promega agrees as its sole responsibility under this Warranty and upon prompt notice of a defect to repair or replace at Promega s discretion any instrument discovere...

Page 84: ... Size Cat Bar Code Reader Maxwell Systems 1 each AS3200 Maxwell RSC CSC 48 Front Deck Tray 1 each AS8401 Maxwell RSC CSC 48 Back Deck Tray 1 each AS8402 USB Ethernet Adapter 1 each AS8403 For In Vitro Diagnostic Use This product is only available in certain countries Instrument Service ...

Page 85: ...ems have been decontaminated and can be handled without exposing personnel to health hazards Select the type of material used in the instrument Chemical Biological Radioactive Briefly describe the decontamination procedure performed Date ______________________________________________________________________________ Place _____________________________________________________________________________...

Page 86: ...85 Promega Maxwell CSC 48 Instrument TM623 Revised 6 20 Notes ...

Page 87: ...Summary of Change 12 86 Promega Maxwell CSC 48 Instrument TM623 Revised 6 20 The following change was made to the 6 20 revision of this document Updated Methods link in Section 5 3 ...

Page 88: ...Corporation All Rights Reserved Maxwell is a registered trademark of Promega Corporation LpH is a registered trademark of Steris Corporation Windows is a registered trademark of Microsoft Corporation Products may be covered by pending or issued patents or may have certain limitations Please visit our Web site for more information All prices and specifications are subject to change without prior no...

Page 89: ...ON 2800 WOODS HOLLOW ROAD MADISON WI 53711 5399 USA TELEPHONE 608 274 4330 www promega com 2020 PROMEGA CORPORATION ALL RIGHTS RESERVED PRICES AND SPECIFICATIONS SUBJECT TO CHANGE WITHOUT PRIOR NOTICE TM623 Revised 6 20 ...

Reviews: