background image

VQT0K98

2

English

Important Information

For Your Safety

The power switch turns the DVD Video Camera on and off, leaving the date/time feature unaffected. If the video camera 
is to be left unattended for a long period of time, turn it off .

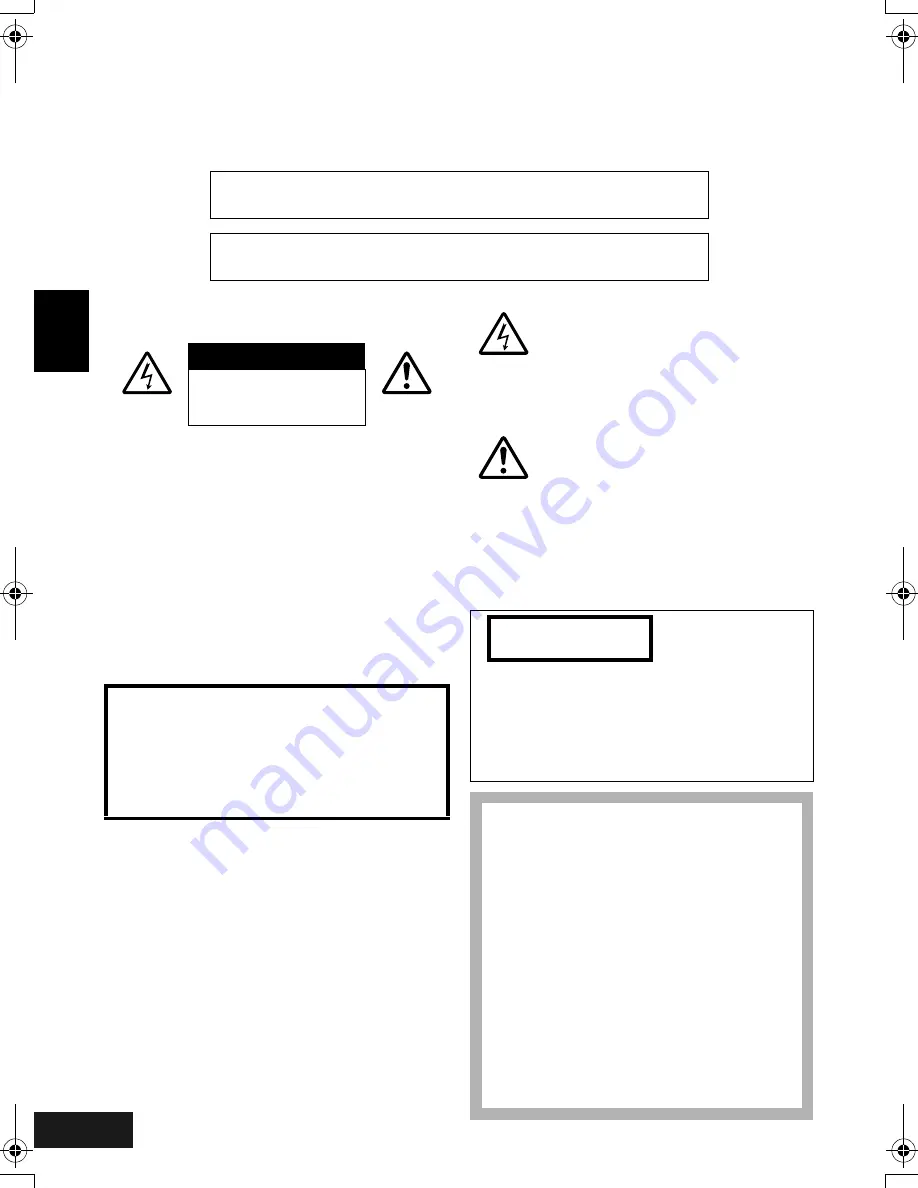
The DVD Video Camera and AC adaptor/charger 
have the following caution marks.

CAUTION:

 TO REDUCE THE RISK OF 

ELECTRIC SHOCK, DO NOT OPEN.

NO USER-SERVICEABLE PARTS INSIDE.

REFER SERVICING TO QUALIFIED 

SERVICE PERSONNEL.

Precautions

WARNING:

 Many television programmes and films 

are copyrighted. In certain circumstances, copy-
right law may apply to private in-home videotaping 
of copyrighted materials.

Identifications of caution marks

This symbol warns the user that 
uninsulated voltage within the unit may 
have sufficient magnitude to cause 
electric shock. Therefore, it is 
dangerous to make any kind of contact 
with any inside part of this unit.

This symbol alerts the user that 
important literature concerning the 
operation and maintenance of this unit 
has been included. Therefore, it should 
be read carefully to avoid any problems.

WARNING:

 To prevent risk of injury or damage to 

your DVD Video Camera and the AC adaptor/
charger, use only the CGA-DU14/CGA-DU21 
battery and VSK0631 AC adaptor/charger.

WARNING : TO PREVENT FIRE OR SHOCK HAZARD, DO NOT 

EXPOSE THIS UNIT TO RAIN OR MOISTURE.

WARNING : TO PREVENT FIRE OR SHOCK HAZARD, USE THE 

RECOMMENDED ACCESSORIES ONLY.

CAUTION

RISK OF ELECTRIC 

SHOCK 

DO NOT OPEN

The liquid crystal display (LCD) panel is made by 
highly precise technology. More than 99.99% of 
its picture elements (pixels) are effective, but 
some (less than 0.01%) may appear as coloured 
bright dots. This does not indicate a fault as the 
LCD panel stretches the limits of current 
technology.

CLASS 1
LASER PRODUCT

CAUTION

This product contains a laser diode of higher 
class than 1. To ensure continued safety, do not 
remove any covers or attempt to gain access to 
the inside of the product. Refer all servicing to 
qualified personnel.

As this equipment gets hot during use, 
operate it in a well-ventilated place; do 
not install this equipment in a confined 
space such as a bookcase or similar unit.

To reduce the risk of fire, electric shock 
or product damage, do not expose this 
equipment to rain, moisture, dripping or 
splashing and ensure that no objects 
filled with liquids, such as vases, shall be 
placed on the equipment.

DVD Video Camera
• The rating plate is on the surface of the 

Video Camera.

AC Adaptor
• The rating plate is on the underside of 

the AC Adaptor.

170

ENG.book  Page 2  Tuesday, March 23, 2004  8:12 PM

Summary of Contents for VDR-M70GC

Page 1: ...he AC adaptor charger use only the CGA DU14 CGA DU21 battery and VSK0631 AC adaptor charger WARNING TO PREVENT FIRE OR SHOCK HAZARD DO NOT EXPOSE THIS UNIT TO RAIN OR MOISTURE WARNING TO PREVENT FIRE...

Page 2: ...lectual property and international properties Article 3 Other Rights and Limitations a You may not copy This Software or any of the printed materials attached except for duplications to provide back u...

Page 3: ...current technology and does not indicate a fault that will interfere with recording The LCD screen and viewfinder will be slightly dimmer than usual when the DVD Video Camera is at low temperature asi...

Page 4: ...During playback of normally recorded video and audio noise may also be present in picture and sound At worst the DVD Video Camera could malfunction Do not expose the DVD Video Camera to soot or steam...

Page 5: ...re that the temperature of this DVD Video Camera when connected to PC does not rise excessively reference for usage approx 30 minutes at about 30 C DonotturntheDVDVideoCameraoffwhiletheACCESS PCindica...

Page 6: ...e DVD Video Camera in a place where the humidity is high or in a dusty place Dust entering the DVD Video Camera could cause malfunctions If the humidity is high the lens could be mouldy and the DVD Vi...

Page 7: ...disc or card Also Panasonic cannot be responsible for your recorded video and audio If you or a third party make a mistake when handling this DVD Video Camera disc card etc the recorded contents may...

Page 8: ...uction to products sold separately proper cleaning and troubleshooting We want this manual to be as helpful as possible so it includes two easy ways to find the information you need A quick index for...

Page 9: ...in this text Microsoft Windows Windows 98 Windows 98 Second Edition Windows Me Windows 2000 Professional and Windows XP Home Edition XP Professional are registered trademarks of Microsoft Corporation...

Page 10: ...ded data You can immediately play back desired recorded scenes You do not need to rewind unlike recorders using tape You can select any scene you want and immediately play it back using Disc Navigatio...

Page 11: ...e play list and dub it on VCR Itisalsoeasytomakeanynumberofidentical tapes Create original DVDs on PC You can use a DVD R disc to create an original DVD using the provided software CD ROM The created...

Page 12: ...eo Camera 40 Removing Battery 40 Battery Remaining Level Indicator 42 Efficient Use of Battery 42 Using DVD Video Camera with AC adaptor charger 43 Inserting and Removing Disc 44 Inserting Disc 44 Rem...

Page 13: ...ing Images for Thumbnails Edit Thumbnail 98 Playing Back by Skipping Scenes Edit Skip 99 Arranging Order of Scenes Edit Move 99 Adding Special Effects Edit Fade 100 Combining Multiple Scenes Edit Comb...

Page 14: ...1 Installing DVD MovieAlbumSE 134 Installing MyDVD 136 Creating DVD Video on PC from DVD RAM Disc Recorded on DVD Video Camera 138 Uninstalling Software 140 Uninstalling USB Driver 140 Deleting Other...

Page 15: ...t output cable Used when viewing the picture played back on the DVD Video Camera on TV screen or output video to another video device Shoulder strap Attach to the DVD Video Camera to hang it from shou...

Page 16: ...conversion lens 8 Zoom lever P 55 Push the lever to the T side for telephoto or to the W side for wide angle 9 Hot shoe P 65 Only for VDR M70GC Attach the optional video flash here 10 AV input output...

Page 17: ...ever to open the disc guide 18 CARD ACCESS indicator P 6 50 19 Card insertion block P 47 20 Battery attachment platform P 40 21 Record REC button P 49 22 Power switch P 48 49 50 23 Shoulder strap hold...

Page 18: ...34 RESET button P 160 To reset all settings to defaults status when the DVD Video Camera was shipped from the factory 35 USB port To PC 36 Joystick P 38 57 75 Move the joystick to select a scene or me...

Page 19: ...ton P 38 76 97 47 ZOOM T button P 55 48 ZOOM W button P 55 49 Forward search button P 58 50 Play pause button P 57 51 Forward skip button P 59 52 DISPLAY button P 61 53 Stop button P 10 57 92 54 DELET...

Page 20: ...dicator on AC adaptor charger will light 3 Attach the battery to AC adaptor charger Note When charging a battery unplug the DC power cord from the DC output jack on AC adaptor charger Battery charged...

Page 21: ...or trial recording since you can delete the recorded contents See page 26 1 Connect a power supply P 43 Mains lead AC adaptor charger DC power cord Connect them in sequence of the digits To AC outlet...

Page 22: ...g an unformatted disc format initialise it on this DVD Video Camera If unformatted disc is inserted into this DVD Video Camera a message will appear Format the disc following the instructions on scree...

Page 23: ...orded on card 1 Connect a power supply P 43 Mains lead AC adaptor charger DC power cord To AC outlet Connect them in sequence of the digits 2 Insert a card P 47 1 Open the cover of card insertion bloc...

Page 24: ...t the centre of power switch set the switch to 4 Press the REC button Pressing REC once will record one photo REC button 4 View the playback of recorded content on LCD monitor screen P 57 1 Open the L...

Page 25: ...into the DVD Video Camera It will not be removable Note It is recommended that you use Panasonic discs since their compatibility with this DVD Video Camera has been confirmed Using a disc other than t...

Page 26: ...R disc refer to Finalising DVD R Disc Finalize Disc P 123 Note When using an unformatted DVD R disc it is necessary to format it on this DVD Video Camera See page 45 Do not insert a DVD R disc record...

Page 27: ...rding session as shown above In this case the recordable time on disc will decrease Be careful when removing the disc since the metal of removal slot of DVD Video Camera and disc itself may be hot Sto...

Page 28: ...of data Do not use DVD Video Camera in a place subject to static electricity or electrical noise Note The reading writing speed of MultiMediaCard is slower than SD Memory Card When MultiMediaCard are...

Page 29: ...x 6 Mbps 3 Transfer rate Approx 3 Mbps Note Audio in XTRA FINE or STD mode is recorded in the MPEG1 Audio Layer 2 format which is the option standard of DVD video standard No movie can be recorded on...

Page 30: ...and quality of one JPEG still recorded on card Although still images are recorded on DVD RAM disc only in the FINE mode the quality mode can be chosen when recording stills on card See page 161 for th...

Page 31: ...3 Attach the belt Note Do not adjust the hand strap while holding the DVD Video Camera Doing this could cause the DVD Video Camera to fall and be damaged To use as a Hand Strap Using the Grip Belt as...

Page 32: ...Shorter side is for the lens cap 2 Attach the string to the attachment hole of DVD Video Camera Detaching the grip belt makes things easier 3 Push the both sides of cap inward and attach it over the...

Page 33: ...ECHARGE DISASSEMBLE OR DISPOSE OF IN FIRE Note Replace the battery with a Panasonic CR2025 Use of another battery may present a risk of fire or explosion Dispose of battery safely in accordance with l...

Page 34: ...obstacle between the remote control and infrared receiver on DVD Video Camera remote control may not be possible Depending on the type of fluorescent lamp the remote controller may not work properly...

Page 35: ...s in the same direction as the lens If the LCD monitor is turned 180 so the screen faces in the same direction as the lens during recording subject image will also appear in the viewfinder as an mirro...

Page 36: ...monitor at right angles to the DVD Video Camera before closing it or replacing it on the DVD Video Camera with its screen facing outside If the LCDmonitoristilted itcannotbeclosedtotheDVDVideo Camera...

Page 37: ...idway press the C button 6 After setting the current date and time press the A button The screen for verifying the set date will appear 7 Ifthedisplayeddateandtimearecorrect usethe joystick to choose...

Page 38: ...ched to the currently selected option 3 Use the joystick to select the desired date display format andthenpressthe A button The menu screen for setting date will be restored and the Date Mode has been...

Page 39: ...battery to fall resulting in damage Removing Battery After using the DVD Video Camera remove the battery from it 1 SlidetheBATTERYEJECTswitchonthebottom of DVD Video Camera The battery can be removed...

Page 40: ...ime will vary depending on the battery remaining level During and after charging the battery will be warm but this does not indicate a fault If the following phenomena appear the battery may be dead R...

Page 41: ...deoCameraanduse it up then remove the battery and store it in a cool place again Store in cool dark place When you are not using the DVD Video Camera remove the battery and store it in a cool dark pla...

Page 42: ...jack on AC adaptor charger 4 Attach the other end of DC power cord to the battery attachment platform on DVD Video Camera Note The mains lead s outlet plug does not fit entirely into the AC adaptor c...

Page 43: ...ording playback side must face the inside DVD Video Camera If the disc is not correctly inserted the cover will not close Never try to forcibly close the cover This could cause damage Reinsert the dis...

Page 44: ...start The messages on the right will appear in sequence by pressing the A button between messages Whenrecordingonthis DVD Video Camera Whenfirstmessage Format the disc now appears choose YES and then...

Page 45: ...The DISC EJECT indicator on the LCD screen will blink It is recommended that you turn the DVD Video Camera off before inserting or removing disc to prevent misoperation Do not remove the battery pack...

Page 46: ...edge The card will come out so that it can be held by fingers 4 Close the cover of card insertion block Note Do not push the label pasting portion of SD Memory Card whenremovingit Doingsocould damage...

Page 47: ...ediatelystartrecordingwhenturning the DVD Video Camera on next time DVD R disc It will take some time for the DVD Video Camera to display the Disc Navigation screen after power is turned on If you tur...

Page 48: ...ding can be made while DISC ACCESS is being displayed Recording willrestartafterthemessage disappear Do not turn power off while message DISC ACCESS is being displayed Take care that power is not inte...

Page 49: ...is being displayed you cannot proceed with the next recording 4 Set the power switch to OFF to turn the DVD Video Camera off Turn power off only after message DISC ACCESS disappears Note See Size and...

Page 50: ...Press the BACK LIGHT button during recording The backlight correction icon will appear Note Pressing the BACK LIGHT button will alternate between backlight setting between on and off The backlight set...

Page 51: ...s display in Spanish Manual focus 3 Backlight compensation No display Backlight compensation OFF m Backlight compensation ON 4 Wind Cut only in movie recording mode No display Wind Cut OFF Wind Cut ON...

Page 52: ...REM XX 7 Number of remaining recordable still images during still recording 16 Remaining battery level w full charge x y z low remaining charge 17 Brightness Colour density of LCD screen 18 Current da...

Page 53: ...ing level will blink when the battery has almost no remaining charge The following operating status indicator will light or blink to give warning messagetouser ThemessagecanbecheckedwhenreturningtheLC...

Page 54: ...during movie recording will switch the setting between Off 40 and 500x on VDR M50GC or 240x on VDR M70GC Pressing the button during still recording will switch between Off and 40 If you set zoom to 5...

Page 55: ...o focus The amount of light tends to be insufficient during macro recording If the subject image is too dark use additional lighting Recording Subjects for Stronger Wide Angle or Telephoto Effect Use...

Page 56: ...canplaybacktheaudiorecordedinDolby AC3 2ch To temporarily stop playback press the A button Press the A button again to restart playback Even if you stop playback midway and immediately start recording...

Page 57: ...if search playback does not operate normally 12 Frame Advance Frame Back Slow Playback of Movie During playback pause tilt the joystick Frame advance frame back or slow playback will start Tilt to rig...

Page 58: ...s at the beginning of the located scene Tilting down in the last scene on disc will set the DVD Video Camera to the playback pause status at the last image See Check 3 on page 143 if search playback d...

Page 59: ...ss the A button to enter the selection The DVD Video Camera will go to the specified point and enter the playback pause status To cancel the Go To procedure midway press the C button before going to t...

Page 60: ...g Forward frame advance h Reverse frame back Forward slow playback Reverse slow playback Refer to Playing Back beginning on page 57 for how to operate The j mark will appear on the first image on dis...

Page 61: ...s surface to infinity 1 Press the FOCUS button during recording MF will appear on the screen 2 Press the zoom lever down to T control side to zoom in on subject 3 Use the S R buttons to adjust the foc...

Page 62: ...LCD screen Note Pressing EXPOSURE will alternate between manual adjustment and auto exposure With auto exposure no indication will appear on the screen Theexposuresettingwillbestoredinmemoryevenwhen t...

Page 63: ...e the camera functions 1 Press the AUTO button FULL AUTO will be displayed on the screen of DVD Video Camera for several seconds The following settings will reset to defaults Function When setting ful...

Page 64: ...o Camera automatically sets the shutter speed between 1 800 and 1 30 second between 1 800 and 1 10 second if Program AE has been set to Low Light depending on the subject brightness P 76 WhenyouuseVid...

Page 65: ...se howling from the TV speakers Insert the AV S input output cable plugs into jacks straight Obliquely inserting them could damage the jacks A V MIC To AV input output jack AV S input output cable pro...

Page 66: ...sound on TV The infrared remote control is useful when operating the DVD Video Camera while viewing an image on TV screen Information that the DVD Video Camera is recording will appear on the TV scree...

Page 67: ...Operating Instructions of DVD video recorder for details Request when recording to hard disk of DVD video recorder Movie only recorded discs can be used A disc on which is recorded only still images o...

Page 68: ...e disc from Round DVD Holder See Removing and Replacing from in Round DVD Holder on page 28 3 Insert the disc into the DVD player and play it back See the instruction manual for DVD player Note DVD R...

Page 69: ...ortion of the holder piece marked SIDE A with thumb and middle finger and warp it in the direction of arrows 4 2 Fit the hinged portion of the other holder piece into the warped hinge portion Note Han...

Page 70: ...put on page 83 for details and Recording Stills on page 50 for how to record still images The Input Source setting will return to CAMERA whenever DVD Video Camera is turned off Recording of most image...

Page 71: ...rring to Input Source on page 83 2 Turn on the connected device and start playback The picture will appear on the LCD screen or viewfinder of this DVD Video Camera 3 Press the REC button Recording wil...

Page 72: ...st screen to select the play list to be recorded dubbed and then press the recordbuttonontheconnecteddevice TheDVD Video Camera will start playback and the recorded device will record dub it Note Usin...

Page 73: ...here to explain are displayed when DVD RAM disc is used Some items will not appear when a DVD R disc or card is used or when no disc or card is inserted Interpreting screen for setting Spo r t s Por t...

Page 74: ...will restore the original image size Came r a Fun c t i ons Se t up On Au t o RAM Pr og r am AE Whi te Ba l Dig Zoom Wind Cut Of f S I S ENTER RETURN 40x Au t o Cinema Of f Rec o rd Func t i ons Se t...

Page 75: ...g rapidly moving subjects such as in golf or tennis If the Sports mode is used under a fluorescent light the image may flicker In this case use the Auto mode for recording Portrait Creates a shallow d...

Page 76: ...the MENU button to end the setting Mode Setting content On screen display Auto White balance always automatically adjusted None Set You can manually adjust white balance to match the light source or...

Page 77: ...ept the h indicator will blink re setting the white balance will change the h indicator to a steady light Note The white balance mode can be confirmed using the on screen information OnlytheSetmodewil...

Page 78: ...tting 10x or more of magnification and turning the SIS to On in dim places after images may stand out In this case we recommend using a tripod with turning the SIS to Off only for VDR M50GC The SIS fu...

Page 79: ...screen Note The black bands that appear across the top and bottom of screen will not be recorded If you record in the cinema mode and play back on a TV other than wide screen TV the portions masked b...

Page 80: ...setting will switch to FINE in the following cases When the mode is set to XTRA with a DVD RAM disc inserted and then the disc is replaced with a DVD R disc When using DVD R disc you cannot switch th...

Page 81: ...ll recording quality only when using card 1 Press the MENU button choose Quality on the Record Functions Setup menu screen and then press the A button 2 Choose the option you want and then press the A...

Page 82: ...r a DVD RAM disc or a card The DVD Video Camera can record an external image with little movement by specifying Frame but Field is recommended for recording image with movement 1 Press the MENU button...

Page 83: ...will be set 3 Press the MENU button to end the setting 4 Press the REC button The recording indicator at the front of DVD Video Camera will blink The self timer indicator will start to count down and...

Page 84: ...Video Camera is turned off Even if Off is chosen the on screen information will appear during playback See page 61 for playback on screen information display Evenaftertheon screeninformation isremove...

Page 85: ...of LCD Screen Colour Level 1 Choose ColourLevel on the LCD Setup menu screen and then press the A button The colour density adjustment bar will appear on the screen 2 Use the joystick for adjustment T...

Page 86: ...eo Camera on again from automatic off activated by the power save function set the power switch to OFF and then set it to or The Power Save setting will not appear in the on screen information display...

Page 87: ...is On or Off Changing Display Language Language You can change the language used to display the menu and information The following shows that English is changed to French 1 Press the MENU button choo...

Page 88: ...ess the A button The screen for verifying reset will appear 2 If you are sure that you wish to reset use the joystick to choose YES and then press the A button The setting items have now been reset to...

Page 89: ...appear when DVD R disc or card is used but the operation is the same 1 Press the DISC NAVIGATION button The Disc Navigation screen shown on page 91 will appear Note Do not proceed with a following st...

Page 90: ...risplacedinthe space for operating guide Pressing DISPLAY again will display the operating guide If no disc or card is inserted the Disc navigation screen cannot be displayed even by pressing the DISC...

Page 91: ...long as 5 minutes the Disc Navigation screen will automatically be restored Playing back stills A still will be displayed for approx 3 seconds When playing back stills on card playback will stop afte...

Page 92: ...blue 4 Use the joystick to select the last scene in the range you want and then press the A button Thethumbnailsofscenes in the specified range will be framed in red and then selected Note You can kn...

Page 93: ...et desired titles to play lists and programmes 109 118 Creation of play list 1 You can create an original movie by changing the combination of scenes 111 Disc or Card initialisation 13 Youcaninitialis...

Page 94: ...P 108 Play P 109 Title P 109 Switch P 112 Play P 113 Create P 111 Edit P 114 116 Title P 118 Delete P 118 Scene Program Play list Top P 119 End P 119 Category P 124 Repeat Play P 124 Capacity P 120 Pr...

Page 95: ...rograms screen andthenpresstheDELETEbuttonon remote control the screen in step 5 will appear Todeleteanunwantedpartofasceneon DVD RAMdisc divide the scene first and then delete the unnecessary part Se...

Page 96: ...i t RAM ENTER RETURN Ex i t De l e t e Se l ec t RAM ENTER RETURN S t a r t Cu r r en t Cu r r en t End A l l Go To RAM ENTER RETURN End To p Edit Exit To restore the Disc Navigation screen Delete To...

Page 97: ...image you want to use as the thumbnail of the scene appears press the SELECT button 7 The screen for verifying switchingofthumbnailwill appear Choose YES and then press the A button Choose NO to canc...

Page 98: ...e C button to quit A skip mark will appear in the thumbnail of any scene for which skipping has been set Releasing Skip Select the scene set to be skipped and perform the same procedure as setting ski...

Page 99: ...tting choose Cancel After setting the Fade screen will be restored Repeat steps 5 and 6 to add fade to other scenes 7 Press the C button to quit The and or mark s will appear in the scenes for which s...

Page 100: ...ou want to change the scenes to be combined you can change them on this screen 6 The screen for verifying combination will appear Choose YES and then press the A button The two images appearing on the...

Page 101: ...eing played back can be switched off or on by pressing the DISPLAY button Search and frame advance are useful when designating division points If a special effect has been added to the original scene...

Page 102: ...peat steps 6 and 7 to copy other stills to card 8 Press the C button to quit Note No movie can be copied When you copy stills recorded on DVD RAM disc to card recording quality will automatically be s...

Page 103: ...escenetobelocked you can change it on this screen After setting the Lock Set screen will be restored Repeat step 6 to lock another scene 7 Press the C button to quit To unlock the scene Select the loc...

Page 104: ...sejoysticktospecifythe number of prints and then press the A button Tilt it up or to right To increase the number one by one Tiltitdownortoleft Todecreasethenumberone by one After setting the DPOF Set...

Page 105: ...edeselectedandthenpresstheSELECT button Note Up to 999 scenes can be selected Deselecting all the selected scenes at once While you are displaying the All Programs screen on which scenes have been sel...

Page 106: ...unknown Also this will not appear when a DVD R disc is used 3 This will not appear with DVD R disc since no still image can be recorded on it Note If multiple scenes have been selected the total reco...

Page 107: ...displayed and then press the A button The Disc Navigation screen of the selected programme will appear Note Pressing the C button on the Switch Program screen will restore the Disc Navigation screen T...

Page 108: ...e DISC NAVIGATION button 2 Press the MENU button 3 Choose Title on the Program menu screen and then press the A button 4 Select the programme whose title you want to change and then press the A button...

Page 109: ...tting choose YES If you press the C button on the screen for verifying change in title the title setting screen will be restored Double byte characters set on other devices may be displayed blank on t...

Page 110: ...can change them on this screen With the created play list you can also add scenes recorded on another day or delete unnecessary scenes afterwards 6 When creation of a play list is complete the Disc N...

Page 111: ...ing all programmes all recorded scenes choose All Programs on the Switch PlayList screen Editing on play list When making settings on play list such as changing title adding fade setting skip etc use...

Page 112: ...list will be played back from the first scene To cancel playback midway press the C button The Disc navigation screen of the play list being played back will appear Note If Repeat Play On is specified...

Page 113: ...ted play list will appear Repeat steps 5 7 to add other scenes 8 Press the C button The screen for verifying exit will appear Note The cursor shows the position where the scene is to be added You can...

Page 114: ...tton 2 Display the editing screen of the play list to be edited Perform steps 2 4 on page 114 3 From the playlist in lower row selectthe position where you wish to insert a scene 4 Select the scenes t...

Page 115: ...r deleting consecutive multiple scenes to from play list This Select menuitemisusefulwhenselectingconsecutivemultiplescenesinitemsforaddingordeleting scenes using menu on page 106 1 Press the DISC NAV...

Page 116: ...the mark to the positionwhereyouwishto move the scene and then press the A button 9 The screen for verifying move will appear Choose YES and then press the A button Choose NO to cancel move After Yes...

Page 117: ...re Deleting Play List Delete 1 Press the DISC NAVIGATION button 2 Press the MENU button 3 Choose Delete on the PlayList menu screen and then press the A button 4 Use the Delete PlayList screen to sele...

Page 118: ...jump to the first scene or last scene Top End 1 Press the DISC NAVIGATION button 2 Press the MENU button 3 Choose Top or End on the Go To menu screen and then press the A button Go To RAM ENTER RETURN...

Page 119: ...possible on protected disc until the protection is released 1 Press the DISC NAVIGATION button 2 Press the MENU button 3 Choose Protect Disc on the Disc menu screen and then press the A button 4 The s...

Page 120: ...o initialise a disc with many scratches or dirt Such a disc cannot be used If you useabrand new DVD R disc message Discis not formatted will appear initialise the disc following the subsequent message...

Page 121: ...Navigation menu screen will be restored A black screen may appear while the message for updating is displayed Choose NO to cancel updating 5 Press the C button to quit Note BesuretousetheACadaptor ch...

Page 122: ...e disc in the DVD Video Camera has already been finalised you cannot choose Finalize Disc Be sure to use the AC adaptor charger when finalising disc Finalisation cannot be executed using a battery If...

Page 123: ...Play on the Others menu screen and then press the A button 4 Choose On and then press the A button Playback will start Choose Off to cancel Repeat Play setting When Repeat Play is set If one scene has...

Page 124: ...and then press the A button All To play all stills recorded on card in slide show DPOF To play only stills to which DPOF has been set in slide show Pressing the A button will start slide show When pl...

Page 125: ...ratedwiththePentium compatibleCPU notmadebyIntel or AMD This unit also may not be operated with AMD K6 2 AMD K6 III Memory 128 MB or more Free disk space 400 MB or more not including the space for whi...

Page 126: ...stallation You can use DVD MovieAlbumSE to edit the images recorded on DVD RAM disc and create a 3D title MyDVD 4 0 see page 136 for installation You can use MyDVD to create a DVD Video disc from movi...

Page 127: ...pen the electronic instruction manual in Documentation folder Toreadtheabovemanual aWebbrowser Internet Explorer Netscape Communicator etc must be set up in your PC Ifyoucannotopentheelectronicinstruc...

Page 128: ...Windows XP Home Edition XP Professional skip this step 4 When using Windows XP Home Edition XP Professional click Continue Anyway When using OS other than Windows XP Home Edition XP Professional skip...

Page 129: ...using the power switch on DVD Video Camera No image will appear on the LCD screen or viewfinder of DVD Video Camera when it is connected to PC Make sure of the connection with PC using the ACCESS PC...

Page 130: ...r 1 Insert the provided CD ROM into the PC and Click DVD RAM Driver on the Setup Menu screen If the Setup Menu screen will not appear double click the CD ROM drive icon 2 The driver setup screen will...

Page 131: ...ion XP Professional a message that prompts you to restart will appear Follow the on screen instructions and then click Finish 10Installing the DVD RAM Driver is now complete If your PC uses Windows 20...

Page 132: ...ingWindows 98SecondEdition there is not Hardware tab 2 Click Device Manager verify the following items are listed on the screen When using disc MATSHITA DVD CAMERA M5070 USB Device under the DVD CD RO...

Page 133: ...SE 3 on the Setup Menu screen If the Setup Menu screen will not appear double click the CD ROM drive icon 2 The screen for installing DVD MovieAlbumSE will appear Click Next 3 CarefullyreadtheSoftware...

Page 134: ...nistrator computer s manager or user namewithequivalentauthorization logontoPC and then install the software if you do not have authorization consult your system manager When using DVD MovieAlbumSE so...

Page 135: ...tup Menu screen will not appear double click the CD ROM drive icon 2 The screen for installing MyDVD will appear Click Next 3 CarefullyreadtheSoftwareLicenseAgreement If you accept it click Yes 4 Afte...

Page 136: ...tionenvironmenttothe Internet for user registration Contact the following for information on MyDVD Europe London Phone 44 20 7439 1477 http support sonic com You will need to perform customer registra...

Page 137: ...necessary Starting DVD MovieAlbumSE Mount Information window may appear or the recorded movies may not be shown If it has occurred try following procedure 1 Click Preference and then Device setting 2...

Page 138: ...DVD Video disc or an MPEG file disc will appear Check the small box for Eject the disc being used and then click Yes Insert a brand new DVD R disc into the DVD Video Camera 7 DVD MovieAlbumSEwillauto...

Page 139: ...next step 5 Deletethe followingitem in Universal SerialBus controllers Panasonic DVD CAMERA DVD Mode USB Interface If no item exists proceed with the next step 6 Close Device Manager If the message fo...

Page 140: ...ion XP Professional open the C WINDOWS INF folder If INF folder cannot be found use Explorer to choose Tools menu Folder Options View tab and then Show all files and folders Click OK and then try agai...

Page 141: ...uld cause a defect in the screen result in display unevenness or damage the LCD monitor If dust adheres to the viewfinder lens remove it using a cotton swab etc Do not rub the lens with force Doing so...

Page 142: ...cannot be recorded after the above check is clear the disc or card may be damaged Use another disc or card Check 3 Skip or search playback does not work well If the temperature inside the DVD Video C...

Page 143: ...tor open No image will appear in viewfinder unless the LCD monitor is closed and securely locked to DVD Video Camera Check 7 No image appears on the LCD screen or in the viewfinder Is DVD Video Camera...

Page 144: ...ther recorder is mixed in The repaired data may be different from the original recorded content because of partial deletion of defective portion Since the date time for repair is added to the repaired...

Page 145: ...cenes Select a range of at least 2 scenes to be combined and then combine them 101 Cannot delete scenes This may occur when scene that was edited for division etc is to be deleted Combine the divided...

Page 146: ...eoccurredduringeditingofscenes Turnoffthe DVDVideoCamerawiththecardbeingusedinside connecttheAC adaptor charger and then power the DVD Video Camera again Repair of scenes will be attempted 43 48 Card...

Page 147: ...Has initialising the disc on PC been interrupted Choose YES and initialise the disc when using it on this DVD Video Camera initialising the disc will erase all data on it See 2 on page 152 121 Disc e...

Page 148: ...is not set to a scene Thismessagewillappearwhen SlideShow DPOF isspecifiedfor the card to which DPOF was not set 125 DPOF scenes over limit Cannot set DPOF scenes The maximum number of scenes for whic...

Page 149: ...are deleted from the play list Since a play list with no scenes cannot be supported by specifications a play list from which all registered scenes have been deselected will be deleted 115 116 Photo c...

Page 150: ...ged If this message appears be sure to initialise the disc on this DVD Video Camera before using it Reinitialising even a disc used on this DVD Video Camera may be necessary initialising will erase al...

Page 151: ...ondensation occurs and the disc is not dirty choose repair 2 This message may also appear when dirt adheres to disc In this case do not initialise the disc remove it and then use a soft dry cloth to c...

Page 152: ...hand 41 Battery may be dead The performance of battery will deteriorate if it is used for an extended period of time or frequently Purchase a new battery 42 The CHARGE indicator onACadaptor chargeris...

Page 153: ...lt or slight sound is heard from mechanism These vibrations or sound are caused by disc drive This does not indicate a fault LCD screen is hard to see Has brightness of LCD screen been adjusted Stop r...

Page 154: ...sibleon this DVD Video Camera No playback picture appears on TV screen Is TV input selector set correctly Some TVs have multiple video input jacks Check whether the correctinputwasselectedonTVtomatcht...

Page 155: ...blue thumbnails will appear thumbnails in the figure meaning the image is unplayable Even when the number of pixels is within the above range playback maynot be possible depending on the recording st...

Page 156: ...emove the disc from the DVD Video Camera and then turn it off After a few moments connect them again and write to a brand new disc Transfer of images stops Connect the DVD Video Camera to another USB...

Page 157: ...click OK An image that should have been recorded does not appear when DVD MovieAlbumSE is started Click the Preference button at top right of DVD MovieAlbumSE screen click the Device Setting tab to ch...

Page 158: ...ntrol Is the remote control pointed at the infrared receiver on DVD Video Camera Point it at the infrared receiver to operate the DVD Video Camera 35 Is the infrared receiver on DVD Video Camera expos...

Page 159: ...et button for several seconds All settings will be reset Note Do not press the reset button with undue force List of setting items Some items will not appear depending on the disc or card inserted Ite...

Page 160: ...2 lx 3 lx When Low Light mode is selected Viewfinder 0 33 inch colour TFT approx 110 000 pixels LCD monitor 2 5 inch colour TFT approx 120 000 pixels Image stabiliser Electronic type Shutter speed 1 6...

Page 161: ...r General Ver 2 0 SD Memory Card MultiMediaCard Jacks Video audio input output 1 External microphone input 1 USB terminal connected to PC USB port 1 Battery system Lithium ion Dimensions W H D approx...

Page 162: ...n are approximate Designs and specifications are subject to change without prior notice Power Source Power Consumption DC Output AC 110 240 V 50 60 Hz 19 W DC 7 9 V 1 4 A DVD Video Camera Operation DC...

Page 163: ...riter for SD Memory Card BN SDCAPE 14 Video Flash VW FLH3E only for VDR M70GC 15 DVD RAM Disc 8 cm LM AK60JE 16 DVD R Disc 8 cm LM RK30JE Some optional accessories may not be available in some countri...

Page 164: ...jointly developed this memory card standard in 1999 The card is 32 mm long x 24 mm wide x 2 1 mm thick and has 9 pins Since the SD Memory Card was developed based on MultiMediaCard MMC MMC can be ins...

Page 165: ...nals and select the desired audio and video signals among those input to output them Finalise This process makes a DVD R disc recorded on this DVD Video Camera playable on a DVD player etc that confor...

Page 166: ...English VQT0K98 167 335...

Page 167: ...English VQT0K98 168 336...

Page 168: ...English VQT0K98 169 337...

Page 169: ...English VQT0K98 170 338...

Page 170: ...English VQT0K98 171 339...

Page 171: ...VQT0K98 QR35236 C Matsushita Electric Industrial Co Ltd Web Site http www panasonic co jp global...

Reviews: