© 2008 Panasonic Communications Co., Ltd. All
rights reserved. Unauthorized copying and distribu-
tion is a violation of law.
ORDER NO. KM40801513CE
F13
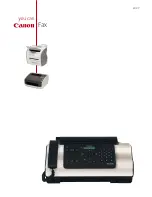
Telephone Equipment
Model No.
KX-TG9341T
KX-TG9342T
KX-TG9343S
KX-TG9343T
KX-TG9344T
KX-TGA931S
KX-TGA931T
Expandable Digital Cordless Answering
System
Pearl Silver Version
Titanium Black Version
(for U.S.A.)
Summary of Contents for KX-TG9341T - Cordless Phone - Metallic
Page 2: ...2 KX TG9341T KX TG9342T KX TG9343S KX TG9343T KX TG9344T KX TGA931S KX TGA931T ...
Page 35: ...35 KX TG9341T KX TG9342T KX TG9343S KX TG9343T KX TG9344T KX TGA931S KX TGA931T ...
Page 38: ...38 KX TG9341T KX TG9342T KX TG9343S KX TG9343T KX TG9344T KX TGA931S KX TGA931T ...
Page 39: ...39 KX TG9341T KX TG9342T KX TG9343S KX TG9343T KX TG9344T KX TGA931S KX TGA931T ...
Page 40: ...40 KX TG9341T KX TG9342T KX TG9343S KX TG9343T KX TG9344T KX TGA931S KX TGA931T ...
Page 69: ...69 KX TG9341T KX TG9342T KX TG9343S KX TG9343T KX TG9344T KX TGA931S KX TGA931T ...
Page 73: ...73 KX TG9341T KX TG9342T KX TG9343S KX TG9343T KX TG9344T KX TGA931S KX TGA931T ...
Page 78: ...78 KX TG9341T KX TG9342T KX TG9343S KX TG9343T KX TG9344T KX TGA931S KX TGA931T Memo ...
Page 88: ...88 KX TG9341T KX TG9342T KX TG9343S KX TG9343T KX TG9344T KX TGA931S KX TGA931T Memo ...
Page 92: ...92 KX TG9341T KX TG9342T KX TG9343S KX TG9343T KX TG9344T KX TGA931S KX TGA931T Memo ...