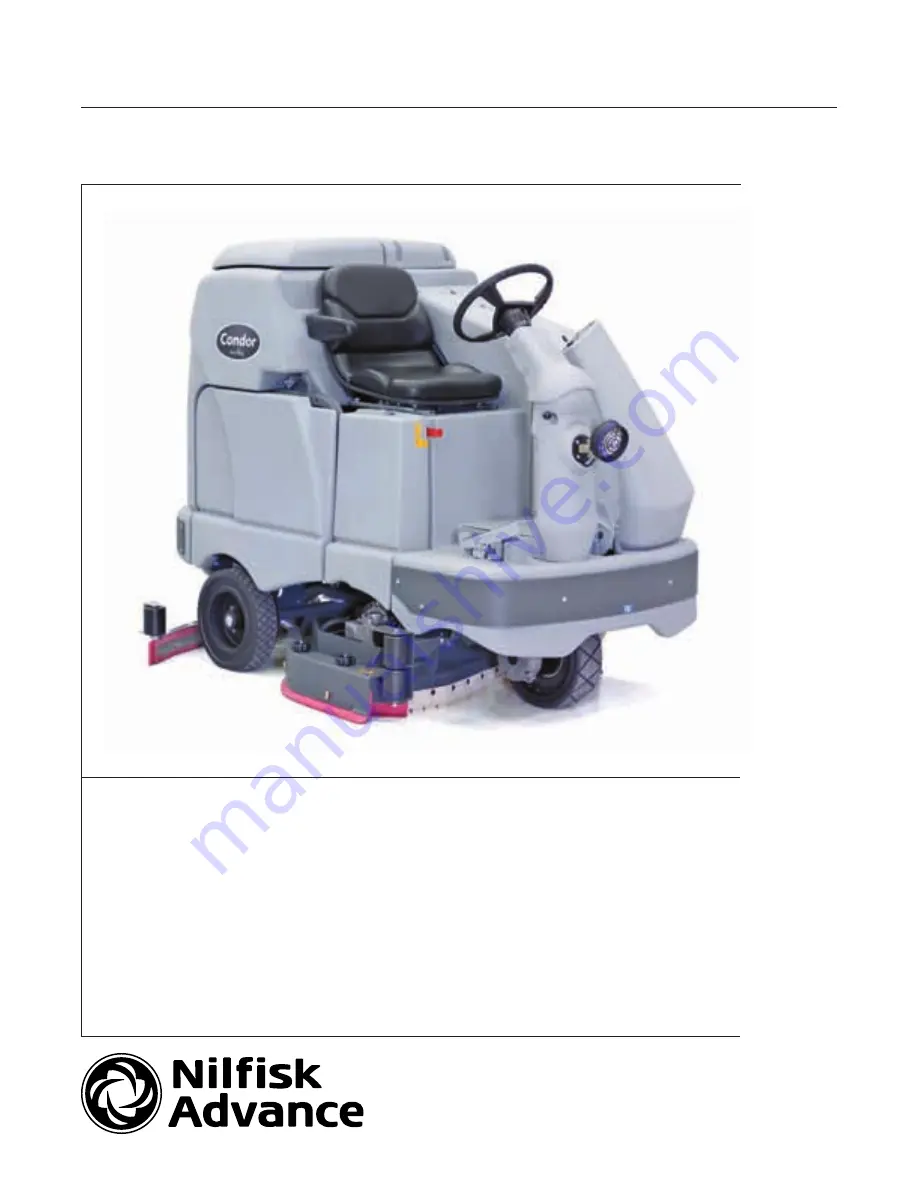
manualshive.com logo in svg
background image

Condor

 EcoFlex

, BR 1100 S/SC EcoFlex

, BR 1300 S/SC EcoFlex

7/11 Form No. 56043154

Service Manual

Advance Models:
56381032 (X4030D-EcoFlex)  

56381037 (X4830C-EcoFlex w/Side Broom)

56381033 (X4030C-EcoFlex w/Side Broom)  

56381043 (X4030C-EcoFlex w/o Side Broom)

56381034 (X4530D-EcoFlex)  

56381044 (X4530C-EcoFlex w/o Side Broom)

56381035 (X4530C-EcoFlex w/Side Broom)  

56381045 (X4830C-EcoFlex w/o Side Broom)

56381036 (X4830D-EcoFlex)

Nilfisk Models:
56413006 (BR1000 S EcoFlex w/o Side Broom)   56413007 (BR1000 S C EcoFlex w/Side Broom)
56413010 (BR1300 S EcoFlex w/o Side Broom)  56413011 (BR1300 S C EcoFlex w/Side Broom)

English

Содержание EcoFlex BR 1100 SC

Страница 1: ...ide Broom 56381043 X4030C EcoFlex w o Side Broom 56381034 X4530D EcoFlex 56381044 X4530C EcoFlex w o Side Broom 56381035 X4530C EcoFlex w Side Broom 56381045 X4830C EcoFlex w o Side Broom 56381036 X4830D EcoFlex Nilfisk Models 56413006 BR1000 S EcoFlex w o Side Broom 56413007 BR1000 S C EcoFlex w Side Broom 56413010 BR1300 S EcoFlex w o Side Broom 56413011 BR1300 S C EcoFlex w Side Broom English ...

Страница 2: ...ng Options 28 Service Test Mode 37 Troubleshooting 40 Removal and Installation 46 Specifications 47 I O Tables 48 Electrical System 52 Functional Description 52 Low voltage Cut out Feature 54 Battery Condition Indicator 54 Battery Location 55 Maintenance and Adjustments 55 Removal and Installation 58 Specifications 59 Special Tools 59 Options and Accessories 60 Recovery System 65 Functional Descri...

Страница 3: ...ations 129 Special Tools 129 Sweep System Side Broom 130 Functional Description 130 Component Locations 131 Maintenance and Adjustments 132 Troubleshooting 135 Removal and Installation 136 Specifications 138 Special Tools 138 Wheel System Non traction 139 Functional Description 139 Component Locations 139 Maintenance and Adjustments 140 Troubleshooting 142 Removal and Installation 143 Wheel System...

Страница 4: ...iginal replacement parts and accessories Call the Advance dealer named below for repair parts or service Please specify the Model and Serial Number when discussing your machine Dealer affix service sticker here Nameplate The Model Number and Serial Number of your machine are shown on the machine nameplate This information is needed when ordering repair parts for the machine Use the space below to ...

Страница 5: ...the Off position Do not move the machine faster than a normal walking pace 2 3 mph 3 5 kph and for short distances only Note Disconnecting the wheel drive motor wiring connector will make a disabled machine easier to push Other Manuals Available for Your Machine Electronic Databases The manuals listed below can be found on Advance s electronic supported databases They are Advance Dealer Customer Z...

Страница 6: ... correctly trained and authorized persons Avoid sudden stops while on ramps or inclines when the tanks are full Avoid abrupt sharp turns Use low speed down hills Clean only while ascending driving up the ramp Keep sparks flame and smoking materials away from batteries Explosive gases are vented during normal operation Charging the batteries produces highly explosive hydrogen gas Charge batteries o...

Страница 7: ...itch off O and remove the key before changing the brushes and before opening any access panels Take precautions to prevent hair jewelry or loose clothing from becoming caught in moving parts Use caution when moving this machine in below freezing temperature conditions Any water in the solution recovery or detergent tanks or in the hose lines could freeze causing damage to valves and fittings Drain...

Страница 8: ...stop Battery Disconnect is the red lever located to the right of the Operator s seat In the event of an emergency press the Emergency stop Battery Disconnect in toward the rear of the machine to disconnect the battery from the machine This will stop all machine functions Save These Instructions Emergency stop Battery Disconnect ...

Страница 9: ...ph Gradeability Transport 14 5 8 Gradeability Working Scrubbing 10 5 6 Wheel Drive Motor 1 75 HP 1300 watt Vacuum Motor 3 stage 75 HP 560 watt Vacuum Water Lift for one motor Sealed 68 in Open Hole Adapter 1 14 in Vacuum Water Lift for two motors Sealed 74 in Open Hole Adapter 1 27 in Power Source Batteries Battery Weight 395 amp STD 6 6 volt 20 hour rate 121 lbs 55 kg Battery Weight 450 amp Opt 1...

Страница 10: ...drical Models use 2 1 5 HP 1120 watts Scrub Brush Speed Disc 240 RPM 225 RPM 225 RPM Cylindrical 630 RPM 630 RPM 630 RPM Minimum Aisle Turn Width 84 in 214 cm 84 in 214 cm 84 in 214 cm Machine Net Weight English 1 845 lbs 1 845 lbs 1 845 lbs Metric 837 kg 837 kg 837 kg Machine Gross Weight English 3 545 lbs 3 545 lbs 3 545 lbs Metric 1608 kg 1608 kg 1608 kg Cleaning Width scrubbing path English 40...

Страница 11: ...General Information 11 Service Manual Condor EcoFlex BR 1100 1300 EcoFlex Dimensions ...

Страница 12: ...at Squeegee Rear Wheel Solution Tank Fill Cover Control Panel Circuit Breakers Steering Wheel Tilt Adjust Knob Drive Steer Wheel Brake Pedal Parking Brake Battery Compartment underneath recovery tank Machine Battery Connector Emergency stop Switch Battery Disconnect Scrub Deck Side Access Panel Drive Pedal Direction Speed Operator s Seat Adjustment Lever ...

Страница 13: ...ry Tank Shutoff Valve Squeegee Vacuum Hose Squeegee Height Adjust Knob Squeegee Tilt Adjust Knob Squeegee Assembly Squeegee Height Adjust Knob Solution Tank Drain Hose Solution Shutoff Valve Solution Filter Hopper cylindrical models only Recovery Tank Drain Hose Top Cover Assembly ...

Страница 14: ...main control board and the wheel drive speed control Scrub On Pressure Increase Switch functions as follows If the scrub system is off pressing this switch once will put the machine into the Auto Scrub mode The following will occur The scrub system will be enabled with the scrub pressure set to the 1 normal setting Note Press the switch twice for 2 heavy scrub setting and three times for the 3 ext...

Страница 15: ...tch functions as follows If the scrub system is off pressing and holding this switch will switch on the solution flow to pre wet the floor The solution flow will stop when the switch is released Note this must be done prior to pressing the Scrub On Switch and putting the machine into the Auto Scrub mode If the machine is in the Auto Scrub mode pressing this switch will disable the solution system ...

Страница 16: ...s the scrub speed to 100 percent of transport speed Traction Control Switch regulates the drive wheel motor torque to minimize drive wheel slippage and provide better traction Side Broom On Down Switch lowers and raises the side brooms only functional on cylindrical models equipped with side brooms Note that when the scrub system is switched on the side brooms are lowered to the same position they...

Страница 17: ... displays the various icons that indicate scrub pressure solution flow rate detergent ratio battery charge state and a recovery tank full condition The display also shows any error conditions detected by the main control board Control Panel Indicators In general the following guidelines apply to the control panel indicators When the key switch is first turned on all of the blue control panel indic...

Страница 18: ...en the solution tank liquid level float switch senses a low solution level Detergent System Indicator The indicator will light when the detergent system is enabled and or is switched on The indicator will be off when the detergent system is off Note The control board automatically recognizes that the machine has an operational detergent system through its wiring harness connection Vacuum Wand Indi...

Страница 19: ...lay is a liquid crystal display LCD that shows the hour meter battery charge indicator solution flow rate and scrub pressure If the detergent system is enabled the display will also show the detergent system indicator and the current detergent solution ratio If an A2 Control Board error occurs the display will show a wrench icon to indicate an error and display a two digit error code number If mor...

Страница 20: ...move the Solution Tank Drain Hose from its storage clamp b Direct the Solution Tank Drain Hose to a designated disposal site and remove the Solution Tank Drain Hose Plug c Rinse the tank with clean water 4 To empty and clean the recovery tank a Pull the Recovery Tank Drain Hose from its storage area b Direct the Recovery Tank Drain Hose to a designated disposal site and remove the Recovery Tank Dr...

Страница 21: ... Rotate the Brushes Pads X Check Clean the Squeegee X Check Clean Vacuum Shutoff Float X Check Clean the Vacuum Motor Foam Filter s X Clean Hopper on Cylindrical System X Check the Water Level in each Battery Cell X Inspect Scrub Housing Skirts X Inspect and Clean Solution Filter X Check Foot Parking Brake For Wear and Adjustment X Clean Solution Trough on Cylindrical System X Purge Detergent Syst...

Страница 22: ... Apply light machine oil to the components shown Apply grease to Squeegee Caster Wheel Axle and Pivot Steering Wheel Shaft Universal joint Steering Chain Squeegee mount angle adjustment knob threads Apply light machine oil to Squeegee tool end wheels Recovery Tank release latch Brake Pedal parking brake linkage Machine Lubrication Lubrication Points Grease Grease Grease Grease Grease Grease Oil Oi...

Страница 23: ...Off and flow volume Min Max A B L 11 Emergency Battery Disconnect Control Lever B D 12 Side broom Sweep System Raise Lower and auto sweep functions cylindrical only A B D 13 Tilt Steering Mechanism and Seat A B D 14 Optional Accessories headlight safety beacon etc D 15 Main Control Board Special Program Options check all applicable program settings reference Service Manual 56043154 Example Fault R...

Страница 24: ...ushes C W 38 Front Drive Tire Tread Wear W 39 Rear Brake Rotors and Disc Wear Adjust Free Play A B W 40 Drive Pedal Linkage neutral return Torsion Spring A B 41 Steering Chain lubricate and tension 1 4 Deflection A B C 42 Steering Column knob and plunger spring also Universal Joint Grease A D 43 Rear Wheels bearing wear Tread Wear C W 44 Sweep Debris Tray cylindrical only Rinse C Defect Codes A ne...

Страница 25: ...ervice Manual Condor EcoFlex BR 1100 1300 EcoFlex Chassis System Major Chassis Components Side Rear Panel Chassis Support Side Panel Assembly Chassis Weldment Pin Plate Weldment Conduit 2 Edge Trim Support ...

Страница 26: ...witches on the lift actuator motor to move the scrub deck downward until the brush motor current draw is within the correct range for the scrub pressure selected If the brush motor current rises above the desired range the A2 Control Board Assembly switches on the lift actuator motor to lift the scrub deck upward until the brush motor current draw is again within the correct range for the scrub pr...

Страница 27: ...er 15 Amp Circuit Breaker 3 Amp K5 4 3 16 15 Direction Battery Ground B B B Bat Bat Bat 8V Bat CAN H CAN L Circuit Description The A2 Control Board Assembly is connected by several inputs to battery negative The A2 Control Board Assembly gets positive battery voltage from two inputs When the key switch seat switch and battery interlock are closed positive voltage is supplied to the A2 Control Boar...

Страница 28: ...s stored the display will toggle through all the errors stored 6 If you want to save the codes skip to step 7 To clear the stored error codes press the scrub off switch The display will now show key switch icon asking you to reset the machine 7 To exit the fault recall mode turn the key switch off To Restore the Scrub Pressures to the Factory Default Settings 1 Turn the key switch off 2 Press and ...

Страница 29: ...to hold both switches until the scrub off and traction control indicators light 5 Release both switches The scrub off and traction control indicators will switch off The display will show the MAIN REVISION of the A2 control board assembly the DISPLAY REVISION of the A3 switch display panel assembly and the key switch icon 6 Turn the key switch off Monitor Mode The control system allows the five ma...

Страница 30: ...ed again Normal Light Scrub Setting Adjustment Note that the factory default settings for the normal scrub setting are Scrub pressure one bar Solution flow rate one bar The scrub pressure and solution flow rate for the normal scrub setting can be programmed to better suit a particular application This allows you to select a higher solution flow rate with normal scrub pressure or a normal solution ...

Страница 31: ...b settings 1 Turn the key switch off 2 Press and hold the scrub on and detergent switches 3 While holding both switches turn the key switch on 4 Continue to hold both switches until the detergent indicator turns on and the heavy scrub indicator blinks 5 Release both switches The display will now show a scrub icon either disc or cylindrical with the current scrub pressure setting 6 Press the scrub ...

Страница 32: ... to increment the scrub pressure setting as shown by the number of bars in the display 7 Press the scrub off switch to save the new setting and move to the solution flow rate setting The display will now show the solution icon with gauge The normal and heavy scrub indicators will stop blinking and the solution indicator will blink 8 Press the solution switch to increment the solution flow rate as ...

Страница 33: ...rned on FAST SLOW DISABLE means that the high speed scrub feature is turned off 7 Press the scrub off switch to save the setting and display the key switch icon 8 Turn the key switch off The new setting will be saved until changed again Detergent System Selection Mode 1 Turn the key switch off 2 Press and hold the scrub off switch and the detergent switch 3 While holding both switches turn the key...

Страница 34: ...r setting 5 Press the vacuum wand switch to toggle between VACUUM SINGLE for a single vacuum motor or VACUUM DUAL for two vacuum motors 6 Press the scrub off switch to save the setting and display the key switch icon 7 Turn the key switch off The new setting will be saved until changed again Recovery Tank Full Detection Enable Disable Note that the factory default setting for the recovery tank ful...

Страница 35: ...E or DISABLE If you select ENABLE the solution flow will stay on when the machine is moving in reverse If you select DISABLE solution flow will stop when the machine is moving in reverse 7 Press the scrub off switch to save the setting and display the key switch icon 8 Turn the key switch off The new setting will be saved until changed again Indicator LED Intensity Selection Option Note that the f...

Страница 36: ...ches for three seconds The detergent and solution pumps will run for approximately 10 seconds 3 When the purge cycle is complete turn the key switch off Side Broom Function 1 Turn the key switch off 2 Press and hold the side broom on down switch 3 While holding the switch turn the key switch on 4 Continue to hold the switch until the side broom on down indicator turns on 5 Release the switch The d...

Страница 37: ...to work with the new side broom height setting Display Mode Selection 1 Turn the key switch off 2 Press and hold the detergent switch and EcoFlex button 3 While holding the detergent switch and EcoFlex button turn the key switch on 4 Continue to hold the button and switch for two seconds until the EcoFlex and detergent system indicators turn on 5 Release the button and switch The EcoFlex indicator...

Страница 38: ...trol panel display will read REVERSE when the operator foot pedal is depressed in the reverse direction to activate its reverse drive mode functions Control Panel Switch and Button Functions Scrub System Off Switch This switch controls the scrub brush motor s Pressing and releasing this switch will alternately turn the brush motor s on and off The scrub off indicator provides the following status ...

Страница 39: ...s The side broom on down indicator will light as the actuator is running Once the side brooms reach the down position the side broom on down indicator will blink Pressing the switch a second time will switch off the side broom on down indicator Pressing the switch a third time will switch off the side broom motors and switch on the actuator to raise the side brooms The side broom on down indicator...

Страница 40: ...k for correct operation Note that there are four different resistor values used on the different deck types See the electrical diagram decal for the correct specification for the resistor to replace 03 Speed control fault Observe the blue flashing light detergent indicator light then refer to the Wheel Drive Traction section to troubleshoot the drive system 04 Scrub motor overload Note that some m...

Страница 41: ...circuit in the actuator motor and wiring Repair or replace To test the actuator disconnect the motor plug and attach the actuator power cord adapter p n 56407502 and perform an amp draw test Compare readings to the current load specifications 09 Vacuum motor overload Normal current load for one motor is 16 20 amps Normal current load for two motors is 32 40 amps 1 Check for debris in the vacuum mo...

Страница 42: ...ect the motor plug and attach the actuator power cord adapter p n 56407502 and perform an amp draw test Compare readings to the current load specifications 18 K5 Auxiliary contactor coil overload The nominal coil resistance is 100 ohms 1 Check for a K5 coil wiring problem or short circuit wire colors YEL BRN BLK ORN 2 Check the coil resistance If the resistance is below 80 ohms replace the contact...

Страница 43: ... wire 2 If the above test doesn t remove the code substitute a new A2 control board assembly 26 Right brush motor contactor coil open 1 Check for an open circuit in the K2 coil and wiring wire colors VIO and YEL BLU 2 Test for 36V at the K2 coil If you get 0 Volts check the A2 control board assembly 27 Right brush motor contactor coil short to ground 1 Disconnect the K2 coil wiring wire colors VIO...

Страница 44: ...defective motor M3 3 Check for 36 Volts at the actuator motor If 0 Volts check the A2 control board assembly 33 L1 Solution solenoid open 1 Check for an open circuit in the L1 coil and wiring wire colors VIO and YEL GRN 2 Test for 36V at the L1 coil If 0 Volts check the A2 control board assembly 34 L1 Solution solenoid short to ground 1 Disconnect the L1 solenoid coil wiring wire colors VIO and YE...

Страница 45: ...eck to see if the code disappears If the code disappears replace the K5 contactor If the code does reappear test the wiring for a short back to the battery ground Repair or replace the defective wire 2 If the above test doesn t remove the code substitute a new A2 control board assembly 41 Back up alarm open 1 Use an ohmmeter to check for an open circuit in the H1 back up alarm and its wiring wire ...

Страница 46: ...rical panel cover assembly located to the left of the operator position Make sure to unplug the fan assembly before removing the electrical panel cover assembly from the machine 2 Disconnect the electrical connectors from the A2 Control Board Assembly 3 Remove the five Screws holding the A2 Control Board Assembly to the Electrical Mount and remove the A2 Control Board Assembly from the machine 4 I...

Страница 47: ...mps 50 amps 35 amps Heavy Scrub 2 bars 2 50 amps 45 amps 60 amps 45 amps Extreme Scrub 3 bars 3 65 amps 55 amps 80 amps 55 amps Solution Flow Rates Standard flow rates Override flow rates 1 bar 2 bars 3 bars 4 bars 5 bars 40 Disc 0 84 GPM 1 00 GPM 1 50 GPM 2 00 GPM 2 50 GPM 40 Cylindrical 0 70 GPM 0 84 GPM 1 00 GPM 1 50 GPM 2 50 GPM 45 48 Disc 1 00 GPM 1 50 GPM 2 00 GPM 2 25 GPM 2 50 GPM 45 48 Cyl...

Страница 48: ...rollers built in status LED Input J1 5 GRN Battery Voltage 36V B ground 31V 38V Downstream of circuit breaker F1 Key switch S1 Diode D1 Seat Switch S2 and Battery Interlock Switch S3 Output J1 6 TAN BRN Detergent Pump1 Pulsed Voltage 0 or 36V B ground see comment below Line should alternate between 0V and 36V when detergent pump is activated Output J1 7 BLK GRA Detergent Pump1 Pulsed Voltage 0 or ...

Страница 49: ...und 0 1V Output J1 21 BLU ORN Solution Pump PWM 0 or 36V B see comment below Pulsed PWM signal Switched ground return for pump Output J1 22 WHT BRN UI Panel Power Supply Voltage 8V B ground 7 9V Provides power to User Interface panel Input J1 23 VIO Battery Voltage 36V B Ground 31V 38V Downstream of circuit breaker F2 switched through contactor K5 Output J2 1 WHT GRN Squeegee Actuator Voltage 36V ...

Страница 50: ...0 or 36V B ground Depends on which mode the speed controller is in Output J2 20 BLK WHT Speed Control Mode Sel 2 Voltage 0 or 36V B ground Depends on which mode the speed controller is in Output J2 21 BLK ORN Auxiliary Contactor Voltage 0V B ground 0 1V Output J2 22 BLU Vacuum Contactor Voltage 0V B ground 0 1V Output J2 23 BLU WHT Backup Alarm Voltage 0V B ground The signal controlling the deterg...

Страница 51: ...teristics Nominal Value when activated Reference To Acceptable Range Comments Input J1 1 GRN GRA EcoFlex Board Power Voltage 5V B ground 4 5 5 5V Supplied by control board Input J1 2 ORN WHT EcoFlex Board Ground Voltage 0V B ground 0 1V Supplied by control board unused J1 3 unused Output J1 4 GRA WHT EcoFlex Chemical Ratio Analog Voltage B ground 1 5V Signal is sent to main control board ...

Страница 52: ...nformation on battery installation and maintenance a description of the low voltage cut out function and descriptions of the battery condition displays For information on the A2 Control Board Assembly refer to the Control System section For information on the A1 Curtis Speed Controller refer to the Wheel System Traction section ...

Страница 53: ... MOTOR TRACTION M M1 MOTOR TRACTION F1 F2 A1 A2 L1 VALVE SOLENOID L1 VALVE SOLENOID 1 2 M M9 MOTOR RIGHT BRUSH M M9 MOTOR RIGHT BRUSH F2 CIRCUIT BREAKER 15 AMP F2 CIRCUIT BREAKER 15 AMP 1 2 K4 CONTACTOR LEFT BRUSH K4 CONTACTOR LEFT BRUSH 1 2 S2 SWITCH SEAT S2 SWITCH SEAT 2 1 BT1 BATTERY 36 Vdc BT1 BATTERY 36 Vdc M M6 MOTOR VACUUM M M6 MOTOR VACUUM 1 2 K5 CONTACTOR AUX K5 CONTACTOR AUX 1 2 M M14 FA...

Страница 54: ... pack must increase to a 38 6 volt minimum Battery Condition Indicator The battery indicator displays the state of battery charge Five vertical bars indicates a fully charged battery after a complete charging cycle The battery indicator will retain the state of charge even if the key switch has been turned off The state of charge indicator is reset to full charge when the batteries have been recha...

Страница 55: ...ly charged fill each cell to the bottom of the filler tube Do not overfill the batteries Do not add acid to batteries Keep the batteries charged charge weekly Batteries should be charged each time that a machine is used for more than one hour The battery compartment cover should be open during charging to avoid a concentrated buildup of hydrogen gas Operators should follow the instructions provide...

Страница 56: ... batteries each time the machine is used or when the battery indicator is reading less than full To Charge the Batteries 1 Disconnect the machine battery connector 2 Open the side access panel and push the connector from the charger into the battery connector 3 Follow the instructions on the battery charger 4 After charging the batteries check the fluid level in all battery cells Add distilled wat...

Страница 57: ...ck the specific gravity or state of charge of the fluid in each cell A dead cell is one that reads 50 points or more lower than the other cells If the batteries in the machine are more than one year old it s usually best to replace the whole set rather than replacing just one battery General Troubleshooting Problem Cause Correction No Power to the Machine The emergency stop switch battery disconne...

Страница 58: ...batteries must be installed only by an Advance representative or dealer a qualified electrician or the battery manufacturer 1 Remove the batteries from their shipping crate and carefully inspect them for cracks or other damage If damage is evident contact the carrier that delivered them or the battery manufacturer to file a damage claim 2 Turn the key switch off and remove the key 3 Remove the rec...

Страница 59: ... cycle battery system Note that the battery pack must fit the battery compartment size listed in the Technical Specifications Wet Cell Battery Charger Use a 36 volt DC output charger matching the DC battery pack voltage and the input AC line voltage supply being used When selecting a battery charger always follow the recommendation of the battery supplier to match the correct charger DC output amp...

Страница 60: ... Grit Extreme heavy duty scrubbing on concrete floors 4030D Pad Holders and Disc Brushes two required Description Short trim pad holder with pad retainer 20 inch 51 cm Pad retainer centering device only snap lock Prolite disc brush 20 inch 51 cm Prolene disc brush 20 inch 51 cm Union Mix disc brush 20 inch 51 cm AgLite Grit 500 disc brush 20 inch 51 cm MidGrit 240 disc brush 20 inch 51 cm MidLite ...

Страница 61: ...uired Description Soft nylon cylindrical brush 45 inch 114 cm Hard nylon cylindrical brush 45 inch 114 cm Prolene cylindrical brush 45 inch 114 cm MidLite 180 cylindrical brush 45 inch 114 cm Dyna Grit 80 cylindrical brush 45 inch 114 cm Side broom polypropylene all purpose Side broom polypropylene finer bristles for delicate surfaces 4830D Pad Holders and Disc Brushes three required Description S...

Страница 62: ...ach 2 required per deck Cylindrical deck side skirt Linatex 1 each 2 required per deck Cylindrical deck side skirt polyurethane 1 each 2 required per deck Disc deck skirt kit gum rubber includes left and right blades Disc deck skirt kit Linatex includes left and right blades Disc deck skirt kit polyurethane includes left and right blades 4530C D Squeegee Kits Description 52 inch 131 cm squeegee bl...

Страница 63: ...nd right blades Disc deck skirt kit polyurethane includes left and right blades Options and Accessories Description Heavy duty front bumper Deluxe Grammer seat kit in lieu of standard Refillable detergent cartridge 2 5 gallons 9 5 L Onboard Scrub Spray and Vacuum kit includes mounting bracket vacuum hose w solution line 2 piece stainless steel heavy duty wand with hard floor and soft floor shoes C...

Страница 64: ...e phase SCR 240 480 VAC 36 VDC 88A max for 450 AH C6 battery Deck Kits includes deck and squeegee brushes sold separately Description 40 inch 102 cm disc deck fits disc units only 40 inch 102 cm cylindrical deck fits cylindrical units only 45 inch 114 cm disc deck fits disc units only 45 inch 114 cm cylindrical deck fits cylindrical units only 48 inch 122 cm disc deck fits disc units only 48 inch ...

Страница 65: ...is is used to pick up solution already on the floor or when using a wand on the Squeegee Hose A current sensor monitors the Vacuum Motor current and will display a fault if the Vacuum Motor current draw is too high Squeegee and Squeegee Hose The wastewater and air enter the vacuum system at the Squeegee tool through small openings notches located in the front Squeegee blade The small openings are ...

Страница 66: ... the A2 control board which automatically shuts off the vacuum and scrub systems The LCD will then display the recovery tank full indicator icon to alert the operator that the recovery tank needs to be drained Recovery System Wiring Diagram A2 Control Board Assembly A3 Switch Display Panel Assembly Fuse 250 A 36V Battery A1 Speed Controller Motion 8 B B F4 K7 F1 S1 S2 S3 D1 Key Switch Seat Switch ...

Страница 67: ...Assembly monitors the voltage input from the Vacuum Motor Shunt wire connected to the ground side of Vacuum Motors M5 and M6 If the voltage is out of the acceptable range 07 12 volts for a single vacuum motor or 15 24 volts for dual vacuum motors the A2 Control Board Assembly will sense that the float ball is sealed against the float cage and that the recovery tank is full The A2 Control Board Ass...

Страница 68: ...e and contained Float Ball attach to the bottom of the Recovery Tank Top The Vacuum Fan Top Gasket seals the Top Cover Assembly to the recovery tank Float Cage and Ball The Float Ball is retained inside the two piece interlocking Float Cage The assembled Float Cage and Float Ball attach to the bottom of the Recovery Tank Top Vacuum Filter Lid Filter Filter Screen Wire Rope Recovery Tank Top Vacuum...

Страница 69: ... Recovery Tank Squeegee and Drain Hoses The Squeegee Hose and Drain Hoses are mounted on the rear of the Recovery Tank The Squeegee Hose connects the squeegee to the inlet port on the Recovery Tank The Drain Hose allows you to drain the Recovery Tank by removing the Drain Hose Cap Recovery Tank Lid Squeegee Hose Drain Hose Cap Drain Hose Recovery Tank ...

Страница 70: ...efore reinstalling 5 Replace the Vacuum Filter Lid To Inspect and Clean the Vacuum Motor Float Cage 1 Lift the Recovery Tank Lid to access the Float Cage and captive float ball The Float Cage is attached to the underside of the Top Cover Assembly 2 Carefully remove the Float Cage from the Top Cover Assembly Note that the Float Cage is a two piece design and can be snapped apart to separate for cle...

Страница 71: ...rushes 3 Defective motor bearings repair or replace 4 Check for a short circuit in the vacuum motor or wiring repair or replace Vacuum motor contactor coil overload error code 10 displayed 1 Check for a K1 coil wiring problem or short circuit wire colors VIO and BLU 2 Check the coil resistance If the coil resistance is below 80 ohms replace the coil Vacuum motor open error code 29 displayed 1 Chec...

Страница 72: ...engaged Recovery Tank 1 Drain the recovery tank 2 Disconnect the squeegee hose from the squeegee tool and from the top of the recovery tank twist the hose to remove Note Removing the squeegee tool at the mount will allow more room to maneuver when removing the recovery tank 3 Disconnect the Vacuum Motor Wiring Connector located underneath the left rear bottom of the recovery tank 4 Release the Tan...

Страница 73: ... from the machine Caution Be careful not to crush or damage the drain hose when pulling the tank from the chassis 8 To reinstall the tank a Align each side of the tank bracket with the chassis pins one at a time b Grip the opening of the tank cover at the rear and quickly lift up to set engage the tank in its upright position c Reconnect the Tank Tether to the back of the operator seat d Swing the...

Страница 74: ...from its mounting cavity 6 Inspect the following vacuum system gaskets and replace as necessary Vacuum Filter Lid Gasket Vacuum Fan Top Gasket RS Strip Gasket Vacuum Fan Gaskets 7 Clean the vacuum motor Filter Filter Screen and Vacuum exhaust Hose 8 Inspect the carbon motor brushes If the carbon brushes are less than 3 8 10 mm in length replace the brushes 9 Reinstall the Vacuum Motor by following...

Страница 75: ...s Component Specifications Vacuum Motor 36 VDC Insulation Class A Vacuum Lift One Vacuum Motor Sealed 68 in H2 O Open Hole Adapter 1 14 in H2 O Two Vacuum Motors Sealed 74 in H2 O Open Hole Adapter 1 27 in H2 O Special Tools Vacuum water lift gauge Nilfisk Advance part number 56205281 ...

Страница 76: ...ain the desired scrub pressure Cylindrical Scrub System Wiring Diagram A2 Control Board Assembly A3 Switch Display Panel Assembly Fuse 250 A 36V Battery A1 Speed Controller Motion 8 B B F4 K7 F1 S1 S2 S3 D1 Key Switch Seat Switch Battery Interlock Switch for roll out Battery Diode F2 Circuit Breaker 15 Amp Circuit Breaker 3 Amp K5 4 3 16 15 Direction Battery Ground CAN H CAN L S5 Solution Empty Sw...

Страница 77: ...embly via the CAN BUS that the operator has pressed the scrub on switch the A2 Control Board Assembly sends the appropriate voltage to the Brush Actuator M2 to lower the scrub deck to the operating position The Scrub Deck Sensing Resistor R2 senses the deck size so the operator does not need to program the deck size into the hidden menu As the brush motor current passes through the BRN current sen...

Страница 78: ...e squeegee and help keep the water confined within the cleaning path The Side Skirt height is adjustable and the Side Skirts can be removed for cleaning or replacement Maintenance and Adjustments Warning Before performing any machine maintenance or adjustments make sure the key switch is off the key is removed from the machine and the parking brake is engaged General Scrub System Maintenance The s...

Страница 79: ...onthly Maintenance Inspect the scrub brush bristles for wear the brushes should be replaced when the bristle length is 1 inch 26 mm or less Scrub Brush Belt Replacement 1 Remove the Side Skirt Assembly on the side needing belt replacement 2 Remove the two hex nuts 10 mm socket and Phillips screw holding the Belt Guard then remove the Belt Guard 3 Loosen the Flat Head Screw and Hex Screw holding th...

Страница 80: ...eps for adjusting the actuator drive nut Spring Housing Assembly setting for the scrub deck actuator motor Using the Actuator Power Cord Adapter The adjacent drawing shows the special actuator power cord adapter p n 56407502 that is needed to connect the machine s battery pack and actuator motor for setting the actuator drive nut limit settings To connect the actuator power cord adapter 1 Open the...

Страница 81: ...tor motor begin with step 2 below If you re adjusting the Drive Nut on the existing scrub deck actuator skip to step 5 on the following page 2 Remove spin off the plastic Drive Nut and install the Upper Housing Spring onto the actuator lead screw shaft 3 Reinstall the Drive Nut as shown with the nut pin pocket away from the motor 4 Assemble the Lower Housing Spring Spring Housing Nut Retainer two ...

Страница 82: ...edge of the gearbox to the edge of the plastic Spring Housing Assembly as shown in the above drawing Note All adjustment settings are measured out of the machine not attached 7 After making the initial adjustment hold the Spring Housing Assembly and run it out enough so that the Nut Retainer can be turned in to make up difference from the dimension targeted For example the first Retracted dimensio...

Страница 83: ...val and Installation Scrub Deck Lift Actuator section to reassemble it in the machine Refer to the adjacent drawing to correctly mount the top of actuator motor to the chassis by model size Service Note Note the correct orientation of the Spring Housing Assembly when installing the complete motor assembly and also run the Spring Housing Assembly to the Retracted in position before you install it i...

Страница 84: ... the Skirt Blades as a set if all four edges are nicked torn or worn beyond their ability to be adjusted 4 Reinstall the Side Skirt Assemblies onto the machine and check the height of the Skirt Blades for correct contact on the floor when the brush deck is lowered to the scrub position The Skirt Blades should fold over just enough when scrubbing that all the waste water is contained inside the ski...

Страница 85: ... wire colors VIO and WHT VIO 2 Check the coil resistance If the resistance is below 75 ohms replace the coil Note that the nominal coil resistance is 94 ohms for both motor contactors Right brush motor contactor coil overload error code 07 displayed 1 Check for a K2 coil wiring problem or a short circuit wire colors VIO YEL BLU 2 Check the coil resistance If the resistance is below 75 ohms replace...

Страница 86: ... the code substitute a new A2 control board assembly The scrub deck actuator doesn t raise or lower the scrub deck Scrub deck actuator overload error code 08 displayed Normal current load is 1 3 amps Max current load is 6 amps Max current with no load is 1 4 amps 1 Check for binding or a frozen brush lift linkage and excessive weight on the brush deck 2 Check for a short circuit in the actuator mo...

Страница 87: ...n the Retainer Knobs then slide the Side Skirt Assembly forward slightly then off of the scrub deck 3 Loosen the Thumb Nut on top of the Broom Idler Assembly until the Broom Idler Assembly drops down far enough to disengage it from the Notches then remove the Broom Idler Assembly 4 Remove the Brush from the housing 5 To reinstall a Brush slide it into the housing lift it slightly then push and tur...

Страница 88: ... solenoid valve located underneath the left side of the machine ahead of the rear wheel 6 Remove bottom lift actuator Cotter Hair Pin then push the Retainer Pin from its housing and mount bracket holes 7 Disconnect the actuator wire harness connector Note that this will prevent the actuator from being switched on and rising when it is disconnected from its deck mount Service Note Connect the Advan...

Страница 89: ... assembly out from underneath the machine Service Note Connect the power cord adapter p n 56407502 to the actuator motor and use the adapter to shorten the Scrub Deck Actuator length Hold the Spring Housing Assembly when you run the Scrub Deck Actuator motor to maintain the correct retracted and extended position settings See the Lift Actuator Adjustment section in this manual for additional detai...

Страница 90: ...tter Hair Pin from underneath the middle of the machine 3 Slide the actuator Mount Pin from the housing and frame mounting bracket holes allowing the motor to drop down completing its removal 4 Refer to the Drive Nut Adjustment section for instructions on how to install a new drive nut and set the extended and retracted positions 5 Install the scrub deck actuator by following the above steps in re...

Страница 91: ...10 mm socket and Phillips screw holding the Belt Guard and remove the Belt Guard 7 Remove the four motor mount Screws holding the Scrub Motor to its deck mount Also note that the Scrub Motor may stick to the motor mount so be careful and watch your fingers as the motor will drop 8 Turn the Scrub Motor clockwise to access the motor terminal studs Note the wire connections for correct reassembly the...

Страница 92: ...and follow the instructions on how to replace or tension the belt Specifications Component Specifications Scrub Brush Motor Voltage 36 VDC Power 1100 Watt Speed 2200 RPM Current 30 Amps UP Rating 55 Deck Actuator Motor Type permanent magnet 36 VDC 1 5 HP reversible Motor to drive screw ratio 19 1 1 Performance Data No Load Thrust 0 lbs Speed 36 4 in min 1 0 0 5 Amps Full Load Thrust 600 lbs Speed ...

Страница 93: ... Wiring Diagram A2 Control Board Assembly A3 Switch Display Panel Assembly Fuse 250 A 36V Battery A1 Speed Controller Motion 8 B B F4 K7 F1 S1 S2 S3 D1 Key Switch Seat Switch Battery Interlock Switch for roll out Battery Diode F2 Circuit Breaker 15 Amp Circuit Breaker 3 Amp K5 4 3 16 15 Direction Battery Ground CAN H CAN L S5 Solution Empty Switch closes when empty B B B Bat Bat Bat Bat K2 Right B...

Страница 94: ...A3 Switch Display Panel Assembly via the CAN BUS that the operator has pressed the scrub on switch the A2 Control Board Assembly sends the appropriate voltage to the Brush Actuator M2 to lower the scrub deck to the operating position The Scrub Deck Sensing Resistor R2 senses the deck size so the operator does not need to program the deck size into the hidden menu As the brush motor current passes ...

Страница 95: ... power the two scrub brushes The Scrub Deck Actuator Assembly raises and lowers the scrub deck and automatically adjusts the deck height during scrubbing to maintain the correct scrub pressure The Side Skirts direct the waste water to the squeegee and help keep the water confined within the cleaning path The Side Skirt height is adjustable and the Side Skirts can be removed for cleaning or replace...

Страница 96: ...or motor for setting the actuator drive nut limit settings To connect the actuator power cord adapter 1 Open the machine battery compartment and disconnect the battery connector The battery pack is needed to power the lift actuator motor to correctly set the IN and OUT limit switches 2 Connect the actuator motor to be tested to the power cord adapter end 3 Connect the alligator clips from the cord...

Страница 97: ...scrub deck lift actuator skip to step 5 on the following page 2 Remove spin off the plastic Drive Nut and install the Upper Housing Spring onto the actuator lead screw shaft 3 Reinstall the Drive Nut as shown with the nut pin pocket away from the motor 4 Assemble the Lower Housing Spring Spring Housing Nut Retainer two piece and mounting hardware Upper Housing Spring Drive Nut Lower Housing Spring...

Страница 98: ...e of the gearbox to the edge of the plastic Spring Housing Assembly as shown in the above drawing Note All adjustment settings are measured out of the machine not attached 7 After making the initial adjustment hold the Spring Housing Assembly and run it out enough so that the Nut Retainer can be turned in to make up difference from the dimension targeted For example the first Retracted dimension m...

Страница 99: ...l and Installation Scrub Brush Lift Actuator section to reassemble it in the machine Refer to the adjacent drawing to correctly mount the top of lift motor to the chassis by model size Service Note Note the correct orientation of the Spring Housing Assembly when installing the complete motor assembly and also run the Spring Housing Assembly to the Retracted in position before you install it in the...

Страница 100: ...he center of the machine Replace the Skirt Blades as a set if all four edges are nicked torn or worn beyond their ability to be adjusted 4 Reinstall the Side Skirt Assemblies onto the machine and check the height of the Skirt Blades for correct contact on the floor when the brush deck is lowered to the scrub position The Skirt Blades should fold over just enough when scrubbing that all the waste w...

Страница 101: ...ssive belt tension and the condition of the idler bearing Left brush motor contactor coil overload error code 05 displayed Contactor K4 is for the left motor on the three motor decks 1 Check for a K4 coil wiring problem or a short circuit wire colors VIO and GRA RED 2 Check the coil resistance If the resistance is below 75 ohms replace the coil Note that the nominal coil resistance is 94 ohms for ...

Страница 102: ... at the K3 coil If you get 0 Volts check the A2 control board assembly Center brush motor contactor coil short to ground error code 25 displayed 1 Disconnect the K3 coil wiring wire colors VIO and WHT VIO and check to see if the code disappears If the code disappears replace the brush contactor If the code does reappear test the wiring for a short back to the battery ground Repair or replace the d...

Страница 103: ...2 Check for a short circuit in the actuator motor and wiring Repair or replace To test the actuator disconnect the motor plug and attach the actuator power cord adapter p n 56407502 and perform an amp draw test Compare readings to the current load specifications to the left Scrub deck actuator open error code 28 displayed 1 Check for disconnected lift actuator wiring 2 Check for an open circuit in...

Страница 104: ...onnect the battery pack push in the Emergency Disconnect This will prevent the scrub deck from automatically rising when the key is turned off 4 Turn the key switch off 5 Remove the Solution Feed Hose at solution distribution bladder located on the scrub deck 6 Remove bottom Scrub Deck Actuator Cotter Hair Pin then push the Retainer Pin from its housing and mount bracket holes 7 Disconnect the Scr...

Страница 105: ...crub Deck Lift Actuator Note All new replacement actuator motors are not shipped with the lift nut pre adjusted for any specific machine model application Note The scrub deck must be removed to access the top mount bracket on the scrub deck lift motor 1 Remove the scrub deck by following the steps in the Scrub Brush Deck section 2 Locate and remove the upper Cotter Hair Pin from underneath the mid...

Страница 106: ...by pulling it straight up 6 Reassemble the Gearbox Assembly to the Deck Weldment by following the above steps in reverse order Make sure to reinstall the key stock To Disassemble and Reassemble a Gearbox Assembly 1 Remove the three socket head cap screws securing the Gearbox to the Brush Motor then separate the Gearbox from the Brush Motor Make sure to save the internal Gearbox key stock for reass...

Страница 107: ...75 Amps 45 and 48 decks Voltage 36 VDC Power 1 5 HP Speed 4000 RPM Current 45 Amps Deck Actuator Motor Type permanent magnet 36 VDC 1 5 HP reversible Motor to drive screw ratio 19 1 1 Performance Data No Load Thrust 0 lbs Speed 36 4 in min 1 0 0 5 Amps Full Load Thrust 600 lbs Speed 29 3 in min 5 0 1 Amps Stall Current 25 Amps max Start Thrust 600 lbs min Special Tools Actuator Power Cord Adapter ...

Страница 108: ... disc desks only then through the various fittings and hoses to the Scrub Brushes Note that the Solution Solenoid Valve is full open whenever the solution system is switched on The Drain Hose allows you to drain the Solution Tank by removing the Drain Plug When the detergent system is switched on the Detergent Pumps pump the detergent from the Detergent Tank to a tee fitting upstream of the Soluti...

Страница 109: ...nt or debris from reaching the solution control pump and solution solenoid valve The Solution Filter can be disassembled for cleaning Solution Control Pump The Solution Control Pump pumps the solution through the solution solenoid valve to the nozzles adjacent to the scrub brushes The Solution Control Pump gets PWM voltage from the A2 Control Board to regulate the Solution Control Pump speed and t...

Страница 110: ...ge from the Battery when the load side of contactor K5 is closed The contactor K5 closes when the A2 Control Board Assembly connects the K5 coil to battery ground A2 Control Board Assembly A3 Switch Display Panel Assembly Fuse 250 A 36V Battery A1 Speed Controller Motion 8 B B F4 K7 F1 1 2 S1 S2 S3 D1 Key Switch Seat Switch Battery Interlock Switch for roll out Battery Diode F2 Circuit Breaker 15 ...

Страница 111: ... L1 is also PWM voltage but is always at full voltage when the Solution Control Pump M12 is on Detergent System The Detergent Metering Pumps M13 and M16 are powered directly by the A2 Control Board Assembly The A2 Control Board Assembly sends the Detergent Metering Pumps voltage to run the Detergent Metering Pumps when The A3 Switch Display Panel Assembly sends the A2 Control Board Assembly a sign...

Страница 112: ... and Hose Cap The Drain Hose and Drain Hose Cap are attached to the shutoff valve and are located above the left rear tire Solution Filter The in line Solution Filter is located between the shutoff valve and the solution pump underneath the left side of the machine The Solution Filter is below the FILTER location arrow molded into the machine body panel Shutoff Valve Drain Hose Drain Hose Cap Solu...

Страница 113: ...ol Pump speed and the subsequent solution flow Solution Solenoid Valve The Solution Solenoid Valve opens to allow solution flow to the scrub brushes Although the Solution Solenoid Valve gets PWM voltage from the A2 Control Board it remains full open when the solution pump is switched on Solution Manifold disc decks only The Solution Manifold distributes the solution from the solution pump and sole...

Страница 114: ...y Pump is included in the optional Spray Wand Kit The pump mounts on the underside of the chassis Detergent Tank and Pumps The Detergent Tank and Detergent Pumps are located behind the side access panel on the right hand side of the machine Accessory Pump Detergent Pump Detergent Pump Detergent Tank ...

Страница 115: ...oid Valve section 2 Remove the four Screws and disassemble the solenoid valve Be careful not to lose any internal parts 3 Thoroughly wash any dirt or sediment from the Block and Diaphragm 4 After you reassemble the solenoid valve check the valve for correct operation Weekly Maintenance To Empty and Rinse the Solution Tank 1 Remove the solution drain hose from its storage area located above the lef...

Страница 116: ...ion Filter removed from the machine to more clearly show the individual components 2 Unscrew the Filter Cover and remove the Filter Cover and Screen from the Filter Base 3 Clean any accumulated dirt or debris from the Screen 4 Reinstall the Screen into the Filter Base 5 Make sure the Rubber Washer is installed correctly in the Filter Cover then reinstall and hand tighten the Filter Cover To Clean ...

Страница 117: ...s turn the key switch on The display will show the purge icon the detergent and solution pumps will run for 20 seconds then shut off 5 When the purge cycle is complete turn the key switch off 6 Install and connect the new detergent tank To Program the Detergent Ratio There are 10 available detergent ratios Select the desired detergent ratio as follows 1 Press the detergent switch to turn the deter...

Страница 118: ...oil L1 Solution solenoid short to ground Main Controller Error Code 34 Disconnect the L1 solenoid coil wiring and check to see if the code disappears If the code disappears replace the solenoid If the code reappears test the wiring for a short back to the battery ground Repair or replace the defective wire Substitute a new A1 control board Solution solenoid L1 overload Main Controller Error Code 1...

Страница 119: ...ing replace the pump Removal and Installation Warning Before removing or reinstalling any machine components make sure the key switch is off the key is removed from the machine and the parking brake is engaged Solution Control Pump Note Access the solution control pump from underneath the machine 1 Drain the solution tank or turn the solution shutoff valve to the off position to prevent solution l...

Страница 120: ...ve or hoses 3 Disconnect the L1 solenoid valve Electrical Connector from the machine harness 4 Loosen the Hose Clamps on the Inlet and Outlet Hoses 5 Separate pry the Outlet Hose off of the barbed fitting on the Valve Body 6 Remove the two Hex Screws holding the Valve Body to the underside of the chassis then pull the Valve Body toward the front of the machine to separate it from the Outlet Hose 7...

Страница 121: ...M 1 50 GPM 2 00 GPM 2 25 GPM 2 50 GPM 45 48 Cylindrical 84 GPM 1 00 GPM 1 50 GPM 2 00 GPM 2 50 GPM Component Specifications Component Specifications Solution Control Pump Voltage 36 VDC Current Draw 3 9 amps max Flow Rate 3 3 GPM 2 75 amps with 20 psi inlet pressure Solution Solenoid Valve Coil Voltage 36 VDC Coil Resistance 74 ohms Accessory Pump Voltage 36 VDC Current Draw 3 0 amps max Pressure ...

Страница 122: ... M3 gets voltage from the A2 Control Board Assembly which switches the polarity to move the squeegee tool up or down When the A2 Control Board Assembly receives a signal from the A3 Switch Display Panel Assembly via the CAN BUS that the operator has pressed the scrub on switch the A2 Control Board Assembly sends the appropriate voltage to the Squeegee Actuator M3 to lower the squeegee to the opera...

Страница 123: ...en the scrub system is switched off Moving the drive pedal back to the neutral forward switches off the reverse direction output from the A1 Speed Controller to the A2 Control Board Assembly The A2 Control Board Assembly then sends voltage to the Squeegee Actuator M3 at the appropriate polarity to lower the squeegee tool back onto the floor Component Locations The Squeegee Assembly is attached to ...

Страница 124: ...ur edges are nicked torn or worn to a large radius 5 Install the Rear Blade following the above steps in reverse order then adjust the squeegee as necessary To Reverse or Replace the Front Squeegee Blade 1 Raise the squeegee tool off the floor then loosen the two Thumb Nuts on top of the squeegee and remove the squeegee tool from the Squeegee Mount Weldment 2 Remove both Tension Straps then remove...

Страница 125: ...e floor evenly across its entire width To Adjust the Squeegee Blade Height Adjust the squeegee height whenever a blade is reversed or replaced or if the squeegee is not wiping the floor dry The squeegee blade height is easily adjustable at the caster wheels To adjust the squeegee blade height 1 Park the machine on a flat even surface and lower the squeegee 2 Drive the machine forward enough to hav...

Страница 126: ...on the actuator power cord adapter to change the motor rotation when setting the correct actuator drive nut dimensions Service Note You can use the above actuator power cord adapter to help position the drive nut spring housing assembly in or out for ease in actuator motor installations Actuator Drive Nut Adjustment 1 Hold onto the Actuator Drive Nut and press the rocker switch on the actuator pow...

Страница 127: ...djuster Cover Troubleshooting Problem Cause Correction Problem Cause Solution Poor water pick up Clogged vacuum hose Check the vacuum hose and clear clean as necessary Vacuum leaks Check the squeegee tool and vacuum hose for leaks or cracks and repair replace as necessary The squeegee tilt and or height is set incorrectly Adjust the squeegee tilt and or height as necessary The squeegee leaves narr...

Страница 128: ... from the machine harness 6 Go underneath the machine and remove the two Hair Cotter Pins then slide out push both Clevis Pins from their mounting holes to remove the lift actuator from the machine Note New replacement lift actuator motors do not come with the lift drive nut pre adjusted Service Note After removing the lift actuator and before installing a new actuator or drive nut the drive nut a...

Страница 129: ...ations Squeegee Actuator Motor Type permanent magnet 36 VDC 1 6 HP reversible Motor to drive screw ratio 27 1 1 Performance Data No Load Thrust 0 lbs Speed 39 in min 1 4 Amps max Full Load Thrust 600 lbs Speed 30 in min 6 7 1 Amps Start Thrust 600 lbs Special Tools Actuator Power Cord Adapter p n 56407502 ...

Страница 130: ...ered automatically when the scrub system is enabled Note that this automatic side broom function can be enabled or disabled in the main control programming options The broom motors will switch on when the drive pedal is moved from the neutral position Side Broom Sweep System Wiring Diagram A2 Control Board Assembly A3 Switch Display Panel Assembly Fuse 250 A 36V Battery A1 Speed Controller Motion ...

Страница 131: ...ard Assembly which switches the polarity to move the side brooms up or down When the A2 Control Board Assembly receives a signal from the A3 Switch Display Panel Assembly via the CAN BUS that the operator has pressed the scrub on switch the A2 Control Board Assembly sends the appropriate voltage to the Side Broom Actuator M4 to lower the side brooms to the operating position Component Locations Th...

Страница 132: ...ss and hold the side broom on down and scrub off switches 3 While holding the switches turn the key switch on 4 Continue to hold the switches until the side broom on down indicator scrub off indicator and both scrub on indicators turn on 5 Release the switches The indicators will stay on and the display will now show the side broom actuator down run time in seconds 6 Press the scrub on switch to i...

Страница 133: ...m the cord adapter red clip to the positive and black to negative to battery connector or battery posts Use the rocker switch on the actuator power cord adapter to change the motor rotation when setting the correct actuator drive nut dimensions Service Note You can use the above actuator power cord adapter to help position the drive nut spring housing assembly in or out for ease in actuator motor ...

Страница 134: ...Lift 1 5 8 4 12cm 3 1 8 7 93cm Cylindrical w side brooms 5 If the OUT measurement doesn t match the dimension shown in the table remove the Adjuster Cover and adjust the OUT position as follows To increase the travel of the Actuator Drive Nut turn the adjuster clockwise To decrease the travel of the Actuator Drive Nut turn the adjuster counterclockwise Note Use a 1 2 13 mm socket to turn the adjus...

Страница 135: ...il short to ground error code 37 displayed 1 Disconnect the K6 coil wiring wire colors VIO and BRN BLK and check to see if the code disappears If the code disappears replace the K6 contactor If the code does reappear test the wiring for a short back to the battery ground Repair or replace the defective wire 2 If the above test doesn t remove the code substitute a new A2 control board assembly The ...

Страница 136: ...and Lift Arm mounts Service Note It may be helpful to lift up and down on the Lift Arm to relieve any preload pressure on the Clevis Pins when removing the front Clevis Pin 4 Drop the Side Broom Lift Actuator out from underneath the machine to remove it Note New replacement lift actuator motors do not come with the lift drive nut pre adjusted Service Note After removing the lift actuator and befor...

Страница 137: ...ly to the Side Broom Bracket Weldment 4 Install the Side Broom Motor by following the above steps in reverse order 5 Note that the position of the mounting screws inside the three Die Springs set the spring tension for the side broom front and side impact breakaway Once you ve reinstalled the Gearmotor Assembly adjust the mounting screws inside the Die Springs to the dimensions shown in the detail...

Страница 138: ...ox 27 1 ratio Power 162 Watts Output 105 in lbs 84 RPM Current 6 Amps Side Broom Actuator Motor Type permanent magnet 36 VDC 1 6 HP reversible Motor to drive screw ratio 21 7 1 Performance Data No Load Thrust 0 lbs Speed 39 4 in min 1 4 Amps max Full Load Thrust 600 lbs Speed 30 3 in min 6 7 1 Amps Start Thrust 600 lbs Special Tools Actuator Power Cord Adapter p n 56407502 ...

Страница 139: ... attached to the brake Spindles and are held on the frame shafts by a M10 1 5 x 20mm hex screw and washer The Brake Pedal Assembly actuates the Brakes via a Cable Assembly The Brake Pedal Assembly can be locked with the Brakes engaged to act as a parking brake The Cable Assembly actuates an Equalizer that ensures the tension from the Cable Assembly is applied equally to both brakes Non traction Wh...

Страница 140: ...s mount bracket on the chassis 4 Locate a plastic Tie Strap on the lower left side of the chassis at midpoint then cut the Tie Strap to free the cable at that point 5 Unclip the cable Clevis Yoke at the left brake caliper at the arm and separate 6 Loosen the cable Anchor Locknuts at the Equalizer Yoke mounting bracket The cable assembly is now completely disconnected 7 Attach a new cable to the en...

Страница 141: ...n Anchor Nuts 3 Install a new Tie Strap to the chassis as a cable guide Allow a small amount of cable movement through the Tie Strap There should be about 1 2 of clearance between the Tie Strap and the chassis as shown 4 Check that the left rear brake adjustable Clevis Yoke has about 1 8 3 16 of thread engagement as shown then tighten the hardware 5 Adjust the cable at the Equalizer Yoke so 1 8 of...

Страница 142: ...he adjustment make sure the machine can be pushed easily when the brake pedal is not engaged Troubleshooting Problem Cause Correction Poor braking performance The brakes are out of adjustment Adjust the brake cable as necessary Refer to the Brake Cable Adjustment section If the brake cable is stretched to the point where it cannot be adjusted to provide good braking performance replace the brake c...

Страница 143: ...nd disconnect the Brake Linkage Rod from the brake arm mounting hole 3 Loosen the M10 1 5 x 20mm Hex Screw holding the Rear Wheel to the axle 4 Position a suitable jack underneath the wheel axle and jack up the machine so the wheel is approximately 1 inch off the floor Warning Place wood blocking under the rear axle as the machine is only being supported by the jack This is to prevent any accident...

Страница 144: ... Screw and washer to fasten the Rear Wheel to the axle Service Note Apply a small amount of Loctite 242 blue thread sealant to the M10 1 5 x 20mm Hex Screw to prevent the screw from loosening d Remove the wood blocking from the rear axle then lower the jack e Reconnect the brake cable Clevis Yoke to the brake arm left wheel Reconnect the Brake Linkage Rod to the brake arm right wheel and reinstall...

Страница 145: ...ion Curtis A1 Speed Controller The Curtis solid state speed controller A1 controls the speed and direction of wheel drive motor according to the inputs it receives from the A2 control board assembly The speed controller is located to the left of the operator seat behind the electrical access panel The speed controller is programmed for two maximum speed setting modes M1max and M2max The M1max is t...

Страница 146: ...e weldment to turn the drive wheel left and right Drive Pedal Assembly The drive pedal rotates the 5kΩ potentiometer R1 via the Link Weldment and Throttle Lever according to the operator s specific drive pedal speed and direction demands The 5kΩ potentiometer is mounted inside the Potentiometer Housing The A1 Curtis speed controller senses the voltage 0 5 VDC through the R1 potentiometer to determ...

Страница 147: ...e signal to the A1 Speed Controller Note that 2 5 VDC to the A1 Speed Controller is neutral The A1 Speed Controller interprets the input voltage as a direction and percentage of throttle movement and sends the appropriate voltage to the Traction Motor M1 The PWM voltage to the motor armature connections A1 and A2 controls the motor speed The polarity of the voltage to the field connections F1 and ...

Страница 148: ...ine above the Drive Wheel Assembly Drive Pedal Assembly The Drive Pedal Assembly is mounted on the floor plate to the operator s right The 0 5k Ohm Potentiometer that controls the drive motor speed and direction is housed in the Drive Pedal Assembly Interlock Switches Key Switch S1 main power switch mounted on the control panel Seat Switch S2 closes when the operator is in the seat Battery Interlo...

Страница 149: ...ing Vehicle Speed Changes The maximum high speed M1 transport and maximum low speed M2 scrub can be changed electronically using the handheld programmer To change a parameter using the programmer 1 Press the PROGRAM key and scroll down the Program Menu until the desired parameter is the top line of the display 2 Press the appropriate CHANGE VALUE key up or down until the desired number is reached ...

Страница 150: ...rity to the wheel motor at the field terminals S1 and S2 Check the A1 speed controller The hourmeter status display shows an error 03 fault code The A1 speed controller has sensed an operation error code fault Refer to the Status LED Fault Codes section See the Curtis Controller Diagnostics section Curtis Controller Diagnostics Diagnostics Method A Method A uses the machine s control display LCD p...

Страница 151: ... Check or replace the electronic throttle and wiring and repeat the test If the programmer shows the forward switch closing and the vehicle now drives normally the problem has been corrected Refer to the Status LED Fault Codes section for suggestions covering a wide range of possible faults Diagnostic History The handheld programmer can be used to access the controller s diagnostic history file Co...

Страница 152: ...g delay too short 2 1 00 0 Throttle wiper fault 1 Throttle input wire open 2 Throttle input wire shorted to B or B 3 Throttle pot defective 4 Wrong throttle type selected 2 3 00 000 HPD fault 1 Incorrect sequence of KSI interlock and throttle inputs 2 Wrong HPD type selected 3 Throttle pot not adjusted correctly 4 Sequencing delay too short 2 4 00 0000 Pot low input fault 1 Throttle pot wire open ...

Страница 153: ...Temperature 85 C 185 F or 25 C 13 F 2 Excessive load on vehicle 3 Incorrect mounting of controller 4 Operation in extreme environments 4 4 0000 0000 Anti tie down fault 1 Mode switches shorted to B 2 Mode switches tied down to select Mode 2 or Mode 4 permanently Note A KSI key switch input system problem is a specific HPD high pedal disable type operational fault caused by the operator activating ...

Страница 154: ...mn toward the rear of the machine This will allow you to separate the Chain from the Steer Sprocket 3 Remove both Master Links that secure the Chain to the Steer Plate then remove the Chain from the chassis 4 Reinstall the Chain by following the above steps in reverse order 5 Adjust the Chain tension so there is about 3 16 1 4 4 7 6 4mm total deflection with moderate pressure applied at the Midpoi...

Страница 155: ...ervice Note When you disassemble or reassemble the wire terminal connecting hardware use an extra wrench to help prevent the electrical motor stud s from rotating to prevent damage to the internal motor leads 3 Remove the 16 5 16 24 Socket Head Cap Screws from the rim use a 1 4 hex drive socket 4 Safely jack up or lift the front of the machine 1 to 2 inches 25 50 mm and block both front machine co...

Страница 156: ...ble the wire terminal connecting hardware use an extra wrench to help prevent the electrical motor stud s from rotating to prevent damage to the internal motor leads 3 Remove the hex screw and nut holding the motor wiring harness P clamp use a 7 16 wrench then pull wiring to the rear of the machine 4 Loosen the four Screws from underneath the front of the machine and push the lower steering column...

Страница 157: ...refer to the Electric Drive Motor section 10 Reassemble the steering spindle and wheel drive assembly by following the above steps in reverse order Note Tighten the Castle Nut to eliminate any bearing play then back off the Castle Nut enough to install a new Cotter Pin Electric Drive Motor 1 Follow steps 1 through 9 in the Steering Spindle and Wheel Drive Assembly section 2 Remove the 12 Gear Case...

Страница 158: ...l Inspection Band from the motor end bell Service Note Bend a sharp loop in the end of a stiff piece of wire to fabricate a tool to pull on the end of the carbon brush spring tail to easily help apply or remove the spring tension on the end of a carbon brush 2 Remove the spring tension on the end of each brush using the above mentioned tool and then pull the brush from the holder to examine and me...

Страница 159: ...olors and their terminal connections for reassembly 3 Disconnect the wiring and remove the pedal mount assembly from the machine 4 Remove the Link Rod from the Pedal Be careful not to lose the link rod Mounting Hardware items 5 Loosen the Nut and Screw at the drive pedal Throttle Lever then pry the Throttle Lever off of the end of the Potentiometer shaft 6 Remove the Potentiometer from the Mount H...

Страница 160: ... adjusted correctly the machine will creep in either forward or reverse 1 Install the Potentiometer into the Mount Housing and tighten the attachment nut 2 Loosely connect both the Link Rod to the Pedal and the Throttle Lever to the Potentiometer input shaft 3 Tighten the Link Rod pedal Mounting Hardware only Check the Pedal movement It must move freely in both forward and reverse 4 See the Potent...

Страница 161: ...tentiometer and or drive pedal neutral position Check both again and readjust Alternate Method for Throttle Adjustment The throttle adjustment is easier and more accurately adjusted by measuring the throttle potentiometer wiper voltage with respect to B To set throttle neutral 1 Connect a voltmeter to B on the speed controller and to the BRN RED wire A thin probe can be inserted into the connector...

Страница 162: ...ns of both spring ends See the figure on the following page If the Torsion Spring is damaged replace it To Adjust the Pedal Spring 1 Loosen the Screw and Nut The Screw and Bushing are positioned between both forward and reverse torsion spring ends Their position controls the needed pre load pressure to eliminate excessive pedal free play and provides a balanced spring rate to return the pedal to a...

Страница 163: ...s free of the error code 03 drive system fault If error 03 is shown the throttle is not set correctly for the potentiometer and or drive pedal neutral position Check both again and readjust Installation Checkout for the Curtis Speed Controller Warning The Curtis 1243 controller is inherently a high power device When working around any battery powered vehicle appropriate safety precautions must be ...

Страница 164: ...reen appears If the throttle is activated prior to this screen appearing the controller will shut down 4 If there is a problem the LED will flash a diagnostic code and the programmer will display a diagnostic message If you are conducting the checkout without a programmer look up the LED diagnostic code in the Status LED Fault Codes section 5 When the problem has been corrected it may be necessary...

Страница 165: ...larm Auxiliary Driver output Battery commands turns off solution raises squeegee and sounds back up alarm 4 BLK YEL Main Contactor Driver Battery output to main contactor K7 5 VIO BLK Throttle pot R1 Pot High 6 BRN RED Throttle pot R1 wiper input 7 WHT BLK Throttle pot R1 Pot Low 8 RED WHT Motion Auxiliary Driver Battery output signal to main controller A2 to turn on activate all auto scrub functi...

Страница 166: ...igh 36V Low 0V Scrub Mode Mode 2 Low 0V High 36V Traction Mode Mode 3 High High N A Special Tools Curtis hand held programmer model 1311 part number 56409441 16 15 14 13 12 11 10 9 8 7 6 5 4 3 2 1 AUXILIARY MOTION DRIVER FAULT 1 THROTTLE CONTROL WIPER MAIN CONTACTOR DRIVER MODE 1 SELECT INTERLOCK Detail of A1 16 pin Connector Used 11 Pins Not Used 5 Pins KEY SWITCH INPUT KSI MODE 2 SELECT AUXILIAR...

Страница 167: ...ooms K7 Contactor Main Speed Controller L1 Solenoid Solution M1 Motor Wheel Drive M2 Lift Actuator Brush M3 Lift Actuator Squeegee M4 Lift Actuator Side Broom M5 Motor Assembly Vac M6 Motor Assembly Vac optional M7 Gearmotor Assembly Side Broom cyl models only M8 Gearmotor Assembly Side Broom cyl models only M9 Motor Gearbox Ass y disk or Motor Brush cyl M10 Motor Gearbox Ass y disk or Motor Brush...

Страница 168: ...J1 22 J1 13 8V B J3 1 J3 2 J2 6 J2 5 J2 1 J2 9 J2 8 J2 7 J2 17 J2 4 J2 16 J2 12 J1 5 J2 13 J4 2 J2 11 J4 4 J2 2 J2 3 J1 8 J2 21 J1 15 J1 23 J2 22 J1 19 J1 16 J1 17 J2 15 J1 20 J2 18 J1 21 J1 18 J1 7 J1 6 5V B 3 1 U M QTY CODE PART ITEM J2 23 J2 10 J2 14 J1 10 J1 14 ON 40 DISK ON 40 DISK J1 1 J1 9 A4 NOT USED WITH ECOFLEX G F1 CIRCUIT BREAKER 3 AMP F1 CIRCUIT BREAKER 3 AMP 1 2 M M15 PUMP ACCESSORY ...

Страница 169: ...D HEAT TREATING BUT BEFORE PAINTING 4 REMOVE ALL BURRS AND SHARP EDGES APPROVED APPROVED APPROVED CHECKED FIRST USED ON DRAWN PROJ ENG U M QTY CODE PART ITEM FOR 40 DISK FOR 40 DISK A4 NOT USED WITH ECOFLEX I SP9 SP9 1 2 2 X55 X55 A B S1 SWITCH KEY S1 SWITCH KEY B1 3 H4 HORN H4 HORN 1 2 1 2 H2 LAMP FLASHING OPTIONAL H2 LAMP FLASHING OPTIONAL 1 2 X48 X48 A B A1 A1 S1 S2 B M B X42 X42 A B F1 CIRCUIT...

Страница 170: ...em Plumbing Schematic Item Description 1 Solution Tank 2 Shutoff Valve 3 Inline Solution Filter 4 Solution Pump 5 Detergent Tank 6 Detergent Pump 2 7 Drain Hose 8 Drain Plug 9 Solution Solenoid Valve 10 Reducer Tee 11 Y Barb Fitting 12 Solution Manifold Disc Models 13 Tee 14 Coupler Barb ...

Страница 171: ... Switch After five seconds the machine will lock in the displayed detergent ratio setting Also refer to the Solution System Maintenance and Adjustments To Program the Detergent Ratio section Note The detergent cartridge may have a magnetic slider on one end On EcoFlex machines the magnetic slider has no effect on the detergent ratio and can be disregarded To Purge the Detergent System 1 Disconnect...

Отзывы: