CVI™, LabVIEW™, Measurement Studio™, National Instruments™, NI™, ni.com™, NI-DAQ™, and SCXI™ are trademarks of National Instruments
Corporation. Product and company names mentioned herein are trademarks or trade names of their respective companies. For patents covering
National Instruments products, refer to the appropriate location:
Help»Patents
in your software, the
patents.txt
file on your CD,
or
ni.com/patents
.
323236A-01
©
2003 National Instruments Corp. All rights reserved.
April 2003
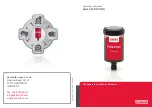
SCXI Quick Start Guide
Signal Conditioning eXtensions for Instrumentation
This document assumes you have already installed, configured, and tested
a data acquisition (DAQ) device. If you have not done so, follow the
instructions in the
DAQ Quick Start Guide for NI-DAQ 7.0
included with
the DAQ device before continuing. This document does not cover
PXI chassis, PXI combo chassis, the SCXI-1000DC chassis, the SCXI
switch modules, multichassis systems, or parallel-mode operation of any
module. Refer to the module, chassis, or cable adapter documentation for
information on these topics. If you are installing an SCXI switch, refer to
the
NI Switches Getting Started Guide
.
Contents
Conventions ............................................................................................ 2
Measurement System Overview ............................................................. 3
Step 1. Unpack the Module and Accessories .......................................... 4
Step 2. Verify the Components ............................................................... 5
Step 3. Set up the Chassis ....................................................................... 6
Step 4. Install Modules............................................................................ 7
Step 5. Attach Terminal Blocks .............................................................. 8
Step 6. Attach Sensors ............................................................................ 8
Step 7. Connect Modules to the DAQ Device ........................................ 9
Step 8. Power on the SCXI Chassis ........................................................ 9
Step 9. Launch Measurement & Automation Explorer (MAX).............. 9
Step 10. Add the SCXI Chassis .............................................................. 10
Step 11. Configure the Chassis ............................................................... 11
Traditional NI-DAQ ........................................................................ 11
NI-DAQmx ...................................................................................... 13
Step 12. Configure the SCXI Modules ................................................... 15
Traditional NI-DAQ ........................................................................ 15
NI-DAQmx ...................................................................................... 18
Step 13. Test the Chassis......................................................................... 21
Step 14. Configure Channels and Tasks ................................................. 21
Configure a Task in NI-DAQmx ..................................................... 22
Configure Global Channels for NI-DAQmx ................................... 24
Configure Virtual Channels for Traditional NI-DAQ ..................... 25
Getting Started Developing an Application ............................................ 25
Examples.......................................................................................... 25
™