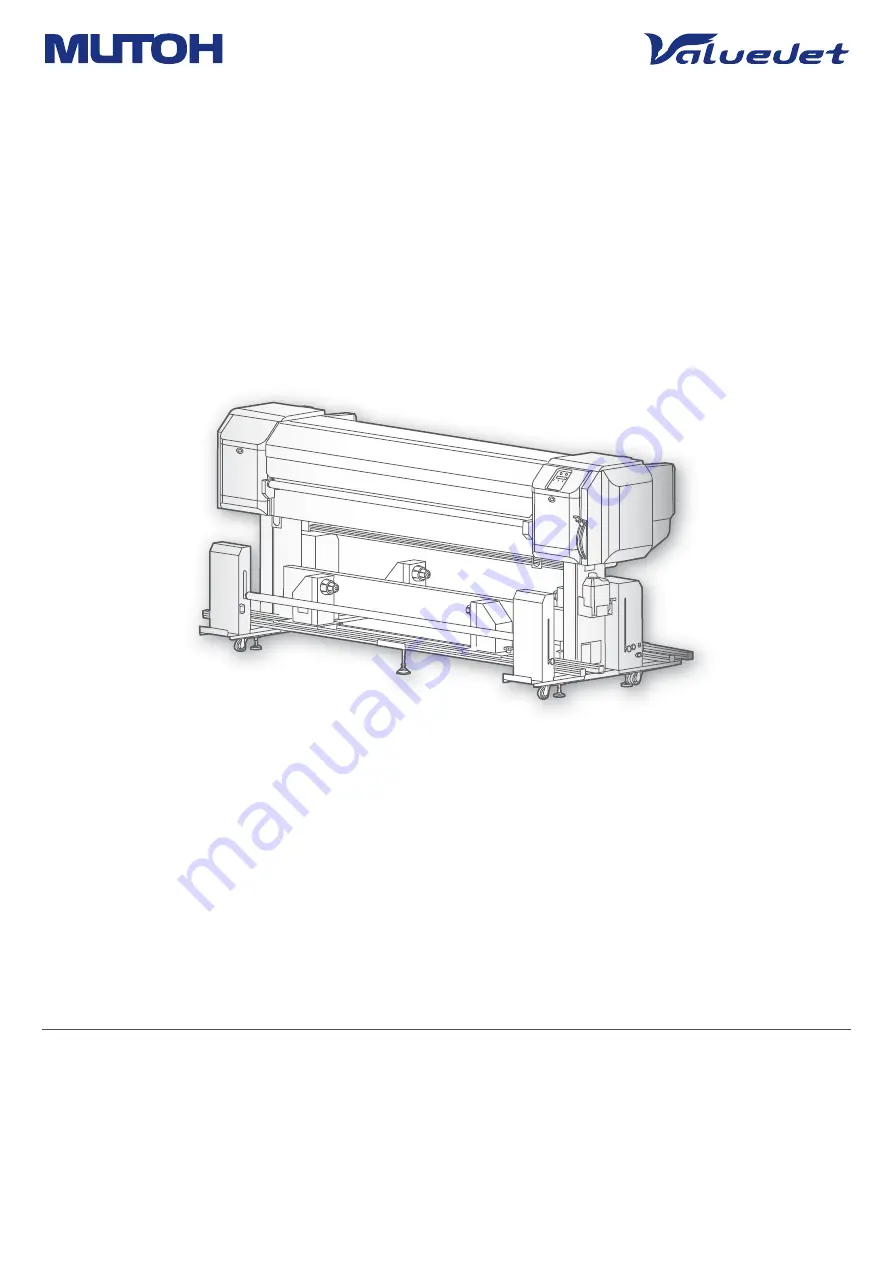
background image

VJ-1938TX

Operations and Maintenance Methods

Operation Manual

• Unauthorized copying or duplication of the whole or part of the contents of this manual is prohibited.

• Every care has been taken in writing the contents of this manual, but please contact MUTOH or the dealer you purchased the 

product from if you find any unclear, erroneous or otherwise unsatisfactory content in the manual.

• Please be aware that MUTOH will not be liable in any way for failures or accidents that result from handling or operating the 

printer according to any procedures other than those set forth in this manual.

• Company names and product names that appear in this manual are registered trademarks of the respective companies.

Summary of Contents for VJ-1938TX

Page 1: ...UTOH or the dealer you purchased the product from if you find any unclear erroneous or otherwise unsatisfactory content in the manual Please be aware that MUTOH will not be liable in any way for failures or accidents that result from handling or operating the printer according to any procedures other than those set forth in this manual Company names and product names that appear in this manual are...

Page 2: ...USTRIES LTD warrants part repair or replacement as a sole measure only if a failure is found in the system or in the materials and workmanship of the product the seller produced However if the cause of failure is uncertain decide the action after due mutual consultation The warranty shall not apply to any direct or indirect loss or compensation for the loss due to the product that has been subject...

Page 3: ...ht 31 Adjusting the Rail 33 Adjusting the Slack Detection Sensor 35 Powering ON OFF 36 Printer 36 Take up System 37 Loading the media 38 Set the media to the Feeding Unit 38 Put the media through the Rear roller Assembly 40 Loading the media to the Take up Unit 42 After loading the media 47 Nozzle check and cleaning 50 Nozzle check 50 Cleaning 51 Setting the Printing Precision 52 Head adjustment 5...

Page 4: ...aning 83 Set 13 Ink Status 84 Set 14 Media Length 84 Set 15 Exhaust Fan 85 Set 16 Longstore 85 Set 17 CR Maintenance 85 Set 18 Initialization 86 Set 19 Life Times 86 Set 20 IP Address 87 Set 21 Subnet Mask 87 Set 22 Gateway 87 Set 23 Header Dump 88 Set 24 Single Head 88 Set 25 Start Feed 89 Set 26 Temporary 89 Menu 2 Test Print 90 Test 1 Nozzle Check 90 Test 2 Mode Print 90 Test 3 Setup List 91 Te...

Page 5: ...uid tank 107 Emptying waste fluid tank 107 Cleaning each part 109 Head cleaning 109 Cleaning of cleaning wiper 111 Cleaning of print head circumference 114 Inside cleaning 116 Maintaining the ink gutter 118 Cleaning the Take up System 124 Replacing consumable parts 125 Replacing absorption material for the flushing box 125 Replacing the ink gutter filter 128 Moving or transporting the printer 130 ...

Page 6: ...r 4 Appendix Messages and Error Messages 138 Status messages 138 Error message display and remedies 140 Error requiring restart 142 Specifications of this product 143 Drawing area 143 List of specifications 144 ...

Page 7: ... Take up System 27 Take up Methods 27 Operation 28 Adjusting the Weight 31 Adjusting the Rail 33 Adjusting the Slack Detection Sensor 35 Powering ON OFF 36 Printer 36 Take up System 37 Loading the media 38 Set the media to the Feeding Unit 38 Put the media through the Rear roller Assembly 40 Loading the media to the Take up Unit 42 After loading the media 46 Nozzle check and cleaning 49 Nozzle che...

Page 8: ...8 What you can do during printing 57 Pausing Restarting printing 57 Canceling printing 57 What you can do on the operation panel during printing 57 ...

Page 9: ...cated at the edge of the media and it protects the media from being lifted located on both edges Rubber roller Presses the media from above Ink gutter This groove collects the ink that permeates through the media It requires regular cleaning Ink gutter cover Protects media from contact with ink stains on the ink gutter filter Carriage Contains the printer head When printing it moves left and right...

Page 10: ...ver Used for fixing or releasing the media This lever is interlocked with the media setting lever on the front side Cartridge slots Cartridge slots Install an ink cartridge or cleaning cartridge Ink color indicating labels Ink color indicating labels Power connector mini DIN connector Connect the external heater control cable to this port Do not connect the cable through the rear roller Network co...

Page 11: ...change a set value key When setting the menu Press this to move to another menu item Press this to change a set value Pause Cancel key Press this key to pause printing Holding this key pressed down for 2 seconds or longer will cancel the print job and delete the data received When setting the menu Cancels a change of a setting value Forward feed key Media is fed in the forward direction When setti...

Page 12: ...aper tube to take up the media Slack detection sensor With this sensor you can take up the media using the slack take up method You may need to adjust the angle Adjuster Tension roller Sensor reflector This is a sensor light reflector for the Slack detection sensor Assy Rear tension unit Rear roll unit drive Rear roll unit driven Rear tension unit Home side Rail Front roll unit driven Mount the pa...

Page 13: ...ons above are not available AUTO switch Sets the media rolling method Unless the switch is set to OFF the printer will automatically feed or take up the media when printing OUTSIDE ROLL Use this setting for the outside roll media OFF The media is not taken up automatically INSIDE ROLL Use this setting for the inside roll media OPERATION switch Sets the take up method SLACK Use this setting for the...

Page 14: ...etting Menu 4 Set 11 Slant Check セット4 メディアケンシュツ to Setting Menu 4 Set 12 Auto Cleaning セット4 メディアケンシュツ Set 13 InkStatus セット4 メディアケンシュツ Set 14 Media Length セット4 メディアケンシュツ to Setting Menu 5 Set 15 Exhaust Fan セット4 メディアケンシュツ Set 16 Longstore セット4 メディアケンシュツ Set 17 CR Maintenance セット4 メディアケンシュツ to Setting Menu 5 Set 18 Initialization セット4 メディアケンシュツ to Setting Menu 5 Set 19 Life Times セット4 メディアケンシュツ Set ...

Page 15: ... Display セット4 メディアケンシュツ Test 5 HeadAdjust Time Short Time LittleCharge Time Normal Time Long Display 1 Language Display 4 Remain Ink Display 2 Temperature Display 3 Length Menu 8 Job Status Job Status Done Remain XXX X m ToDoLength XXX X m Done XXX X m SleepMode 1 SetTimer SleepMode 2 Start Version X XX セット4 メディアケンシュツ Time InitialCharge HeadAdj 1 Standard HeadAdj 2 Custom Adj X Fine Pattern X Adj ...

Page 16: ...Fine Fog PF 1 Initial Print PF 2 Initial Change PF 3 Confirm Print PF 4 Micro Print PF 5 Micro Change Set 1 User Type Thickness 170 µm Adj Print 1 Standard Adj 1 Confirm Ptn Adj 2 Rough Pattern Adj 3 Fine Pattern Adj 1 Confirm Ptn Adj Print 2 Custom Adj 2 Rough Ptn ALL Adj X Fine Pattern X Adj X Rough Pattern X Adj 9 Fine Ptn ALL ...

Page 17: ...t Width Page Gap Narrow WaitingTime XXXX min WaitingTime Off Output Mode Take Up Set 2 Spitting Set 8 Head Travel PrintingTime XXX min PrintingTime Off Before Print Off Before Print On Init Off Auto 1 WaitingTime Auto 2 PrintingTime Auto 3 Before Print Set 12 Auto Cleaning Set 4 Media Initial Set 6 Output Mode Media Slant On Media Slant Off Set 11 Slant Check Output Mode Off InkDryTimer XX min ...

Page 18: ...haust Fan Low Exhaust Fan High Media Kind Media 3 Set 14 Media Length Set 18 Initialization Header Dump OFF Header Dump DUMP Set 23 Header Dump Set 15 Exhaust Fan Header Dump ON Single Head OFF Single Head Head 2 Set 24 Single Head Single Head Head 1 Head 2 E F Pump E F CR Motor Change PF Motor E F Head 1 E F Set 19 Life Times Exhaust Fan Off ...

Page 19: ...Menu chart 19 Menu during printing ToDoLength XXX X mm Done XXX X mm Remain Time XXXX min Menu 1 PF Micro Adj Menu 2 Backup Menu 3 Job Status Remain XXX X mm ...

Page 20: ...check and remote control of ValueJet can be done from personal digital assistance like your iPhone and Android Main functions Status monitor Remote panel 1 ValueJet Club This Web service provides free useful contents to ValueJet users Have user registration done to use various services Main functions Downloading the latest application and manual Downloading media profiles Printer status check When ...

Page 21: ... the IP address subnet mask and gateway Set 20 IP Address P 87 Set 21 Subnet Mask P 87 Set 22 Gateway P 87 Important The above figure is the example of peer to peer connection between this product and computer Connection method differs depending on the usage environment If you use the product with a LAN connect the cable so that the computer and printer are on the same subnet wv u ...

Page 22: ...n the Desktop Windows7 Windows Vista Double click the VSM icon on the Desktop Note Launching from the Start Menu of Windows Windows 8 Windows8 1 Right click somewhere the Start screen tiles are not displayed to display the application bar and click All Apps Windows7 Windows Vista From the Start menu click All Programs or Programs MUTOH ValueJet Status Monitor Displaying VSM Double click the VSM ic...

Page 23: ...Settings Close Windows8 1 Click the Down Arrow in the Start screen Click ValueJet Status Monitor Printing area Media Width a c b d a Printable Area a 5 mm 1 b 5 mm to 25 mm According to the Operation panel settings c 5 mm 1 d 5 mm to 25 mm According to the Operation panel settings 1 When the output mode is set to Take Up the margin between pages to Narrow When the page gap is set to Normal factory...

Page 24: ...0 mm Minimum width 900 mm Maximum thickness 3 5 mm When the head height is set to High Weight 100 kg or less Important The default setting for the head height is Low When the head height is set to Low the maximum available media thickness is 1 3 mm Media Rolling Methods Outside Roll With this rolling method the printed surface is on the outside Inside Roll With this rolling method the printed surf...

Page 25: ...long time a week or more conduct a head cleaning once a week Clean its inside once a month Drain waste ink in the waste fluid tank periodically before it becomes full In this product there are some parts required to be replaced after a long term use Parts required to be replaced by users absorption material for the flushing box ink gutter filter Parts required to be replaced by service personnel V...

Page 26: ...en the ink gutter cover when replacing roll media The ink gutter and the ink gutter filter need to be cleaned regularly Maintaining the ink gutter P 118 The ink gutter filter needs to be replaced regularly Replacing the ink gutter filter P 128 How to use the ink gutter Opening and closing the ink gutter To open the ink gutter cover pull the knob toward yourself To close the ink gutter cover push t...

Page 27: ...on the Take up Unit to TENSION Slack Take up Method Use this method to take up the media without the tension unit This method is for the types of media that get creased during the tension take up because too much load is applied This is suitable for thin media light media elastic media and so on When using this take up method set the OPERATION switch on the Take up Unit to SLACK Important The SLAC...

Page 28: ...operation 1 Raise Media setting lever 2 Set the AUTO switch of the Feeding Unit to OFF 3 When using the outside roll Put the MANUAL switch of the Feeding Unit in the REVERSAL position and keep it in that position for a while When using the inside roll Put the MANUAL switch of the Feeding Unit in the NORMAL position and keep it in that position for a while Press OUTSIDE ROLL INSIDE ROLL OFF NORMAL ...

Page 29: ...rolling direction When Media End Take up Error is displayed on the operation panel 1 Raise Media setting lever 2 Lower Media setting lever No Media Detected is displayed on the operation panel 3 Press and hold the Enter key to 2 seconds or longer User Type OK is displayed on the operation panel OUTSIDE ROLL INSIDE ROLL OFF OUTSIDE ROLL INSIDE ROLL OFF Press ...

Page 30: ...30 Operation 4 Press the Enter key on the operation panel Media detection will start Press ...

Page 31: ...ed or the print result is uneven Important If the weight is too heavy or too light the media may rub against the print head and become dirty Adjusting the Weight Adjusting the Tension Unit Weight 1 Adjusting the tension unit weight when inserting the pin 1 While pressing the button for the weight changing pin insert it to the weight changing hole For the tension unit if you insert the pin in the u...

Page 32: ...it does not come off Note If it is difficult to insert the pin in the weight try holding up the tension bar slowly 2 Adjusting the tension unit weight when removing the pin While pressing the button for the weight changing pin remove the pin from the weight changing hole ...

Page 33: ...The illustration used here is for the right side when you are facing the Take up Unit Also adjust the left side when you are facing the Take up Unit 2 Rotate the rail adjustment screw clockwise to move the rail forward Note The rail does not move symmetrically Only the rail on the side you rotate the screw moves forward Also adjust the left side when you are facing the Take up Unit 3 When moving t...

Page 34: ... Rotate the rail adjusting screws on left and right sides and adjust so that the lengths of the media edges are the same on both sides 5 Tighten the screw that you loosened in step 1 6 Adjust the Feeding Unit in the same way ...

Page 35: ...or Note If there are any objects between the slack detection sensor and sensor reflector remove them and check the above item Adjusting the Angle of the Slack Detection Sensor 1 Turn on the Take up Unit 2 Use a hexagonal wrench commercial product and loosen two screws hexagon socket head cap screw M4 8 of the slack detection sensor of the front tension unit Home side 3 Move the slack detection sen...

Page 36: ...oduct to turn the power ON The blue light becomes ON This product starts its initialization operations Turning the power OFF 1 Make sure printing is done 2 Press the power button of this product to turn the power OFF This product starts its powering off operations The blue light becomes OFF Powering ON OFF Press Press ...

Page 37: ...wer ON 1 Press the power button of the Take up System to turn the power ON The green light becomes ON Turning the power OFF 1 Make sure printing is done 2 Press the power button of the Take up System to turn the power OFF The green light becomes OFF ...

Page 38: ...itable for most media Slack take up method You can take up the roll media without using the tension unit Use this method for the media that tend to have wrinkles from too much load when using the tension take up method This is suitable for thin media light media elastic media and so on Important Depending on the type of the media we recommend that 2 or more persons set the media Set the media to t...

Page 39: ...ia OUTSIDE ROLL When setting the outside roll media Note Inside roll media Media with the printable side on the inside Outside roll media Media with the printable side on the outside 6 Load the roll media to the rear roll unit Loosen the screw with a handle and then attach the rear roll unit to the roll media For the outside roll media see the left illustration For the inside roll media see the le...

Page 40: ...complete tighten and secure the screw with a handle Put the media through the Rear roller Assembly 1 Move the MANUAL switch on the rear tension unit to the NORMAL side and pull the roll media out about 1 5 m 2 Put the roll media over the rear roller A For the outside roll media see the left illustration For the inside roll media see the left illustration 3 Put the roll media from the bottom to the...

Page 41: ... from the bottom to the top over the rear roller B 5 Put the roll media from the bottom to the top over the rear roller C The media should be loaded to the roller as shown in the illustration when seen from the side For the outside roll media For the inside roll media B C ...

Page 42: ...lace the media setting plate in the center of the media Note The media setting plate is supplied with the printer Important If the thickness of the media that you wish to set is 1 0 mm or more do not use the media setting plate 3 Wrap the roll media around the media setting plate and pass the media through the media feed slot Note Insert the media into the media feed slot until the whole media set...

Page 43: ...rear tension unit will light up The rear tension unit will stop Set the AUTO switch of the rear tension unit to OFF and select either INSIDE ROLL or OUTSIDE ROLL depending on the media rolling method When the red lamp lights up P 29 After you pull it out remove the board and remove the wrinkles from the media 5 Adjust the position of the roller so that the edge of the media on the roller is straig...

Page 44: ...top over the front tension unit s tension bar 4 Secure the roll media to the media tube using double sided tape Note For instructions on how to roll back the media during the setting operation refer to the following page Rolling back the media during the media setting operation P 28 After rolling back the media adjust the position of the roller so that the edge of the media on the roller is straig...

Page 45: ...Loading the media to the Take up Unit 45 For the inside roll media 5 Remove the auxiliary media setting plate from hook B and place it on hook A B A ...

Page 46: ... tube using double sided tape Note For instructions on how to roll back the media during the setting operation refer to the following page Rolling back the media during the media setting operation P 28 After rolling back the media adjust the position of the roller so that the edge of the media on the roller is straight when seen from behind The media should be loaded to the roller as shown in the ...

Page 47: ...a is less than 5 mm in length 2 Lower the media setting lever 3 Switch the front tension unit AUTO switch depending on how you set the media OUTSIDE ROLL When setting the outside roll media INSIDE ROLL When setting the inside roll media 4 Switch the front roll unit OPERATION switch depending on how you set the media SLACK When using the slack take up method TENSION When using the tension take up m...

Page 48: ...ter loading the media 5 Open the ink gutter cover Note If the ink gutter cover isn t completely open you cannot print 6 Close the front cover 7 Turn the power of the printer on w v u w v u w v u w v u Press ...

Page 49: ...t 6 Output Mode Set 6 Output Mode P 80 3 Press the Forward key on the operation panel and take up about 2 to 3 rounds of the media Note When Media End Take up Error is displayed on the operation panel the media setting lever will be raised and lowered and the media detection operation will start Check the combination of the Operation switch and the AUTO switch of the front tension unit and select ...

Page 50: ... 2 Press the Menu key 3 Press the key several times to bring up the display on the left Press the key 4 Press the Enter key Nozzle check patterns will be printed 5 Check the print result If parts of lines are missing or faint go to Cleaning steps P 51 If all lines are clearly printed you can start printing Nozzle check and cleaning Press Menu2 Test Print Test 1 Nozzle check K Y Y K M C C M K Y Y K...

Page 51: ...lights steady The cleaning mode will be set to Normal 2 Give the Cleaning key a long press for 2 seconds or more Cleaning will start 3 Conduct a nozzle check again Nozzle check steps P 50 If there is still nozzle clogging repeat normal cleaning See Head cleaning P 109 regarding Short Long and LittleCharge cleaning Press Press ...

Page 52: ...adjustment make sure you adjust print head Since all print modes are adjusted at once after performing Custom head adjustment head adjustment is not required even after changing the print mode When specifying a print mode for RIP software etc that is different from the mode set in the user type setting perform Custom head adjustment and check all patterns A to F and then adjust any patterns that a...

Page 53: ...ng up the display on the left Press the key 4 Press the key several times to bring up the display on the left Press the Enter key 5 Select the adjustment method with the key Press the Enter key 6 Starts printing The confirmation pattern will be printed 7 Follow the steps below and adjust the head Steps P 93 Press Menu2 Test Print Test 5 HeadAdjust Head Adj 1 Standard Head Adj 2 Custom ...

Page 54: ...lity may improve by head adjustment in the following situations For adjustment procedure see Head adjustment P 52 Print quality is poor when using the uni direction print mode Details of print mode P 68 Print quality does not improve even after performing print quality adjustment After you have performed head alignment make sure you perform print quality adjustment There may be misalignment caused...

Page 55: ...thod with the key Press the Enter key Note In Standard print quality adjustment and Custom print quality adjustment the names in the available patterns are different For details refer to the page below Adj Print 1 Standard P 69 Adj Print 2 Custom P 70 For a pre adjustment check select Confirm Ptn Check the printing results in Confirm Ptn If the shift is too big select Rough Pattern If the shift is...

Page 56: ... Media feed adjustment Note If you encounter any of the following problems with the printing results you may be able to solve them by adjusting the media feed Printed images overlap White lines are printed over images Media feed adjustment steps 1 Load the media Loading the media P 38 2 Press the Menu key 3 Press the key 4 Press the Enter key 5 Use the keys to select a user type Press the Enter ke...

Page 57: ...ng up the display on the left Press the key 7 Use the key to select a menu Press the Enter key 8 Follow the steps below and adjust the print quality Steps P 73 3 PF Adjust PF 1 Initial Print PF 2 Initial Change PF 3 Confirm Print PF 4 Micro Print PF 5 Micro Change ...

Page 58: ...yon the operation panel for2seconds ormore during printing The printing is canceled it cannot be restarted The printing data sent to the product are deleted Note You can alternatively do this via the printer driver or the VSM s remote panel What you can do on the operation panel during printing 1 Press the Menu key while any of the messages on the left is displayed 2 Use the key to select a menu i...

Page 59: ...Menu1 PF Micro Adj reflected in the currently selected User Types Menu 1 PF Micro Adjustment 1 Press the Enter key 2 Use the key to change the setting value Press the Enter key to set the changed value Note The changed value set with this menu item will become invalid when the printing ends To have the change reflected in the currently selected User Type save it using Menu 2 Backup Menu 2 Backup 1...

Page 60: ...ia feed direction of the job being printed Done display this to check how much of the current job has been printed Remain display this to check how much of the current job remains to be printed Remain time displays the time remaining to complete the print job Note The values displayed by this function are approximate They are not guaranteed to be rigorously accurate If the print job data contains ...

Page 61: ...ait 82 Set 11 Slant Check 82 Set 12 Auto Cleaning 83 Set 13 Ink Status 84 Set 14 Media Length 84 Set 15 Exhaust Fan 85 Set 16 Longstore 85 Set 17 CR Maintenance 85 Set 18 Initialization 86 Set 19 Life Times 86 Set 20 IP Address 87 Set 21 Subnet Mask 87 Set 22 Gateway 87 Set 23 Header Dump 88 Set 24 Single Head 88 Set 25 Start Feed 89 Set 26 Temporary 89 Menu 2 Test Print 90 Test 1 Nozzle Check 90 ...

Page 62: ... Version 97 Menu 6 Sleep Mode 97 Sleep Mode 1 Set Timer 97 Sleep Mode 2 Start 97 Menu 7 Display 98 Display 1 Language 98 Display 2 Temperature 98 Display 3 Length 98 Display 4 Remain Ink 99 Menu 8 Job Status 100 ...

Page 63: ... button is flashing 2 Use the key to scroll through the menus Press the key to access the menu you are on 3 Use the key to select submenus enter numeric values and so forth Press the Enter key to set execute Use the Cancel key to return to the menu submenu the previous higher level In the case shown on the left pressing Cancel key will return to Menu2 Test Print Introduction Push Menu 3 Cleaning M...

Page 64: ...t 15 Exhaust Fan Set 16 Longstore Set 17 CR Maintenance Set 18 Initialization Set 19 Life Times Set 20 IP Address Set 21 Subnet Mask Set 22 Gateway Menu 1 Setup Set 1 User Type Set 2 Spitting Set 3 Side Margin Set 4 Media Initial Set 5 Media Width Set 6 Output Mode Set 7 Origin Set 8 Head Travel Set 9 Multi Strike Set 10 Strike Wait Set 11 Slant Check Set 12 Auto Cleaning Set 13 InkStatus Set 14 M...

Page 65: ...ead Adjust Menu 3 Cleaning Cleans the print head and performs the initial ink charging Submenus Menu 3 Cleaning Menu 4 Menu Option Displays or hides the Setup menu Menu 4 Menu Option Set 23 Header Dump Set 24 Single Head Set 25 Start Feed Set 26 Temporary Menu 2 Test Print Test 1 Nozzle Check Test 2 Mode Print Test 3 Setup List Test 4 Palette Test 5 HeadAdjust Menu 3 Cleaning Time Short Time Norma...

Page 66: ...g ink are displayed Submenus Display 1 Language Display 2 Temperature Display 3 Length Display 4 Remain Ink Menu 8 Job Status Various information of previous print will be displayed Submenus Menu 8 Job Status Menu 5 Version Version X XX Menu 6 Sleep Mode SleepMode 1 SetTimer SleepMode 2 Start Menu 7 Display Display 1 Language Display 2 Temperature Display 3 Length Display 4 Remain Ink Menu 8 Job S...

Page 67: ...nt When you change to another User Type all the settings that can be set via the User Type will be changed The settings that can be set via the User Type include Print Mode Effect the adjustment value for Adjust Print the adjustment value for PF Adjust and Thickness When using the printer for the first time or when changing the media configure the items for the User Type Making media settings Subm...

Page 68: ...2 is the initial setting Suitable for outdoor signs and test printing Sets up to perform high speed printing There are four patterns Banner 1 to Banner 4 Print Mode Resolution Pass Direction Initial values for effect Quality 1 1440 1440 16 pass Uni unidirectional Fine Fog Quality 2 1440 1440 16 pass Bi bidirectional Fine Fog Quality 3 720 1440 8 pass Uni unidirectional Fine Fog Quality 4 720 1440 ...

Page 69: ...attern P 72 3 Fine adjustment pattern P 72 Submenus Adjusts only the print mode in the user type setting which is currently set Adjusts the print modes other than the mode in the user type setting which is currently set Adjusts only the print mode in the user type setting which is currently set 1 Confirm pattern P 71 2 Rough adjustment pattern P 72 3 Fine adjustment pattern P 72 Submenus Print the...

Page 70: ...eadjustmentpatternsfromA to X For printing an adjust pattern selected from A to F Print mode Print mode specifications Adjustment pattern Quality 1 1440 x 1440 16 pass Uni C Quality 2 1440 x 1440 16 pass Bi Quality 3 720 x 1440 8 pass Uni B Quality 4 720 x 1440 8 pass Bi Graphics 1 720 x 1080 6 pass Uni Graphics 2 720 x 1080 6 pass Bi Banner 1 720 x 720 4 pass Uni A Banner 2 720 x 720 4 pass Bi Ba...

Page 71: ...and look for a place that is properly adjusted in the printing results of print head 1 If you selected Adj Print 2 Custom select ALL or A to F The number printed under the pattern without alignment errors is the adjustment value 6 Enter the correction values 7 Follow the same procedure to adjust print head 2 1 Confirm pattern Press the Enter key to carry out printing Check the printing results If ...

Page 72: ...sides and center of the media For Head 1 check the print results on both sides and center of the media and select the number that looks most aligned between 1 and 7 Pattern names such as Pattern B1 4 are shown on the display Use the key to enter the number of the best adjusted pattern and press the Enter key In the case of the picture below enter 6 so that the display reads Pattern B1 6 Follow the...

Page 73: ...irmation adjustment printing cut the media Measure the distance between the in the confirmation adjustment print using a ruler Then confirm that the distance matches the feeding length when printing If the distance does not match the feeding length follow the procedure from Step 1 to Step 5 and readjust If the distance matches the feeding length proceed to Step 7 3 PF Adjust Sets up various settin...

Page 74: ...2 Select whether you wish to print a confirm pattern and complete the setup PF1 Initial Print After the initial adjustment printing cut the media With a ruler measure the length between in the pattern In the example below the measured place is shown in orange dotted lines and arrows the orange parts are not actually printed Pressing the Enter key when the words on the left are displayed will execu...

Page 75: ...t value and press the Enter key Setting values You can set a value that is between 50 mm and 50 mm of the feed length configured in Initial Print Pressing the Enter key when the words on the left are displayed will execute confirmation adjustment printing Setting values 100 mm to 250 mm to 500 mm indicates the initial value Note The length of media that is fed feeding length for confirmation adjus...

Page 76: ...ange value saved becomes the pattern s standard value For example if 0 20 is saved as the micro change value and a pattern is printed again the number below the center pattern changes from 0 00 to 0 20 and the left edge to 0 30 and right edge to 0 70 Use the key to enter the adjustment value and press the Enter key Select whether you wish to perform confirmation print and complete the setup Settin...

Page 77: ...y to enter the value and press the Enter key Setting values 80 μm to 170 μm to 3500 μm indicates the initial value 5 User Copy This is for copying the currently selected User Type setting into another User Type The items that will be copied are Print Mode Effect the Confirm Print and PF Adjust adjustment values and Thickness Setting values Here you can select the User Type to copy the settings int...

Page 78: ...annot be guaranteed Set 2 Spitting Sets up the spitting operation while printing The display will shift to setting of the pass count only if On is set for Spitting Setting values Perform the spitting operation on Spitting box located on the origin side for every shuttle This is the initially set value Perform the spitting operation on the page margins The printing speed will be improved since the ...

Page 79: ...ting operation on Spitting box on the origin side every time Print head returns to the origin position Perform the spitting operation on Spitting box every time Print head returns to the origin position On Media 5 cnt Performs the spitting operation on Spitting box on the origin side every five times Print head returns to the origin position Perform the spitting operation on Spitting box every tim...

Page 80: ...put Mode is set to Take up the menu is shifted to Page Gap In the Page Gap menu you can change the margin setting between images Setting values The default margin setting between images will be applied This is the initially set value The margin setting between images is smaller than Normal After setting the Page Gap sets the Ink drying time Use the key to enter the value and press the Enter key Se...

Page 81: ...reprinting on the margin with changing the printing data position to the printed media Use the key to enter the value and press the Enter key Setting values X media feeding distance 0 mm to 15 000 mm Y print head transferring distance 0 mm to 1 690 mm Set 8 Head Travel Sets up the range that Print head moves while printing Setting values Print head moves the range of the print data width Print hea...

Page 82: ...me while overwrite printing Use the key to enter the value and press the Enter key Setting values 0 0 sec to 5 0 sec indicates the initial value Set 11 Slant Check Sets up slanting detection during media loading Setting values Slant Check is not performed This is the initially set value Slant Check is performed Set 9 Multi Strike Strike Cnt 1 cnt Set 10 Strike Wait Strike Wait 0 0 sec Set 11 Slant...

Page 83: ...auto cleaning will be carried out before printing Setting values Off 10 min to 360 min to 1 440 min indicates the initial value Set the auto cleaning interval during printing Setting values Off 5 min to 180 min indicates the initial value Set the value for auto cleaning before printing Setting values Off On indicates the initial value Set 12 Auto Cleaning Auto 1 WaitingTime Auto 2 PrintingTime Aut...

Page 84: ...lack k K2 Black C C1 Cyan c C2 Cyan M M1 Magenta m M2 Black Y Y1 Yellow y Y2 Yellow Set 14 Media Length Sets up the roll media length Setting values Media Length is not used This is the initially set value Sets up the roll media length The set values of the roll media length can be set as Roll1 to Roll3 Sets up the roll media length Setting values 1 m to 30 m to 200 m indicates the initial value S...

Page 85: ...ngstore Wash Print head with the cleaning fluid Submenu Wash Print head with the cleaning fluid Press the Enter to perform head cleaning Remove Ink cartridge and install Cleaning cartridge Long term storage P 132 Set 17 CR Maintenance Performs maintenance Used in the following cases Replacing absorption material for the flushing box Cleaning of cleaning wiper Cleaning of print head circumference M...

Page 86: ...rates the number of asterisks decreases one by one 20 The part should be changed when all of the asterisks have disappeared and Change is displayed Contact your local MUTOH dealer to ask for replacing parts After Change appears Life Times Head or a similar message will be displayed when you are not in this menu You can delete this message by pressing the Cancel key Submenus Displays the service li...

Page 87: ...tial value Set 21 Subnet Mask Sets the subnet mask of the printer Use the key to increase a setting value Use the key to decrease a setting value Press the Enter key to confirm your input for a value The cursor will move on to the next setting value Confirm your input for each value Setting values 0 0 0 0 to 255 255 255 0 to 255 255 255 255 indicates the initial value Set 22 Gateway Sets the gatew...

Page 88: ...ther to print the following information when printing Data header Data dot number printed only when Header damp setting is ON Printer serial number Firmware version Setting values Dump data is not printed This is the initially set value Dumpdataisprintedaftertheoriginalimageis printed Prints only damp data Data dot number is not printed Set 24 Single Head You can set whether or not to perform prin...

Page 89: ...n images will be wider than when setting 0 Value equal to 0 The default margin setting between images will be applied Value below 0 The margin setting between images will be smaller than when setting 0 Setting values 10 mm to 0 0 mm to 500 0 mm indicates the initial value Set 26 Temporary Displays the settings of Off or ALL Off in the Selection menu in the Setup menu temporarily Press the Enter ke...

Page 90: ...Print Mode print can be performed Used to confirm the following printing conditions Print quality Effect Fine adjustment value for feed correction Menu 2 Test Print Test 1 Nozzle Check K Y Y K M C C M K Y Y K M C C M Print Head 2 Print Head 1 K Y Y K M C C M K Y Y K M C C M Print Head 2 Print Head 1 Test 2 Mode Print 2016 1 01 00 00 G1 720x1080 6Pass Uni Fine Fog PF Adjust 0 00 ...

Page 91: ...t Feed 0 0mm Head2 E F Pump E F CR Motor E F PF Motor E F Number Menu Option Menu Setup 1 User Type Type 7 2 Spitting On Pass Count 1cnt 3 Side Nargin 25mm 4 Media Initial Width 5 Media Width 1000 mm 6 Output Mode Off InkDryTimer 0sec 7 Origin 8 Head Travel Media Width 9 Multi Strike 1cnt 10 Strike Wait 0 0sec 11 Slant Check Off 1 Print Mode Banner 2 Effect Fine Fog 2 Adjust Print 3 PF Adjust 1 Initi...

Page 92: ...re you need to use the same print mode settings for the RIP Raster Image Processor as the print mode settings for the User Type Use the same settings for the resolution pass and printing direction in the RIP print mode as in the print mode for the User Type Youcanalsoadjustaprintmodeotherthanthe one used for the current User Type You can print with an optimal image quality even if the RIP print mo...

Page 93: ...e the key to enter the number of the best adjusted pattern and press the Enter key In the case of the picture below enter 5 so that the display reads Pattern B 5 If you selected Head Adj 2 Custom and Fine Pattern ALL enter the adjustment value for A to F Print Mode Print mode specifications Adjustment pattern Quality 1 1440 x 1440 16 pass Uni C Quality 2 1440 x 1440 16 pass Bi Quality 3 720 x 1440...

Page 94: ...mes more ink than Normal cleaning When nozzle clogging still occurs after Normal cleaning conduct Long cleaning Though much better cleaning results can be expected than Long cleaning it consumes a large amount of ink Gives a rather higher cleaning effect than LittleCharge but also consumes rather more ink Menu 3 Cleaning Time Short Time Normal Time Long Time LittleCharge Time InitialCharge ...

Page 95: ...lue is Displays the Output Mode menu The initial value is Displays the Origin menu The initial value is Displays the Head Travel menu The initial value is Displays the Multi Strike menu The initial value is Displays the Strike Wait menu The initial value is Displays the Slant Check menu The initial value is Displays the Auto Cleaning menu The initial value is Displays the InkStatus menu The initia...

Page 96: ...l value is Displays the Gateway menu The initial value is Displays the Header Dump menu The initial value is Displays the Single Head menu The initial value is Displays the Start Feed menu The initial value is If you press the Enter key all the items in Menu Option will be marked with a displayed If you press the Enter key all the items in Menu Option will be marked with a not displayed 15 Exhaust...

Page 97: ...nt During Sleep Mode even if the set amount of time has passed print head cleaning is not performed under the following circumstances When the maintenance cover is open The waste fluid tank is full There is little remaining ink in the ink cartridge or no ink The ink cartridge has been removed The inserted ink cartridge is not the genuine ink cartridge etc If one of the above conditions occurs duri...

Page 98: ...be displayed Setting values Displays the temperature in Celsius This is the initially set value Displays the temperature in Fahrenheit Display 3 Length For setting the length units that will be displayed Setting values Displays the length in millimeters mm This is the initially set value Displays the length in inches inch Menu 7 Display Display 1 Language Language エイゴ Language ニホンゴ Display 2 Tempe...

Page 99: ... This is the initially set value Icon displays on operation panel In the display shown on the left the slot 2 cartridge s ink is low the slot 4 cartridge s ink has run out and no cartridge has been inserted in slot 5 The meanings of the icons are as set out below Remaining ink amount More than 80 less than 100 Remaining ink amount Less than 20 Remaining ink amount More than 60 less than 80 Ink Low...

Page 100: ...g length of print data will be displayed Note The values displayed in this function are just standard values not guarantee the accuracy If the print data includes no length data all information will be displayed as 0 This function is to check the information of print data with the print operation is completed For the details on data while printing please refer to the Menu 3 Job Status P 60 Menu 8 ...

Page 101: ...9 Head cleaning 109 Cleaning of cleaning wiper 111 Cleaning of print head circumference 114 Inside cleaning 116 Maintaining the ink gutter 118 Cleaning the Take up System 124 Replacing consumable parts 125 Replacing absorption material for the flushing box 125 Replacing the ink gutter filter 128 Moving or transporting the printer 130 Moving the printer 130 Transporting the printer 131 Long term st...

Page 102: ...eaning wiper P 111 Cleaning of print head circumference P 114 Monthly Inside cleaning P 116 Once a week if the ink gutter filter looks dirty with waste ink Maintaining the ink gutter P 118 When not used for a week or more Head cleaning P 109 Once a week When not used for a long period Long term storage P 132 Important Since a service technician has to handle following cases please contact your loc...

Page 103: ...eft Press the Enter key 4 Press the key to change the display The ink level is displayed from 0 to 100 K K1 Black C C1 Cyan M M1 Magenta Y Y1 Yellow k K2 Black c C2 Cyan m M2 Magenta y Y2 Yellow When it becomes time to replace ink cartridge Steps 1 Press the Enter key The buzzer stops In the figure to the left the C2 ink is nearing replacement 2 Prepare the replacement ink Checking ink and replaci...

Page 104: ...correctly If ink cartridge is moved from cold to warm place leave it at least 3 hours If you do not have any replacement ink do not remove the empty ink pack or high capacity pack adapter from the printer Leaving them removed could cause the print head to become clogged 1 Removing the high capacity pack adapter Note The High capacity pack adapter is sold separately 1 Press the Enter key The buzzer...

Page 105: ...econds Repeat that 3 times 2 Slide the smart chip card into the tab on the high capacity pack adapter to install it 3 Lower the lock lever on the high capacity pack adapter and insert the ink pack Insert all the way to the end 4 Confirm that the ink pack is inserted all the way and is locked 5 Confirm that the lock lever on the high capacity pack adapter is in its original position 3 sec x 3 3 sec...

Page 106: ...acity pack adapter Match the colors of the label on the printer and the label on the high capacity pack adapter Firmly insert it all the way in Note Place the used ink pack in a plastic bag or the like and dispose of it in accordance with local ordinances and municipal instructions ...

Page 107: ...p It will resume when you have carried out ResetWasteInk below 1 Transfer the waste ink 1 Prepare a container to put the waste ink in such as a waste fluid tank sold separately Important The capacity of waste fluid tank is 2 000 ml Make sure to prepare a container that has enough capacity when discharging waste ink 2 Cover the floor beneath the waste fluid tank using paper you do not need or the l...

Page 108: ... etc 6 Dispose of the waste fluid as an industrial waste product You are obligated to properly dispose of waste fluid from the printer in compliance with Wastes Disposal and Public Cleansing Act and local ordinances Delegate disposal to an industrial waste disposal contractor WARNING ...

Page 109: ...re ink than Normal cleaning When nozzle clogging still occurs after Normal cleaning conduct Long cleaning Little Charge Though much better cleaning results can be expected than Long cleaning it consumes a large amount of ink This mode cannot be selected via the Cleaning key Select it from the Cleaning submenu in the Panel Setting Menus Menu 3 Cleaning P 94 Steps for head cleaning 1 Use the Cleanin...

Page 110: ...aning P 109 Note When nozzle clogging remains even after repeating normal cleaning several times conduct Long cleaning When nozzle clogging remains even after repeating Long cleaning several times conduct Cleaning of cleaning wiper P 111 or Cleaning of print head circumference P 114 If the nozzle clog still is not rectified carry out LittleCharge via the Cleaning submenu in the Panel Setting Menus...

Page 111: ...int head Do not touch the tip of a cleaning stick with fingers If sebum is adhered it can cause damage to the print head Do not reuse a cleaning stick Dusts can adhere causing damage to the print head Standard cleaning time should be within 5 minutes If it takes longer the stick can dry causing damage to the print head 1 Putting the printer into the CR maintenance mode 1 Press the Menu key 2 Press...

Page 112: ...e 2 Detach the maintenance cover 3 Wipe the cleaning wiper with a cleaning stick Wipe the left side surface of cleaning wiper going back and forth Important If it is hard to remove the stain perform Short Head cleaning and then clean again 4 Wipe the right side surface of cleaning wiper going back and forth ...

Page 113: ... right side surface of the base of cleaning wiper going back and forth 6 Attach the maintenance cover 7 Close the maintenance cover 8 Press the Enter key The message on the left will appear That ends the procedure CR Mainte End CR Mainte Start ...

Page 114: ...o the print head Do not touch the tip of a cleaning stick with fingers If sebum is adhered it can cause damage to the print head Do not reuse a cleaning stick Dusts can adhere causing damage to the print head Standard cleaning time should be within 5 minutes If it takes longer the stick can dry causing damage to the print head Steps 1 Put the printer into the CR maintenance mode Putting the printe...

Page 115: ...sts or ink lump are adhered clean with a cleaning stick Important Do not touch the print head surface with fingers or a cleaning stick It can cause damage to the print head 6 Attach the maintenance cover 7 Close the maintenance cover 8 Press the Enter key The message on the left will appear That ends the procedure Circumference of Print head Head guide Do not touch the print head surface CR Mainte...

Page 116: ...e cleaning the inside of the printer Steps 1 Remove the media 2 Confirm that the power for the printer and the take up system is off 3 Open the front cover 4 Close the gutter cover 5 Use a wet tightly wrung soft cloth to clean the gutter cover and the paper guide Important Do not blow off dusts inside the product with a gas duster It may cause abnormal noise CAUTION ...

Page 117: ...Inside cleaning 117 6 Close the front cover ...

Page 118: ...e liquid container commercially available Maintaining the ink gutter When cleaning the gutter be sure to turn off the power and remove the power plug from the outlet Cleaning the ink gutter filter Important Do not pour more than 1 5 litters of water into the gutter Otherwise water may overflow Waste liquid container should be large enough to fill the waste liquid from the gutter 1 Unload the media...

Page 119: ...r filter to wash off the ink If foreign substances or liquids such as water entered the printer do not use the printer as it is It could lead to an electric shock or fire Contact the customer support 8 Once the waste liquid has stopped draining insert the stopper into the waste liquid tube 9 Close the ink gutter cover 10 Dispose of the waste fluid as an industrial waste product WARNING ...

Page 120: ...rom the outlet 2 Wear the plastic gloves 3 Open the ink gutter cover 4 Lay a waste sheet of paper on the ink gutter cover the media guide and the front roller Important Ink may drip from the ink gutter filter We recommend you to place a waste paper on the floor 5 Remove the ink gutter filter and its frame x 4 6 Wipe the inside of the gutter with a soft cloth dampened with water If the ink gutter i...

Page 121: ... gutter Important If the ink gutter filter frame is not in its place the print head strike or print head damage may occur 8 Close the ink gutter cover If you cannot close the cover properly check the ink gutter filter attachment 9 Close the front cover 10 Dispose of the waste fluid as an industrial waste product Important Do not pour more than 1 5 litters of water into the gutter Otherwise water m...

Page 122: ...aste liquid tube of the gutter The waste liquid tube is located on the lower left side of the printer 6 Connect the waste liquid tube to the waste liquid container 7 Wash the gutter with water The water that you used to wash the gutter with is industrial waste Do not dump this waste water into sewers WARNING ...

Page 123: ...e the print head strike or print head damage may occur 10 Close the ink gutter cover If you cannot close the cover properly check the ink gutter filter attachment 11 Dispose of the waste fluid as an industrial waste product You are obligated to properly dispose of waste fluid from the printer in compliance with Wastes Disposal and Public Cleansing Act and local ordinances Delegate disposal to an i...

Page 124: ...h Cleaning the Take up System Unplug the power cable with the power off before cleaning the inside of the printer Steps 1 Unload the media 2 Make sure that the printer and the Take up System are turned OFF 3 Use a wet tightly wrung soft cloth to clean the tension rollers of the Take up Unit CAUTION ...

Page 125: ...eriod Approx every 2 months since it differs depending on usage frequency please check periodically Preparation Absorption material for the flushing box Paper you can get dirty paper which ink will not bleed through Replacing absorption material for the flushing box 1 Checking steps 1 Open the maintenance cover on the right side 2 Check the absorption material for the flushing box When there are l...

Page 126: ...per 2 Open the front cover 3 Cover the platen with the paper you can get dirty Important Ink may drip from the absorption material for the flushing box We recommend covering the floor with paper as well 4 Remove the absorption material for the flushing box Pull the tab up of the absorption material for the flushing box and release the hook Important When removing the absorption material for the fl...

Page 127: ...material for the flushing box 127 5 Attach new absorption material for the flushing box 6 Close the front cover 7 Press the Enter key The message on the left will appear That ends the procedure CR Mainte End CR Mainte Start ...

Page 128: ...tter filter supplied accessory or supplies Replacing the ink gutter filter Unplug the power cable with the power off before replacing the ink gutter filter Note Ink gutter filters for replacement are bundled with the printer Purchase the optional filter as needed Steps 1 Remove the media 2 Make sure that the printer and the take up system are turned OFF 3 Wear the plastic gloves 4 Open the front c...

Page 129: ...stic bag and dispose of it in accordance with your local regulations 8 Put the ink gutter filter back in its place Firmly insert the ink gutter filter frame into the gutter Important If the ink gutter filter frame is not in its place the print head strike or print head damage may occur 9 Close the ink gutter cover If you cannot close the cover properly check the ink gutter filter attachment 10 Clo...

Page 130: ...maintain a horizontal position Do not tilt set against something or place this product upside down Otherwise the ink may leak or the handling mentioned above may cause abnormality 1 Preparation before moving 1 Make sure that the printer is turned OFF 2 Dispose of waste fluid 3 Remove all the cables such as Power cord set 4 Loosen the four adjusters of Stand as shown in the left 5 Move the printer ...

Page 131: ...suitable place for installation Startup Guide 2 Move and install the printer to the location 3 Attach Cables such as Power cord set 4 Perform Nozzle check and then confirm that there is no clogging in Print head Nozzle check steps P 50 5 Perform print quality adjustment Print quality adjustment steps P 55 Transporting the printer Important When transporting the printer consult the MUTOH product de...

Page 132: ...the key several times to bring up the display on the left Press the Enter key 5 Press the Enter key The message to the left is displayed 6 Remove all high capacity pack adapters The message on the left will appear Ink discharging begins When the discharge is complete the message to the left is displayed Press Menu 1 Setup Set 16 Longstore Longstore Start Remove Cartridges Busy Washing Insert Clean...

Page 133: ... all cleaning cartridges The message on the left will appear Discharging of cleaning fluid begins When cleaning fluid discharging ends the message on the left will appear 9 Insert cleaning cartridges into all the cartridge slots The arrow should face up Insert all the way to the end The message on the left will appear Start charging cleaning fluid When cleaning fluid charging ends the message on t...

Page 134: ...10 Remove all cleaning cartridges The message on the left will appear Discharging of cleaning fluid begins When discharging is complete the message to the left is displayed 11 Turn the power off Busy Washing ALL No Cartridge ...

Page 135: ...utton of this product ON Blue light becomes ON The product starts initialization operations 2 When the message to the left is displayed press the Enter key 3 Press the Enter key when the message on the left appears The message on the left will appear 4 Make sure you shake the ink cartridge after you unpack it Turn the ink plug upward and wait for 3 seconds Next turn the ink plug downward and wait ...

Page 136: ...ity pack adapters Match the label of this product to the color label of High capacity pack adapters Insert all the way to the end The message on the left will appear Ink charging begins When ink charging is complete the message to the left is displayed Ink Refill Media End ...

Page 137: ...er 4 Appendix Messages and Error Messages 138 Status messages 138 Error message display and remedies 140 Error requiring restart 142 Specifications of this product 143 Drawing area 143 List of specifications 144 ...

Page 138: ...ntly being printed Remain Time XXX Xmin Displays the time remaining to print in minutes for the data currently being printed Media Remain XXX m Displays the remaining length of the roll media currently set in meters PrintRestart Enter Pausing printing Press the Enter key to restart printing SubTank Refill Filling the subtank Please wait a while User Type OK Initializing the media Please wait a whi...

Page 139: ...ode operations via the operation panel are not possible To terminate the remote panel mode give the Cancel key a long press for 2 seconds or more Insert CleaningCart Washing Print head Install the cleaning cartridges Busy Washing Initial filling ejecting filler fluid Washing the print head by cleaning fluid Please wait a while Remove Cartridges Washing Print head or discharging ink Remove the cart...

Page 140: ...oad the media Media Slant Media is fed obliquely Stops operation Reload the media End Of Media The Media has run out Stops operation Load a new media Loading the media P 38 Media End Takeup Err The Take up system switch is off Stops operation Set the Take up system switch to outside roll or inside roll Open Gutter Cover Ink gutter cover is open Close Ink gutter cover Heater Error Your heater may b...

Page 141: ...ad insert new ink cartridge S C Col Err Ink cartridges are inserted in wrong slots Insert ink cartridges correctly again S C Ink Err The ink cartridge cannot be used for this printer Contact your local MUTOH dealer S C CodeErr Inserted ink cartridge is not a proper one Contact your local MUTOH dealer Broken Chip S C Card has been broken Insert new ink cartridge Check Ink Ink cartridges were not re...

Page 142: ...ng any key on the operation panel stops the beeping For an error requiring restart operation will return to normal after removing the cause of the error and restarting the printer If the same error continues to be displayed contact the your local MUTOH dealer Be sure to tell us the code no of the error message when you contact us Note in the error message is the code no that indicates what type of...

Page 143: ...uct Drawing area a c b d Media feed direction a 5mm 1 2 b 5mm 3 c 5mm d 5mm 3 1 After media initial printing starts at 15 mm 2 While the media initial tip is ON printing starts at 40 mm 3 According to the remote panel settings Possible drawing area ...

Page 144: ... 384 MB Interface Ethernet 10 100BASE TX 1000BASE T Waste fluid tank Fixed to the body type capacity 2 000 ml waste ink discharge by users Environmental conditions Printer Operation Environment Temperature 20 to 32 C humidity 40 to 60 No condensation Printer Accuracy Guaranteed Environment Temperature 22 to 30 C humidity 40 to 60 No condensation Change rate Temperature No more than 2 C per 1 hour ...

Page 145: ...mption 100V to 120V 2 5 A or below 200V to 240V 1 0 A or below External dimensions Height 1 261 mm Size of printer when the front cover is opened 1 529 mm Width 2 983 mm Depth 1 134 mm Weight Main body 177 kg Stand 37 kg Take up System 135 kg ...

Page 146: ...de roll Inside roll Outside roll only when slack Power supply specifications Voltage AC 100V to 240V 10 Frequency 50 60Hz 1Hz Capacity No less than 1 0 A Power consumption Power off 1 0 W or below Standby 18 0 W or below Operation 80 0 W or below Current consumption 100V to 120V 1 0 A or below 200V to 240V 0 5 A or below Environmental conditions Operation Environment Temperature 20 to 32 C humidit...

Page 147: ......

Page 148: ...VJ1938TXE A 00 ...

Reviews: