background image

___________________________________________________________ 

CKM Series 

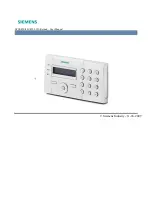
12-Button Customizable Keypad

User’s Manual 

Revision 1.1 

Copyright ©2020 Carling Technologies, Inc. 

60 Johnson Ave. 

Plainville, CT 06062 USA 

All Rights Reserved 

http://www.maretron.com 

Summary of Contents for A3802-1

Page 1: ...___________________________________ CKM Series 12 Button Customizable Keypad User s Manual Revision 1 1 Copyright 2020 Carling Technologies Inc 60 Johnson Ave Plainville CT 06062 USA All Rights Reserv...

Page 2: ...Cable A3703 4 ORDERING OPTIONS 4 Table 1 Ordering Options 4 INSTALLATION 5 UNPACKING THE BOX 5 CHOOSING INSTALLATION LOCATION 5 MOUNTING THE CKM12 6 Figure 6 Mounting Panel Cutout Dimension 6 CONNECTI...

Page 3: ...e 1 Key Numbering 2 Figure 2 Hardware Description Front View 2 Figure 3 Hardware Description Side View 3 Figure 4 Hardware Description Back View 3 Figure 5 CKM to NMEA 2000 Adapter Cable A3703 4 Figur...

Page 4: ...he NMEA2000 network to a PC running N2KAnalyzer Control MPower and other Maretron systems with the CKM12 through an NMEA 2000 Network Using standard NMEA 2000 messaging the CKM12 can illuminate any of...

Page 5: ...as a function indicator The LEDs are located above the top row of keys and below the bottom row of keys The icons on each key are lit by an LED backlight located behind the icon LEDs can be tied to a...

Page 6: ...CKM12 User s Manual_________________________________________ 3 CKM12 User s Manual Rev 1 1 Figure 3 Hardware Description Side View Figure 4 Hardware Description Back View...

Page 7: ...ble with a minimum order of 100 units Contact Marine Sales carlingtech com for custom quotation Table 1 Ordering Options PART NUMBER DESCRIPTION A3802 1 CKM12 Keypad Circle on Buttons with CKM to NMEA...

Page 8: ...NMEA 2000 Adapter Cable 2 10 32 Nuts Mounting Hardware If any of these items are missing or damaged please contact Maretron Technical Support please refer to page 13 for contact information Choosing...

Page 9: ...to 30 In lbs Do not use permanent adhesive to install unit Certain adhesives such as methacrylate will cause cracking of the plastic enclosure The use of permanent adhesive for installation will void...

Page 10: ...key on the male connector and keyway on the female connector Be sure the cable is connected securely and that the collar on the cable connector is tightened firmly Connect the other end of the cable b...

Page 11: ...ance 32 The unit will pair with Maretron CLMD12 and CLMD16 to toggle each unit s first 12 ECB s ON and OFF If more than one CLMD12 CLMD16 or one of each unit is on the same NMEA 2000 network the CKM12...

Page 12: ...as shown in Advanced Tab Key n The CKM12 has 12 Keys each with a separate indicator output number referencing each key number as depicted in Figure 1 Key Numbering on page 2 Data Instance and Indicato...

Page 13: ...Ensure that the unit is mounted securely and cannot be moved relative to the mounting surface Check the security of the cable connected to the NMEA 2000 connector and tighten if necessary Troubleshoot...

Page 14: ...O Acknowledge N A 059904 ISO Request N A 060928 ISO Address Claim N A 065240 ISO Address Command N A 126208 NMEA Request Command Acknowledge N A 126993 Heartbeat 1 time 60 seconds Electrical Parameter...

Page 15: ...0 9 Result IP69K Mechanical Shock Drop Test EN 60068 2 31 1993 500mm free fall all faces of 3 axes Mechanical Shock 60068 2 27 2009 500m s2 pulse duration 11ms Mechanical Bump 60068 2 29 1993 400m s2...

Page 16: ...n requirements below shall be limited to the repair or replacement at Carling s option of any product not meeting the above limited warranty and which is returned to Carling or if Carling is unable to...

Page 17: ...failure to conform with such specifications samples descriptions or illustrations shall not constitute any breach of Carling s limited warranty Warranty Return Procedure To apply for warranty claims c...

Page 18: ...eld 1 Indicator Bank Instance This field identifies the particular indicator bank to which this PGN applies Please refer to Configuring the CKM12 on page 8 for instructions on how to program the value...

Reviews: