Manfrotto 532 ART, Instructions Manual
The Manfrotto 532 ART tripod is a versatile and sturdy camera support system perfect for photography and videography. For detailed setup and usage instructions, download the free Instructions Manual from our website. Ensure optimal performance and longevity by following the manual closely.
Share
Download


Reviews:
No comments
Related manuals for 532 ART

O00QH-0514
Brand: 1byone Pages: 9

Muse
Brand: hager Pages: 4

AKS 41
Brand: Danfoss Pages: 4

IPV58P2P
Brand: Ebode Pages: 76

Vector Series
Brand: Garmin Pages: 26

Edge 510
Brand: Garmin Pages: 8

EDGE 1040
Brand: Garmin Pages: 72

IR3-1
Brand: Napoleon Pages: 2

VT-3508
Brand: V-TAC Pages: 4

WrapAround Windjammer
Brand: Bestop Pages: 7

Ceiling Trim Kit for Home2 Series
Brand: Elite Screens Pages: 8

09766
Brand: Summer Pages: 18

Pro Spectrum
Brand: Tobii Pro Pages: 34
UpFront STS 12 Combo
Brand: Hagie Pages: 149

SPCOM00000032
Brand: N-Com Pages: 2
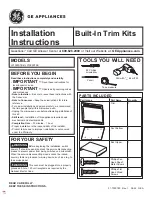
JX1095STBB
Brand: GE Pages: 12

SG102 Series
Brand: Sandel Pages: 56

MN002
Brand: Flash Cover Pages: 2


