background image

C

ONCEPT AND MAIN APPLICATIONS


S

pecification

Model No.

DDF481 

 Description

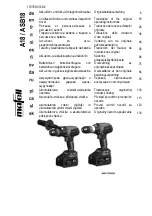
18V Cordless driver drill

S

tandard equipment

O

ptional accessories

Note:

 The standard equipment may vary by country

 or model variation.

Fast charger DC18RC

Charger DC18SD

Charger DC24SC

Automotive charger DC18SE

Quad Port Charger  DC18SF

Battery BL1815N

Battery BL1820

Battery BL1830

Battery BL1840

Battery BL1850

Drill bits for wood

Drill bits for steel

Driver bits

Belt clip

Bit holder

*4

: Battery and charger are not supplied with “Z” model

*5

: Supplied with the same quantity of extra Battery

Battery

*

4

Charger

*

4

Battery cover

*

5

+ – bit 2-45

Belt clip

(+) Screw M4x12

Grip assembly

Bit holder

Plastic carrying case

Dimensions: mm (")

Width (W)

Height (H)

Length (L)

205 (8-1/8)

79 (3-1/8)

249 (9-3/4)

*

1

266 (10-1/2)

*

2

Battery

Capacity of drill chuck: mm (")

Capacity: mm (")

Max lock torque: N.m (in.lbs)

Electric brake

Variable speed control

Mechanical speed control

Reversing switch

Max fastening torque:

        N.m (in.lbs)

Torque setting

Steel
Wood

Soft joint
Hard joint

No load speed: min.

ˉ

¹= rpm

Energy capacity: Wh

Voltage: V
Capacity: Ah

High

Weight according to

EPTA-Procedure 01/2003

*

3

: kg (lbs)

Low

Cell

Li-ion

Charging time (approx.): min.

18

Yes

Yes

Yes (2 speed)

Yes
Yes

2.4 (5.2)

*

1

2.6 (5.8)

*

2

13 (1/2)

76 (3)

21 stage + drill mode

Clutch torque setting: N.m (in.lbs)

1.0 - 10.0 (9 - 89)

125 (1,090)

60 (530)

115 (1,020)

0 - 2,100

0 - 550

1.5 (1/16) - 13 (1/2)

Max output: W

640

LED job light

*

3

: with Grip assembly

*1

with BL1815N or BL1820

*2

with BL1830, BL1840 or BL1850

PRODUCT

P  1/ 11

Model DDF481 is a supreme class cordless driver drill 

powered by 18V Li-ion battery of BL1815N (1.5Ah)/ BL1820 (2.0Ah)/ 

BL1830 (3.0Ah)/ BL1840 (4.0Ah)/ BL1850 (5.0Ah) .

Its main features are:

• Max lock torque: 125N.m. (1,090in.lbs)

• Compact tool size with an overall length of 205mm (8-1/8")

• Efficient Brushless DC motor provides higher power and productivity

than that of 18V Cordless driver drill model BDF458/DDF458.

Note

: BL1815 is not compatible.

T

ECHNICAL INFORMATION

W

H

L

15, 24, 22, 36, 45 with DC18RC

1.5, 2.0, 3.0, 4.0, 5.0

27, 36, 54, 72, 90

OFFICIAL USE 

for ASC & Sales Shop

Summary of Contents for DDF481

Page 1: ...switch Max fastening torque N m in lbs Torque setting Steel Wood Soft joint Hard joint No load speed min rpm Energy capacity Wh Voltage V Capacity Ah High Weight according to EPTA Procedure 01 2003 3...

Page 2: ...is not required to lubricate because this product has gear mechanism of factory assembled Code No Description Use for 1R298 Hex bar 10 with square socket removing Drill chuck 1R404 Drill chuck removin...

Page 3: ...ocker type and therefore apply ThreeBond 1342 Loctite 243 to the thread and tighten the screw using Cordless impact driver with slotted bit 1 Remove nine Bind PT3x14 tapping screws and four 4x18 Tappi...

Page 4: ...assembly Drill chuck side Drill chuck side Pin on the lever of Gear assembly front Compression spring 4 1 Apply the front Compression spring 4 of Speed change lever assembly to the flat side without p...

Page 5: ...ousing L Housing R and Rear cover Other side viewed from Housing L Leaf spring 2 pcs Speed change lever assembly Make sure that two Leaf springs are set in place in advance Depressions Terminal of Sta...

Page 6: ...Retaining ring INT R 15 in place of Arm R complete M5 Hex nut for DHP481 only M5x10 Thumb screw for DHP481 only Arm L Arm R complete Retaining ring INT R 15 Pole complete The components of Grip assemb...

Page 7: ...m Color index of lead wires sheath Black White Red Gray Controller Terminal Yellow Switch Stator complete LED circuit Orange Blue Purple Brown Fig D 1 Red lead wire is used for some country instead of...

Page 8: ...circuit after setting Gear assembly in place Note Be sure to route the lead wires for LED circuit to the space between ribs of Gear assembly after setting Gear assembly in place If the routing is done...

Page 9: ...s Thick lead wires from Stator complete must be put on the other thin lead wires for the designated area Lead wires from Stator complete must be routed between Boss A and Rib C Lead wire Red from Term...

Page 10: ...next page Connect it firmly Check Lead wires or replace it LED indicator lamps are on Switch is broken Yes Yes Yes Yes Yes No No No No No Controller is broken Rotor is broken Stator is broken Replace...

Page 11: ...heck the figure in the tester Test 2 Attach Red tester bar to minus terminal of Terminal connected with black lead wire Fig D 9 Attach Black tester bar to one of UVW terminal connected with Red White...

Reviews: