background image

Read your Owner’s Manual first for 

quick tips that make using your 

Magnavox product more enjoyable.

If you have read assistance, 

you may access our online help at 

http://www.funai-corp.com

or call

1-800-605-8610

while with your product

(and Model / Serial number)

Owner’s Manual

MBP2100/F7

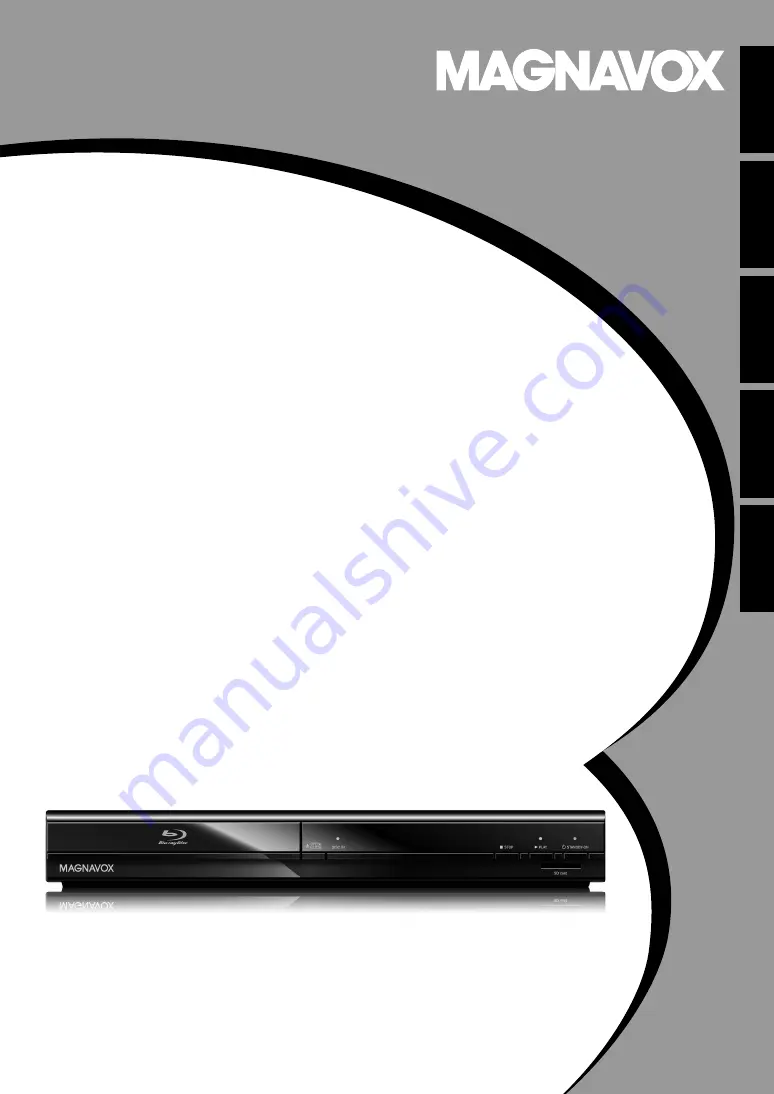
Blu-ray Disc / DVD Player 

© 2010 Funai Electric Co., Ltd.

INTRODUCTION

CONNECTIONS

PLAYBACK

FUNCTION SETUP

O

THER

S

Summary of Contents for MBP2100

Page 1: ...yable If you have read assistance you may access our online help at http www funai corp com or call 1 800 605 8610 while with your product and Model Serial number Owner s Manual MBP2100 F7 Blu ray Disc DVD Player 2010 Funai Electric Co Ltd INTRODUCTION CONNECTIONS PLAYBACK FUNCTION SETUP OTHERS ...

Page 2: ... SERVICEABLE PARTS INSIDE REFER SERVICING TO QUALIFIED SERVICE PERSONNEL CAUTION RISK OF ELECTRIC SHOCK DO NOT OPEN The exclamation point within an equilateral triangle is intended to alert the user to the presence of important operating and maintenance servicing instructions in the literature accompanying the appliance The lightning flash with arrowhead symbol within an equilateral triangle is in...

Page 3: ... place with drastic temperature changes Install the unit in a horizontal and stable position Do not place anything directly on top or bottom of the unit Depending on your external devices noise or disturbance of the picture and or sound may be generated if the unit is placed too close to them In this case please ensure enough space between the external devices and the unit Depending on the environ...

Page 4: ...verse 23 Slow Forward Playback 23 Step by Step Playback 23 Repeat Playback 23 Program Playback 24 Random Playback 25 Rapid Playback 25 Adjusting the Picture 25 Virtual Surround 26 PIP BONUSVIEW Setting 26 Camera Angle 26 Enjoying BD Live Discs with Internet 27 Search 27 Switching Subtitles 29 Switching Audio Soundtrack 29 Setting the BD Audio Mode 30 FUNCTION SETUP Using the Setup Menu 31 Quick 31...

Page 5: ...d transcribed downloaded or stored in any storage medium in any form or for any purpose without the express prior written consent of Funai Furthermore any unauthorized commercial distribution of this manual or any revision hereto is strictly prohibited Information in this document is subject to change without notice Funai reserves the right to change the content herein without the obligation to no...

Page 6: ...an SD Memory Card BD ROM Profile 2 0 BD Live and Profile 1 1 discs sometimes store picture in picture commentary subtitles or other extras in the SD Memory Card for use during playback with the BD video Easy and simple connection to your HDTV via HDMI Connect this unit to your HDTV with one single HDMI High Definition Multimedia Interface cable It is recommended to use a High Speed HDMI Cable for ...

Page 7: ...plug this cord from the AC outlet to completely turn off the unit 2 LAN terminal Use to connect a network equipment with LAN cable 3 HDMI OUT jack Use to connect a TV with an HDMI compatible port with an HDMI cable 4 AUDIO OUT jacks Use to connect a TV an AV receiver amplifier or other device with an audio cable 5 COMPONENT VIDEO OUT jacks Use to connect a TV with component video inputs with a com...

Page 8: ...RETURN button Press to return to the previously displayed menu screen 17 D forward button During playback press to fast forward the playback In pause mode press to slow forward the playback 18 G skip button During playback press to skip to the next title chapter track or file 19 F pause button Press to pause playback When playback is in pause mode press repeatedly to forward the playback step by s...

Page 9: ... cover 2 Insert batteries Make sure to match and on the batteries to the marks indicated in the battery compartment 3 Close the cover Note Incorrect use of batteries can result in hazards such as leakage and bursting Please observe the following Do not mix alkaline standard carbon zinc or rechargeable ni cad ni mh etc batteries Do not mix new and old batteries together Do not use different kinds o...

Page 10: ... are used in this connection Please purchase the necessary cables at your local store Use an HDMI cable with the HDMI logo a certified HDMI cable for this connection High Speed HDMI Cable also known as HDMI category 2 cable is recommended for better compatibility Better B COMPONENT VIDEO IN Y PB CB PR CR AUDIO IN R L Video Audio Component video cable Your TV Go To Audio cable High Definition TV Su...

Page 11: ... screen The indicators blink under the following conditions When the connected device does not support HDCP When the connected device is recognized as an HDCP incompatible by HDMI SRM When the connected device supports HDCP but cannot be recognized as an HDCP compatible for some reason The indicators blink as follows for 30 seconds STOP PLAY STANDBY ON DISC IN 9 02 2 0 2 8 0 4 6 54 5 54 6 54 4 54 ...

Page 12: ...PCM BITSTREAM HDMIOUT LAN AUDIO IN L R COAXIAL DIGITAL AUDIO INPUT COAXIAL PCM BITSTREAM DIGITAL OUT L R AUDIO OUT audio AUDIO OUT Analog audio input jacks Audio cable stereo system this unit digital audio coaxial input jack digital audio cable DIGITAL OUT COAXIAL AV receiver amplifier To set up Digital Out refer to page 38 HDMI Audio Connection HDMI IN L Y PR CR PB CB R COAXIAL COMPONENT VIDEO OU...

Page 13: ...connecting a LAN cable set up necessary network settings Do not insert any cable other than a LAN cable to the LAN terminal to avoid damaging the unit If your network equipment modem etc does not have broadband router functions connect a broadband router If your network equipment modem etc has broadband router functions but there is no vacant port use a hub For a broadband router use a router whic...

Page 14: ...ur TV 1 After you have made all the necessary connections press STANDBY ON Q to turn on the unit 2 Turn on your TV 3 Press the button on the TV s remote control that accesses the external input channel It may be labeled SOURCE AV or SELECT refer to your TV s user manual Note If the TV is connected by an HDMI cable it may take a while for the opening picture to come up ...

Page 15: ...uding SDHC miniSD Card microSD Card Readable cards Playable files data SD Memory Card 8 MB 2 GB JPEG picture in picture commentary subtitles or other extras for BD ROM ver 2 Profile 2 0 Profile 1 1 SDHC Memory Card 4 GB 8 GB miniSD Card 8 MB 2 GB microSD Card 8 MB 2 GB Note for SD Memory Cards This unit supports SD Memory Card with FAT12 FAT16 file system and SDHC Memory Card with FAT32 file syste...

Page 16: ...information remaining time A Title information elapsed time A Title information remaining time A Decoding format information A off Track information elapsed time A Track information remaining time A Disc information elapsed time A Disc information remaining time A Track information elapsed time not available during program random playback off A File information A File name information A off Color ...

Page 17: ...apter Current title number Total number of titles Elapsed time or remaining time of the current title 1 1 10 1 3 2 4 5 T 3 5 0 01 02 2 6 1 2 3 4 5 6 3 5 0 01 02 1 2 1 2 Current track file number Total number of track file Elapsed time or remaining time of the current track except for JPEG files Indication of SD Memory Card playback Current repeat setting Only when repeat setting is active T Track ...

Page 18: ... STANDBY ON SD card SDMemoryCard STOP PLAY STANDBY ON OPEN CLOSE DISC IN SD card 2 Use K L to select SD Card then press OK 3 Use K L to select a desired track folder or file then press OK Use s B to go back and forward between the hierarchies If you press OK on the desired file playback will start To remove the SD Memory Card In stop mode gently push in the SD Memory Card then pull it out slowly N...

Page 19: ...ecting the Media Mode is e hen SD y is 1 In stop mode press SETUP 2 Use K L to select then press OK 3 Use K L to select Media Select 4 Press OK repeatedly to select the desired media 5 Press SETUP to exit Selected media mode is now activated Quick Media Select HDMI Audio Out HDMI Video Resolution Component Output Player Menu Disc HDMI Multi Normal Auto 480i English Quick Media Select HDMI Audio Ou...

Page 20: ...for the BD that supports Java applications BD Java In the Disc mode the resume information will be cleared when C stop is pressed while in the Resume On Stop mode the parental level is changed the disc tray is opened In the SD Card mode the resume information will be cleared when C stop is pressed while in the Resume On Stop mode the SD Memory Card is removed the unit is turned into the standby mo...

Page 21: ... 19 Icons Folder audio CD tracks JPEG files Using the Title Disc Pop up Menu Note Contents of menus and corresponding menu operations may vary among discs Refer to the manual accompanying the disc for details Playing Back Audio CD JPEG Files 1 Insert an audio CD or a disc card with JPEG files 2 Use K L to select a desired track folder or file then press OK Use s B to go back and forward between th...

Page 22: ...With regard to the multi border BD RE R additionally recorded sections cannot be recognized With regard to the multi border DVD RW R additionally recorded sections may not be recognized Kodak Picture CD 1 When Kodak Picture CD is inserted in this unit Kodak Picture CD menu will appear automatically on the TV screen File information Current page Total page number Operation guide Press BLUE to go to...

Page 23: ...andom playback Slow Forward Playback Note For BD and DVD speed changes in 3 different levels Only slow forward is available Set Still Mode setting to Field in Video menu if pictures in the slow forward playback mode are blurred Refer to Still Mode on page 35 Step by Step Playback Note Only step by step forward is available Set Still Mode setting to Field in Video menu if pictures in step by step p...

Page 24: ...LUE to go to the previous page in the programmed list Press YELLOW to go to the next page in the programmed list 0 26 24 CD_DA 0 36 1 14 0 45 0 50 0 53 0 20 0 54 8 9 10 11 12 13 14 1 14 0 50 1 14 0 50 0 53 0 54 0 36 2 4 9 11 12 14 8 16 1 6 2 3 4 7 5 8 Program Total Page Prev Page Next Page Down Page Up e g audio CD 1 2 3 4 5 6 7 8 Note During program playback press C stop once to set the resume po...

Page 25: ...e next page in the track file list Total playback time of all tracks audio CD only Playback status Note During the random playback press C stop once to set the resume point and then press B play to resume random playback from where C stop was pressed audio CD or from beginning of the file where C stop was pressed JPEG To repeat the current track file in the random selection press REPEAT repeatedly...

Page 26: ...he original picture as recorded 1 Executes 3D noise reduction which detects and deletes the noise by comparing each picture frames 2 Executes MPEG noise reduction which reduces the block noise and mosquito noise on the subtitle on movie 3 Executes both MPEG noise reduction and 3D noise reduction Note The setting will remain the same even if the unit is turned to the standby mode Black Level is not...

Page 27: ...ack or time search will start Press CLEAR to erase an incorrect input Enjoying BD Live Discs with Internet How to Activate the BD Live Function Note You must connect the unit to the Internet and set up necessary settings in order to use BD Live For certain discs BD Live Setting may need to be changed Depending on your connection environment it may take time to connect to the Internet or the Intern...

Page 28: ...hapter number you want to search using the Number buttons Playback of the chapter will start in a few seconds Track file search Enter the track file number you want to search using the Number buttons Playback of the track file will start in a few seconds Using the Number buttons Direct Search Note As for the BD video how it performs will be strongly determined by the disc and may not perform as de...

Page 29: ...red audio stream channel For audio CD you can select following options 3 Press AUDIO to exit Switching Subtitles Primary Subtitle Sets the subtitle for the primary video Secondary Subtitle Sets the subtitle for the secondary video Subtitle Style Sets style of the subtitle Note Some discs will only allow you to change the subtitles from the disc menu or pop up menu Press TOP MENU or POP MENU MENU t...

Page 30: ...w BD Audio will be output Note The secondary audio will not be output when the secondary video is not displayed or when BD Audio Mode is set to HD Audio Output For some BD secondary audio will be output even when secondary video is off The sound mode cannot be changed during playback of discs not recorded in multiple audio Some discs allow changing the audio language setting on the disc menu Opera...

Page 31: ...3 Use K L to select your desired setting items 4 Follow the procedure below depending on the setting items A If B does not appear on the right side of the setting items when you select the items Press OK repeatedly to change options B If B appears on the right side of the setting items when you select the items 1 Press OK 2 Use K L to select options then press OK Use s or RETURN to go back to the ...

Page 32: ...he procedure on page 41 4 Use K L to select your desired setting items 5 Follow the procedure below depending on the setting items A If B does not appear on the right side of the setting items when you select the items Press OK repeatedly to change options B If B appears on the right side of the setting items when you select the items 1 Press OK 2 Use K L to select options then press OK Use s or R...

Page 33: ...ish German Italian Swedish Dutch Russian Chinese Japanese Korean Danish Finnish Norwegian Icelandic Hungarian Romanian Turkish Greek Irish Portuguese Polish Czech Slovak Bulgarian Other Subtitle Sets the language for subtitle Off English French Spanish German Italian Swedish Dutch Russian Chinese Japanese Korean Danish Finnish Norwegian Icelandic Hungarian Romanian Turkish Greek Irish Portuguese P...

Page 34: ...icture is displayed in the center of the 16 9 screen with a 4 3 aspect ratio HDMI Video Resolution Sets the HDMI video resolution Auto HDMI video resolution will be selected automatically depending on the connected HDMI device 480p HDMI Deep Color Sets whether to output the picture from HDMI OUT jack with Deep Color or not Auto The picture from HDMI OUT jack will be output with Deep Color to the c...

Page 35: ...g to from the HDMI output mode You cannot change the video resolution during Blu ray Disc playback To change the resolution stop playback In order to get natural and high quality film reproduction of 24 frame film material use an HDMI cable High Speed HDMI Cable is recommended and select Auto if the connected TV is compatible with 1080p24 frame input Even if the connected TV is compatible with 108...

Page 36: ...Sets the audio format for the audio output from HDMI OUT jack Refer to page 37 HDMI Multi Normal The multi channel audio signals are output from HDMI OUT jack with bitstream or LPCM HDMI Multi LPCM The multi channel audio signals are output from HDMI OUT jack with LPCM Refer to pages 39 40 for setting options Audio Mute Mutes the HDMI audio signal and set the signal format from DIGITAL OUT jack Re...

Page 37: ...with the speaker setting items appear after you select HDMI Multi LPCM Refer to page 36 HDMI connection to a TV and digital audio connection coaxial to an AV amplifier Audio Mute HDMI audio will be mute and Dolby Digital DTS bitstream or LPCM will be output from DIGITAL OUT jack depending on Digital Out setting Refer to page 38 Media Recording format HDMI Audio Out setting HDMI Multi Normal HDMI M...

Page 38: ...scs recorded in Dolby Digital Dolby Digital Plus Dolby TrueHD DTS or DTS HD the corresponding core stream Dolby Digital or DTS are output LPCM LPCM signal will be output from DIGITAL OUT jack Media Recording format Digital Out setting Bitstream LPCM When BD Audio Mode is set to HD Audio Output When BD Audio Mode is set to Mix Audio Output When BD Audio Mode is set to HD Audio Output When BD Audio ...

Page 39: ... tone If you want to stop the test tone press RETURN For Default Press OK to reset to the default 4 Press SETUP to exit Speaker setting for the audio signal output from HDMI OUT jack e g basic layout with 7 1 channel surround system Front speaker left Front speaker right Center speaker Subwoofer Surround speaker left Surround speaker right Surround backspeaker left Surround back speaker right Quic...

Page 40: ...he volume for the desired speaker Select Auto then press OK to automatically output the test tone from each speaker Manual Auto Front Lch 0dB to 12dB 0dB If you have selected Manual in Test Tone select the desired speaker to set and adjust the volume for the selected speaker If you select Auto in Test Tone test tone will automatically be output in order Adjust the volume of the speaker that output...

Page 41: ...lect your desired option then press OK After selecting Age Setting use the Number buttons to enter the age from 0 254 e g for age 15 press 0 1 5 3 Press SETUP to exit B DVD Rating Level 1 Use K L to select DVD Rating Level then press OK 2 Use K L to select your desired level then press OK 3 Press SETUP to exit C Password Change 1 Use K L to select Password Change then press OK 2 Enter a new 4 digi...

Page 42: ...Media Select Selects the media to playback Disc Select this when you play back a disc SD Card Select this when you play back an SD Memory Card Network Connection Connection Test Perform a network connection test After you change IP address or DNS setting always perform this test Enable Easy If you select Enable Easy connection test will automatically start Enable Custom IP Address Setting Auto DHC...

Page 43: ...Set Menu Language The unit recognizes the OSD language set for the TV and automatically sets the same language as the player menu language OSD menu language for this unit This feature is available only when Auto XXXX is selected in Player Menu in the setup menu Refer to Player Menu on page 33 Setting items Options Network Connection Enable Custom Proxy Setting Do Not Use Set the proxy server In mo...

Page 44: ...ss OK to go to network status confirmation screen 3 Press OK to activate the network settings and set the network connection automatically Press SETUP to exit In following cases select Enable Custom to set each setting as necessary When connection test failed with the setting of Enable Easy When instructed by your Internet service provider to make specific settings in accordance with your network ...

Page 45: ...ct the desired setting For default settings select Do Not Use If you need to change the proxy setting as instructed by your Internet service provider to set the designated proxy address and port select Use If you select Use follow the following instructions to set the proxy address and proxy port xxx xxx xxx xxx xxx xxx xxx xxx xxx xxx xxx xxx IP Address Subnet Mask Default Gateway then press OK O...

Page 46: ...nnection speed to 10BASE Half 10BASE Full Set the connection speed to 10BASE Full 100BASE Half Set the connection speed to 100BASE Half 100BASE Full Set the connection speed to 100BASE Full 5 Press RETURN to go back to the previous screen or press SETUP to exit K L s B Move the highlight the Number buttons Enter number OK Enter the highlighted number word RED Clear the entered number or word GREEN...

Page 47: ...activate all the network connection and settings 1 Follow steps 1 to 4 in Connection Test on page 44 2 Use K L to select Disable then press OK 3 Press RETURN to go back to the previous screen or press SETUP to exit You can confirm the current software version 1 Follow steps 1 to 3 in Connection Test on page 44 2 Use K L to select Software Update then press OK 3 Use K L to select Current Version th...

Page 48: ...ile to complete the updating Please wait until 100 appears on the front panel display The indicators blink for this procedure Success Error If the indicator shows Error 1 Unplug the AC power cord and turn the unit again 2 Confirm the current firmware version 3 If the firmware version is updated the software update has succeeded If not please try again 7 After the disc update finishes this unit wil...

Page 49: ...e BD ROM contents such as BD ROM game scores from this player Erase Saved BD ROM Data SD Card Available only when an SD Memory Card is inserted Clears the supplemental data for the BD ROM playback such as subtitle data from the SD Memory Card Network Settings Reset the network setting to the default 4 Press OK For Setup and Format SD Card only Final confirmation message will appear Select Yes then...

Page 50: ...nit No sound or distorted sound Adjust the volume Check if speakers are connected correctly Check the HDMI connections Check the settings in Audio menu Picture freezes momentarily during playback Check the disc for fingerprints scratches and clean with a soft cloth wiping from center to edge Clean the disc Disc cannot be played back Clean the disc Ensure the disc label is facing up Check if the di...

Page 51: ...r Internet service contract to see if your Internet service provider prevents multiple terminals connecting at the same time The capacity of the SD card decreased Data may be written to the SD card when a BD video that supports the virtual package is used and an SD card is in the slot Cannot use the BD Live function or download of data does not perform properly Insert an SD card with enough capaci...

Page 52: ... DNS Server A server which translates Internet domain names into IP addresses Dolby Digital The system to compress digital sound developed by Dolby Laboratories It offers you sound of stereo 2ch or multi channel audio Dolby Digital Plus Dolby Digital Plus is the next generation digital audio compression technology developed as an extension to Dolby Digital Blu ray Disc supports 7 1 multi channel s...

Page 53: ...th more than one region or all regions Router A networking device which distinguishes the IP address assigned to each device and routing and forwarding information in the computer network Sampling Frequency The rate which sound is measured by a specified interval to turn into digital audio data The numbers of sampling in one second defines as sampling frequency The higher the rate the better the s...

Page 54: ...n Lettish 5868 Lingala 5860 Lithuanian 5866 Language Code Macedonian 5957 Malagasy 5953 Malay 5965 Malayalam 5958 Maltese 5966 Maori 5955 Marathi 5964 Moldavian 5961 Mongolian 5960 Nauru 6047 Nepali 6051 Norwegian NOR 6061 O R Occitan 6149 Oriya 6164 Oromo Afan 6159 Panjabi 6247 Pashto Pushto 6265 Persian 5247 Polish POL 6258 Portuguese POR 6266 Quechua 6367 Rhaeto Romance 6459 Romanian RUM 6461 R...

Page 55: ...ensation Terminals Rear Video output RCA jack x 1 1 Vp p 75Ω Component video output RCA jack x 3 Y 1 Vp p 75Ω PB CB 700 mVp p 75Ω PR CR 700 mVp p 75Ω HDMI output HDMI jack x 1 Video 480p 720p 1080i 1080p 1080p24 Audio Audio output Analog RCA jack x 2 L R 2 Vrms output impedance more than 1kΩ Audio output Digital RCA jack x 1 500 mVp p 75Ω LAN terminal 10BASE T 100BASE TX Note The specifications an...

Page 56: ...og records Cleaning the disc lens If this unit still does not perform properly although you refer to the relevant sections and to Troubleshooting in this manual the laser optical pickup unit may be dirty Consult your dealer or an authorized service center for inspection and cleaning of the laser optical pickup unit Disc handling Handle the discs so that fingerprints and dust do not adhere to the s...

Page 57: ...57 EN MEMO ...

Page 58: ...58 EN MEMO ...

Page 59: ...59 EN MEMO ...

Page 60: ...E ASSEMBLY PARTS DEMO OR FLOOR MODELS FUNAI CORP AND ITS REPRESENTATIVES OR AGENTS SHALL IN NO EVENT BE LIABLE FOR ANY GENERAL INDIRECT OR CONSEQUENTIAL DAMAGES ARISING OUT OF OR OCCASIONED BY THE USE OF OR THE INABILITY TO USE THIS PRODUCT THIS WARRANTY IS MADE IN LIEU OF ALL OTHER WARRANTIES EXPRESS OR IMPLIED AND OF ALL OTHER LIABILITIES ON THE PART OF FUNAI ALL OTHER WARRANTIES INCLUDING THE W...

Reviews: