background image

Summary of Contents for 911.92391

Page 1: ...e using this range read this manua and foHlow all its Safety Rules and Operating _nstructions Safety instructions Operation Care and Cleaning Problem Solving Sears Roebuck and Co Hoffm_n Estates IL 60179 U S A 229C4020Pt 18 SR 10323 ...

Page 2: ...Odor 11 Aluminum Foil 11 Oven Vent 11 Preheating 11 Temperature Sensor 11 No Peeking 1l Bakeware 12 Bakeware Placement t 2 Oven Racks 12 Oven Control 13 Hide A Way Handle 13 Self Cleaning 16 17 Control Panel I8 Broiler Pan and Grid 18 Walls of The Oven 18 Cooktop and Burner Box Bottom 18 Painted Surface 18 Control Knobs 19 Replacing Oven Light Bulb 19 Storage Drawer 20 Lift Up Cooktop 21 Cooktop U...

Page 3: ...s outside edge at this location and against back wall See Figure 2 4 Determine whether you wili anchor the bracket to the floor or wal Make sure this location is clear of electrical wiring or plumbing Outside Edge Of Bracket To Be Left Or Right Side Of Range Fig 1 1 Fasten the bracket securely with the screws provided Screws are self drilling in wood plywood particle and chip board and most metal ...

Page 4: ...ets above the appliance Children climbing on the appliance could be seriously injured KEEP THIS book for later use NEVER USE your appliance for warming or heating the room NEVER TRY to repair or replace any part of the appliance unless instruc tions are given in this manual All other work should be done by a qualified technician ALWAYS KEEP combustible wall coverings curtains dish cloths towels po...

Page 5: ... being used Undersized utensils expose the heating element and may result in direct contact or ignition of clothing ALWAYS USE drip bowls to prevent wiring and component damage Do not use aluminum liners or foil in drip bowls Improper use may result in risk of electrical shock or fire NEVER LEAVE surface units unattended at high settings Boilovers result in smoking or greasy spills which could cat...

Page 6: ... cleaning oven will give off a very small amount of carbon monoxide during the cleaning cycle Exposure can be minimized by venting with an open door or window or using a ventilation fan or hood iii ii i _q CAUTION Never line the drip bowls with aluminum foil Foil can block the normal heat flow and damage the range Always use cookware and woks that are flat on the bottom and the same size as the co...

Page 7: ... Gasket Removable Oven Door To remove the adhesive left from packaging tape use household dishwashing liquid mineral oil or cooking oil With a soft cloth rub into the area and allow to soak Rinse and dry well Repeat procedure using an appliance polish to insure no damage is done to the appliance This should be done before the range is turned on for the first time The tape cannot be removed once th...

Page 8: ...rrounding the surface units LEFT LEFT RIGHT FRONT REAR REAR MED HI Used for quick starts such as bringing water to a boil Used for slow boiling and saut6ing LO Used for steaming foods or keeping cooked foods at serving temperature t Push down to turn I _ the knob 2 Set on or between marks for desired heat OFF 1 Be sure the canner is centered over the elementr 2 Make sure the canner is flat on the ...

Page 9: ...hing showing in the display To activate this feature If the time of day is showing in the display press the CLOCK pad once To bring back the display from the time of day black out press the CLOCK pad twice 9 If the display flashes an F _ followed by a number and beeps continuously you have a function error code Note the number after the F Turn the oven control knob to the OFF position Allow the ov...

Page 10: ...you are setting the time After releasing the arrow pad the timer indicator light and the colon will blink three to five times the timer wilt start the count down The Timer Indicator Light will remain on until countdown reaches When the timer has started the count down you may press the CLOCK pad to return to the current time of day At the end of the countdown the control will beep and the Timer In...

Page 11: ...MPORTANT Never cover the oven bottom or oven rack with aluminum foil Improper use can cause poor heat flow poor baking results and may damage the oven finish In the back of the oven you will notice a small tube This is a heat sensor that maintains the temperature of the oven Never move or bend this tube Temperature Sens Opening the door often to check foods wilt cause heat toss and poor baking res...

Page 12: ...hen using these pans should be reduced by 25 F The oven racks are designed with stop locks a convenience as well as a safety precaution The guides have a bump to prevent the racks from tilt ing when racks are pulled out of the oven Bump in rack guide Your oven has four 4 rack positions Above the top guide cannot be used for a rack position 4_ 3_ 2_ GUIDE _4 _3 _2 1 Always place oven racks in the p...

Page 13: ...equipped with a hide away handle used for self clean only that can be hidden under the maintop when it is in the unlocked position 1 Be sure the handle is in the unlocked position and raise the cooktop 2 Push the handle into the latch cover until it stops 3 Lower the cooktop Your oven control has a selector knob for choosing BAKE BROIL or CLEAN There are also three indicator lights Never latch the...

Page 14: ...ture a series of short tones will sound and the PREHEATED and OVEH ON indicator lights will glow 4 The PREHEATED and OVEN OH indicator lights will remain on until baking is complete and the control knob is turned to the OFF position 1 With the oven control in the OFF position press and hold the MINUTE UP and DOWN arrow pads at the same time until ON or OFF shows in the dis play 2 Holding the MINUT...

Page 15: ...nly 140 F rare moans that some food poisoning organisms may survive The closer you place foods to the broil element the faster foods brown on the outside yet remain red to pink in the center Moving meats away from the element will allow the meat to cook to the center while browning on the outside Cook side 1 at least 2 minutes longer than side 2 If your oven is connected to 208 volts you may want ...

Page 16: ...or displaced on the door it should be replaced The door gasket is designed to have a 5 6 gap at the bottom of the door This allows for proper air circulation Door Panel Gasket D t _ _ 4 oOr Liner It is normal for your oven door to give the appearance of not having a good seal against the range This is due to the gasket The location of the gasket on the oven door maintains a good seal and prevents ...

Page 17: ...you may notice some white ash in the oven Just wipe it up with a damp cloth or sponge If white spots remain scrub them with a soap filled steel wool pad Be sure to rinse thoroughly These are usually deposits of salt that cannol be removed during the cycle If for any reason you are not satisfied with the cleaning results just repeat the cycle 4 Turn the oven control knob to CLEAN The CLEAN and OVEN...

Page 18: ...r cleaning and dry NEVER USE OVEH CLEA_ ERS IN OR AROUHD ANY PART OF THE OVEN When cleaning be sure not to bend or displace the temperature sensor located on the back wall of the oven CLEANING MATERIALS Dishwashing detergent Warm water _Paper towel Ammonia Abrasive cleaner Scouring pad TO CLEAN Clean after each use If acidic foods hot fruit filling milk tomatoes sauerkraut or sauces with vinegar o...

Page 19: ...nob 2 The molded rib of the knob is designed to fit perfectly onto the knob stem 3 Align the molded rib to the clear groove in the knob stem Push the knob back as far as it wilt go P I I I PlI_ I II I J_ltlI CAUTION Be sure the oven light switch is in the off position Do not touch a hot light bulb with wet hands or a wet cloth Wait until the bulb has cooled and use a dry cloth Never touch the live...

Page 20: ...er stop TO CLEAN Wipe the inside and outside with warm soapy water and a damp cloth or sponge Do not use harsh abra sives or scouring pads on the drawer Stop Guide 2 Lower the front of the drawer and push back the drawer until it stops 3 Lift up on the front of the drawer untN the stop guide of the drawer clears the stop guide of the base rail Slide the drawer into place CAUTION The drawer gives y...

Page 21: ...stains that cannot be removed For heavily soiled bowls place an am monia soaked paper towel over the bowl to loosen the soil then gently scrub the bow with a plastic scouring pad For blue gold heat stains use a metal polish These stains are caused by overheating and are usu ally permanent To help minimize this effect avoid excessive use of high heat settings and use flat bottom pans that do not ex...

Page 22: ... Slide the rack all the way back TO 1 Broil Stop Position r_Tf REMOVE Open the door to the broil stop position Grasp the door at each side and lift up and off the hinges DO NOT LIFT DOOR BY THE HANDLE i ii F I iiiiiii _ AUTION When the _ door is removed and the hinge arms are at the broil stop position as a precaution cover the hinge arms with toweling or an empty paper towel roll Do not bump or t...

Page 23: ... Oven temperature seems inaccurate i 11 11 ii i i a Improper rack or a pan placement b Oven vent blocked or covered c Improper use of foil d Improper temperature setting for utensil used e Recipe not followed f Improper oven control calibration g Range and oven rack not level i iii1 11111111111111 11 I ii i ii I i iii ba Maintain uniform air space around pans and utensils See oven cooking section ...

Page 24: ...f foil not recommended c Clean pan and grid after each use i i n innii1 a Elements a unplugged inuln i inlll I Check the elements make sure they are properly plugged into the receptacle b Push knob in while turning to temperature setting i u ilUlU lUlll llnlllU ii1 111 11 a Check the control and oven cook ing sections b Be sure to unlatch the door after the self clean cycle is finished and the ove...

Page 25: ... the temperature set the oven temperature 25 degrees higher if foods are undercooked or 25 degrees lower if foods are burning than the temperature in your recipe then bake The results of this test should give you an idea of how much the temperature should be changed 1 While the control knob is in the off position press and hold at the same time the HOUR UP and DOWN arrow pads until the display sho...

Page 26: ...NOTES 26 ...
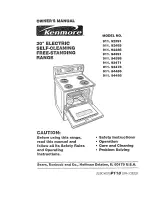
Page 27: ...ICE CENTER DEPARTMENT INTHEUNITED STATES ThiswarrantyappUes onlywhUethisproductis in usein the Unil_dStates Thiswarrantygivesyou specific legalrights andyoumayalsohaveotherrightswhichvaryfromstateto state SearsRoebuck andCo_ Dept 817WAHoftmanEstates IL 60179 _ J To further add to the value of your Range Buy a Sears Maintenance Agreement Year of Ownership Covorag_ lit YoQr 2x_d Yemr 3rd Y_r Rep ace...

Page 28: ...ce Call 24 hours a day 7 days a week t 800 4 REPAIR 1 800 473 7247 For thelocation of a Searsparts and RepairCenterin your area Call24 hours a day 7 days a week 800 488 t 222 For informationon purchasinga Sears Maintenance Agreementor to inquire about an existing Agreement Ca I9 am 5 pro Monday Saturday t 800 527 6655 ii ii i i i ii i America s Repair Specialists 28 ...

Reviews: