background image

PK2943

INSTALLATION

INSTRUCTIONS

Solitaire 710-II
SolitaireSMART

Knob Retrofit Kit

Summary of Contents for Solitaire 710-II Series

Page 1: ...PK2943 INSTALLATION INSTRUCTIONS Solitaire 710 II SolitaireSMART Knob Retrofit Kit ...

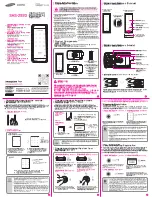
Page 2: ... Sleeve 6 Insert 7 Knob NOTE The Solitaire 710 II outside housing is illustrated throughout these instructions The same steps apply to the SolitaireSMART 740 outside housing with only minor differences in the appearance of the trim LOCK HANDING Before installing the knob remove the lock from the door and check the handing of the outside housing IMPORTANT DO NOT install the knob on the insert befor...

Page 3: ...Step by Step Instructions 710 11 SMART Retrofit Installation Instructions PK2943 Page 3 Remove spindle and compression spring 1 Remove extension spring 2 Remove retaining ring 3 Outside Housing ...

Page 4: ...structions PK2943 Page 4 Disassemble stop plate A bushing B and lever Assemble insert D and sleeve C from kit with existing nylon bushing B and stop plate A B A Check handing LH RH B A C D 4 5 Step by Step Instructions cont Outside Housing ...

Page 5: ...RH TIP Pry up the groove in the insert if necessary Closed end to hook Reattach retaining ring in position shown 6 Connect the long extension spring from the knob kit between the stop plate and the hook on the housing 7 Outside Housing Step by Step Instructions cont ...

Page 6: ...he insert Ensure it clips in place 8 Insert short half spindle from kit and compression spring 9 Outside Housing IMPORTANT See notes at the end of this document before reinstalling lock on door TIP The tooth inside the knob engages the slot on the insert Step by Step Instructions cont ...

Page 7: ...PK2943 Page 7 Step by Step Instructions cont Remove spindle and compression spring Unscrew two Phillips screws 1 1 Remove extension spring 2 Remove retaining ring 3 Inside Housing A C B Remove plate Remove override cam A gear B and felt washer C 1 2 ...

Page 8: ...structions PK2943 Page 8 Disassemble stop plate A bushing B and lever 4 Assemble insert D and sleeve C from kit with existing nylon bushing B and stop plate A 5 Inside Housing Step by Step Instructions cont B A Check handing C D B LH RH A ...

Page 9: ...tach retaining ring in position shown 6 Inside Housing Step by Step Instructions cont LH RH TIP Pry up the groove in the insert if necessary Closed end to hook Connect the short extension spring from the knob kit between the stop plate and the hook on the housing 7 1 ...

Page 10: ... Instructions PK2943 Page 10 If the thumbturn has a pin position the pin as shown 7 2 Inside Housing Step by Step Instructions cont LH RH POINT MARK DOT MARK DOT POINT PCB MARK PIN Install override gear override cam and felt washer 7 3 ...

Page 11: ...h inside the knob engages the slot on the insert Reinstall plate 7 4 Inside Housing Step by Step Instructions cont Assemble the knob on the insert Ensure it clips in place 8 Insert short half spindle from kit and compression spring IMPORTANT See notes on following page before reinstalling lock on door 9 ...

Page 12: ...inside housing the orientation is not important Simply ensure the thumbturn is vertical thumbturn vertical align groove with correct mark IMPORTANT NOTES Always re install the lock components on the same door from which they were taken If you disconnected the battery you will need to reset the lock time to restore the lock to a working condition see reference manual Check the following table for t...

Page 13: ...es representative or dealer distributor in your region www kaba ilco com Customer Service 1 877 468 3555 North America Technical Support 1 800 906 4526 North America 1 514 735 5411 International Printed in Canada PK2943 04 03 Kaba Ilco is a subsidiary of Kaba Holding AG ...

Reviews: