background image

ENGLISH

FRANÇAIS

EN FR

INSTRUCTIONS
MANUEL D’UTILISATION
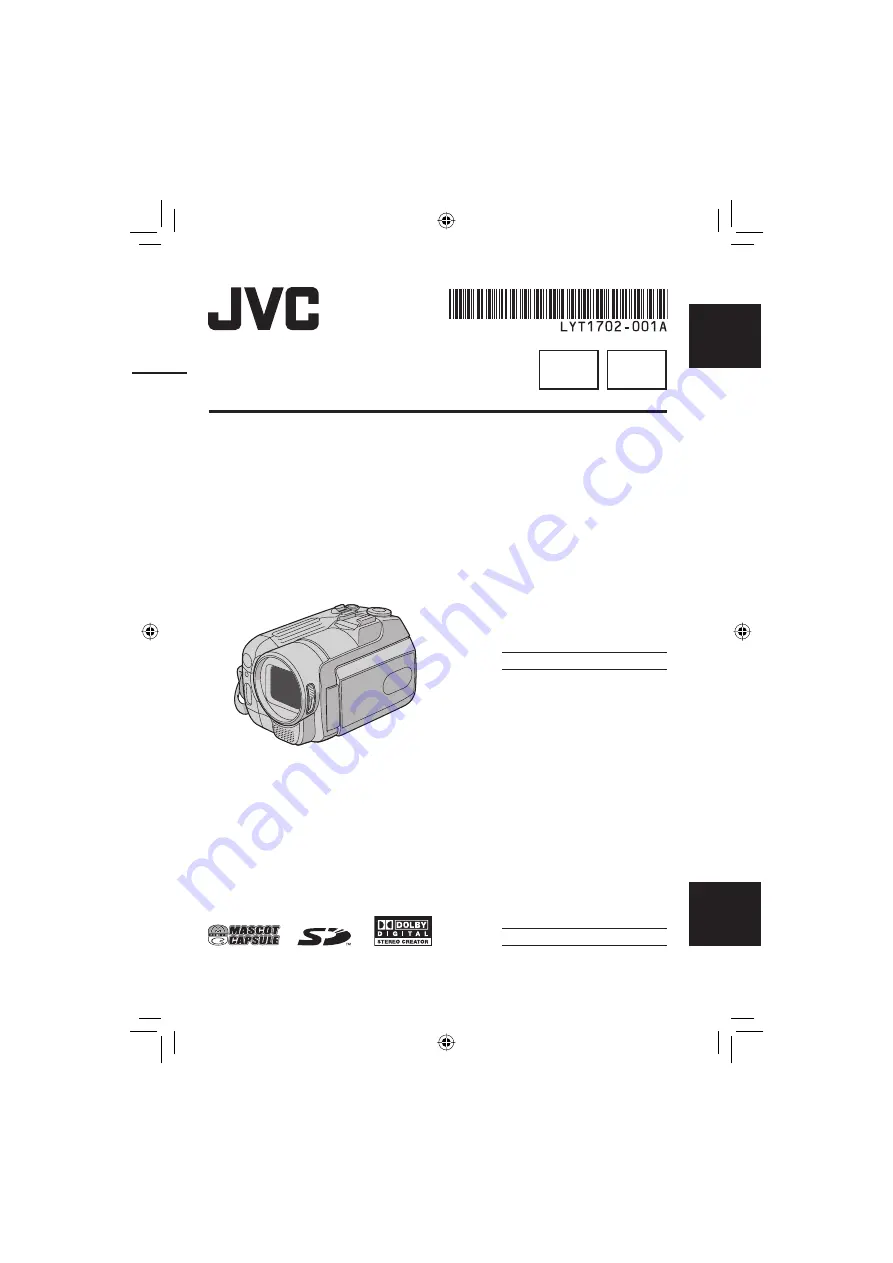
HARD DISK CAMCORDER
CAMÉSCOPE À DISQUE DUR

Dear Customer

Thank you for purchasing 
this hard disk camera. Before 
use, please read the safety 
information and precautions 
contained in pages 2 and 3 to 
ensure safe use of this product.

For Future Reference: 

Enter the Model No. (located on 
the bottom of the camera) and 
Serial No. (located on the battery 
pack mount of the camera) 
below.

Model No.

Serial No.

Cher client,

Nous vous remercions d’avoir 
acheté cet appareil photo à 
disque dur. Avant utilisation, 
veuillez lire les informations 
et les précautions de sécurité 
présentées dans les pages 2 et 3 
pour utiliser cet appareil en toute 
sécurité.

Pour consultation ultérieure : 

Noter ci-dessous le N° de 
modèle (fi gurant sous l’appareil 
photo) et le N° de série (fi gurant 
sur le logement de la batterie de 
l’appareil photo).

N° de modèle

N° de série

GZ-MG555U

Summary of Contents for GZ MG555 - Everio Camcorder - 5.4 MP

Page 1: ...tom of the camera and Serial No located on the battery pack mount of the camera below Model No Serial No Cher client Nous vous remercions d avoir acheté cet appareil photo à disque dur Avant utilisation veuillez lire les informations et les précautions de sécurité présentées dans les pages 2 et 3 pour utiliser cet appareil en toute sécurité Pour consultation ultérieure Noter ci dessous le N de mod...

Page 2: ...See www dtsc ca gov hazardouswaste perchlorate When the equipment is installed in a cabinet or on a shelf make sure that it has sufficient space on all sides to allow for ventilation 10 cm 3 15 16 or more on both sides on top and at the rear Do not block the ventilation holes If the ventilation holes are blocked by a newspaper or cloth etc the heat may not be able to get out No naked flame sources...

Page 3: ...s of time 12 Refer all servicing to qualified service person nel Servicing is required when the apparatus has been damaged in any way such as power supply cord or plug is damaged liquid has been spilled or objects have fallen into the apparatus the apparatus has been exposed to rain or moisture does not operate normally or has been dropped Remember that this camera is intended for private consumer...

Page 4: ...rge turn the power off before using it again If a malfunction occurs stop using the camera immediately and consult your local JVC dealer If a problem occurs when using the SD card take the card together with the camera for repair If one of them is not included the cause of the malfunction cannot be diagnosed and the camera cannot be repaired Recorded data may be erased while the camera is being re...

Page 5: ...Setting in Function Menu 22 PLAYBACK Playing Back Files 24 Video Playback 24 Still Image Playback 25 File Search Function 26 To Play Back Demonstration Files 27 Playback with Special Effects 28 Watching Images on TV 29 EDITING PRINTING Managing Files 30 Deleting Protecting Files 30 Viewing File Information 32 Changing the Event Registration of Video Files after Recording 32 Partial Delete EDITED C...

Page 6: ...the S connector and DV Connector an optional S Video cable and DV cable are needed To purchase these cables consult the JVC Service Center described on the sheet included in the package for details on its availability Make sure to connect the end with a core filter to the camera The core filter reduces interference The S Video cable optional enables even higher quality playback on TV pg 29 Be sure...

Page 7: ...emote Control A battery is included inside the remote control at the time of purchase Remove the insulation sheet before use Beam Effective Area NOTE The transmitted beam may not be effective or may cause incorrect operation when the remote sensor is directly exposed to sunlight or powerful lighting To Reinsert the Battery Pull out the battery holder by pressing the lock tab Eyelet Strap Guide Buc...

Page 8: ...x NOTES The LCD monitor can rotate 270 Power linked operation You can also turn the camera on off by opening closing the LCD monitor during the recording mode Be careful not to cover 5 6 8 and during shooting ...

Page 9: ...HARGE pg 12 Blinks when you access files or charge the battery Do not turn off the power or remove the battery pack AC adapter while accessing files Video Still Image Mode Lamp pg 16 17 1 Video Recording Start Stop Button REC pg 16 2 Power Mode Switch OFF CHARGE ON MODE pg 12 3 Lock Button pg 12 4 Flash pg 18 5 Camera Sensor Remote Sensor pg 7 6 LED Light pg 18 7 Lens Cover pg 14 8 Lens 9 Shoe Mic...

Page 10: ...trol Indicator pg 22 6 Iris Lock Indicator pg 22 During Video Recording Only 16 9 0 0 4 0 1 5 h 5 6 m Mode Indicator pg 16 ND Filter Indicator pg 19 Aspect Ratio of the Image 16 9 4 3 pg 47 Picture Quality B ultra fine C fine D normal E economy pg 46 Remaining Time pg 16 57 Counter pg 47 7REC Appears during recording pg 16 79 Appears during record standby mode Wind Cut Indicator pg 47 Event Indica...

Page 11: ...low Motion The number on the left shows speed Counter pg 47 Volume Level Indicator Battery Indicator pg 54 Date Time pg 13 Selected Medium Indicator pg 47 48 Drop Detection Indicator Appears when DROP DETECTION is set to OFF pg 48 Effect Mode Indicator pg 28 Wipe Fader Effect Indicator pg 28 During Still Image Playback PM 4 5 5 JA N 2 0 2 0 0 7 1 0 1 0 0 9 8 Mode Indicator pg 25 Folder File Number...

Page 12: ...from the camera Necessary Settings before Use MENU Access Charge Lamp Power Mode Switch Set Lever Bottom of the Camera BATT DC Connector AC Adapter To AC Outlet 110V to 240V Required charging recording time approx The values within are the times when the LED light is on Battery pack Charging time Recording time BN VF808U Provided 1 hr 30 min 1 hr 15 min 1 hr 10 min BN VF815U 2 hr 40 min 2 hr 30 mi...

Page 13: ... Select Set ENGLISH GENERAL SELECT SET QUIT 6 Select the desired language Select Set 8 To return to the previous screen Move the set lever to 8 To exit the screen Press MENU Date Time Setting After performing steps 1 4 left column 5 Select CLOCK ADJUST Select Set JAN 31 11 AM 07 2007 DATE TIME GENERAL SELECT SET QUIT 6 Set the date and time Select Set Repeat this step to input the month day year h...

Page 14: ...the button is pressed and released quickly and for approx 15 seconds if the button is pressed and held for several seconds NOTES If COMMUNICATING ERROR appears there may be a problem with your battery In such a case consult your nearest JVC dealer The recordable time display should only be used as a guide It is displayed in 10 minute units Tripod Mounting Align the camera stud hole with the tripod...

Page 15: ...lipped edge first Clipped Edge 3 Close the SD card cover 8 To remove an SD card Push the SD card once After the card comes out a little pull it out NOTES Insert and remove the SD card only while the power is turned off Otherwise data on the card may be corrupted Do not touch the terminal on the reverse side of the label R Change the recording medium The camera is programmed to record on the built ...

Page 16: ...ed The lamp on the camera lights up NOTES The video recording mode is automatically selected when you turn the camera s power off and then on again If the camera is not operated for 5 minutes while the power is on it turns itself off automatically to conserve power To turn the camera on again when using the battery pack set the power mode switch to OFF then to ON When using the AC adapter perform ...

Page 17: ...40 NOTE If the camera is not operated for 5 minutes while the power is on it turns itself off automatically to conserve power To turn the camera on again when using the battery pack set the power mode switch to OFF then to ON When using the AC adapter perform any operation such as zooming 8 To change the picture quality Change the settings in QUALITY pg 47 8 To record still images continuously Set...

Page 18: ... mode A N Each time you move the set lever to setting changes The light remains on regardless of the surrounding conditions The light turns on automatically when shooting in insufficient light conditions No display Disables this function Flash mode only Preparation Slide the power mode switch to MODE to select mode Press the PLAY REC button to select recording mode 9 9 9 9 FINE 40 Each time you mo...

Page 19: ... file to a certain event the setting will remain even if you turn the power off Unless you change the setting you will register a file to the same event that you had previously selected ND Filter mode only The amount of light that enters the lens is reduced by the filter Therefore the aperture value can be raised or shutter speed lowered in situations such as when recording videos outdoors in sunn...

Page 20: ...ckground H SPORTS Records fast moving subjects clearly G SNOW Compensates for subjects that may appear too dark when shooting in extremely bright surroundings such as in snow SPOTLIGHT Select this when a spotlight makes a subject appear too bright Changing the Shutter Speed A fast shutter speed can freeze the motion of a fast moving subject and a slow shutter speed can blur the subject to give the...

Page 21: ...uto recording mode NOTE If the image is too bright set to a larger F number If the image is too dark set to a smaller F number Manual Focus Preparation Set the program AE dial to 3 manual recording mode 1 4 JA N 2 2 Adjust the focus Select Set 8 To cancel the manual focus setting Set the program AE dial to 4 auto recording mode Nightalive The shutter speed is automatically adjusted from 1 2 to 1 2...

Page 22: ...ever for more than 2 seconds The C indicator appears 8 To cancel spot exposure control Move the set lever to once so that the indicator disappears Manual Setting in Function Menu You can use manual recording functions easily by selecting items in the function menus Preparation Set the program AE dial to 3 manual recording mode 1 FUNCTION ADJUST BRIGHTNESS EFFECT WB 2 Select the desired menu For de...

Page 23: ...undings during recording AUTO White balance is adjusted automatically B MWB Adjusts the white balance manually depending on the light source 1 Hold a sheet of plain white paper in front of the subject so that the white paper fills the screen 2 Press and hold the set lever until the B indicator starts blinking then stops blinking D FINE When shooting outdoors on a sunny day E CLOUD When shooting ou...

Page 24: ... to select the desired file then press down Select Set Video Playback Slide the power mode switch to MODE to select video mode MODE OFF ON The switch returns to the original position when it is released The lamp on the camera lights up Operations during Playback Return to the first scene of the file Reverse search Frame by frame playback during pause Play Pause Forward search Frame by frame playba...

Page 25: ...ill images appears Move the set lever to to select the desired file then press down Select Set Still Image Playback Slide the power mode switch to MODE to select still image mode MODE OFF ON The switch returns to the original position when it is released The lamp on the camera lights up Rotate 90 degrees counterclockwise Display the previous file Start end the slide show Display the next file Rota...

Page 26: ... DEC 22 2006 DEC 19 2006 DEC 01 2006 SELECT SET SORT 2 Select the recording date Select Set JAN 07 2007 1 3 SELECT SET SORT 3 Select the file you want to play back Select Set 8 To return to the index screen Press the INDEX button Event Screen mode only You can search the desired file by the event that you registered the file to when recording pg 19 After searching by the event you can search by th...

Page 27: ...CHANGE EVENT REG EDITED COPY 2 Select PLAYBACK MPG FILE Select Set VIDEO MPG 8 8 SELECT SET QUIT 3 Select the file you want to play back Select Set 8 To exit the screen Press FUNCTION 8 To return to the normal file playback mode Select PLAYBACK NORMAL FILE in step 2 2 Select the event To move to the next page select NEXT PAGE Select Set SEARCH EVENT SELECT SET SORT ALL SCENES JAN 22 2007 JAN 25 20...

Page 28: ...te screen P FADER BLACK Fade in or out with a black screen Q FADER B W Fade in to a color screen from a black and white screen or fade out in the opposite way R WIPE CORNER Wipe in on a black screen from the upper right to the lower left corner or wipe out in the opposite way S WIPE WINDOW The scene starts in the center of a black screen and wipes in toward the corners or wipes out in the opposite...

Page 29: ...elevision signals It cannot be used with a television of a different standard 1 Turn on the camera and the TV 2 Set the TV to its VIDEO mode 3 Only when connecting the camera to the VCR DVD recorder Turn on the VCR DVD recorder and set the VCR DVD recorder to its AUX input mode 4 Start playback on the camera pg 24 25 16 9 TV 4 3 TV 8 If the aspect ratio of the image is not correct as shown right C...

Page 30: ...all the files slide the tab to the LOCK position Preparation Slide the power mode switch to MODE to select or mode Press the PLAY REC button to select playback mode ex Performing DELETE 1 FUNCTION DELETE PROTECT PLAYBACK PLAYLIST EDIT PLAYLIST PLAYBACK MPG FILE PLAYBACK NORMAL FILE WIPE FADER EFFECT CHANGE EVENT REG EDITED COPY 2 Select DELETE or PROTECT Select Set DELETE DELETE ALL FILE SELECT CU...

Page 31: ... Move the set lever to to select EXECUTE then press down Selecting and Deleting Protecting Files After performing steps 1 2 pg 30 3 Select FILE SELECT Select Set VIDEO DELETE 8 8 SELECT SET QUIT 4 Select the desired file Select Set VIDEO DELETE 8 8 SELECT SET QUIT The or x mark appears on the file To select other files repeat this step If you slide the zoom lever towards T the preview screen is di...

Page 32: ... the exposure level pattern and the overall tone reproduction Press twice INFO TELEMACRO B D 1 250 s F3 5 ISO100 A larger number of pixels in the center position indicates correct exposure and well balanced brightness D B The shutter speed F number and ISO sensitivity GAIN when recorded are also displayed 8 To turn off the file information display Press INFO several times NOTE The shutter speed di...

Page 33: ...on Slide the power mode switch to MODE to select mode Press the PLAY REC button to select playback mode 1 FUNCTION DELETE PROTECT PLAYBACK PLAYLIST EDIT PLAYLIST PLAYBACK MPG FILE PLAYBACK NORMAL FILE WIPE FADER EFFECT CHANGE EVENT REG EDITED COPY 2 Select EDITED COPY Select Set EDITED COPY 8 8 SELECT SET QUIT 3 Select the desired file Select Set 00 00 03 EDITED COPY RETURN SET QUIT Playback start...

Page 34: ...QUIT 4 Select an item and display files Select Set IMPORT FROM EVENT Search for an event and display the corresponding files listed by recording date Move the set lever to to select the event then press down IMPORT FROM DATE Display all the files in the medium listed by recording date ALL SCENES Display all files individually EDIT 8 8 TOTAL 00h00m SELECT REGISTER 5 Select the file to add to playli...

Page 35: ...E FADER EFFECT CHANGE EVENT REG EDITED COPY 2 Select PLAYBACK PLAYLIST Select Set PLAYBACK PLAYLIST ALL SCENES 01 2007 JAN 07 04 45PM 02 2007 JAN 07 09 25PM 03 2007 JAN 07 09 55PM SELECT SET QUIT 3 Select the playlist that you want to play back Select Set 8 To exit the screen Press FUNCTION 8 To stop playback Press down the set lever 8 To return to the normal file playback mode Select PLAYBACK NOR...

Page 36: ...aylist then press down 5 Move the set lever to to select the desired letter then press down Repeat this process to complete the name You can change the character types capital letters small letters or marks by selecting A a To correct a letter select or and press down the set lever to move the cursor to the letter then select CLEAR and press down the set lever 6 Move the set lever to to select the...

Page 37: ...ECT IMAGES Select Set DPOF TOTAL 0 8 8 SELECT SET QUIT 4 Select the desired file Select Set If you slide and hold the zoom lever towards T the preview screen of the still image is displayed 5 Select the number of prints max 15 prints Select Set To set print information for other images repeat steps 4 and 5 You can set up to 999 files 6 FUNCTION 8 To exit the screen Press FUNCTION 8 To cancel the s...

Page 38: ...ress down 2 Move the set lever to to select EXECUTE then press down Direct Printing with PictBridge Printer If your printer is compatible with PictBridge still images can be printed easily by connecting the camera directly to the printer with the USB cable DPOF setting can also be used pg 37 Preparation Set the power mode switch to OFF You can also connect the cables using the Everio dock connecto...

Page 39: ...the printer is compatible with DPOF you can use the DPOF settings pg 37 After performing steps 1 2 pg 38 3 Select DPOF PRINT Select Set DPOF PRINT PRINT CANCEL CHECK SETTINGS SELECT SET 4 Select PRINT Select Set 8 To stop printing after printing starts 1 Press down the set lever 2 Move the set lever to to select EXECUTE then press down 8 To confirm the DPOF setting In step 4 move the set lever to ...

Page 40: ...isc is a play only disc so no more files can be added Preparation Set the power mode switch to OFF NOTE You can also connect the cables using the Everio dock connectors DIRECT DVD FUNCTION INDEX Power Mode Switch Set Lever Types of Copying and Connectable Device The Camera You can copy still images between the HDD and SD card with this camera alone pg 45 DVD Burner CU VD10 CU VD20 You can copy vid...

Page 41: ... 01 2007 12 15 FEB 01 2007 12 15 SELECT SET QUIT SELECT FROM EVENT Search for an event and display the corresponding files listed by recording date Move the set lever to to select the event then press down SELECT FROM DATE Display the files recorded on selected dates listed by recording date Move the set lever to to select the recording date then press down SELECT FROM PLAYLIST Register a created ...

Page 42: ... operation When COMPLETED CHANGE DISC appears change the disc The second DVD disc begins to be created To cancel the DVD creation select CANCEL 8 To exit the screen Press MENU then move the set lever to to select EXECUTE and press down 8 To check whether the DVD disc was created properly In step 2 pg 41 move the set lever to to select PLAY DVD then press down To return to the previous screen press...

Page 43: ...d DVD disc on a DVD player or other devices the following top menu will be displayed JAN 25 2007 JAN 11 2007 JAN 09 2007 JAN 07 2007 Disc title Creating date of the disc DVD number pg 42 Title thumbnail First scene of the title Title name Recording date Playlist name Jan 10 2007 records file 1 and 2 Title Create a DVD Chapter File 1 File 2 File 4 File 3 File 1 File 2 File 3 File 4 1 2 3 4 Jan 11 2...

Page 44: ...mong the display indications set DISPLAY to OFF DISPLAY ON TV to ON and DATE TIME to ON or AUTO pg 49 Using the Camera to Dub Files from a VCR DVD Player Preparation Set ANALOG INPUT to ON pg 49 Turn off all units AV DC You can also connect the cables using the Everio dock connectors The S Video cable optional enables even higher quality dubbing pg 6 When other devices such as a DVD burner are con...

Page 45: ...xcept read only files in the source medium Select Set IMAGE COPY CANCEL EXECUTE HDD SD MEDIA FILE UNIT NUMBER OF FILE 0059 ALL SELECT SET QUIT 3 Set the direction of copy move HDD SD or SD HDD 4 5 Set the file unit ALL or FILE to copy move FILE Select when you want to transfer the selected files 1 Move the set lever to to select the desired file then press down The s mark appears on the file To se...

Page 46: ...ON BRIGHT REMOTE GENERAL SELECT SET QUIT Changing the Menu Settings 4 Select the desired menu from the second menu item For details on each menu see below Select Set ON OFF GENERAL SELECT SET QUIT 5 Select the desired setting from the third menu item Select Set 8 To return to the previous screen Move the set lever to 8 To exit the screen Press MENU Menus Settings Factory preset VIDEO n QUALITY Ena...

Page 47: ... when watching the videos on your TV If this occurs change the settings in SELECT TV TYPE pg 49 p GAIN UP Makes the subject appear bright automatically when you record in dark places However the overall color tones appear grayish OFF Disables the function ON Activates the function o WIND CUT Reduces noise caused by wind OFF Disables the function ON Activates the function REC MEDIA FOR VIDEO Enable...

Page 48: ...t lever to then press down DROP DETECTION Prevents damage to the HDD by turning off the power automatically when the camera detects that it has been dropped OFF Disables the function ON Activates the function To turn the unit on when the drop detection worked set the power mode switch to OFF and to ON again CAUTION Setting this function to off increases the chances of damaging the built in hard di...

Page 49: ...STYLE Enables you to set the date and time display format DATE STYLE year month day month day year day month year TIME 24h 12h DATE TIME Enables you to set whether to display the current time on the LCD monitor OFF The date time does not appear AUTO The date time appears for approx 5 seconds in the following cases When the power mode switch is set from OFF to ON When playback starts When the date ...

Page 50: ...K when completed CANCEL Cancels this function NOTES Be aware that all files and data including protected files will be erased by the formatting process Do not format the recording medium on your PC DELETE DATA ON HDD This will make it more difficult to recover data on the HDD which has already been erased It is recommended that you do this when disposing of the camera to prevent illegal data recov...

Page 51: ...amera on again when using the battery pack set the power mode switch to OFF then to ON When using the AC adapter perform any operation such as zooming Adjust the brightness of the LCD monitor 48 The power was turned off accidentally Move to a place where no vibration or excessive sound The drop detection function operated Set the power mode switch to OFF and to ON again To turn off this function s...

Page 52: ...or becomes red or black for an instant Such a phenomenon occurs when shooting under direct sunlight This is not a malfunction During recording the date time does not appear Set DATE TIME to ON 49 During video recording the 7REC indicator flashes The temperature of the camera is increasing If the camera continues to heat up recording may be stopped to protect the recording medium In this case turn ...

Page 53: ...was moved suddenly during recording Do not move or shake the camera suddenly during recording During video playback the U indicator flashes The temperature of the camera is increasing If the camera continues to heat up playback may be stopped to protect the recording medium In this case turn off the power and then wait until the camera cools down Other problems Files cannot be deleted Remove prote...

Page 54: ...CK CARD S WRITE PROTECTION SWITCH Appears when you attempt recording when the write erase protection tab on the SD card is set to the LOCK position 30 VIDEO MANAGEMENT FILE IS BROKEN TO RECORD PLAYBACK VIDEO RECOVERY IS REQUIRED RECOVER The video management file is broken Recovery is required to record or play back video files Move the set lever to to select YES then press down to recover the vide...

Page 55: ...nd remove the battery pack and AC adapter 8 To clean the exterior Wipe gently with a soft cloth If the camera is particularly dirty dip the cloth into diluted mild soap and wring it out well before wiping Then wipe again with a dry cloth 8 To clean the LCD monitor Wipe gently with a soft cloth Be careful not to damage the monitor 8 To clean the lens Wipe gently with lens cleaning paper NOTES Avoid...

Page 56: ...video Audio Format SD VIDEO Recording Playback format Video MPEG 2 Audio Dolby Digital 2 ch Signal format NTSC standard Recording mode video ULTRA FINE 720 x 480 pixels 8 5 Mbps VBR FINE 720 x 480 pixels 5 5 Mbps VBR NORMAL 720 x 480 pixels 4 2 Mbps VBR ECONOMY 352 x 240 pixels 1 5 Mbps VBR Recording mode audio ULTRA FINE 48 kHz 384 kbps FINE 48 kHz 384 kbps NORMAL 48 kHz 256 kbps ECONOMY 48 kHz 1...

Page 57: ...2195 4310 1600 x 1200 STANDARD 9999 237 472 937 1892 3616 7099 640 x 480 FINE 9999 783 1560 3094 6246 9999 9999 640 x 480 STANDARD 9999 1118 2229 4420 8924 9999 9999 16 9 2592 x 1456 FINE 9999 73 145 289 583 1138 2234 2592 x 1456 STANDARD 9999 115 229 455 918 1808 3549 1920 x 1080 FINE 9999 132 264 524 1058 2049 4022 1920 x 1080 STANDARD 9999 206 410 814 1643 3235 6351 1280 x 720 FINE 9999 290 577...

Page 58: ...t when not in use as some machines use current even when switched off Recording Medium Be sure to follow the guidelines below to prevent corruption or damage to your recorded data Do not bend or drop the recording medium or subject it to strong pressure jolts or vibrations Do not splash the recording medium with water Do not use replace or store the recording medium in locations that are exposed t...

Page 59: ...tore your CD ROM in a dusty hot or humid environment Keep it away from direct sunlight Declaration of Conformity Model Number GZ MG555U Trade Name JVC Responsible party JVC AMERICAS CORP Address 1700 Valley Road Wayne N J 07470 Telephone Number 973 317 5000 This device complies with Part 15 of FCC Rules Operation is subject to the following two conditions 1 This device may not cause harmful interf...

Page 60: ... 21 Formatting a Recording Medium 50 G Gain 48 Gain Up 47 H Hard Disk 58 I Image Rotation 25 Image Size 47 L Language Setting 13 49 LCD Monitor 8 10 58 LED Light 18 Lens Cover 14 M Manual Recording 20 Menu Settings 46 N ND Filter 19 Nightalive 21 O On Screen Display 49 Operation Sound 48 P Partial Delete 33 PictBridge 38 Picture Quality 46 47 Playlist 34 Power Linked Operation 8 Preset 49 Printer ...

Page 61: ...MEMO ...

Page 62: ...er Aucune source à flamme nue telle que des bougies allumées ne doit être placée sur l appareil En jetant des batteries aux ordures les problèmes d environnement doivent être pris en considération et les réglementations locales ou la législation concernant le rebut de ces batteries doivent être strictement respectées L appareil ne doit pas être exposé à l égouttage ni aux éclaboussements Ne pas ut...

Page 63: ...tilisé pendant une longue durée 12 Confier toutes les réparations à du personnel de service qualifié Un dépannage est nécessaire lorsque l appareil a été endommagé d une façon ou d une autre tel que lorsque le cordon d alimentation ou la fiche est endommagé si du liquide a été renversé ou si des objets sont tombés à l intérieur de l appareil si l appareil a été exposé à la pluie ou à l humidité ne...

Page 64: ...s de dysfonctionnement cesser immédiatement d utiliser l appareil photo et consulter le revendeur JVC le plus proche En cas de problème lors de l utilisation de la carte SD apportez la carte avec l appareil photo pour réparation Si vous ne fournissez pas ces deux éléments la cause du dysfonctionnement ne pourra pas être déterminée et il ne sera pas possible de réparer l appareil photo Il se peut q...

Page 65: ...e de photos 25 Fonction de recherche de fichiers 26 Pour lire les fichiers de démonstration 27 Lecture avec effets spéciaux 28 Visualisation de photos sur le téléviseur 29 ÉDITION IMPRESSION Gestion des fichiers 30 Suppression Protection de fichiers 30 Affichage d informations sur un fichier 32 Modification de l enregistrement des événements des fichiers vidéo après l enregistrement 32 Suppression...

Page 66: ... un câble S Vidéo et un câble DV en option sont nécessaires Pour acheter ces câbles contacter le centre d entretien JVC indiqué sur la fiche incluse dans l emballage pour en savoir plus sur sa disponibilité Veiller à raccorder l extrémité munie du filtre à noyau de ferrite à l appareil photo Le filtre à noyau de ferrite réduit les parasites Le câble S Vidéo en option permet une lecture de qualité ...

Page 67: ...élécommande est dotée d une pile lors de son achat Enlever la feuille isolante avant toute utilisation Portée de la télécommande REMARQUE Le rayon transmis peut manquer d efficacité ou engendrer des dysfonctionnements si le capteur infrarouge est directement exposé à la lumière du soleil ou à des éclairages puissants Pour réinsérer la pile Extraire le logement de la pile en poussant sur le bouton ...

Page 68: ... pivoter sur 270 Fonctionnement avec alimentation couplée Vous pouvez également mettre l appareil photo sous hors tension en ouvrant fermant l écran LCD en mode d enregistrement Veiller à ne pas obstruer 5 6 8 et pendant la prise de vue ...

Page 69: ...ers ou pendant la recharge de la batterie Ne pas mettre l appareil hors tension ni retirer la batterie ou l adaptateur secteur lors d un accès aux fichiers Témoin de mode Vidéo Photo p 16 17 1 Touche de marche arrêt d enregistrement vidéo REC p 16 2 Commutateur Alimentation Mode OFF CHARGE ON MODE p 12 3 Touche de verrouillage p 12 4 Flash p 18 5 Capteur de l appareil photo Capteur infrarouge p 7 ...

Page 70: ...e p 22 Pendant l enregistrement vidéo uniquement 16 9 0 0 4 0 1 5 h 5 6 m Témoin de mode p 16 Témoin de filtre gris neutre p 19 Rapport de format de la photo 16 9 4 3 p 47 Qualité de l image B ultra fine C fine D normale E économie p 46 Temps restant p 16 57 Compteur p 47 7REC Apparaît pendant l enregistrement p 16 79 Apparaît pendant le mode d attente d enregistrement Témoin d atténuation des bru...

Page 71: ...avant Y9 Ralenti arrière Le nombre à gauche indique la vitesse Compteur p 47 Témoin de niveau de volume Témoin de batterie p 54 Date Heure p 13 Témoin de support sélectionné p 47 48 Témoin de détection de chute apparaît lorsque DETECTION DE CHUTE est réglé sur ARRET p 48 Témoin de mode d effet p 28 Témoin d effet de fondu volet p 28 Pendant la lecture de photos PM 4 5 5 JA N 2 0 2 0 0 7 1 0 1 0 0 ...

Page 72: ...tion MENU Témoin d accès recharge Molette Alimentation Mode Commande de réglage Partie inférieure de l appareil photo BATT Connecteur CC Adaptateur secteur Sur une prise secteur 110 V à 240 V Temps de recharge d enregistrement requis approx Les valeurs entre correspondent aux durées lorsque la lumière à DEL est allumée Batterie Temps de recharge Durée de l enregistrement BN VF808U Fourni 1 h 30 mi...

Page 73: ...GLISH GENERAL SELECT DEFINIR QUITTER 6 Sélectionner la langue appropriée Sélectionner Régler 8 Pour revenir à l écran précédent Déplacer la commande de réglage vers 8 Pour quitter l écran Appuyer sur MENU Réglage de la date et de l heure Après avoir exécuté les étapes 1 4 colonne de gauche 5 Sélectionner REGLAGE DE l HEURE Sélectionner Régler JAN 31 11 AM 07 2007 DATE TEMPS GENERAL SELECT DEFINIR ...

Page 74: ...ment et pendant environ 15 secondes si la touche est maintenue enfoncée pendant plusieurs secondes REMARQUES Si ERREUR DE COMMUNICATION apparaît il y a peut être un problème de batterie Dans ce cas contacter le revendeur JVC le plus proche Le temps d enregistrement affiché ne devrait être utilisé qu à titre indicatif Il est exprimé par tranches de 10 minutes Montage sur un trépied Aligner l orific...

Page 75: ...mement le bord biseauté en premier 3 Fermer le volet de la carte SD 8 Pour retirer une carte SD Pousser sur la carte SD une fois Lorsqu elle sort de l appareil la retirer REMARQUES L alimentation doit être coupée pour l insertion et le retrait de la carte SD Sinon les données de la carte risquent d être altérées Ne pas toucher la borne sur le côté opposé de l étiquette R Changer le support d enreg...

Page 76: ...pareil photo REMARQUES Le mode d enregistrement vidéo est automatiquement sélectionné lorsque l on met l appareil photo hors tension et puis le sous tension Si l appareil reste inutilisé pendant 5 minutes alors qu il est sous tension il se met de lui même hors tension pour économiser l énergie Pour remettre l appareil sous tension lors de l utilisation de la batterie régler la molette Alimentation...

Page 77: ...reste inutilisé pendant 5 minutes alors qu il est sous tension il se met de lui même hors tension pour économiser l énergie Pour remettre l appareil sous tension lors de l utilisation de la batterie régler la molette Alimentation Mode sur OFF puis sur ON Pendant l utilisation de l adaptateur secteur effectuer une opération quelconque telle qu un zoom 8 Pour modifier la qualité d image Modifier les...

Page 78: ...ment A N Chaque déplacement de la commande de réglage sur modifie le réglage La lumière reste allumée indépendamment des conditions environnantes La lumière s allume automatiquement lorsque l éclairage est insuffisant Pas d affichage Désactive cette fonction Flash Mode uniquement Préparatif Glisser la molette Alimentation Mode sur MODE pour sélectionner le mode Appuyer sur la touche PLAY REC pour ...

Page 79: ...oisissez d enregistrer un fichier dans un événement le réglage est conservé même si vous éteignez l appareil Par la suite vous enregistrerez un fichier dans l événement préalablement sélectionné sauf si vous modifiez le réglage Filtre gris neutre Mode uniquement La quantité de lumière qui pénètre par l objectif est réduite par le filtre Par conséquent la valeur d ouverture peut être augmentée ou l...

Page 80: ... Enregistre clairement des sujets se déplaçant vite G NEIGE Compense les sujets qui risqueraient d être trop sombres dans une prise de vue effectuée dans un environnement très lumineux par exemple dans la neige PROJECTEUR Sélectionner cette option lorsqu une tache lumineuse rend le sujet trop lumineux Changer la vitesse d obturation Une vitesse d obturation rapide peut geler le mouvement d un suje...

Page 81: ...r un numéro F plus grand Si l image est trop sombre régler sur un numéro F plus petit Mise au point manuelle Préparatif Réglez la molette de l exposition automatique à programmation sur 3 mode d enregistrement manuel 1 4 JA N 2 2 Effectuez la mise au point Sélectionner Régler 8 Pour annuler le réglage de la mise au point manuelle Réglez la molette de l exposition automatique à programmation sur 4 ...

Page 82: ...plus de 2 secondes Le témoin C s affiche 8 Pour annuler la commande d exposition spot Déplacer la commande de réglage sur une fois pour faire disparaître le témoin Réglage manuel du menu Fonction Les fonctions d enregistrement manuel sont simples à utiliser Il suffit de sélectionner les options appropriées dans les menus de fonction Préparatif Réglez la molette de l exposition automatique à progra...

Page 83: ...es blancs est réglée automatiquement B BAL B MANUEL Permet de régler manuellement la balance des blancs en fonction de la source de lumière 1 Placer une feuille de papier blanc uni devant le sujet de sorte que le papier blanc occupe tout l écran 2 Appuyer sur la commande de réglage et la maintenir enfoncée jusqu à ce que le témoin B se mette à clignoter puis s arrête D ENSOLEILLE destiné aux prise...

Page 84: ...ur pour sélectionner le fichier désiré puis enfoncer Sélectionner Régler Lecture vidéo Glisser molette Alimentation Mode sur MODE pour sélectionner le mode vidéo MODE OFF ON La molette retourne en position originale lorsqu elle est libérée Le témoin s allume sur l appareil photo Opérations pendant la lecture Revenir à la première scène du fichier Recherche en arrière Lecture image par image pendan...

Page 85: ...aît Déplacer la commande de réglage sur pour sélectionner le fichier désiré puis enfoncer Sélectionner Régler Lecture de photos Opérations pendant la lecture Faire pivoter de 90 degrés sans antihoraire Afficher le fichier précédent Lancer arrêter le diaporama Afficher le fichier suivant Faire pivoter de 90 degrés sans horaire Pendant l affichage du diaporama le déplacement de la commande de réglag...

Page 86: ...T DEFINIR CLASSER 2 Sélectionner la date d enregistrement Sélectionner Régler JAN 07 2007 1 3 SELECT DEFINIR CLASSER 3 Sélectionner le fichier à lire Sélectionner Régler 8 Pour revenir à l écran d index Appuyer sur la touche INDEX Écran des événements Mode uniquement Vous pouvez rechercher le fichier désiré par le biais de l événement dans lequel vous avez enregistré le fichier lors de l enregistr...

Page 87: ...Sélectionner LECTURE FICHIER MPEG Sélectionner Régler VIDEO MPG 8 8 SELECT DEFINIR QUITTER 3 Sélectionner le fichier à lire Sélectionner Régler 8 Pour quitter l écran Appuyer sur FUNCTION 8 Pour revenir au mode de lecture de fichier normal Sélectionner LECTURE FICHIER à l étape 2 2 Sélectionner l événement Pour passer à la page suivante sélectionner PAGE SUIVANTE Sélectionner Régler RECHERCHE EVEN...

Page 88: ...FONDU NOIR Entrée ou sortie en fondu sur un écran noir Q FONDU NOIR BLANC Passe d un écran noir et blanc à un écran couleur lors de l entrée en fondu ou l inverse lors de la sortie en fondu R VOLET EN COIN Le volet s ouvre sur un écran noir depuis l angle supérieur droit vers l angle inférieur gauche ou se ferme en sens inverse S VOLET FENETRE La scène démarre au centre d un écran noir avec le vol...

Page 89: ...iseur de standard différent 1 Mettre sous tension l appareil photo et le téléviseur 2 Régler le téléviseur en mode VIDÉO 3 Uniquement lors du raccordement de l appareil photo à un magnétoscope graveur de DVD Mettre sous tension le magnétoscope graveur de DVD et définir le mode d entrée AUX pour ces appareils 4 Lancer la lecture sur l appareil photo p 24 25 Téléviseur 16 9 Téléviseur 4 3 8 Si le ra...

Page 90: ...our protéger tous les fichiers faire glisser le loquet en position LOCK Préparatif Glisser la molette Alimentation Mode sur MODE pour sélectionner le mode ou Appuyer sur la touche PLAY REC pour sélectionner le mode de lecture ex Exécuter SUPPRIMER 1 FUNCTION SUPPRIMER PROTEGER LIRE LISTE DE LECT MODIFIER LISTE LECT LECTURE FICHIER MPEG LECTURE FICHIER FONDU VOLET EFFET REORGAN LES ENR COPIE DE SEC...

Page 91: ... sélectionner EXECUTER puis l enfoncer Sélection et suppression protection des fichiers Après avoir exécuté les étapes 1 2 p 30 3 Sélectionner SELECTION FICHIER S Sélectionner Régler SUPPRESSION DE VIDEO 8 8 SELECT DEFINIR QUITTER 4 Sélectionner le fichier approprié Sélectionner Régler SUPPRESSION DE VIDEO 8 8 SELECT DEFINIR QUITTER Le symbole ou x apparaît sur le fichier Répéter cette étape pour ...

Page 92: ...RGAN LES ENR Sélectionner Régler TEMPS LIBRE 1 3 SANS SECTION PAGE SUIVANTE SELECT ENREG QUITTER Affichage d informations sur un fichier Préparatif Pour le mode Interrompre la lecture Sélectionner le fichier dans l écran d index Pour le mode Lire la photo Sélectionner le fichier dans l écran d index INFO TELEMACRO ULTRA FIN ARRET MOV005 MOD 00 30 02 JAN 01 2006 10 56AM PRG001 QUALITE PROTEGER FICH...

Page 93: ...éo Préparatif Glisser la molette Alimentation Mode sur MODE pour sélectionner le mode Appuyer sur la touche PLAY REC pour sélectionner le mode de lecture 1 FUNCTION SUPPRIMER PROTEGER LIRE LISTE DE LECT MODIFIER LISTE LECT LECTURE FICHIER MPEG LECTURE FICHIER FONDU VOLET EFFET REORGAN LES ENR COPIE DE SECTION 2 Sélectionner COPIE DE SECTION Sélectionner Régler COPIE DE SECTION 8 8 SELECT DEFINIR Q...

Page 94: ...ichiers Sélectionner Régler IMPORTER VIA EVENEMENT Rechercher un événement et afficher les fichiers correspondants répertoriés par date d enregistrement Déplacer la commande de réglage sur pour sélectionner l événement puis l enfoncer IMPORTER VIA DATE S Afficher tous les fichiers du support répertoriés par date d enregistrement TOUTE LES SCENES Afficher tous les fichiers individuellement MODIFIER...

Page 95: ...EFFET REORGAN LES ENR COPIE DE SECTION 2 Sélectionner LIRE LISTE DE LECT Sélectionner Régler LIRE LISTE DE LECT TOUTE LES SCENES 01 2007 JAN 07 04 45PM 02 2007 JAN 07 09 25PM 03 2007 JAN 07 09 55PM SELECT DEFINIR QUITTER 3 Sélectionner la liste de lecture à lire Sélectionner Régler 8 Pour quitter l écran Appuyer sur FUNCTION 8 Pour arrêter la lecture Enfoncer la commande de réglage 8 Pour revenir ...

Page 96: ...cture désirée puis l enfoncer 5 Déplacer la commande de réglage sur pour sélectionner la lettre désirée puis l enfoncer Répéter ce processus jusqu à l obtention du nom complet Vous pouvez modifier le type de caractères majuscules minuscules ou signes en sélectionnant A a Pour corriger une lettre sélectionner ou et enfoncer la commande de réglage pour déplacer le curseur jusqu à la lettre puis séle...

Page 97: ...électionner Régler DPOF TOTAL 0 8 8 SELECT DEFINIR QUITTER 4 Sélectionner le fichier approprié Sélectionner Régler Si l on déplace la commande de zoom vers T et qu on la maintient à cette position l écran d aperçu de la photo s affiche 5 Sélectionner le nombre de tirages max 15 tirages Sélectionner Régler Pour définir les informations d impression pour d autres images répéter les étapes 4 et 5 Vou...

Page 98: ...foncer 2 Déplacer la commande de réglage sur pour sélectionner EXECUTER puis l enfoncer Impression directe à l aide d une imprimante PictBridge Si vous disposez d une imprimante compatible PictBridge il est facile d imprimer des photos en raccordant directement l appareil photo à l imprimante au moyen du câble USB Le réglage DPOF peut aussi être utilisé p 37 Préparatif Régler la molette Alimentati...

Page 99: ...réglages DPOF Si l imprimante est compatible avec DPOF vous pouvez utiliser les réglages DPOF p 37 Après avoir exécuté les étapes 1 2 p 38 3 Sélectionner TIRAGE DPOF Sélectionner Régler TIRAGE DPOF IMPRESSION ANNULER DEFINIR PARAM SELECT DEFINIR 4 Sélectionner IMPRESSION Sélectionner Régler 8 Pour arrêter l impression alors qu elle a déjà démarré 1 Enfoncer la commande de réglage 2 Déplacer la com...

Page 100: ...lémentaire ne peut être ajouté Préparatif Régler la molette Alimentation Mode sur OFF REMARQUE Vous pouvez aussi brancher les câbles à l aide des connecteurs de station d accueil Everio DIRECT DVD FUNCTION INDEX Molette Alimentation Mode Commande de réglage Types de copie et d appareil raccordable L appareil photo Vous pouvez copier des photos entre le disque dur et la carte SD en utilisant seulem...

Page 101: ...IA EVEN Rechercher un événement et afficher les fichiers correspondants répertoriés par date d enregistrement Déplacer la commande de réglage sur pour sélectionner l événement puis l enfoncer SELECTION VIA DATE Afficher les fichiers enregistrés aux dates sélectionnées répertoriés par date d enregistrement Déplacer la commande de réglage sur pour sélectionner la date d enregistrement puis l enfonce...

Page 102: ...opération Lorsque TERMINE CHANGER DE DISQUE apparaît changer le disque La création du deuxième disque DVD commence Pour annuler la création du DVD sélectionner ANNULER 8 Pour quitter l écran Appuyer sur MENU puis déplacer la commande de réglage sur pour sélectionner EXECUTER et l enfoncer 8 Pour vérifier si le disque DVD a été créé correctement À l étape 2 p 41 déplacer la commande de réglage sur ...

Page 103: ...ur DVD ou autre appareil le menu supérieur suivant s affiche JAN 25 2007 JAN 11 2007 JAN 09 2007 JAN 07 2007 Titre de disque date de création du disque Numéro DVD p 42 Miniature de titre première scène du titre Nom de titre date d enregistrement Nom de liste de lecture Jan 10 2007 enregistre fichier 1 et 2 Titre Créer un DVD Chapitre Fichier 1 Fichier 2 Fichier 4 Fichier 3 Fichier 1 Fichier 2 Fich...

Page 104: ...cations de l affichage régler AFFICHAGE sur ARRET AFFICHER SURTV sur MARCHE et DATE HEURE sur MARCHE ou AUTO p 49 Utiliser l appareil photo pour copier les fichiers d un magnétoscope ou d un lecteur DVD Préparatif Régler ENTREE ANALOGIQUE sur MARCHE p 49 Mettre tous les appareils hors tension AV DC Vous pouvez aussi brancher les câbles à l aide des connecteurs de station d accueil Everio Le câble ...

Page 105: ...e sont effacés sur le support source Sélectionner Régler COPIE DE PHOTO ANNULER EXECUTER HDD SD SUPPORT ENREG UNITE FICHIER NBRE FICHIER 0059 TOUS SELECT DEFINIR QUITTER 3 Définir le sens de la copie ou du transfert HDD SD ou SD HDD 4 5 Définir l unité de fichier TOUS ou FICHIER à copier transférer FICHIER Sélectionner si vous voulez transférer les fichiers sélectionnés 1 Déplacer la commande de r...

Page 106: ... DEFINIR QUITTER MODE COULEUR Modification des réglages à l aide des menus 4 Sélectionner le menu désiré de la deuxième option de menu Pour plus de détails sur les menus voir ci dessous Sélectionner Régler MARCHE ARRET GENERAL SELECT DEFINIR QUITTER 5 Sélectionner le menu désiré de la troisième option de menu Sélectionner Régler 8 Pour revenir à l écran précédent Déplacer la commande de réglage ve...

Page 107: ... se peut que le rapport de format de la vidéo soit incorrect lors de sa visualisation sur le téléviseur Le cas échéant modifier les réglages dans SELECT FORMAT ECRAN p 49 p LUMINOSITE Éclaire automatiquement le sujet lors de l enregistrement dans des endroits sombres Néanmoins les tonalités globales sont grisâtres ARRET Désactive la fonction MARCHE Active la fonction o FILTRE VENT Réduit le bruit ...

Page 108: ...ECTION DE CHUTE Évite l endommagement du disque dur en mettant automatiquement l appareil photo hors tension lorsqu il tombe ARRET Désactive la fonction MARCHE Active la fonction Pour mettre l appareil sous tension lorsque la détection de chute est activée régler la molette Alimentation Mode sur OFF puis de nouveau sur ON PRÉCAUTION La désactivation de cette fonction augmente les risques d endomma...

Page 109: ... définir le format d affichage de la date et de l heure STYLE DE DATE AA MM JJ MM JJ AA JJ MM AA TEMPS 24h 12h DATE HEURE Permet d indiquer si l heure actuelle doit être affichée sur l écran LCD ARRET La date et l heure ne s affichent pas AUTO La date et l heure apparaissent pendant environ 5 secondes dans les cas suivants Lorsque la molette Alimentation Mode est commutée de OFF à ON Lorsque la le...

Page 110: ...r OK une fois l exécution terminée ANNULER Annule cette fonction REMARQUES Ne pas oublier que le formatage efface tous les fichiers et toutes les données même les fichiers protégés Ne pas formater le support d enregistrement sur l ordinateur EFFACER LES DONNEES Cela rendra plus difficile la récupération des données qui ont été effacées sur le disque dur Il est recommandé d effectuer cette opératio...

Page 111: ...ur remettre l appareil sous tension lors de l utilisation de la batterie régler la molette Alimentation Mode sur OFF puis sur ON Pendant l utilisation de l adaptateur secteur effectuer une opération quelconque telle qu un zoom Régler la luminosité de l écran LCD 48 L appareil a été accidentellement mis hors tension Le déplacer dans un emplacement sans vibrations ni sons excessifs La fonction de dé...

Page 112: ...e produit lors de la prise de vue directement à la lumière du soleil Il ne s agit pas d un mauvais fonctionnement La date et l heure ne s affichent pas pendant l enregistrement Régler DATE HEURE sur MARCHE 49 Pendant l enregistrement vidéo le témoin 7REC clignote La température de l appareil photo s élève Si l appareil photo continue de chauffer il se peut que l enregistrement s arrête pour protég...

Page 113: ...photo a été déplacé brusquement pendant l enregistrement Ne pas déplacer ni secouer brusquement l appareil photo pendant l enregistrement Pendant l enregistrement vidéo le témoin U clignote La température de l appareil photo s élève Si l appareil photo continue de chauffer il se peut que la lecture s arrête pour protéger le support d enregistrement Dans ce cas mettre l appareil photo hors tension ...

Page 114: ... CARTE S affiche en cas de tentative d enregistrement alors que le loquet de protection contre l écriture et l effacement de la carte SD est en position LOCK 30 ERREUR DE FICHIER DE GESTION VIDEO UNE RESTAURATION EST REQUISE RESTAURER Le fichier de gestion vidéo est endommagé Il faut procéder à une restauration pour enregistrer ou lire des fichiers vidéo Déplacer la commande de réglage sur pour sé...

Page 115: ...yage d objectif REMARQUES Éviter les agents de nettoyage puissants comme la benzine ou l alcool De la moisissure peut se former sur l objectif s il n est pas nettoyé Lors de l utilisation d un produit de nettoyage ou d un chiffon traité chimiquement se reporter aux mises en garde inhérentes à chaque produit Témoin Description Action L ENREGISTREMENT RISQUE D ETRE INCORRECT SUR LA CARTE MEMOIRE Les...

Page 116: ...t SD VIDEO Format d enregistrement et de lecture Vidéo MPEG 2 Audio Dolby numérique 2 voies Format du signal Norme NTSC Mode d enregistrement vidéo ULTRA FIN 720 x 480 pixels 8 5 Mbit s VBR FIN 720 x 480 pixels 5 5 Mbit s VBR NORMAL 720 x 480 pixels 4 2 Mbit s VBR ECONOMIE 352 x 240 pixels 1 5 Mbit s VBR Mode d enregistrement audio ULTRA FIN 48 kHz 384 Kbit s FIN 48 kHz 384 Kbit s NORMAL 48 kHz 25...

Page 117: ... 3352 1600 x 1200 FIN 9999 142 283 562 1135 2195 4310 1600 x 1200 STANDARD 9999 237 472 937 1892 3616 7099 640 x 480 FIN 9999 783 1560 3094 6246 9999 9999 640 x 480 STANDARD 9999 1118 2229 4420 8924 9999 9999 16 9 2592 x 1456 FIN 9999 73 145 289 583 1138 2234 2592 x 1456 STANDARD 9999 115 229 455 918 1808 3549 1920 x 1080 FIN 9999 132 264 524 1058 2049 4022 1920 x 1080 STANDARD 9999 206 410 814 16...

Page 118: ...s les 6 mois lors d un entreposage pendant une période de temps prolongée Retirer l appareil du chargeur ou le débrancher lorsque vous ne vous en servez pas certains appareils même éteints continuent de consommer du courant Support d enregistrement Veiller à suivre les directives ci dessous pour éviter d endommager les données enregistrées Ne pas déformer ou laisser tomber le support d enregistrem...

Page 119: ...le CD ROM à l aide d un chiffon doux en partant du centre vers l extérieur Ne pas utiliser de nettoyants pour disques conventionnels ni de produits pulvérisés Ne pas cintrer le CD ROM ni toucher sa surface réfléchissante Ne pas entreposer le CD ROM dans un endroit poussiéreux chaud ou humide Le maintenir à l abri des rayons du soleil Déclaration de conformité Numéro de modèle GZ MG555U Nom de marq...

Page 120: ...raveur DVD 40 I Impression directe 38 Imprimante 38 Informations sur un fichier 32 L Lecteur DVD 44 Liste de lecture 34 Lumière à DEL 18 Luminosité 47 48 M Magnétoscope 44 Menus de réglage 46 Microphone externe 9 47 Mise au point 21 Mise hors tension automatique 50 Mode couleur 50 Mode de démonstration 48 Montage sur un trépied 14 N Nettoyer le disque dur 50 Nightalive 21 P Photo 17 25 PictBridge ...

Reviews: