background image

PUB. DIE-285

0072W225 

PUB. DIE-285 

© CANON INC. 2007 

0007NiXX.X 

PRINTED IN  JAPAN 

Please read also the 

Backup Utility

 and 

Digital Video Software

 instruction manuals 

(on PDF file).

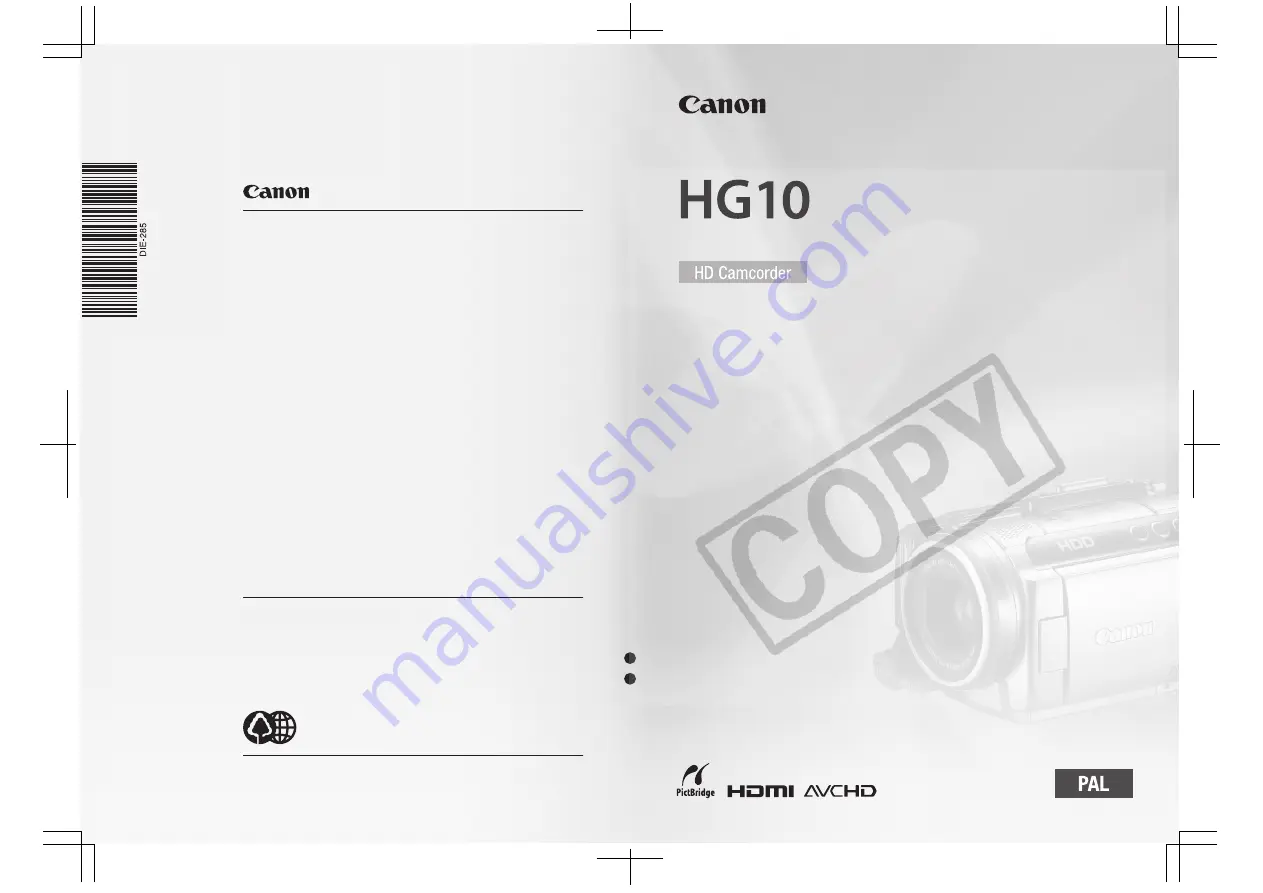
Instruction Manual

Canon Europa N.V.

P.O. Box 2262, 1180 EG Amstelveen, the Netherlands

Canon UK Ltd.

CCI Service Centre, Unit 130
Centennial Park, Borehamwood, Hertfordshire, WD6 3SE, England
Telephone 0870-241-2161

Canon Australia Pty. Ltd.

Info-Line: 131383
www.canon.com.au

Canon New Zealand Ltd.

Customer Care: (09) 489 0470
www.canon.co.nz

Canon Singapore Pte. Ltd

1 HarbourFront Avenue, #04-01 Keppel Bay Tower, Singapore 098632
Tel: (65) 6799 8888
Fax: (65) 6799 8882

Canon Hongkong Company Ltd

19/F., The Metropolis Tower, 10 Metropolis Drive, Hunghom, 
Kowloon, Hong Kong

Canon Latin America, Inc.

Sales & Enquiries: 703 Waterford Way, Suite 400, Miami, FL 33126 USA

The information in this manual is verified as of 1 August 2007.

Printed on 100% reused paper.

Summary of Contents for 2183B001

Page 1: ...ngland Telephone 0870 241 2161 Canon Australia Pty Ltd Info Line 131383 www canon com au Canon New Zealand Ltd Customer Care 09 489 0470 www canon co nz Canon Singapore Pte Ltd 1 HarbourFront Avenue 04 01 Keppel Bay Tower Singapore 098632 Tel 65 6799 8888 Fax 65 6799 8882 Canon Hongkong Company Ltd 19 F The Metropolis Tower 10 Metropolis Drive Hunghom Kowloon Hong Kong Canon Latin America Inc Sale...

Page 2: ...SUPPLY SOCKET WHEN NOT IN USE The Mains plug is used as the disconnect device The Mains plug shall remain readily operable to disconnect the plug in case of an accident While using the compact power adapter do not wrap it or cover it with a piece of cloth and do not place it in confined narrow spaces Heat may build up the plastic case may deform and it could result in electric shock or fire CA 570...

Page 3: ...ders compliant with high definition video composed of 1 080 vertical pixels scanning lines What is Cinema Mode Give your recordings a cinematic look by using the CINE MODE recording program 48 Combine this recording program with the 25 fps progressive frame rate PF25 43 to get the enhanced effect of the 25p Cinema Mode 49 How does the built in hard disk enrich your shooting experience Because this...

Page 4: ...ions or strong impacts The hard disk is a high precision device Vibrations strong impacts or dropping the camcorder may result in permanent data loss Keep the drop sensor activated whenever possible The drop sensor 44 detects when the camcorder is dropped and activates a protection mechanism to help prevent hard disk damage Turning this function off will disable the mechanism Even if this function...

Page 5: ...titudes higher than 3 000 m may result in hard disk damage Initialize the hard disk when movies cannot be recorded played back normally As movies are recorded and deleted over time hard disk fragmentation may occur which may reduce performance Initialize the hard disk should this happen Protect personal information on the hard disk When the hard disk is initialized or movies are deleted stored dat...

Page 6: ...tting Started 18 Charging the Battery Pack 19 Preparing the Wireless Controller and Accessories 21 Basic Operation of the Camcorder 21 Power Switch 21 Operating Modes 22 Navigation Buttons and Control Dial 22 Function Guide 23 Using the Menus 24 First Time Settings 24 Setting the Date and Time 25 Changing the Language 25 Changing the Time Zone 26 Getting Ready to Start Recording 26 Adjusting the P...

Page 7: ...Zoom Image Stabilizer etc 44 Hard Disk Operations HDD Usage Info Initializing the Hard Disk etc 44 Still Image Operations Card Initialization etc 45 Display Setup LCD Brightness Language etc 46 System Setup Volume Beep etc 48 Date Time Setup 48 Additional Functions 48 Giving a Cinematic Look to your Recordings 49 Special Scene Recording Programs 51 Flexible Recording Changing the Aperture and Shut...

Page 8: ...gnifying Photos during Playback 66 Erasing Photos 67 Additional Functions 67 Flash 68 Continuous Shooting and Exposure Bracketing Drive Mode 69 Automatic Focus Priority 70 Light Metering Mode 70 Histogram and Other Screen Displays 71 Capturing a Still Image while Recording Movies 72 Capturing a Still Image from the Playback Scene 72 Protecting Photos 73 Initializing the Memory Card 74 Printing Pho...

Page 9: ...Connection Diagram 85 Transferring Photos Direct Transfer 88 Transfer Orders Additional Information ________________________ 89 Trouble 89 Troubleshooting 93 List of Messages 97 Do s and Don ts 97 Handling Precautions 100 Maintenance Others 101 Using the Camcorder Abroad 103 General Information 103 System Diagram 104 Optional Accessories 108 Specifications 110 Index D122_PAL_E book Page 9 Thursday...

Page 10: ...use the recording The terms photo and still image are used interchangeably with the same meaning The terms hard disk and HDD are used interchangeably to refer to the camcorder s built in hard disk drive The photos included in this manual are simulated pictures taken with a still camera About this Manual 1 Press 2 Press or to select the icon and press to open the setup menus 3 Press or to select DI...

Page 11: ...S Component Cable Red Green Blue plugs STV 250N Stereo Video Cable Yellow Red White plugs IFC 400PCU USB Cable Software CD ROM and User Manual Corel Application Disc Software CD ROM DIGITAL VIDEO Solution Disk Software CD ROM Backup Utility SS 900 Shoulder Strap The CD ROM includes the software instruction manual electronic version on PDF file Europe only D122_PAL_E book Page 11 Thursday July 19 2...

Page 12: ...standby lamp 32 DISP button 39 70 print share button 75 85 USB terminal 85 CARD access indicator 62 Memory card slot open the cover to access 27 Speaker 34 Terminal cover HDMI OUT mini terminal 81 83 COMPONENT OUT terminal 81 AV OUT terminal 80 Grip belt 19 Strap mount Flash 67 Instant AF sensor 42 MIC terminal 59 Remote sensor 20 Mini video light 52 FUNC D122_PAL_E book Page 12 Thursday July 19 2...

Page 13: ...cator red 21 START STOP button 29 DC IN terminal 18 Serial number RESET button 90 Control dial 22 Navigation buttons 22 SET button 22 LCD screen 26 stop button 34 PLAYLIST button 60 BLC backlight correction button 54 play pause button 34 START STOP button 29 fast forward button 34 Zoom in T telephoto button 31 rewind button 34 Zoom out W wide angle button 31 FUNC button 23 39 Mode switch 30 Zoom l...

Page 14: ...tton 60 Navigation buttons PREV NEXT buttons Scene skip 35 Index screen page up down 34 Reverse SEARCH button 35 Reverse SLOW button 35 PLAY button 34 PAUSE button 34 STOP button 34 PHOTO button 62 Zoom buttons 31 SET button Forward SEARCH button 35 Forward SLOW button 35 DISP on screen display button 39 70 D122_PAL_E book Page 14 Thursday July 19 2007 6 54 PM ...

Page 15: ...ecording reminder Instant AF 42 MF Manual focus 53 25F progressive frame rate Hard disk operation Time code Playback time hours minutes seconds Remaining recording time on the hard disk Backlight correction 54 Headphones output 35 Image stabilizer 43 Wind screen off 44 Drop sensor off 44 Level marker 45 Advanced accessory shoe 103 Remote sensor off 46 Scene number Data code 39 D122_PAL_E book Page...

Page 16: ... available on the memory card Self timer 53 Remaining battery charge estimate Image stabilizer 43 AF frame 69 Mini video light 52 Flash 67 Focus exposure automatically set and locked 62 Camcorder shake warning 41 Image number 47 Current image Total number of images Histogram 70 Date and time of recording Image protection mark 72 Manual focus 53 Manual exposure 54 Image size 63 File size Aperture v...

Page 17: ...recorded When viewing the still images the display will always be in green Depending on the recording conditions the number of available still images displayed may not decrease even after a recording has been made or may decrease by 2 still images at once Card access display is displayed next to the number of images available while the camcorder is writing on the memory card Remaining battery char...

Page 18: ...k softly into the battery attachment unit and slide it up until it clicks in place 3 Connect the power cord to the compact power adapter 4 Plug the power cord into a power outlet 5 Connect the compact power adapter to the camcorder s DC IN terminal The CHG charge indicator starts flashing The indicator will stay on when the charging is completed You can also use the compact power adapter without a...

Page 19: ... prevent equipment breakdowns and excessive heating do not connect the supplied compact power adapter to voltage converters for overseas travels or special power sources such as those on aircraft and ships DC AC inverters etc NOTES The CHG charge indicator also serves as a rough estimate of the charge status Continuously on Battery pack fully charged Two quick flashes at 1 second intervals Battery...

Page 20: ...OFF 46 Otherwise replace the battery When the optional Tele converter or Wide converter is attached to the camcorder it may partially obstruct the remote sensor Use the wireless controller from a different angle Accessories 1 Fasten the grip belt Adjust the grip belt so that you can reach the zoom lever with your index and middle fingers and the button with your thumb 2 Attach the supplied shoulde...

Page 21: ...e operating mode From the ON position turn the switch momentarily toward MODE and release it This action will toggle the operating mode between recording CAMERA red indicator and playback PLAY green indicator Operating Modes The camcorder s operating mode is determined by the switch and the position of the switch In this manual indicates that a function is available in the operating mode shown and...

Page 22: ...l cannot be used for some functions Function Guide Press to display hide the function guide In the illustrations of this manual positions other than those relevant to the function explained are marked with a striped pattern Operating Mode Operating Mode Indicator Switch Icon Display Operation Red Movies Recording movies on the hard disk 29 Still images Recording still images on the memory card 62 ...

Page 23: ...will need to make further selections and or press Follow the additional operation guides that will appear on the screen such as the icon small arrows etc 4 Press to save the settings and close the menu You can press to close the menu at any time Selecting an Option from the Setup Menus FUNC 23 1 Press 2 Use the navigation buttons to select the icon and press to open the setup menus You can also ho...

Page 24: ...just settings Setting the Date and Time You will need to set the date and time of the camcorder before you can start using it The DATE TIME screen will appear automatically when the camcorder s clock is not set When the DATE TIME screen appears the year will be displayed in orange and indicated with up down arrows 1 Press or to change the year and press to move to the month You can also use the co...

Page 25: ... and press to open the setup menus 3 Press or to select DISPLAY SETUP and press 4 Press or to select LANGUAGE and press 5 Use the navigation buttons or the control dial to select the desired option and press 6 Press to close the menu NOTES If you changed the language by mistake follow the mark next to the menu item to change the setting The displays and that appear in some menu screens refer to th...

Page 26: ... press Refer to the changing date and time displayed on the screen To adjust for daylight saving time select the area name marked with a 7 Press to close the menu Adjusting the Position and Brightness of the LCD Screen Rotating the LCD Panel Open the LCD panel 90 degrees You can rotate the panel 90 degrees downward You can rotate the panel 180 degrees toward the lens allowing the subject to monito...

Page 27: ...peat this action to toggle between the normal and bright settings NOTES This setting does not affect the brightness of the recording Using the bright setting will shorten the effective usage time of the battery pack Inserting and Removing a Memory Card Only miniSD cards can be used with this camcorder 1 Turn off the camcorder 2 Open the LCD panel 3 Open the memory card slot cover 4 Insert the memo...

Page 28: ...his camcorder 73 Memory cards have front and back sides that are not interchangeable Inserting a memory card facing the wrong direction can cause a malfunction of the camcorder NOTES Compatibility with all miniSD cards cannot be guaranteed D122_PAL_E book Page 28 Thursday July 19 2007 6 54 PM ...

Page 29: ...st zooms and panning can result in jittery scenes In extreme cases the playback of such scenes may result in visually induced motion sickness If you experience such a reaction immediately stop the playback and take a rest break as necessary Observe the following precautions while the HDD access indicator is on or flashing Failing to do so may result in permanent data loss or hard disk damage Do no...

Page 30: ...ll it straight out until it clicks Adjust the viewfinder as necessary with the dioptric adjustment lever You can also change the brightness of the screen 27 Using the bright setting will shorten the effective usage time of the battery pack The LCD screen and the viewfinder can be used simultaneously when the LCD panel is turned 180 degrees to face the subject 26 About the Mode Switch and Recording...

Page 31: ...d close the menu NOTES Recording in LP mode gives you a longer recording time however depending on the scene being recorded the picture and sound recorded in LP mode may be distorted We recommend using HXP or XP mode for important recordings If necessary initialize the hard disk 61 The camcorder uses a variable bit rate VBR when encoding the video data so the actual recording times will vary depen...

Page 32: ... speed will be faster in record pause mode Quick Start Function When you press the camcorder enters the standby mode In standby mode the camcorder consumes only about half the power used when recording saving energy when you are using a battery pack Additionally when you press again the camcorder is ready to start recording within approx 1 second ensuring you do not miss important shooting opportu...

Page 33: ...ge the position of the switch Turn the switch toward MODE Reviewing and Deleting the Last Scene Recorded Even in mode you can play back the last scene recorded in order to check it You can also delete the scene while reviewing it 1 If the function guide does not appear on screen press to display it 2 Press to select If does not appear on the function guide repeatedly press to display it The camcor...

Page 34: ...will start from the scene selected and continue until the end of the last scene recorded 5 Press again to pause the playback 6 Press to stop the playback and return to the scene index screen NOTES Depending on the recording conditions you may notice brief stops in video or sound playback between scenes Adjusting the Volume Speaker and Headphones The camcorder plays the sound with the built in spea...

Page 35: ...on the LCD panel or wireless controller 14 There is no sound during the special playback modes During some special playback modes you may notice some anomalies blocky video artifacts banding etc in the playback picture You can also use the control dial The speed indicated on the screen is approximate Special playback mode Initial mode On the camcorder press On the wireless controller press Fast pl...

Page 36: ...he screen If you connect the headphones while the terminal is set to AV output only noise will be output When using headphones make sure to lower the volume to an appropriate level The sound of the built in speaker will be muted when you close the LCD panel when you connect the STV 250N Stereo Video Cable to the AV OUT terminal or when AV PHONES is set to PHONES NOTES Use commercially available he...

Page 37: ... to Copying your Recordings to an External Video Recorder 84 Transferring Movies from a Computer After you transfer movies to a computer you can use the supplied Corel Application Disc software to select movies and transfer them back to the camcorder For a detailed explanation refer to the Corel Application Disc Installation Guide and User Manual Make sure to use the software on the supplied Backu...

Page 38: ...cted scene Selecting ONE SCENE will delete only the selected scene To delete a scene only in the playlist press first and then select the scene FUNC 23 IMPORTANT Be careful when deleting original recordings Once deleted an original scene cannot be recovered Back up important scenes before deleting them Do not use a computer to delete data in this camcorder NOTES Deleting a scene from the original ...

Page 39: ...ever the markers and the icons and will still appear on the screen 2 Data code Time date and camera data at the time of recording The contents to be displayed can be selected with the DATA CODE setting 45 Menu items not available appear grayed out in the FUNC menu or in black in the setup menus For details about how to select an item refer to Using the Menus 23 FUNC Menu Mode switch P PROGRAM AE S...

Page 40: ...LITY 9 Mbps STANDARD PLAY 7 Mbps LONG PLAY 5 Mbps Size STILL I REC OFF LW 1920x1080 SW 848x480 Quality SUPER FINE FINE NORMAL Size LW 1920x1080 L 2048x1536 M 1440x1080 S 640x480 Quality SUPER FINE FINE NORMAL ALL SCENES THIS DATE ONE SCENE CANCEL Add scenes to the playlist This option is available only from the original index screen White balance 55 Image effect 56 Digital effects 57 Drive mode 68...

Page 41: ...rder to select the still images for which you want to set print orders Press to enter the image selection screen in order to select the still images you want to mark with a transfer order Setup Menus In the setup menus you can also use the control dial to navigate the menus and adjust settings Camera Setup Digital Zoom Image Stabilizer etc CAMERA SETUP Mode switch AUTO or P only in the PROGRAM AE ...

Page 42: ...ed depends on how you operate the zoom lever Press lightly for a slow zoom press harder for faster zooms The fastest zoom speed can be achieved with VARIABLE Among the fixed zoom speeds SPEED 3 is the fastest and SPEED 1 the slowest INSTANT AF NORMAL AF Select how fast the autofocus will operate With INSTANT AF the autofocus adjusts quickly to a new subject This is convenient for example when chan...

Page 43: ... NORMAL PF25 Selects the frame rate to be used when recording PF25 25 frames per second progressive Using this frame rate will give your recordings a cinematic look When combined with the CINE MODE recording program 48 the cinematic look will be enhanced AUTO OFF Mode switch P ON AiAF ON CENTER OFF OFF 2 sec 4 sec 6 sec 8 sec 10 sec Selects the time to display a still image after it has been recor...

Page 44: ...s option is available only from the original index screen ON OFF Detects when the camcorder is dropped and activates a protection mechanism to help prevent hard disk damage While the mechanism is active appears in red on the screen and playback recording may stop This option is available only from the original index screen Keep this function set to ON in most situations Deactivating this function ...

Page 45: ...ATE TIME CAMERA DATA Displays the date and or time when the scene was recorded CAMERA DATA Displays the aperture f stop and shutter speed used when recording the image OFF LEVEL WHT LEVEL GRY GRID WHT GRID GRY You can display a grid or a horizontal line at the center of the screen The markers are available in white or gray Use the markers as a reference to make sure your subject is framed correctl...

Page 46: ...beep will accompany some operations like turning on the camcorder the self timer countdown etc ON OFF In order to save power when the camcorder is powered by a battery pack it will automatically shut off if left without any operation for 5 minutes Approximately 30 seconds before the camcorder shuts off the message AUTO POWER OFF will appear In standby mode the camcorder will shut off after the tim...

Page 47: ...eadphones NOTES Lower the volume before connecting the headphones In mode you can also adjust the volume using the function guide 34 NORMAL TV WIDE TV In order to display the picture in full and in the correct aspect ratio select the setting according to the type of television to which you will connect the camcorder NORMAL TV TV sets with 4 3 aspect ratio WIDE TV TV sets with 16 9 aspect ratio The...

Page 48: ...2007 12 00 AM Changes the date format for on screen displays and for date printing Giving a Cinematic Look to your Recordings Give your recordings a cinematic look by using the CINE MODE recording program Combine this recording program with the 25 fps progressive frame rate PF25 to get the enhanced effect of the 25p Cinema Mode Using the CINE MODE Recording Program With the CINE MODE recording pro...

Page 49: ...ss of the picture may change abruptly Special Scene Recording Programs Recording in a very bright ski resort or capturing the full colors of a sunset or a fireworks display becomes as easy as selecting a Special Scene recording program For details about the available options refer to the sidebar on page 50 POINTS TO CHECK Mode switch P FUNC 23 21 FUNC MENU CAMERA SETUP FRAME RATE FUNC PF25 21 FUNC...

Page 50: ...s Check the image on the screen FIREWORKS To avoid camcorder shake we recommend using a tripod Make sure to use a tripod especially in mode as the shutter speed slows down PORTRAIT The camcorder uses a large aperture achieving a focus on the subject while blurring other distracting details BEACH Use this mode to record on a sunny beach It prevents the subject from being underexposed SPORTS Use thi...

Page 51: ... aperture value to the desired value Shutter speed guidelines Note that on screen only the denominator is displayed 250 indicates a shutter speed of 1 250 second etc 21 PROGRAM AE The camcorder automatically adjusts the aperture and shutter speed to obtain the optimal exposure for the subject SHUTTER PRIO AE Set the shutter speed value The camcorder automatically sets the appropriate aperture valu...

Page 52: ...at any time regardless of the recording program 1 If the function guide does not appear on screen press to display it 2 Press to select If does not appear on the function guide repeatedly press to display it appears on the screen Press again to turn the mini video light off You can attach the optional VL 3 Video Light to the advanced accessory shoe if you want a more powerful video light than the ...

Page 53: ... not work well on the following subjects In such case focus manually Reflective surfaces Subjects with low contrast or without vertical lines Fast moving subjects Through wet windows Night scenes POINTS TO CHECK Adjust the zoom before you start the procedure Mode switch P 1 If the function guide does not appear on screen press to display it 2 Press to select FOCUS If FOCUS does not appear on the f...

Page 54: ... Pressing to select FOCUS again will return the camcorder to autofocus If you use the control dial operate the zoom or press or changes to MF and the camcorder returns to manual focusing mode Automatic Backlight Correction and Manual Exposure Adjustment At times backlit subjects may appear too dark underexposed or subjects under very strong lights may appear too bright or glaring overexposed To co...

Page 55: ...ing and then to select EXP again will return the camcorder to autofocus White Balance The white balance function helps you to accurately reproduce colors under different lighting conditions so that white objects will always look truly white in your recordings POINTS TO CHECK Mode switch P except for the Special Scene recording programs Options Default value BLC BLC 21 AUTO Settings are automatical...

Page 56: ... in a single color sky sea or forest Under mercury lamps and certain types of fluorescent lights Depending on the type of fluorescent light optimal color balance may not be obtained with FLUORESCENT or FLUORESCENT H If the color looks unnatural adjust it using AUTO or SET Image Effects You can use the image effects to change the color saturation and contrast to record images with special color eff...

Page 57: ...pearance To obtain the best effect use this setting when recording a person in close up Note that areas similar to the skin color may lack in detail CUSTOM Allows you to adjust the color depth brightness contrast and sharpness of the image COL DEPTH Shallower colors Richer color tonality BRIGHTN Darker picture Brighter picture CONTRAST Flatter picture More defined light and shade SHARPNESS Vaguer ...

Page 58: ...ings the built in microphone may pick up the sound of the camcorder s internal machinery In such case we recommend using an external microphone Microphones compatible with the advanced accessory shoe You can attach to the advanced accessory shoe on the camcorder an optional DM 50 Directional Stereo Microphone or any commercially available microphone compatible with the advanced accessory shoe For ...

Page 59: ...hones with their own power supply and a cable no longer than 3 m You can connect almost any stereo microphone with a 3 5 mm plug but the audio recording level may vary NOTES Be careful when attaching a very long external microphone it may appear on the screen When the DM 50 or other microphone is connected to the camcorder WIND SCREEN will automatically be set to OFF D122_PAL_E book Page 59 Thursd...

Page 60: ... particular date select a scene recorded on that date FUNC 23 When the operation is completed ADDED TO PLAYLIST will be displayed To delete scenes from the playlist refer to Deleting Scenes 38 Moving Scenes in the Playlist POINTS TO CHECK From the original index screen press From the playlist index screen use the navigation buttons to select the scene to move FUNC 23 Managing Scenes and the Hard D...

Page 61: ...NC 23 Close the menu only after the screen display returns to the HDD OPERATIONS menu IMPORTANT Initializing the hard disk will permanently erase all recordings The lost original recordings cannot be recovered Make sure you back up important recordings in advance using an external device While initializing do not disconnect the power source or turn off the camcorder Do not use your computer to ini...

Page 62: ...e following precautions while the card access display appears on screen and when the CARD access indicator is on or flashing Failing to do so may result in permanent data loss Do not subject the camcorder to vibrations or strong impacts Do not remove the memory card Do not disconnect the power source or turn off the camcorder Do not change the position of the switch or the operating mode NOTES If ...

Page 63: ...images to a computer Try using a card reader Connection to a PictBridge compatible printer will not work when the memory card contains 1 800 images or more For best performance we recommend keeping the number of images on the memory card under 100 Default value 21 FUNC Icon of the currently selected Image Quality Size Desired image size Press FUNC Desired image quality Approximate number of still ...

Page 64: ...mages 2 Turn the switch to ON then turn it toward MODE and release it to set the camcorder in PLAY mode The green PLAY indicator will turn on 3 Press or to move between images Image Jump Function You can locate a specific image without having to browse all of them one by one Image Size Recommended Use L 2048x1536 To print photos up to A4 size M 1440x1080 To print photos up to L size 9 x 13 cm or p...

Page 65: ...ot change the position of the switch or the operating mode The following may not be displayed correctly Images not recorded with this camcorder Images edited on or uploaded from a computer Images whose file names have been changed Slideshow FUNC 23 1 Press 2 Press or to select SLIDESHOW and press You can also use the control dial 3 Press or to select START and press Images are played back one afte...

Page 66: ...ee enlarged To cancel the magnification press the W side of the zoom lever until the frame disappears Erasing Photos You can erase still images recorded on the memory card Erasing a Single Image 1 If the function guide does not appear on screen press to display it 2 Press to select 3 Press or to select ERASE and press Erasing All Images The following procedure will erase all the non protected stil...

Page 67: ...ory is attached to the advanced accessory shoe will appear on the screen NOTES The practical range of the built in flash is approx 1 to 2 m The practical range with the VFL 1 Video Flash Light attached is approx 1 to 4 m In any case the actual range will depend on the recording conditions The range of the flash decreases in continuous shooting mode For red eye reduction to be effective the subject...

Page 68: ...e built in mini video light set the switch on the VFL 1 to OFF first Continuous Shooting and Exposure Bracketing Drive Mode Take a series of pictures of a moving subject or record the same picture in 3 levels of exposure in order to choose later the picture you like the best POINTS TO CHECK Mode switch P except for the FIREWORKS recording program Options Default value PHOTO 21 SINGLE Records a sin...

Page 69: ...for the FIREWORKS recording program AEB Auto Exposure Bracketing The camcorder records a still image in three different exposures dark normal light in 1 2 EV steps allowing you to choose the shot you like the best FUNC Icon of the currently selected Drive Mode FUNC Desired option CONTINUOUS SHOOTING HIGH SPEED CONTINUOUS SHOOTING AUTO EXPOSURE BRACKETING PHOTO PHOTO PHOTO 21 ON AiAF Mode switch P ...

Page 70: ...mage The area to the right of the histogram represents highlights and the left side represents shadows A still image whose histogram skews to the right is FUNC MENU CAMERA SETUP FOCUS PRI FUNC Desired option 21 EVALUATIVE Appropriate for standard shooting conditions including backlit scenes The camcorder divides the picture into several areas and the light is measured in all of them to achieve the...

Page 71: ...l still appear on the screen Capturing a Still Image while Recording Movies You can record still images on the memory card even while the camcorder is set to mode You can also capture simultaneously as a still image on the memory card the same picture you are recording as a scene on the hard disk POINTS TO CHECK Select the size and quality of the still image in record pause mode Default value FUNC...

Page 72: ... changed but you can select the image quality Set TV TYPE to WIDE TV before using this function 47 FUNC 23 The number displayed at the bottom indicates the approximate number of images that can be recorded with the current quality setting 1 Start playback of the desired scene 2 Pause the playback at the point you want to capture 3 Press fully NOTES The data code of the still image will reflect the...

Page 73: ...ith this camcorder for the first time or to erase all the still images on them Options FUNC 23 Press to cancel the complete initialization while it is in progress All the image files will be erased and the memory card can be used without any problem IMPORTANT Initializing the memory card will erase all still images even the protected ones The original still images cannot be recovered FUNC PROTECT ...

Page 74: ...ion Diagram 85 appears and changes to The print share button lights up and the current print settings will be displayed for approx 6 seconds You can also use the following functions The following functions and features of the camcorder can be used either for shooting video or for taking photos The way to set and use them was already explained in detail so we refer you to the relevant page in the V...

Page 75: ...ply by pressing 1 Press or to select the still image you wish to print 2 Press Printing starts The button flashes and stays on when the printing is completed To continue printing press or to select another still image Selecting the Print Settings You can select the number of copies and other settings for printing The setting options vary depending on your printer model Options PAPER PAPER SIZE Ava...

Page 76: ...ettings paper size paper type and page layout Trimming settings 77 Date printing Print effect Number of copies Paper settings Printing Multiple Images on the Same Sheet 2 UP 4 UP etc When using Canon printers you can print the same still image multiple times on the same sheet of paper Use the following table as a guideline for the recommended number of copies depending on the PAPER SIZE setting 1 ...

Page 77: ...in set the camcorder to mode and restore the connection Disconnect the cable from the camcorder and printer and turn off the camcorder IMPORTANT The following still images may not be printed correctly with a PictBridge compatible printer Images created or changed on a computer and transferred to the memory card Images recorded with the camcorder but edited on a computer Images whose file names wer...

Page 78: ...B cable When you expand the trimming frame beyond its maximum size When you change the PAPER SIZE setting You may not be able to set the trimming settings for a still image not recorded with this camcorder Print Orders You can mark in advance the still images you want to print and set the desired number of copies as a print order Later you can easily print out the print orders by connecting the ca...

Page 79: ...ation buttons to select PRINT and press Printing starts The print settings menu disappears when the printing is completed NOTES You can also use the control dial to navigate the FUNC and setup menus Depending on the connected printer you can change some print settings before step 4 75 Cancel Printing Printing Errors 77 Restarting Printing Open the print settings menu as explained in steps 2 3 abov...

Page 80: ...nal The component video terminal is for video only When you use connection type do not forget the audio connections using the AV OUT terminal HDMI OUT Mini Terminal The HDMI OUT mini terminal offers a high quality digital connection that combines audio and video in a single convenient cable AV OUT Terminal Sound from the built in speaker will be muted while the STV 250N Stereo Video Cable is conne...

Page 81: ... Pr Cr Pb Cb Y 1 Output connection signal flow to an HDTV with component video input terminals Red Green Blue CTC 100 S Component Cable supplied White Red STV 250N Stereo Video Cable supplied 2 Output connection signal flow to an HDTV with an HDMI terminal HTC 100 HDMI Cable optional D122_PAL_E book Page 81 Thursday July 19 2007 6 54 PM ...

Page 82: ...HONES to AV when using connection type or Connecting Connect the camcorder to the TV following one of the connection diagrams shown in the previous section Connection Diagrams 81 Terminal on the Camcorder Connecting Cable Terminal on the Connected Device VIDEO AUDIO R L 3 Output connection signal flow to a TV or VCR with AV terminals STV 250N Stereo Video Cable supplied Yellow White Red 4 Output c...

Page 83: ...nnection type is a convenient all digital connection using a single cable for both video and audio When you connect the camcorder to an HDTV equipped with an HDMI terminal you can enjoy video and audio playback at the highest quality The HDMI OUT mini terminal on the camcorder is for output only Do not connect it to an HDMI output terminal on an external device as this may damage the camcorder The...

Page 84: ...ad a blank cassette or disc and set the device to record pause mode 2 This camcorder Locate the scene you wish to copy and pause playback shortly before the scene 3 This camcorder Resume the movie playback 4 Connected device Begin recording when the scene you wish to copy appears Stop recording when copying is complete 5 This camcorder Stop playback NOTES We recommend powering the camcorder using ...

Page 85: ...e USB cable to transfer images 1 Install the supplied Digital Video Software See Installing the Software in the Digital Video Software instruction manual electronic version on PDF file 2 Set the camcorder to mode 3 Connect the camcorder to the computer using the USB cable Refer to PC Connection Diagram 85 Connecting to a Computer USB Terminal Open the LCD panel to access Terminal on the Camcorder ...

Page 86: ...he software and the specifications settings of your computer If you wish to use the image files on your computer make copies of them first Use the copied files retaining the originals During the following operations even if you connect the camcorder to the computer it will not be recognized Erasing all still images from the card Erasing all transfer orders Erasing all print orders NOTES We recomme...

Page 87: ...want to transfer and press SELECT TRANSFER The selected image is transferred and displayed on the computer To continue transferring press or to select another image WALLPAPER The selected image is transferred to the computer and displayed as the desktop s background The button will flash while the images are being transferred Press to return to the transfer menu NOTES You can press to transfer the...

Page 88: ...ion screen appears 1 Press or to select the still image you want to mark with a transfer order 2 Press to set the transfer order A checkmark appears in the box next to the transfer order symbol Press again to cancel the transfer order 3 Repeat steps 1 2 to mark additional images with transfer orders or press twice to close the menu Erasing All Transfer Orders FUNC 23 21 FUNC TRANSFER ORDER Press F...

Page 89: ...ctly The charge indicator flashes rapidly one flash at 0 5 second intervals Charging has stopped because the compact power adapter or the battery pack is faulty Consult a Canon Service Center two quick flashes at 1 second intervals Battery pack at least 50 charged This is not a malfunction 19 Battery pack will not charge The CHG charge indicator flashes very slowly about once every 2 seconds Charg...

Page 90: ...nction Occasionally the operation sound can be heard The hard disk is activated from time to time This is not a malfunction After using the camcorder for a long time it becomes hot lights up in red This is not a malfunction Turn the camcorder off and let it cool for a while before resuming operation The following operations take longer than usual Deleting scenes Changing between and modes Pausing ...

Page 91: ...recording near loud sounds or strong vibrations move to another location The camcorder has exceeded its operational temperature appears Turn off the camcorder and let it cool down before resuming use Camcorder will not focus Autofocus does not work on the subject Focus manually 53 Adjust the viewfinder with the dioptric adjustment lever 30 Lens or Instant AF sensor is dirty Clean the lens or senso...

Page 92: ...but there is no picture or sound from the HDTV Disconnect the HTC 100 HDMI Cable and then restore the connection or turn the camcorder off and then on again Problem Solution Memory card cannot be inserted Memory card was not facing the correct direction Turn the memory card over and insert it 27 Cannot record on the memory card Memory card is full Erase still images to free some space or replace t...

Page 93: ...he remaining battery charge is too low 32 TEMPERATURE TOO HIGH TURN OFF THE POWER AND WAIT The camcorder has exceeded its operational temperature Disconnect the compact power adapter and remove the battery pack Let the camcorder cool down before resuming use TEMPERATURE TOO LOW KEEP POWER ON AND WAIT The camcorder s temperature is too low Keep the power on until the icon disappears TEMPERATURE TOO...

Page 94: ...has formed Wait until the camcorder dries completely before resuming use 101 HARD DISK FULL The hard disk is full END appears on the screen Delete some recordings to free some space 38 TASK IN PROGRESS DO NOT DISCONNECT THE POWER SOURCE The camcorder is updating the hard disk Do not disconnect the compact power adapter or remove the battery pack DROP SENSOR IS TURNED OFF The camcorder was turned o...

Page 95: ...CABLE Disconnect the USB cable and decrease the number of still images on the memory card to fewer than 1 800 If a dialog appeared on the computer screen close it and then reconnect the USB cable WHILE THE CAMCORDER IS CONNECTED TO A PC DO NOT DISCONNECT THE USB CABLE OR POWER SOURCE CANNOT TURN OFF POWER OR CHANGE MODES When the camcorder is in mode and is connected to the computer with a USB cab...

Page 96: ...still persists refer to the printer s instruction manual and contact the appropriate customer support center or service center PRINT ERROR Cancel printing disconnect the USB cable and turn off the printer After a while turn the printer back on and reconnect the USB cable Check the printer status When you are printing using the button check the print settings HARDWARE ERROR Cancel printing Turn off...

Page 97: ...mcorder be dropped or subject to a similar condition a mechanism designed to help prevent hard disk damage will activate and recording playback may stop or the camcorder may turn off Deactivating this function 44 can increase the likelihood of hard disk damage should the camcorder be subject to such conditions Even if this function is set to ON hard disk damage can occur if the camcorder is droppe...

Page 98: ...e Do not subject the camcorder to shocks or vibration as this may cause damage Battery Pack Charged battery packs continue to discharge naturally Therefore charge them on the day of use or the day before to ensure a full charge Attach the terminal cover whenever a battery pack is not in use Contact with metallic objects may cause a short circuit and damage the battery pack Dirty terminals may caus...

Page 99: ...ect to strong magnetic fields Do not leave memory cards in places subject to high humidity and high temperature Do not disassemble bend drop or subject memory cards to shocks and do not expose them to water Do not touch or expose the terminals to dust or dirt Check the direction before inserting the memory card Forcing a memory card into the slot if it is not correctly oriented may damage the memo...

Page 100: ...for 24 hours with the switch set to Storage If you do not intend to use the camcorder for a long time store it in a place free of dust in low humidity and at temperatures not higher than 30 C Cleaning Camcorder Body Use a soft dry cloth to clean the camcorder body Never use chemically treated cloths or volatile solvents such as paint thinner Lens Viewfinder and Instant AF Sensor If the lens surfac...

Page 101: ...room When the camcorder is left in a humid room When a cold room is heated rapidly Do not expose the camcorder to sudden or extreme changes in temperature Place the camcorder in an airtight plastic bag and let it adjust to temperature changes slowly before removing it from the bag The camcorder automatically shuts off The precise time required for water droplets to evaporate will vary depending on...

Page 102: ...tion point e g on an authorized one for one basis when you buy a new similar product or to an authorized collection site for recycling waste electrical and electronic equipment EEE Improper handling of this type of waste could have a possible negative impact on the environment and human health due to potentially hazardous substances that are generally associated with EEE At the same time your coop...

Page 103: ...H Battery Pack Computer VCR DVD recorder WL D86 Wireless Controller miniSD card adapter Card reader writer PictBridge compatible printers IFC 400PCU USB Cable Compatible DVD devices DVD disc TV HDTV WD H43 Wide converter TL H43 Tele converter FS 43U II Filter Set DTC 100 D Terminal Cable CTC 100 Component Cable HTC 100 HDMI Cable VFL 1 Video Flash Light VL 3 Video Light DM 50 Directional Stereo Mi...

Page 104: ... cold surroundings when using the brighter screen settings etc Optional Accessories Use of genuine Canon accessories is recommended This product is designed to achieve excellent performance when used with genuine Canon accessories Canon shall not be liable for any damage to this product and or accidents such as fire etc caused by the malfunction of non genuine Canon accessories e g a leakage and o...

Page 105: ...cord with flash or assist lamp Battery Pack NB 2LH BP 2L13 BP 2L14 BP 2L24H Screen Used Viewfinder LCD Viewfinder LCD Viewfinder LCD Viewfinder LCD Maximum Recording Time HXP 65 min 65 min 110 min 105 min 135 min 125 min 235 min 225 min XP 65 min 65 min 115 min 110 min 140 min 135 min 240 min 235 min LP 65 min 65 min 115 min 110 min 140 min 135 min 245 min 235 min SP 65 min 65 min 115 min 110 min ...

Page 106: ...ble sends both video and audio signals VFL 1 Video Flash Light This video flash light allows you to record still images and movies even at night or in dark places It attaches to the camcorder s advanced accessory shoe for cable free operation VL 3 Video Light This video light enables you to record brightly in color even in dark places It attaches to the camcorder s advanced accessory shoe for cabl...

Page 107: ... this for extra additional protection for active shooting SC 2000 Soft Carrying Case A handy camcorder bag with padded compartments and plenty of space for accessories This mark identifies genuine Canon video accessories When you use Canon video equipment we recommend Canon brand accessories or products bearing the same mark D122_PAL_E book Page 107 Thursday July 19 2007 6 54 PM ...

Page 108: ...te balance custom white balance and preset white balance settings DAYLIGHT SHADE CLOUDY TUNGSTEN FLUORESCENT FLUORESCENT H Minimum Illumination 0 2 lx NIGHT recording program Shutter speed at 1 2 2 5 lx AUTO mode Auto slow shutter ON Shutter speed at 1 25 Recommended Illumination More than 100 lx Image Stabilization Optical Shift Image Stabilizer 1 Recordings made with the PF25 frame rate are conv...

Page 109: ...Terminal 3 5 mm stereo minijack 57 dBV with 600 ohm microphone 5 kohms or more Power Others Power supply rated 7 4 V DC battery pack 8 4 V DC compact power adapter Power consumption SP mode AF on 4 4 W viewfinder normal brightness 4 6 W LCD screen normal brightness Operating temperature 0 40 C Dimensions W x H x D 81 x 75 x 129 mm excluding the grip belt Weight camcorder body only 505 g Power supp...

Page 110: ...Mode recording program 48 Compact power adapter 18 COMPONENT OUT terminal 81 Component video 81 Condensation 101 Connections to a computer 85 to a High Definition TV HDTV 81 to a TV VCR 80 Continuous shooting 68 Control dial 22 D Data code 39 Date and time 24 Date format 48 Daylight saving time 25 Time zone 25 Deleting Erasing Movies 33 38 Still images 64 66 Digital effects 57 Direct print 74 Dire...

Page 111: ... 34 Still images 64 Playlist 60 Portrait recording program 50 Power save 46 Print order 78 Print share button 75 86 Printing still images 74 Protecting still images 72 Q Quick Start function 32 R Recording Movies 29 Still images 62 Recording data 39 Recording mode 40 Recording programs 51 Recording reminder 17 Remote sensor 20 RESET 90 Reviewing Movies Record review 33 Still images Review 43 S Scr...

Page 112: ...d the double D symbol are trademarks of Dolby Laboratories AVCHD and the AVCHD logo are trademarks of Matsushita Electric Industrial Co Ltd and Sony Corporation HDMI the HDMI logo and High Definition Multimedia Interface are trademarks or registered trademarks of HDMI Licensing LLC Corel the Corel logo Ulead the Ulead logo Ulead DVD MovieFactory InterVideo the InterVideo logo WinDVD are trademarks...

Page 113: ...lephone 0870 241 2161 Canon Australia Pty Ltd Info Line 131383 www canon com au Canon New Zealand Ltd Customer Care 09 489 0470 www canon co nz Canon Singapore Pte Ltd 1 HarbourFront Avenue 04 01 Keppel Bay Tower Singapore 098632 Tel 65 6799 8888 Fax 65 6799 8882 Canon Hongkong Company Ltd 19 F The Metropolis Tower 10 Metropolis Drive Hunghom Kowloon Hong Kong Canon Latin America Inc Sales Enquiri...

Reviews: