

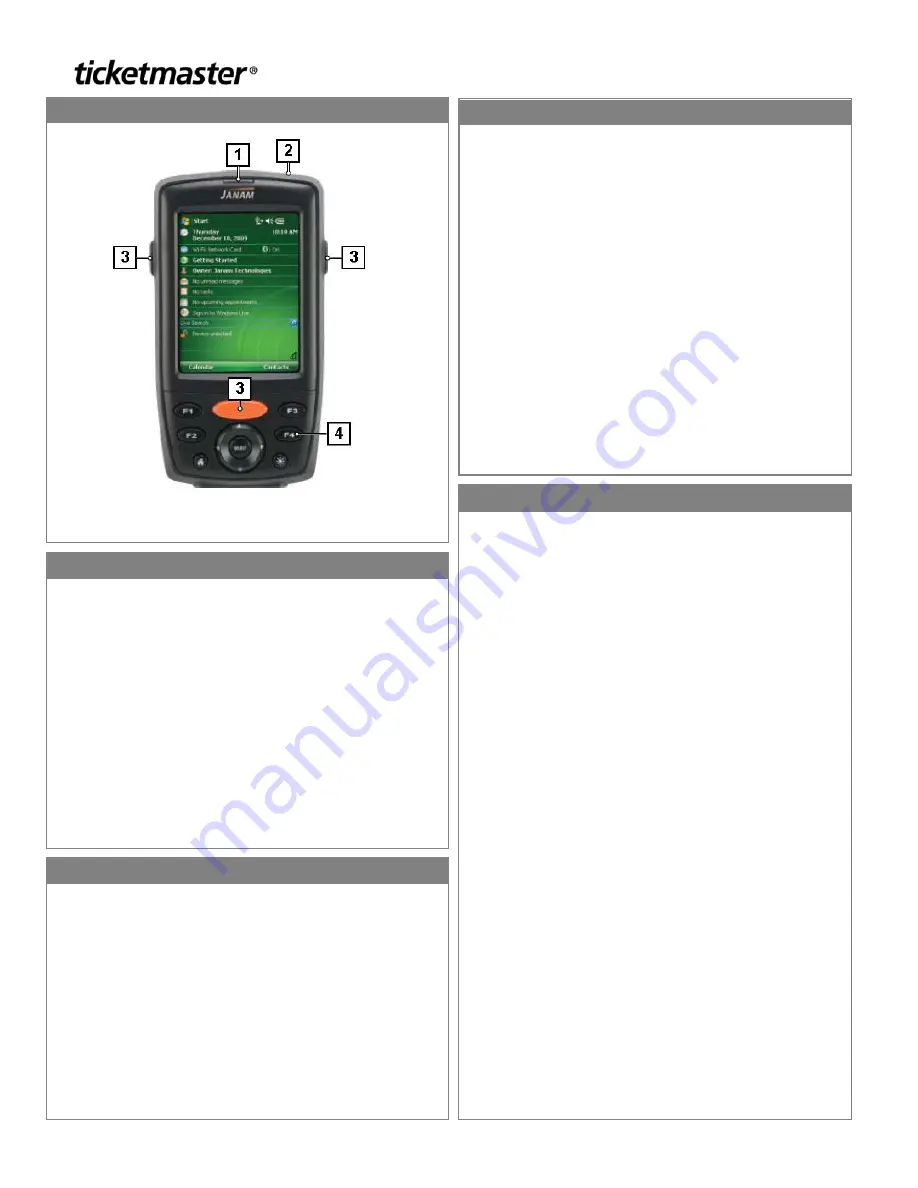
1
- LED Indicator
3
- Scan Button
2
- Power Button
4
- F4 Button
Janam XM66 Quick Start Guide
Soft Reset for Scanners using WMx 3.2.1 or higher
Soft reset the scanner by pressing the
F4
and
Power
button simultaneously, then release.
-or-
Remove the battery cover and momentarily press the
Reset
button using the scanners stylus pen. The stylus pen fits
perfectly in the
Circular Reset
hole located directly
underneath the battery cover.
Soft Reset for Scanners using WMx 3.2 or lower
Soft reset the scanner by pressing the
Reset
button located
underneath the battery cover as described above.
Resetting the Scanner
XM66 Scanner
Powering ON the Scanner
1. Momentarily press the
Power
button.
2. If the
Power
button appears to be unresponsive, press
the
Power
button again for [
2
] seconds and then
release.
3. If the
Power
button is still unresponsive after the 3
rd
attempt, remove the battery cover and perform a
manual soft reset.
Powering OFF the Scanner
Momentarily press the
Power
button located at the top of
the scanner. The scanner has a momentary delay to shut
down various Windows components and backlighting.
NOTE:
The Power button can appear unresponsive when it
is accidentally pressed by the user, who immediately
presses the Power button to turn the scanner back on,
because the scanner appears to have powered off. This is
due to a five second delay the scanner has for shutting
down the Windows components.
Powering ON and OFF the Scanner
Charging the Scanner
When transporting scanners to their assigned
scanning locations ensure that all scanners are
powered off. This helps minimize roaming and
potentially the time it take for the scanner to connect
to the appropriate access point.
Power on the scanner(s) once they have arrived at
their scanning location.
Do not remove the scanners from their assigned
scanning locations.
Transporting Scanners
1. Power the scanner off and place it into the charging
cradle.
2. Check the LED Indicator to determine the charging
state of the scanner as follows:
Orange
- The scanner is charging.
Green
- If the LED immediately turns green, the
scanner is already fully charged.
Red -
If the LED immediately turns red the battery is
completely discharged. Watch to ensure the LED
changes from red to orange and then to green. If the
LED remains red contact your local Client Services
representative to determine if the battery needs
replaced.
LED Indicator not illuminating any colors
- Check
the following:
The battery is properly inserted in the scanner.
The scanner is properly seated in the charging
cradle.
The charging cradle power adapter is properly
connected to each receiving end.
The AC cord is properly connected to each
receiving end.
The AC cord is plugged into a working AC outlet.
NOTE:
If all of the above are true when determining
why the LED Indicator is not illuminating any colors,
contact your Client Services representative to
determine if the scanner, charging cradle or power
adapter need replacing.
Before removing the scanner or battery from the charging
cradle ensure that the previously orange LED in front of the
scanner or on the rear of the cradle is now illumiated green.
This ensures that the scanner has a fully charged battery.
© 2012 Ticketmaster, L.L.C. All rights reserved.


