Hughes AN9-074-G, Installation Manual
The Hughes AN9-074-G is an advanced electronic device designed to enhance your home automation system. Ensure a hassle-free installation process with the comprehensive Installation Manual available for free download from our website. This user-friendly manual provides step-by-step instructions to swiftly set up and maximize your experience with the Hughes AN9-074-G.
Share
Download


Reviews:
No comments
Related manuals for AN9-074-G

CHA MPAS 2.0
Brand: Chameleon Antenna Pages: 25
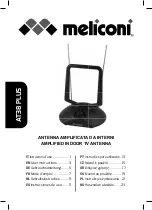
AT38 PLUS
Brand: MELICONI Pages: 28

PowerBeam M5 PBE-M5-620
Brand: Ubiquiti Pages: 28

GXM 30
Brand: Garmin Pages: 48

StreetPilot 2820
Brand: Garmin Pages: 68

18410
Brand: Trust Pages: 49

SensarPro
Brand: Winegard Pages: 2

MIRA BOSS
Brand: Televes Pages: 2

GOL148REA
Brand: Entrematic Pages: 2

94608-1
Brand: Eaton Pages: 24

airGrid M5 AGM5-HP-1724
Brand: Ubiquiti Pages: 20

MA114 Series
Brand: Taoglas Pages: 2
MagnoTRACKER Series
Brand: Aaronia Pages: 11

PowerBeam M PBE-M2-400
Brand: Ubiquiti Pages: 15

50LFA5
Brand: EAntenna Pages: 17

121703
Brand: Hama Pages: 38

BZD 30
Brand: Kathrein Pages: 12

K 51 56 22 /BN 510 386
Brand: Kathrein Pages: 3


