background image

120 Braley Rd. P.O. Box 429                                            East Freetown, MA 02717-0429                                          www.htproducts.com 


                                                                                     LP- 293 REV. 9.2.14 

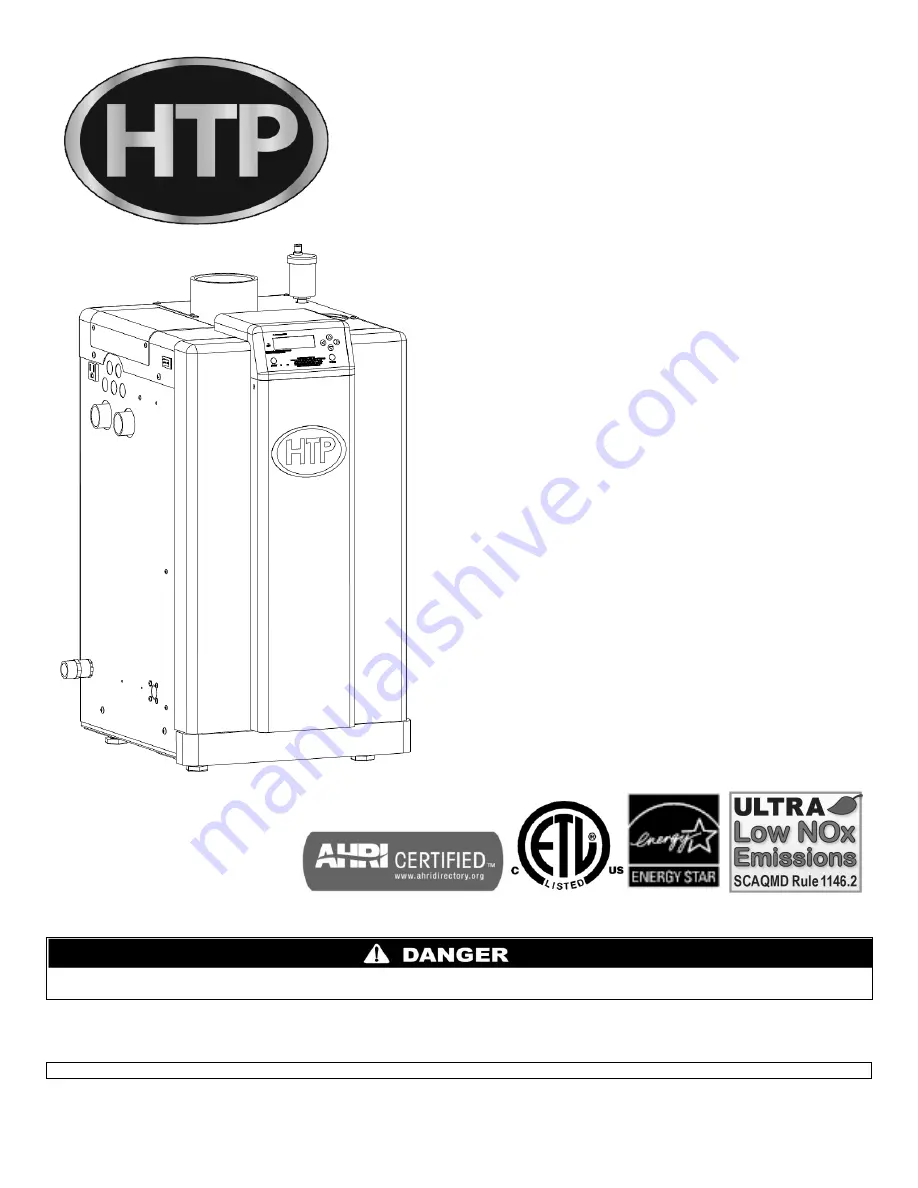
Elite


INSTALLATION 


START-UP 


MAINTENANCE 


PARTS 


Models* 

EL-80 / 110 / 150 / 220 / 299 / 301 / 399 


*A suffix of “LP” denotes propane gas 

*A suffix of “N” denotes natural gas 


Heat Exchanger Bears the ASME “H” Stamp 


NOTICE:

 HTP reserves the right to make product changes or updates without notice and will not be held liable for typographical errors 

in literature. 
 

NOTE TO CONSUMER: PLEASE KEEP ALL INSTRUCTIONS FOR FUTURE REFERENCE. 


This manual must only be used by a qualified heating installer/service technician. Read all instructions in this manual before installing. 
Perform steps in the order given. Failure to comply could result in substantial property damage, severe personal injury, or death. 

Summary of Contents for EL-110

Page 1: ...mp NOTICE HTP reserves the right to make product changes or updates without notice and will not be held liable for typographical errors in literature NOTE TO CONSUMER PLEASE KEEP ALL INSTRUCTIONS FOR FUTURE REFERENCE This manual must only be used by a qualified heating installer service technician Read all instructions in this manual before installing Perform steps in the order given Failure to co...

Page 2: ...CINITY OF THIS OR ANY OTHER APPLIANCE WHAT TO DO IF YOU SMELL GAS Do not try to light any appliance Do not touch any electrical switch Do not use any phone in your building Immediately call your gas supplier from a neighbor s phone Follow the gas supplier s instructions If you cannot reach your gas supplier call the fire department Installation and service must be provided by a qualified installer...

Page 3: ...nt or health department building official or electrical inspector or others having statutory authority In some circumstances the property owner or his her agent assumes the role and at government installations the commanding officer or departmental official may be the AHJ NOTE HTP Inc reserves the right to modify product technical specifications and components without prior notice FOR THE INSTALLE...

Page 4: ...ature that saves energy by reducing the boiler water temperature as the heating load decreases This feature is equipped with an override which is provided primarily to permit the use of an external energy management system that serves the same function THIS OVERRIDE MUST NOT BE USED UNLESS AT LEAST ONE OF THE FOLLOWING CONDITIONS IS TRUE An external energy management system is installed that reduc...

Page 5: ...ON AIR CONTAMINATION 15 G REMOVING A BOILER FROM A COMMON VENT SYSTEM 16 H UNCRATING THE BOILER 17 PART 4 BOILER PIPING 17 A GENERAL PIPING INFORMATION 17 B RELIEF VALVE 17 C BACKFLOW PREVENTER 18 D SYSTEM WATER PIPING METHODS 18 E CIRCULATORS 19 F HYDRONIC PIPING WITH CIRCULATORS ZONE VALVES AND MULTIPLE BOILERS 19 G PIPING DETAILS 19 H PIPING INSTALLATION 24 I CIRCULATOR SIZING 24 J CHECK CONTRO...

Page 6: ...LER 46 E ALARM CONNECTIONS 47 F LOW VOLTAGE CONNECTIONS FOR STANDARD BOILER 47 G THERMOSTAT 47 H OUTDOOR SENSOR 47 I INDIRECT SENSOR 48 J OPTIONAL 0 10 VOLT BUILDING CONTROL SIGNAL 48 K OPTIONAL UL353 LOW WATER CUT OFF INTERFACE KIT 48 L WIRING OF CASCADE SYSTEM COMMUNICATION BUS 48 M CASCADE MASTER PUMP AND SENSOR WIRING 50 N CASCADE FOLLOWER PUMP AND SENSOR WIRING 50 PART 8 START UP PREPARATION ...

Page 7: ...connections Front must have room for service 24 recommended A combustible door or removable panel is acceptable front clearance This appliance has been approved for closet installation Do not install this appliance directly on carpeting For installation on combustible flooring Category IV vent systems only INSTALLER Read all instructions in this manual before installing Perform steps in the order ...

Page 8: ...ctrical supply before performing maintenance To avoid severe burns allow boiler to cool E BOILER WATER If you have an old system with cast iron radiators thoroughly flush the system without boiler connected to remove sediment The high efficiency heat exchanger can be damaged by build up or corrosion due to sediment HTP recommends a suction strainer in this type of system Do not use petroleum based...

Page 9: ... covered by warranty PART 2 BEFORE YOU START A WHAT S IN THE BOX Also included with the boiler Temperature and Pressure Gauge Part 7250P 211 Pressure Relief Valve Part 7250P 080 Indirect Sensor Outdoor Sensor Intake PVC Tee with Screens Exhaust PVC Coupling with Screens Outlet Combination Fitting 1 Part 7450P 134 for EL80 110 150 220 1 25 7450 135 for EL299 301 1 5 7450 136 for EL399 Installation ...

Page 10: ...ure and Pressure Gauge Allows the user to monitor system temperature and pressure Electrical field connections with terminal strips The electrical cover allows easy access to the line voltage and low voltage terminals strips which are clearly marked to facilitate wiring of the boiler Condensation Collection System This boiler is a high efficiency appliance therefore the boiler will produce condens...

Page 11: ...sure ambient temperatures are higher than 32 o F 0 o C and lower than 104 o F 40 o C Prevent the air from becoming contaminated by the products places and conditions listed in this manual Part 3 Section F Avoid continuously high levels of humidity Never close existing ventilation openings The service life of the boiler s exposed metallic surfaces such as the casing as well as internal surfaces suc...

Page 12: ...as conversion instructions when performing the conversion Failure to do so could result in property damage severe personal injury or death B LEVELING AND DIMENSIONS C CLEARANCES FOR SERVICE ACCESS See Figure 2 for recommended service clearances If these minimum clearances are not provided it may not be possible to service the boiler without removing it from the space MINIMUM CLEARANCES FROM COMBUS...

Page 13: ...13 LP 293 REV 9 2 14 Figure 3 LP 285 B ...

Page 14: ...ler so it cannot be damaged by a moving vehicle E EXHAUST VENT AND INTAKE PIPE The appliance is rated ANSI Z21 13 Category IV pressurized vent likely to form condensate in the vent and requires a special vent system designed for pressurized venting NOTE The venting options described here and further detailed in the Venting section of this manual are the lone venting options approved for this appli...

Page 15: ...ce is installed in areas where indoor air is contaminated see Table 1 it is imperative that the appliance be installed as direct vent so that all combustion air is taken directly from the outdoors into the appliance intake connection Unconfined space is space with volume greater than 50 cubic feet per 1 000 Btu hour 4 8 cubic meters per kW of the total input rating of all fuel burning appliances i...

Page 16: ...injury or death Failure to follow all instructions can result in flue gas spillage and carbon monoxide emissions causing severe personal injury or death When removing an existing boiler the following steps must be followed 1 Seal any unused openings in the common venting system 2 Visually inspect the venting system for proper size and horizontal pitch to determine if there is blockage leakage corr...

Page 17: ...roduct should only be done by a qualified licensed plumber in accordance with all local plumbing codes The boiler may be connected to an indirect water heater to supply domestic hot water HTP offers indirect water heaters in a wide range of gallon sizes in either stainless steel or glass lined construction A GENERAL PIPING INFORMATION The building piping system must meet or exceed the piping requi...

Page 18: ...calding injury or property damage For boilers installed with only a pressure relief valve the separate storage vessel must have a temperature and pressure relief valve installed This relief valve shall comply with Relief Valves for Hot Water Supply Systems ANSI Z21 22 CSA4 4 FAILURE TO COMPLY WITH THE ABOVE GUIDELINES COULD RESULT IN FAILURE OF RELIEF VALVE OPERATION RESULTING IN POSSIBILITY OF SU...

Page 19: ...oiler It is important to note that the boiler has a minimal amount of pressure drop that must be calculated when sizing the circulators Unless the system has a closed type expansion tank each boiler installation must have an air elimination device that will remove air from the system Install the boiler so the gas ignition system components are protected from water dripping spraying etc Allow clear...

Page 20: ... concept only 2 A mixing valve is recommended if the DHW temperature is set above 119 o F 3 Install a minimum of 12 diameters of straight pipe upstream of all circulators 4 Piping shown is Primary Secondary 5 System flow secondary loop should be greater than the boiler primary loop flow In all cases the boiler primary loop flow rate must be maintained above the minimum flow rates published in this...

Page 21: ...l circulators 4 Piping shown is Primary Secondary 5 System flow secondary loop should be greater than the boiler primary loop flow In all cases the boiler primary loop flow rate must be maintained above the minimum flow rates published in this manual 6 Installations must comply with all local codes 7 In Massachusetts a vacuum relief valve must be installed in the cold water line per 248 CMR 8 Refe...

Page 22: ...eters of straight pipe upstream of all circulators 3 Piping shown is Primary Secondary 4 System flow secondary loop should be greater than the boiler primary loop flow In all cases the boiler primary loop flow rate must be maintained above the minimum flow rates published in this manual 5 Installations must comply with all local codes ...

Page 23: ...eters of straight pipe upstream of all circulators 3 Piping shown is Primary Secondary 4 System flow secondary loop should be greater than the boiler primary loop flow In all cases the boiler primary loop flow rate must be maintained above the minimum flow rates published in this manual 5 Installations must comply with all local codes ...

Page 24: ...on Size the expansion tank for the required system volume and capacity 8 Install an air elimination device on the system supply 9 Install a drain valve at the lowest point of the system NOTE The boiler cannot be drained completely of water without purging the unit with an air pressure of 15 psi 10 The relief valve and temperature and pressure gauge are included in the boiler accessory kit A pipe d...

Page 25: ...gure 10 MULTIPLE BOILER MANIFOLD PIPING Flow Rate GPM 120 132 150 160 170 179 200 210 239 240 250 255 300 340 350 400 425 510 595 680 Pipe Dia In 4 4 4 4 4 4 4 4 5 5 5 5 5 5 5 5 5 6 6 6 Table 7 0 1 2 3 4 5 6 0 50 100 150 200 250 Pipe Diameter Size Inches Combined Boiler Water Flow GPM Multiple Boiler Manifold Piping Flow Rate 23 GPM 24 GPM 25 GPM 26 GPM 27 GPM 28 GPM 29 GPM 30 GPM 31 GPM 32 GPM 33...

Page 26: ...d install them to properly clean the system 3 Flush system until water runs clean and you are sure piping is free of sediment NOTE It is recommended you clean heat exchanger at least once a year to prevent lime scale buildup Follow the maintenance procedure to clean the heat exchanger in the Maintenance Section Part 12 of this manual Test replace freeze protection fluid 1 For systems using freeze ...

Page 27: ...s You must also assure the purge and shut off valves are in open positions L GLYCOL ANTIFREEZE SOLUTIONS Use only inhibited propylene glycol solutions which are specially formulated for hydronic systems Ethylene glycol is toxic and can attack gaskets and seals used in hydronic systems Glycol mixtures should not exceed 50 Glycol in hydronic applications should include inhibitors that prevent the gl...

Page 28: ...ed directly outdoors using the vent materials and rules outlined in these instructions Do not connect vent connectors serving appliances vented by natural draft into any portion of mechanical draft systems operating under positive pressure Follow the venting instructions below carefully Failure to do so will result in substantial property damage severe personal injury or death 1 Installation shoul...

Page 29: ... vent piping install a PVC to stainless adapter at the boiler vent connection and at the termination when using an HTP PVC termination kit DO NOT mix AL 29 4C piping from different manufacturers unless using adapters specifically designed for the purpose by the manufacturer PVC DWV for air intake applications ONLY Failure to follow these directions will result in substantial property damage severe...

Page 30: ...nce from the outside corner of vertical walls chimneys etc as well as horizontal corners created by roof overhangs G Provide 6 feet clearance from the inside corner of vertical walls chimneys etc as well as horizontal corners created by roof overhangs H Provide 4 feet clearance from center line within a height of 15 feet above electrical meters gas meters gas regulators relief equipment exhaust fa...

Page 31: ...s and alarms shall comply with NFPA 720 latest edition Failure to comply with requirements for detectors and alarms could result in property damage severe personal injury or death DETERMINE LOCATION OF CONDENSATE PIPING This boiler is a high efficiency appliance and therefore produces condensate a by product of the combustion process A condensate collection system with an internal float switch mon...

Page 32: ... in the drain line 2 Plastic pipe should be the only material used for the condensate line Steel brass copper or other materials will be subject to corrosion or deterioration 3 NEVER install condensate lines outside It is very important that the condensate line is not exposed to freezing temperatures or any type of blockage Damages due to frozen or blocked condensate lines ARE NOT covered by warra...

Page 33: ...equivalent length of friction loss in elbows tees and other fittings are listed in Table 10 FRICTION LOSS EQUIVALENT FOR STAINLESS OR PLASTIC PIPING AND FITTINGS FITTING DESCRIPTION 2 3 4 6 90 o elbow short radius 5 5 5 3 90 o elbow long radius 4 4 4 3 45 o elbow 3 3 3 2 Coupling 0 0 0 0 Tee intake only 0 0 0 0 V Series Vent Kit 1 1 1 1 AL20 4C Vent Terminal 1 1 1 1 Pipe All Materials 1 1 1 1 Tabl...

Page 34: ...ENE PIPE 4 Ensure the vent is located where it will not be exposed to prevailing winds 5 In all roof venting applications exhaust discharge must point away from the pitch of the roof 6 To prevent water leakage install adequate roof flashing where the pipe enters the roof 7 Do not locate vent over public walkways driveways or parking lots Condensate could drip and freeze resulting in a slip hazard ...

Page 35: ...ion The exhaust vent and intake piping lengths routing and termination methods must all comply with the methods and limits given in the Venting section of this manual When installing a combustion air intake from outdoors care must be taken to utilize uncontaminated combustion air NOTE To prevent combustion air contamination see Table 1 Take extra precaution to adequately support the weight of vent...

Page 36: ...by local codes All vent pipes must be glued properly supported and the exhaust must be pitched a minimum of per foot back to the heater to allow drainage of condensate When placing support brackets on vent piping the first bracket must be within 1 foot of the water heater and the balance at 4 foot intervals on the vent pipe Heater venting must be readily accessible for visual inspection for the fi...

Page 37: ... the exhaust must be pitched a minimum of per foot back to the boiler to allow drainage of condensate When placing support brackets on vent piping the first bracket must be within 1 foot of the boiler and the balance at 4 foot intervals on the vent pipe Boiler venting must be readily accessible for visual inspection for the first three feet from the boiler ...

Page 38: ...mum of per foot back to the boiler to allow drainage of condensate When placing support brackets on vent piping the first bracket must be within 1 foot of the boiler and the balance at 4 foot intervals on the vent pipe Boiler venting must be readily accessible for visual inspection for the first three feet from the boiler An unbalanced vent system can be installed ONLY when the exhaust is in a ver...

Page 39: ...e glued properly supported and the exhaust must be pitched a minimum of per foot back to the boiler to allow drainage of condensate When placing support brackets on vent piping the first bracket must be within 1 foot of the boiler and the balance at 4 foot intervals on the vent pipe Boiler venting must be readily accessible for visual inspection for the first three feet from the boiler 2 VENTING T...

Page 40: ...entric vent kits Refer to Concentric Vent Kit installation manual LP 166 for further information on venting with the optional concentric vent kits Concentric venting through an existing system must run vertically through the roof See Table 13 for proper minimum vent sizing Use only the approved venting materials specified in Table 9 for piping the system All instructions listed in the Venting sect...

Page 41: ... meters per kW of the total input rating of all fuel burning appliances installed in that space Rooms connected directly to this space through openings not furnished with doors are considered part of the space Confined space is space with volume less than 50 cubic feet per 1 000 Btu hour 4 8 cubic meters per kW of the total input rating of all fuel burning appliances installed in that space Rooms ...

Page 42: ...42 LP 293 REV 9 2 14 Figure 21 1 21 2 NOTE These drawings are meant to demonstrate system venting only The installer is responsible for all equipment and detailing required by local codes ...

Page 43: ... 80 110 150 and 1 for the EL 220 299 301 399 It is mandatory that this fitting is used for connection to a field fabricated drip leg as shown in the illustration above per the National Fuel Gas Code You must ensure that the entire gas line to the connection at the boiler is no smaller than the unit supplied connection Once all inspections have been performed the piping must be leak tested If the l...

Page 44: ... measure incoming pressure from 0 35 w c See Figure 24 4 Turn on the gas and power up the unit 5 Put the unit into manual test mode details on test mode are in Part 10 Section D In service mode monitor pressure to assure it does not drop below 1 inch from its idle reading If gas pressure is out of range or pressure drop is excessive contact the gas utility gas supplier qualified installer or servi...

Page 45: ...ator is as least 6 10 feet upstream of the appliance Failure to do so could result in substantial property damage severe personal injury or death D BOILER GAS VALVE Figure 24 LP 293 V Do not do a gas conversion on this boiler without an officially approved conversion kit and instructions supplied by HTP Failure to use a conversion kit when converting the boiler to fire on Natural or LP gas will re...

Page 46: ...r boiler As a standard unit each pump can provide a maximum of 3 amps at 120 volts If a pump requires more than this amount of power an external contactor or motor starter is needed If the boiler is configured as a cascade master the system pump output is a dry contact output capable of switching 5 amps at 120 volts in addition to the boiler pump output sourcing 4 amps each The electrical junction...

Page 47: ...t closure across these terminals will cause the boiler to run Take caution to ensure neither of the terminals becomes connected to ground 2 Mount the thermostat on an inside wall as central as possible to the area being heated but away from drafts or heat producing devices such as television sets that could influence the ability of the thermostat to measure room temperature 3 If the thermostat is ...

Page 48: ...ol interprets the 0 10 volt signal as follows when the signal is between 0 and 1 5 volts the boiler will be in standby mode not firing When the signal rises above 1 5 volts the boiler will ignite As the signal continues to rise towards its maximum of 10 volts the boiler will increase in set point temperature See Part 10 for details on the setting of function 16 2 Connect a building management syst...

Page 49: ...200 feet 4 Route the communication cables through one of the knockouts in the cabinet 5 Connect the boilers in a daisy chain configuration as shown below It is best to wire the boilers using the shortest wire runs rather than trying to wire them in the order that they are addressed The communication bus jacks on the customer connection panel are interchangeable so you can use either one or both in...

Page 50: ...losed alarm contact may be used to turn a device off if the boiler goes into lockout mode The alarm contacts are rated 5 amps at 120 VAC To connect an alarm device connect the power for the device to the ALARM COM terminal Connect the alarm device hot wire to the ALARM NO terminal Connect the neutral or return of the alarm device to the neutral or return of the power for the alarm device To connec...

Page 51: ...51 LP 293 REV 9 2 14 Figure 29 Cascade Master and Follower ...

Page 52: ...52 LP 293 REV 9 2 14 Figure 30 ...

Page 53: ...53 LP 293 REV 9 2 14 Figure 31 ...

Page 54: ...54 LP 293 REV 9 2 14 Figure 32 ...

Page 55: ... 6 0 and 8 0 Check with litmus paper or have chemically analyzed by water treatment company 2 If pH differs from above consult local water treatment company for treatment needed Hardness less than 7 grains Consult local water treatment companies for unusually hard water areas above 7 grains hardness Chlorine concentration less than 100 ppm 1 Filling with chlorinated fresh water should be acceptabl...

Page 56: ... codes may require back flow preventer or actual disconnect from city water supply 3 When using freeze protection fluid with automatic fill install a water meter to monitor water makeup Freeze protection fluid may leak before the water begins to leak causing concentration to drop reducing the freeze protection level D FILL AND TEST WATER SYSTEM Ensure the boiler is full of water before firing the ...

Page 57: ...normal operation i After the system has operated for five minutes eliminate any residual air by using the manual air vents located throughout the system j If purge valves are not installed in the system open manual air vents in the system one at a time beginning with the lowest floor Close vent when water squirts out Repeat with remaining vents k Refill to correct pressure F CHECK THERMOSTAT CIRCU...

Page 58: ...er Boiler s address as 0 NOTE The Master Boiler MUST be addressed as 0 e Change cascade mode function 23 to 926 Boiler This makes it a Master Boiler f Exit the installer menu NOTE In order for the system to operate properly the temperature set point of the master must match the follower boiler set point NOTE READ THE NOTES BELOW BEFORE PROGRAMMING FOLLOWER BOILERS The boiler addressed as 1 will sh...

Page 59: ...r any evidence of a gas leak shut down the boiler at once Find the leak source with a bubble test and repair immediately Do not start the boiler again until the leak is repaired Failure to comply could result in substantial property damage severe personal injury or death A CONTROL OVERVIEW The control is one of the primary safety devices of the boiler It monitors the safety sensors of the boiler t...

Page 60: ...ettings 4 Next check the system settings Adjustments and factory defaults are outlined within this section If a cascade system is used it is important that the Master Boiler is programmed with the correct system settings 5 Create a demand on the boiler or boilers if a cascade system is used The user can monitor system functions when the boilers are operational 6 If the boilers fail to start refer ...

Page 61: ...ns NOTE The clock does not automatically adjust for Daylight Savings Time and requires manual adjustment E PROGRAMMING THE SYSTEM SETTING System Setting Program Access NOTE Programming the boiler control is not possible when the boiler is firing Make sure any input which can create a demand on the boiler such as the tank thermostat is turned off so the boiler will remain idle to allow programming ...

Page 62: ...e Address CASCADE ADDRESS 0 15 Bus addressing boilers maximum boilers allowed 8 in a cascade system Master Boiler address is 0 and Following Boilers are addressed 1 thru 7 Default 0 Range 0 8 NOTE DO NOT USE ADDRESS 8 Function 16 Optional Inputs OPTIONAL INPUT RETURN SEN 16 Allows the user to select from optional inputs to control or monitor the system Default RETURN Range Off Booster Board 0 10 V...

Page 63: ...E Without setting this function Functions 33 34 35 36 will not display Table 19 System Setting Menu Screens NOTE For the following functions you must have your maintenance function turned on To change press ENTER The left most digit will begin to blink Use the up or down arrows to change the digit Use the arrow keys to switch between digits When you ve made your selection press ENTER again SCREEN ...

Page 64: ...ensor is displayed on the bottom line Press the key once CH DEMAND OFF BOILER This screen displays the central heat demand set for the cascade system Press the key once 0 10 SIGNL ON Shows if 0 10 volt is enabled Press the key once CAS SET 190 o F SYSTEM 112 o F NOTE This screen will appear only when set in Master Boiler mode This screen displays the cascade set point maximum 190o F on the top lin...

Page 65: ... that the fault occurred Press the key once FAULT HISTORY 3 08 28 2009 Fr 5 19A This screen displays the third oldest lockout fault that occurred in the boiler controller The top line will alternate between the words FAULT HISTORY and the actual fault encountered if one has occurred The bottom line displays the date and time a fault occurred Press the key once FAULT HISTORY 4 08 28 2009 Fr 5 19A T...

Page 66: ...hows the status of system pump output contacts Press the key once CASCADE PWR 100 PRESENT 01234567 This screen shows the overall cascade power output The range of this value is the number of boilers communicating with the Master x 100 For example if 8 boilers are connected and communicating the maximum cascade power is 800 The second line shows which boiler addresses are communicating with the Mas...

Page 67: ...orrective actions are described in Section D C BOILER FAULT 1 When a fault condition occurs the controller will illuminate the red FAULT indication light and display a fault message in the screen The alarm output will also activate Most fault conditions cause the CH pump to run in an attempt to cool the boiler 2 Note the fault message displayed and refer to Section D in this part for an explanatio...

Page 68: ...BLOCKING PUMP ON TT This screen indicates a temporary hold on the burner There is a demand on the boiler the pump is powered on but the temperature of the water at the supply sensor is too high for the boiler to ignite This occurs because the water temperature measured by the supply sensor is higher than the boiler temperature ignition diff setting This error will clear itself when the water tempe...

Page 69: ...vely hot replace the ECO sensor Fault Code F01 FLUE TEMP WAT LV F01 PUMP ON This code indicates that one of the safety interlock switches present in the unit has tripped There are several interlock switches that could possibly trip and cause this error The following switches are installed standard equipment in all boilers 1 Flue ECO Trips if the flue temperature is excessive This switch has to be ...

Page 70: ...atically when the temperature drops below 194o F During the time that this message or lockout fault is displayed the pump will be on as indicated on the second line 1 Check circulator pump operation 2 Assure that there is adequate flow through the boiler by accessing the status menu and assuring that there is less than a 50 F rise from the return thermistor to the supply thermistor 3 Check the dir...

Page 71: ...ed on the second line of the display 1 Look into window If there is flame turn the gas off to the boiler at the service valve and replace the gas valve 2 If the flame signal on the status menu is greater than 1 0 when the burner is not lit replace the spark igniter and the flame rectification probe 3 If the flame return sensor is not present after turning off the gas supply check the gas valve ele...

Page 72: ...r sensor resistance 3 Replace the outdoor sensor NOTE If an outdoor sensor IS NOT used in the installation enter the System Setting Program Navigation go to Function 21 and turn the setting from ON to OFF The following blocking codes will block operation until the control determines the situation safe for boiler operation Blocking Code E07 FLUE TEMP HIGH E07 PUMP OFF TIME This display indicates th...

Page 73: ...ry arrangements with a qualified heating contractor for periodic maintenance of the boiler The installer must also inform the owner that a lack of proper care and maintenance of the boiler may result in a hazardous condition BEFORE EACH HEATING SEASON a trained and qualified service technician should perform the inspections as per the boiler inspection and maintenance schedule in the back of the m...

Page 74: ...n stainless steel or brass brush not steel an FDA approved liquid lime scale remover in a spray bottle gloves and eye protection 1 Shut down the Boiler by using the following steps a Shut down the appliance Close the gas valve Wait for the appliance to be cool to the touch b Disconnect the condensate piping from the outside connection not from the Boiler side so flow from condensate reservoir can ...

Page 75: ... serious injury C CLEANING WATER SIDE OF HEAT EXCHANGER 1 Make sure power is turned off to the boiler Run water through the hot water system to assure it is below room temperature 2 Close isolation valves on the return and supply connections to the boilers as shown in the piping diagrams within this manual Slowly open the ball valves and release pressure into a bucket Once pressure is released con...

Page 76: ... boiler without the clear hose attached from the hose barb to the pressure switch Failure to follow this warning could result in property damage serious personal injury or death 8 If a condensate neutralizer kit is installed with the boiler check the assembly when cleaning the condensate trap and replenish the limestone chips if necessary When replacing the limestone chips take care to ensure chip...

Page 77: ...77 LP 293 REV 9 2 14 Figure 36 ...

Page 78: ...78 LP 293 REV 9 2 14 Figure 37 ...

Page 79: ...79 LP 293 REV 9 2 14 Figure 38 LP 293 A ...

Page 80: ...r Verify combustion settings after gas conversion Carbon Dioxide ____ CO2 High Fire ____ CO2 Low Fire Verify combustion settings after gas conversion Carbon Monoxide ____ppm CO High Fire ____ppm CO Low Fire Mail in the conversion registration 8 Record system settings Record heating curve record steps ____ 8 ____ 9 ____ 10 ____ 11 Notes Table 29 MAINTENANCE REPORT In unusually dirty or dusty condit...

Page 81: ...nctional CHAMBER BURNER Combustion Chamber Check burner tube and combustion chamber coils Clean according to maintenance section of manual Vacuum combustion chamber Spark Electrode Clean Set gap at Flame Probe Clean Check ionization in uA d7 on status menu in Start up Procedures Record high fire and low fire CONDENSATE Neutralizer Check condensate neutralizer Replace if necessary Condensate hose D...

Page 82: ...82 LP 293 REV 9 2 14 ...

Page 83: ...83 LP 293 REV 9 2 14 ...

Page 84: ...84 LP 293 REV 9 2 14 MAINTENANCE NOTES ...

Page 85: ...e of Installation Installer s Code Name Product Serial Number s Combustion Setting at Time of Installation Comments Installer s Phone Number Signed by Installer Signed by Customer IMPORTANT NOTES Customer Please only sign after the installer has reviewed the installation safety proper operation and maintenance of the system In the case that the system has any problems please call the installer If ...

Reviews: