HENGQUAN H400B Series, User Manual
The HENGQUAN H400B Series product is accompanied by a comprehensive User Manual. Obtain the manual for this exceptional product from our website, where you can easily download it for free. Explore the functionalities, features, and instructions of this product through the user manual available at manualshive.com.
Share
Download


Reviews:
No comments
Related manuals for H400B Series

MS926P
Brand: Unitech Pages: 2

MS912+
Brand: Unitech Pages: 17

MS912
Brand: Unitech Pages: 6

MS842
Brand: Unitech Pages: 2

MS840P
Brand: Unitech Pages: 2

HT630
Brand: Unitech Pages: 3

TS-150
Brand: Themis Pages: 2

InkPad X PB1040
Brand: Pocketbook Pages: 104

Encompass 1d
Brand: TransCore Pages: 12

KIP 2100
Brand: Konica Minolta Pages: 153

miniPad
Brand: Identix Pages: 6

EasyCoder PX4i
Brand: Intermec Pages: 2

Cobalto CO5330
Brand: Datalogic Pages: 292

54546
Brand: Hama Pages: 24
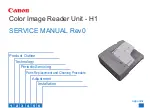
H1
Brand: Canon Pages: 112

IdentIPoint
Brand: Honeywell Pages: 32

Accentic
Brand: Honeywell Pages: 32

IdentIPoint
Brand: Honeywell Pages: 48


