background image

eTrex

®   

H

Owner’s Manual

personal navigator

Summary of Contents for eTrex eTrex

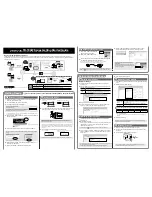
Page 1: ...eTrex H Owner s Manual personal navigator ...

Page 2: ...e copy of this manual or of any revision hereto provided that such electronic or printed copy of this manual must contain the complete text of this copyright notice and provided further that any unauthorized commercial distribution of this manual or any revision hereto is strictly prohibited Information in this document is subject to change without notice Garmin reserves the right to change or imp...

Page 3: ...AM 5 PM Central Time or go to www garmin com support In Europe contact Garmin Europe Ltd at 44 0 870 8501242 outside the UK or 0808 2380000 within the UK Product Registration Help us better support you by completing our online registration today Connect to our Web site at http my garmin com Keep the original sales receipt or a photocopy in a safe place Optional Accessories For a complete list of a...

Page 4: ...nstalling Batteries and Lanyard 2 Operating the eTrex 3 Key Functions 4 Turning on the eTrex 5 Main Pages 7 SkyView Page 7 Map Page 7 Pointer Page 9 Trip Computer Page 10 Main Menu 11 Routes Page 14 Tracks Page 16 Appendix 23 Specifications 23 Interface Formats 24 Connecting Your eTrex to a Computer 24 Software License Agreement 25 Declaration of Conformity 25 Index 26 ...

Page 5: ...ting Started Unit Overview Carry lanyard attachment slots Battery compartment cover Battery compartment locking ring External power and data connector under weather cap LCD display GPS antenna QUIT PAGE key POWER key UP DOWN keys ENTER MARK key ...

Page 6: ...ttery cover by turning the Locking ring counter clockwise and pulling out 2 Insert the batteries observing the proper polarity Remove the batteries if the unit is not being used for several months Stored data is not lost when batteries are removed To install the lanyard 1 Remove the battery cover and place the loop of the lanyard through the slot in the base of the unit 2 Route the strap through t...

Page 7: ...creen a scroll bar appears next to the list To scroll through a list press the Up or Down keys Default the factory setting saved in the unit s memory You can change the settings but you can revert to the factory settings when you select Restore Defaults Manual Conventions In this manual when you are instructed to select an item small arrows appear in the text They indicate that you should select a...

Page 8: ... list or move a slider bar ENTER MARK key Press and release to enter data or menu selections Press with a main page open to view its option menu Press and hold to MARK your location as a waypoint QUIT PAGE key Press to cycle through the main pages Press to exit a page or quit a function POWER key Press and hold to turn unit on or off Press and release to turn backlighting on or off ...

Page 9: ...the SkyView page 2 To turn off the eTrex press and hold POWER Ready to navigate SkyView Page Backlight and Contrast Adjustment To turn on the backlight Press and quickly release POWER To set the timeout and adjust the contrast 1 Press PAGE until the SkyView page appears then press ENTER twice to open the backlight contrast window 2 Press ENTER to view the timeout options make a selection ENTER 3 P...

Page 10: ...ect an option press ENTER To exit a menu or return to the previous setting Press QUIT PAGE The QUIT PAGE key moves backward through your steps Press QUIT PAGE repeatedly to return to the starting page Once at the starting page pressing the key cycles you through the five main pages On Screen Messages When a significant event in the operation of the unit occurs an on screen message appears to advis...

Page 11: ... is shown when the receiver has gathered enough satellite information to begin navigation SkyView Page Options To view the options menu press ENTER Setup Display change the display contrast and set the length of time that the backlight will stay on Advanced SkyView select the Advanced SkyView feature to view a page containing detailed information on the satellites Map Page Your location North poin...

Page 12: ...s oriented to the north and your current position is indicated by a direction arrow Auto Zoom On Off when on the map automatically adjusts its scale to display your entire route When it is off press UP or DOWN to select a map scale Hide Waypoints keeps waypoint symbols and names from being shown on the map Show Course Bearing Line when using the GOTO function use this option to show a course line ...

Page 13: ...g at the moving direction line your destination is ahead NOTE The eTrex is not a magnetic compass You must be moving for the unit to determine your heading Press UP or DOWN to cycle through the trip information at the bottom of the page Pointer Page Options Reset Max Speed resets the Maximum Speed achieved during a trip Reset Trip resets the trip time trip distance odometer and average speed back ...

Page 14: ...ange Fields use the CHANGE FIELDS option to select the data to be displayed from a list of data fields To change the fields 1 From the Trip Computer page press ENTER 2 Select CHANGE FIELDS ENTER 3 Select the field to change ENTER 4 Select an option ENTER 5 Repeat Steps 3 and 4 as necessary Reset Max Speed resets your maximum speed to zero Reset Trip resets all the data in the Trip Computer to zero...

Page 15: ...ess ENTER when you have found your correct time zone Use the Menu page to customize the display transfer information from a computer to the eTrex and back again manage and organize your waypoints Mark Waypoint Page Use the Mark Waypoint page to create a waypoint at your current location or at a location you enter in the position field To mark a waypoint Press PAGE to switch to the Menu page Press ...

Page 16: ...the waypoint ENTER To view the NEAREST waypoints page 1 On the Waypoints page select NEAREST Press ENTER The Nearest Waypoints page appears showing a list of the closest waypoints including their names and distances from your location 2 Select a waypoint from this list ENTER To delete all waypoints From the Waypoint page select DELETE ALL ENTER A confirmation message box appears asking if you real...

Page 17: ...th sun and moon set and rise times for a chosen location and date This option is located at the bottom of the Hunt Fish page To view the Sun Moon Page 1 On the Hunt Fish page select SUN MOON ENTER to view the Sun Moon page 2 View the Sunrise and Sunset Times Moonrise and Moonset Times as well as the Moon Phase for the waypoint location and date 3 You can set the date at which you want to view the ...

Page 18: ...elect the correct number ENTER When all numbers are entered correctly highlight OK ENTER 9 The name symbol and elevation can be changed on this page as well When all changes have been made select OK ENTER to save the waypoint Select GOTO to save the waypoint and begin direct navigation to the point Routes Page Navigate using one of three methods GOTO TracBack and Routes The Routes feature guides y...

Page 19: ...s placed in the first field of the route and the second field of the route is highlighted 4 Repeat Steps 2 3 until all of the waypoints are entered into the route 5 After you have entered all the waypoints into your route press PAGE Your new route is saved and displayed on the Routes page Note You can also plan a route using Garmin MapSource on a computer and upload the route to the eTrex See your...

Page 20: ...ant to delete the route Select YES ENTER Tracks Page The eTrex draws an electronic Track Log on the Map page as you travel The Track Log contains information about each point it plots including time and position Review the saved Track Log on the map turn recording on or off and change the way tracks are recorded The Track Log starts recording as soon as the unit gets a location fix Save the curren...

Page 21: ...me a saved Track Log 1 With the Menu page displayed select TRACKS ENTER 2 Place the highlight on the preferred saved track ENTER The saved track is shown on a map with a default track name 3 Select the name ENTER 4 With the Edit Track Name page shown press DOWN to move the highlight to the next place in the name field When the location is selected press ENTER 5 Select the correct character ENTER W...

Page 22: ...Full select YES to overwrite the beginning track points when the Track Log is full Select NO to stop recording when full Defaults restores the factory default settings To use the Track Setup page 1 From the Track Log page select SETUP ENTER 2 Select the preferred fields ENTER Make the preferred changes to the fields then press ENTER to save the changes 3 To restore the default Track settings selec...

Page 23: ...se Yes to add daylight saving or No for standard time To change the daylight saving field 1 Press PAGE and switch to the Menu page Select SETUP ENTER 2 Select TIME ENTER 3 Select DAYLIGHT SAVING ENTER 4 Select AUTO YES or NO ENTER NOTE The Daylight Saving Time setting does not affect the UTC offset number Display Page Use the Display page to set the display backlight timeout and the display contra...

Page 24: ...o a paper map the map datum in the eTrex should match the horizontal map datum used The default datum in the eTrex is WGS 84 Change only the datum if you are using a different datum than WGS 84 To change the Map Datum 1 From the Menu page select SETUP ENTER 2 Select UNITS ENTER 3 Select MAP DATUMS ENTER 4 Select a datum ENTER Distance Speed Units Select statute nautical or metric units of measure ...

Page 25: ... in DEGREES or MILS To select an Angle setting 1 From the Menu page select SETUP ENTER 2 Select UNITS ENTER 3 Select ANGLE ENTER 4 Select DEGREES or MILS ENTER Defaults Restore the Units page to the default settings by highlighting DEFAULTS ENTER Interface Page Use the Interface page to connect and use devices such as computers Input Output Formats GARMIN the format for exchanging waypoint route a...

Page 26: ...rmat field select the preferred format ENTER System Page Mode Normal Mode means the GPS is active and running whenever the unit is powered on WAAS Mode improves the overall accuracy and integrity of the GPS signal Demo Mode demonstrates features and functions inside a closed building where satellite reception is not possible To select an operating mode 1 From the Menu page select SETUP ENTER 2 Sel...

Page 27: ... DGPS corrections3 Velocity Accuracy 1 knot RMS steady state Dynamics Performs to specifications to 6 g s Interfaces NMEA 0183 versions 2 00 3 0 RTCM 104 for DGPS corrections and RS 232 for computer interface Antenna Built In Power Input Two 1 5 volt AA batteries External power adapter Battery Life Up to 17 hours of typical use Specifications subject to change without notice 1 The temperature rati...

Page 28: ...B GPRMC GPBOD GPRTE Garmin Proprietary Sentences PGRME estimated error and PGRMZ altitude DGPS Differential GPS corrections are accepted in RTCM SC 104 version 2 0 format through the Data In line Beacon receivers with the correct RTCM format may be used but may not correctly display status or allow tuning control from the GPS unit Connecting Your eTrex to a Computer You can connect your eTrex to y...

Page 29: ...ructure organization and code of the Software are valuable trade secrets of Garmin and that the Software in source code form remains a valuable trade secret of Garmin You agree not to decompile disassemble modify reverse assemble reverse engineer or reduce to human readable form the Software or any part thereof or create any derivative works based on the Software You agree not to export or re expo...

Page 30: ...nu 11 manual conventions 3 map datums 20 map orientation 8 Map page 7 mark 11 marking a waypoint 11 moving direction line 9 N nearest waypoints 12 NMEA format 22 north pointer 7 north reference 20 O on screen message 6 P Pointer page 9 Power Baclkight key 4 projecting a waypoint 14 Q Quit Page key 4 R routes 14 activating 15 creating 15 editing 16 S selecting Options and entering data 6 Setup page...

Page 31: ......

Page 32: ...t www garmin com 2007 Garmin Ltd or its subsidiaries Garmin International Inc 1200 East 151st Street Olathe Kansas 66062 USA Garmin Europe Ltd Liberty House Hounsdown Business Park Southampton Hampshire SO40 9RB UK Garmin Corporation No 68 Jangshu 2nd Road Shijr Taipei County Taiwan www garmin com Part Number 190 00818 00 Rev B ...

Reviews: