Epson ActionScanner ActionScanner II, Getting Started
The Epson ActionScanner ActionScanner II user manual is the perfect guide to help you get started with your scanner. Easily download this comprehensive manual for free from our website and uncover all the features and functionalities of your Epson ActionScanner ActionScanner II.
Share
Download


Reviews:
No comments
Related manuals for ActionScanner ActionScanner II

IRISPEN EXECUTIVE 6-MAC
Brand: I.R.I.S. Pages: 58

UR21-MR-01
Brand: Denso Pages: 31

CardMinder Series
Brand: Fujitsu Pages: 85
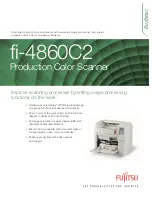
4860C - fi - Document Scanner
Brand: Fujitsu Pages: 316

6010N - fi - Document Scanner
Brand: Fujitsu Pages: 663
4860C - fi - Document Scanner
Brand: Fujitsu Pages: 2

C150-E146-02EN
Brand: Fujitsu Pages: 100

C150-E049-02EN
Brand: Fujitsu Pages: 236

6240 - fi - Document Scanner
Brand: Fujitsu Pages: 241

SnapScan e20
Brand: AGFA Pages: 35

HS-SCNR430
Brand: Hip Street Pages: 2
53 05 30
Brand: BASETech Pages: 2

ID-01
Brand: Di-soric Pages: 222

KAPPHDSCANA
Brand: Kogan Pages: 12
AT-10
Brand: Nikon Pages: 28

Scanner Compact
Brand: Raven Pages: 2

Portable Ultrasound V12
Brand: ValueStore US Pages: 2

200 Ch VHF/Air/UHF Home Scanner
Brand: Radio Shack Pages: 32


