

Bedienungsanleitung
BELICHTUNGSRAHMEN 220 X 160
Best.-Nr. 53 05 30
Bestimmungsgemäße Verwendung
Der Belichtungsrahmen dient als Fixierhilfe zur kurzzeitlichen Belichtung von gedruckten Leiterplatten.
Die Schaumstoffeinlage verhindert ein verrutschen der Leiterplatte und stellt eine plane Auflage der
Belichtungsfolie auf der Leiterplatte sicher. Schattenbelichtungen werden somit zuverlässig vermieden.
Die Abdeckung erfolgt mit einer UV-durchlässigen Glasplatte.
Ein integriertes Schubfach dient zur Aufbewahrung von Zubehör.
Eine andere Verwendung als zuvor beschrieben ist nicht zulässig.
Die Sicherheitshinweise sind unbedingt zu beachten!
Sicherheitshinweise
Lesen Sie bitte vor Inbetriebnahme die komplette Anleitung durch, sie enthält wichtige
Hinweise zur korrekten Verwendung.
• Bei Schäden, die durch Nichtbeachten dieser Bedienungsanleitung verursacht werden, erlischt der
Garantieanspruch! Für Folgeschäden übernehmen wir keine Haftung!
• Bei Sach- oder Personenschäden, die durch unsachgemäße Handhabung oder Nichtbeachten der
Sicherheitshinweise verursacht werden, übernehmen wir keine Haftung! In solchen Fällen erlischt
jeder Garantieanspruch.
• Achten Sie auf eine sachgerechte Verwendung. Beachten Sie hierbei diese Bedienungsanleitung.
• Der Belichtungsrahmen ist kein Spielzeug und gehört nicht in Kinderhände.
• Vermeiden Sie eine starke mechanische Beanspruchung. Setzen Sie den Belichtungsrahmen keinen
Vibrationen oder Schlägen aus. Dadurch könnte die Glasplatte brechen. Verletzungsgefahr!
• Scharfe oder spitze Metallgegenstände können die Glasoberfläche beschädigen.
• Legen Sie keine stärkeren Materialien als 2 mm unter die Glasplatte. Durch ein Verkanten könnte das
Glas brechen. Verletzungsgefahr!
• Vermeiden Sie hohe Temperaturen, da dadurch der Kunststoffrahmen beschädigt werden kann.
Beachten Sie die Hinweise, die Belichtungszeiten sowie die Abstände der verwendeten
Belichtungslampen.
Anwendung
Kontrollieren Sie den Belichtungsrahmen nach dem Auspacken auf Beschädigungen. Eine beschädigte
Glasplatte darf nicht verwendet werden.
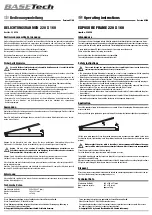
Bevor Sie die Glasplatte aufklappen können, müssen Sie das vordere Metallschubfach etwas heraus-
ziehen (siehe Skizze).
Klappen Sie die Glasplatte nach oben. Legen Sie die zu belichtende Leiterplatte mittig auf den
Schaumstoff. Positionieren Sie die Leiterbahnfolie (Layout) seitenrichtig auf der Leiterplatte.
Achten Sie auf eine saubere Glasplatte; Verunreinigungen beeinflussen das
Belichtungsergebnis. Verwenden Sie zur Reinigung keine scheuernde oder chemische
Reinigungsmittel. Glasreiniger sind zu empfehlen.
Klappen Sie die Glasplatte zurück und drücken die Glasplatte mit leichtem Druck nach unten.
Schieben Sie das Schubfach in den Belichtungsrahmen, bis die Glasplatte fixiert wird.
Die Leiterplatte und die Leiterbahnfolie liegen plan aufeinender und können mit einer geeigneten UV-
Lampe belichtet werden.
Beachten Sie die Belichtungsdaten und Abstände der verwendeten UV-Lampe. Der Abstand braucht
durch die UV-durchlässige Glasplatte nicht verkürzt werden.
Entsorgung
Glas und Metalle sind Wertstoffe die am Ende der lebensdauer entsprechend entsorgt werden sollten
(örtliche Wertstoffhöfe etc.).
Technische Daten
Abmessungen (LxBxH):
220 x 160 x 27 (mm)
Max. Belichtungsfläche:
195 x 155 (mm)
Masse:
ca. 700 g
Operating instructions
EXPOSURE FRAME 220 X 160
Item-No. 53 05 30
Intended use
The exposure frame is designed to help hold the printed circuit board tight for short exposure times.
The foam underlay prevents the printed circuit board from slipping and ensures that the exposure trans-
parency film lies flat on the printed circuit board. This reliably prevents shadow exposures from occurring.
A glass plate that allows UV light to pass through it is used to cover the board.
There is a built-in drawer for storing accessories.
Any use other than that described above is not permitted.
The safety instructions should be observed without fail!
Safety instructions
Please read through the operating instructions completely before using the device; they
contain important information necessary for correct use.
• The guarantee will lapse if damage is incurred as a result of non-compliance with the operating
instructions. We will not assume any responsibility for consequential damage.
• We will also not assume any responsibility for damage to assets or persons caused by improper hand-
ling or failure to observe the safety instructions. The warranty will lapse in these cases.
• Make sure you use the device properly. Please follow the operating instructions carefully in doing so.
• The exposure frame is not a toy and should be kept out of reach of children.
• Avoid subjecting the frame to severe mechanical stress. Do not expose the exposure frame to any
vibrations or knocks. This can cause the glass plate to break. Risk of injury!
• Sharp or pointed metal objects can damage the glass surface.
• Do not place materials thicker than 2 mm underneath the glass plate. Tilting could break the glass.
Risk of injury!
• Avoid exposing the plastic frame to high temperatures to protect it from being damaged. Observe the
information, the exposure times and the distances of the exposure lamps used.
Application
Check the exposure frame for damage when you remove it from its packaging. A damaged glass plate
must not be used.
Before you lift the glass plate open, you must first pull the front metal drawer slightly out (see diagram).
Lift the glass plate upwards. Place the printed circuit board to be exposed in the middle on the foam.
Position the layout „right reading“ onto the printed circuit board (i.e. positioned as it should look when
printed).
Make sure that the glass plate is clean. Dust, dirt or smudges will influence the expo-
sure result. Do not use abrasive or chemical cleaners. Glass cleaners are recommended.
Close the glass plate and press it down lightly.
Push the drawer into the exposure frame until the plate is secure.
The printed circuit board and the layout are lying flat on top of each other and can now be exposed to
light with a suitable UV lamp.
Observe the exposure specifications and distances of the UV lamp used. Because the glass plate allows
UV light to pass through it, the distance does not need to be shortened.
Disposal
Glass and metal are recyclable materials which should be accordingly disposed of at the end of the ser-
vice life of the device (at local recycling centres, etc.).
Technical Data
Dimensions (LxWxH):
220 x 160 x 27 (mm)
Max. exposure surface:
195 x 155 (mm)
Mass:
Approx. 700 g
Diese Bedienungsanleitung ist eine Publikation der Conrad Electronic GmbH,
Klaus-Conrad-Straße 1, D-92240 Hirschau.
Diese Bedienungsanleitung entspricht dem technischen Stand bei Drucklegung. Änderung in
Technik und Ausstattung vorbehalten.
© Copyright 2006 by Conrad Electronic GmbH. Printed in Germany.
These operating instructions are published by Conrad Electronic GmbH,
Klaus-Conrad-Straße 1, D-92240 Hirschau/Germany.
The operating instructions reflect the current technical specifications at time of print. We reserve
the right to change the technical or physical specifications.
© Copyright 2006 by Conrad Electronic GmbH. Printed in Germany.
Version 03/06
Version 03/06


