Electrolux EHI635BD, Installation & User Manual
The Electrolux EHI635BD is a high-performance induction hob offering sleek design and superior cooking experience. To ensure a hassle-free installation and proper usage, make sure to download the comprehensive Installation & User Manual available for free on our website. Get the most out of your appliance with clear step-by-step instructions and valuable tips.
Share
Download


Reviews:
No comments
Related manuals for EHI635BD
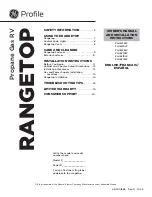
Profile PLU612RW
Brand: GE Pages: 60

MIN 54306 N
Brand: Blomberg Pages: 92

N5..D4 SERIES
Brand: NEFF Pages: 28

KZT 6424 T F
Brand: Ariston Pages: 12

Toledo FS Hob
Brand: Rangemaster Pages: 24

10031548
Brand: Klarstein Pages: 48

10035360
Brand: Klarstein Pages: 94

ER326AB90L
Brand: Siemens Pages: 8

ER3A6AB70
Brand: Siemens Pages: 16

ER3A6AD70
Brand: Siemens Pages: 16

EJ71050
Brand: Siemens Pages: 8

EP9B6QO90M
Brand: Siemens Pages: 16

ER326AB92X
Brand: Siemens Pages: 20

EP916SC91N
Brand: Siemens Pages: 18

EP916QB91E
Brand: Siemens Pages: 18

EI6..TB11 SERIES
Brand: Siemens Pages: 12

ER17254NL
Brand: Siemens Pages: 25

ER12553EU
Brand: Siemens Pages: 28


