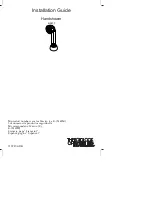
background image

UNIDOOR

 with GLASS SHELVES

Installation Manual

QUESTIONS?

DO NOT RETURN PRODUCT TO STORE.

 CONTACT DREAMLINE

®

 WITH ANY QUESTIONS

Please Contact 

DreamLine Customer Support:

SEE 

DREAMLINE.COM

 FOR HOURS OF OPERATION

CALL

 1-866-731-2244

EMAIL

 [email protected]

©2022 DreamLine

®

 All Rights Reserved

CLICK HERE

To View Our

Installation Video

Summary of Contents for SHDR-20237210F Series

Page 1: ...ETURN PRODUCT TO STORE CONTACT DREAMLINE WITH ANY QUESTIONS Please Contact DreamLine Customer Support SEE DREAMLINE COM FOR HOURS OF OPERATION CALL 1 866 731 2244 EMAIL support dreamline com 2022 DreamLine All Rights Reserved CLICK HERE To View Our Installation Video ...

Page 2: ...ustomer experience Please refer to the model s web page on DreamLine com for the latest technical drawings installation manuals warranty information or additional product details Model s SHDR 20237210F SHDR 20247210F SHDR 20257210F SHDR 20267210F SHDR 20277210F SHDR 20287210F SHDR 20297210F SHDR 20307210F Finish 01 Chrome 04 Brushed Nickel 06 Oil Rubbed Bronze 09 Satin Black Model SHDR 202472E 09 ...

Page 3: ... glass may be coated on either one or both surfaces For best results squeegee the glass after each use and dry with a soft cloth OD Number optional located on the shipping box or label if available Installation Date SKU Number Purchase Order Number Store Vendor Purchased From Installed By Record the following purchase information for your records or in the event you need to contact DreamLine UNIDO...

Page 4: ...aration 2 Required Reinforcement Information 3 Unidoor Glass to Wall Hinge Handle Location 4 Unidoor Styles 5 6 Model Specific Preparation 7 Tools 8 Detailed Diagram of Shower Door Components 9 Parts List 10 Specifications 11 Installation Steps 12 22 PVC Hinge Spacer Information if necessary 13 Handle Assembly Installation 17 Sweep Vinyl Seal Installation 18 Hinge Side Vinyl Seal Installation 19 2...

Page 5: ... an elderly person due to an increased chance of improper handling In such cases alternatives such as shower curtains or grab bars should be considered GENERAL PREPARATION After opening all boxes and packages read this introduction carefully Check that all the items are included in the package by marking off the components on the Detailed Diagram of Product Components page Examine all boxes and pa...

Page 6: ...al Ver 3 Rev 2 122021 2021 DreamLine All Rights Reserved Install DOUBLE STUDS OR install 2 6 WOOD BLOCKING between the studs where the hinge assemblies will attach to the wall OR Double Studs 2 6 8 1 2 216m m 55 5 8 1413m m 5 8 16mm space beneath installed door glass th resh o ld 2 6 64 1 8 1629mm from threshold 72 1829mm from threshold ...

Page 7: ...ts Reserved 8 203mm 2 50mm 7 7 8 200mm 7 7 8 200mm 5 8 15 875mm SPACE THRESHOLD UNIDOOR DOOR GLASS 31 3 4 806 5mm 31 3 4 806 5mm 72 1829mm from threshold 55 5 8 1413mm 5 8 15 875mm SPACE 64 1 8 1629mm from threshold 8 1 2 216mm from threshold handle holes GLASS 5 8 SPACE 32 3 8 822 3mm from threshold 1 3 8 35mm 2 7 8 73mm 3 1 2 89mm 1 15 16 50mm WALL PLATE Hinge Assembly Wall Plate Hole Layout ...

Page 8: ...B UNIDOOR Shower Door 23 30 with a 6 30 inline panel 12 30 inline panel includes Support Bar Adjustable Wall Profile System UNIDOOR LS Shower Door 23 30 with 6 30 inline panel 12 30 inline panel includes an L Bar back to back handle Adjustable Wall Profile System STYLE C UNIDOOR Shower Door 23 30 with 12 30 inline panel with Support Shelves and Adjustable Wall Profile System STYLE F UNIDOOR PLUS S...

Page 9: ...ge panel requires a hinge panel glass bracket 24 hinge panel requires an L Bar NOTE UNIDOOR X with glass to glass hinges STYLE L1 ᧘ UNIDOOR X Shower 23 30 with 6 hinge panel and 30 or 34 full height return panel installed with U Channels STYLE M1 ᧘ UNIDOOR X Shower Door 23 30 with 6 or 24 hinge panel and with 6 6 1 2 14 14 1 2 22 or 22 1 2 full height inline panel installed with U Channels STYLE M...

Page 10: ...istant and or a professional grade glass suction cup when handling heavy glass panels The PVC Hinge Spacers 31 can be used to compensate for a minor out of plumb condition on the hinge side wall up to 1 4 6mm and should only be used behind ONE Hinge Assembly 05 Confirm the finished wall conditions with a level before drilling any holes Unnecessary use of these spacers can compromise the fit of the...

Page 11: ...ntact DreamLine for replacement The shipping boxes may contain extra parts not used in your model configuration Retain these installation instructions for future reference Extended driver bit 2 Phillips driver bit Diamond Tipped Drill Bit Ø1 4 6mm Optional for porcelain tile Professional grade Glass suction cup Optional but Recommended Ø1 4 6mm Drill Bit Ø1 8 3mm Drill Bit Verify that the correct ...

Page 12: ...oor Manual Ver 3 Rev 2 122021 9 2021 DreamLine All Rights Reserved 01 02 04 04 05 05 06 06 07 08 08 for Models SHDR 20237210F SHDR 20247210F SHDR 20257210F SHDR 20267210F SHDR 20277210F SHDR 20287210F SHDR 20297210F SHDR 20307210F SHDR 202472E 89 SHDR 2428720 89 SHDR 2430720 89 SHDR 2424720 89 01 04 06 09 left swing installation shown ...

Page 13: ...eal L Strike Vinyl with VHB Tape PVC Hinge Spacer 1mm 2mm 3mm Door Glass Handle 05 06 04 07 08 31 01 02 x1 x1 x2 x1 x8 x1 x1 x4 Unidoor PLUS LS EDGE 1mm 2mm 3mm item 31 PVC Hinge Spacer use only as necessary item 08 L Strike Vinyl with VHB Tape used with single door installation only or handle styles may vary by model 180 Inline Strike Vinyl 19 x1 item 19 180 strike vinyl ships with the UNIDOOR ED...

Page 14: ...ify the model dimensions for proper placement of the Door Glass 01 for accurate alignment with the Enclosure Panel Glass NOTE The following shower door installation instructions should be used as a general guide and prerequisite to the installation of the UNIDOOR UNIDOOR PLUS UNIDOOR LS UNIDOOR EDGE UNIDOOR TOULON models for Unidoor X models use the manual packaged with the hinge panel glass in pl...

Page 15: ...remove them Always protect the bottom edge and corners of the glass from damage which could lead to breakage and or serious personal injury Fig 1 outside outside NOTE left swing installation shown Fully and evenly tighten the hinge bolts by hand It is normal to hear the gaskets compress onto the glass 05 01 x1 x2 Install the hinges centered in the cutout and flush with the edge of the Door Glass T...

Page 16: ...ired opening size for the door glass Fig 1a Hinge side wall out at the top NOTE 31 x4 1mm 2mm 3mm 1 2 3 plumb line plumb line 0 0 0 0 0 0 0 0 0 0 0 0 Only use spacer s as necessary behind one hinge not both Hinge side wall out at the bottom PVC Hinge Spacer s PVC Hinge Spacer s NOTE If the wall is out of plumb at the top up to 1 4 6mm install the appropriate PVC Hinge Spacer s behind the top Hinge...

Page 17: ...29 mm L Strike Vinyl 08 or 180 Inline Strike Vinyl 19 as a height reference to be sure that the installed Door Glass height will be 72 1829 mm This is especially important when installing the door along with panel glass TIP Use the provided 5 8 16mm spacer shims when positioning the Door Glass 01 to maintain the proper spacing between the bottom of the Door Glass and the threshold Secure the space...

Page 18: ...e when marking the hinge mounting holes Use a diamond tipped bit and low torque when drilling into porcelain or other hard tile surface Follow the drill bit manufacturer s guidelines for proper use NOTE For installation into a stud or other wood reinforcement behind the finished wall Required drill a Ø1 4 6mm hole up to the stud drill an Ø1 8 3mm pilot hole into the stud and use the ST5 5 x 70mm C...

Page 19: ...djust the closing angle of the Hinge Assemblies 05 after the door glass has been installed Door Glass Installation OPTION B Install the Hinges to the wall First TIP Use caution when installing the hinges to the wall to avoid scratching the finished surface of the Hinge Assembly 05 face plates The manufacturer recommends using an extension driver bit to install these long screws Painter s Tape can ...

Page 20: ...rts Needed Handle Assembly Installation handle style may vary by model 17 UNIDOOR STYLE A Single Shower Door Manual Ver 3 Rev 2 122021 2021 DreamLine All Rights Reserved Single sided Handle Back to Back Handle Fig 5a Fig 5b 02 x1 left swing installation shown or inside inside 5 ...

Page 21: ...ion 18 UNIDOOR STYLE A Single Shower Door Manual Ver 3 Rev 2 122021 2021 DreamLine All Rights Reserved Fig 6a Fig 6b Press the Bottom Sweep Vinyl Seal 07 onto the bottom edge of the Door Glass 01 NOTE NOTE 07 x1 Fig 6c inside If necessary cut the Bottom Sweep Vinyl Seal 07 to match the width of the Door Glass 01 6 ...

Page 22: ...on Fig 7a 06 x1 7 177 8 mm 54 1371 6 mm 8 203 2 mm NOTE Cut the Hinge Side Vinyl Seal 06 into three sections with a razor utility knife and notch according to the diagram below to fit around the hinges and sweep vinyl to prevent leakage Fig 7a 7 8 22 mm 7 8 22 mm 7 8 22 mm 7 8 22 mm 1 25 4 mm Door Glass notch notch notch notch notch 7a Hinge Side Vinyl Cut Lengths Hinge Side Vinyls installed on Do...

Page 23: ... 3 Rev 2 122021 2021 DreamLine All Rights Reserved This completes the installation of the Door Glass For Single Shower Door installation proceed to the next step For models that include additional Panel Glass Refer to the manual that is packaged with the Panel Glass to continue with the installation Fig 7b 1 3 2 left swing installation shown 7b ...

Page 24: ...lose so the Door Glass creates a tight seal with the L Strike Vinyl Seal 08 for single shower door models or the Strike Vinyl Seal included with the Inline Panel or Return Panel Glass The Adjustable Hinge Assemblies are factory pre set to overclose to 85 to create a tight seal with the Strike Vinyl If strike vinyl is not used the hinges can be adjusted to close to a different angle 90 for example ...

Page 25: ...ed position Refer to page 21 for more information on the adjustable Hinge Assemblies 05 NOTE The surfaces need to be clean and free of debris before installing the L Strike Vinyl Seal 08 NOTE Hold the door in the closed position parallel with the threshold to mark the location of the L Strike Vinyl Seal 08 The adhesive will work best if you Allow 24 hours for the adhesive to fully set before use 2...

Page 26: ...hower Door Manual Ver 3 Rev 2 122021 23 2021 DreamLine All Rights Reserved TIP Notch the Bottom Sweep Vinyl 07 on the inside where it overlaps the Strike Vinyl 3 4 Inside shower L Strike Vinyl Sweep Vinyl Inside shower Sweep Vinyl Inside shower Sweep Vinyl L Strike Vinyl Cut inner aspect only NOTE 1 2 inside ...

Page 27: ...ng life for your glass shower products wipe them off after each use with a soft cloth Rinse and wipe off the glass using either a soft cloth or a squeegee to prevent soap buildup and water spots Hard water can etch the surface of the glass over time if left to dry To prevent scratching the surface never use abrasive cleaners or cleaning products that contain scouring agents Never use bristle brush...

Page 28: ...e screws were installed into wood reinforcement in the wall during installation and are tight to the walls if not removal and reinstallation may be necessary Page 3 Use a level to confirm the Door Glass 01 is plumb Confirm the L Strike Vinyl 08 is installed in the correct location so the door glass creates a tight seal with the vinyl when in the closed position Be sure the Bottom Sweep Vinyl Seal ...

Page 29: ...for 29 in Door Glass 1 pc 01 010137008 30 in Door Glass 1 pc 07 063015100 0747 Bottom Sweep Vinyl for 10mm 3 8in Glass for 30 in Door Glass 1 pc UNIDOOR PLUS X LS STYLE A GLASS FACTORY PARTS INFORMATION Model s SHDR 20237210F SHDR 20247210F SHDR 20257210F SHDR 20267210F SHDR 20277210F SHDR 20287210F SHDR 20297210F SHDR 20307210F ITEM FACTORY PART NUMBER ITEM DESCRIPTION QTY 02 07221041 07224041 07...

Page 30: ... 092131 ST5 5 x 70 Countersunk Screw Satin Black 11 pcs 05 07419027 Paris 85 Degree Glass to Wall Adj Hinge Assembly for 10mm 3 8in Glass 2 pcs 05a 07559097 Decorative Cap for M6 Hex bolt 8 pcs 06 063011102 1829 Hinge Side Vinyl Seal for 10mm 3 8in Glass Satin Black 1 pc 07 063009000 1829 L Strike Vinyl w VHB Tape Clear 1 pc 11 063015102 0595 Bottom Sweep Vinyl for 10mm 3 8in Glass for 24 in Door ...

Page 31: ...e Glass to Wall Adj Hinge Assembly 2 pcs 06 063011102 1829 Hinge Side Vinyl Seal 1 pc 07 063009000 1829 L Strike Vinyl w VHB Tape for 10mm 3 8in Glass 1 pc 11b 063015102 0747 Bottom Sweep Vinyl Seal 1 pc 11a 063015102 0700 Bottom Sweep Vinyl Seal 1 pc 11c 063015102 0595 Bottom Sweep Vinyl Seal 1 pc 19 063010102 1829 180 degree Inline Strike Vinyl for 10mm 3 8in Glass 1 pc UNIDOOR TOULON 28 Factory...

Page 32: ... DreamLine All Rights Reserved DreamLine All Rights Reserved NOTES UNIDOOR STYLE A Single Shower Door Manual Ver 3 Rev 2 122021 2021 DreamLine All Rights Reserved ...

Page 33: ...TEL 866 731 2244 FAX 866 857 3638 DREAMLINE COM For more information on DreamLine Shower Doors and Enclosures please visit DreamLine com 2021 DreamLine All Rights Reserved ...

Page 34: ...arranty information or additional details please refer to your model s web page on DreamLine com For more information about DreamLine Shower Doors Tub Doors Enclosures please visit DreamLine com INLINE PANEL STYLE C INLINE PANEL Style C shower panel manual Ver 1 Rev 1 07 2018 2018 DreamLine All Rights Reserved Right Hand panel installation shown ELEGANCE Style C UNIDOOR Style C Inline panel with s...

Page 35: ...l for shelves MODEL s SHDR 20357210CS SHDR 20367210CS SHDR 20377210S SHDR 20387210S SHDR 20397210S SHDR 20407210S SHDR 20417210S SHDR 20427210S SHDR 20417210CS SHDR 20427210CS SHDR 20437210S SHDR 20447210S SHDR 20457210S SHDR 20467210S SHDR 20477210S SHDR 20487210S SHDR 20477210CS SHDR 20487210CS SHDR 20497210S SHDR 20507210S SHDR 20517210S SHDR 20527210S SHDR 20537210S SHDR 20547210S SHDR 2053721...

Page 36: ...formulated coating that prevents the build up of soap and water spots Install the surface with the ClearMaxTM label towards the inside of the shower Please note that depending on the model the glass may be coated on either one or both surfaces For best results squeegee the glass after each use and dry with a soft cloth INLINE PANEL Style C shower panel manual Ver 1 Rev 1 07 2018 2018 DreamLine All...

Page 37: ...Ver 1 Rev 1 07 2018 2018 DreamLine All Rights Reserved Detailed Diagram of Shower Panel Components Parts Diagram and Parts List Adjustable Wall Profile System Installation Steps Table of Contents Section title Page Tools Preparation Vinyl Seals Glass Shelves Product maintenance 6 5 6 4 3 2 13 9 7 14 15 ...

Page 38: ...amLine is not responsible for code compliance standards for your project and will not accept any returns 3 If this unit is going to be installed in a new construction please install all of the required plumbing and drainage before installing the shower Use a competent and licensed if required by local code plumber for all plumbing installation 4 Make sure that prior to beginning the installation t...

Page 39: ...se installation instructions for future reference Tip Measure the finished opening before proceeding with the installation to be sure that the correct model size has been ordered Tip Prior to installation cover the shower tub drain with tape to prevent losing screws or small parts Tip Set screw gun clutch to low setting when installing screws and bolts to prevent stripping the heads Threshold must...

Page 40: ...rved DreamLine All Rights Reserved Detailed Diagram of Shower Panel Components INLINE PANEL Style C shower panel manual Ver 1 Rev 1 07 2018 4 2018 DreamLine All Rights Reserved 9 10 11 12 13 14 15 16 17 18 19 22 21 23 Diagram C ...

Page 41: ...ll profile 1pc 10 Glass profile 11 Panel glass 12 13 14 15 Pan head screw ST4 2x10 Wall Anchor Glass shelf 1pc 2pcs 1pc 8pcs 3pcs 16 17 18 19 22 PART DESCRIPTION QTY Pan head screw ST4 2x35 1pc Decorative screw cover and washer 4pcs Bottom bracket 1pc Anti Water strip inline 1pc Shelf bracket without nut 4pcs 23 Countersunk screw ST4 2x40 4pcs Truss head screw ST4 2x40 4pcs 21 Shelf bracket with n...

Page 42: ... 1 Rev 1 07 2018 6 2018 DreamLine All Rights Reserved 1 max Wall Profile Glass Profile The Glass Profiles can be adjusted within the Wall Profiles for overall width or to correct for out of plumb conditions within the model size Screw them together after making final adjustments Ø1 8 1 3 2 w a s h e r s c r e w d e c o r a t i v e c a p ...

Page 43: ...ing size Specific model size information can be found on DreamLine com NOTE The left swing Unidoor door installation is shown as an example throughout this manual Use the same method for aligning the door and panel for the Elegance door and inline panel installation Fig 1 DOOR outside outside 1 2 3 UNIDOOR door shown as an example NOTE The Unidoor and Elegance hinges are factory set to overclose 8...

Page 44: ...allet and a piece of wood to gently tap on the glass profile Never use a metal hammer or hit the profile without a wood bumper Fig 2 1 2 3 4 flush with glass If necessary use a rubber mallet to tap on the glass profile hole for bottom bracket Glass Profile Wall Profile Glass Profile PANEL GLASS PANEL GLASS PANEL GLASS 2 Apply clear silicone into the entire length of the channel in the Glass Profil...

Page 45: ...e inside inside 3 Press the Anti Water Strip inline 19 onto the vertical edge of the Panel Glass 11 This will protect the edge of the panel glass and allow for proper spacing with the door glass Attach the Bottom Bracket 18 through the bottom hole of the Panel Glass 11 Fig 3 4 Carefully position the assembled panel onto the threshold and against the wall Push the Wall Profile 09 tight to the wall ...

Page 46: ...ence mark on the threshold from Step 1 to confirm that the Door is perpendicular to the wall If needed adjust the position of the Panel Glass 11 so that the Anti Water Strip inline 19 makes contact with the Door Glass from top to bottom and creates a seal Mark the wall along the inner edge of the Wall Profile 09 Mark the drilling hole onto the threshold through the hole in the Bottom Bracket 18 Fi...

Page 47: ...on into an Acrylic Threshold drill a Ø1 8 3mm hole and use the Pan Head Screw ST4 2x35 16 OR For installation into a Tile Threshold drill a Ø5 16 8mm hole install a Wall Anchor 5 16 13 and use the Pan Head Screw ST4 2x35 16 7 Drill a hole for the Bottom Bracket 18 into the threshold at the mark that was made in step 5 Use an Ø1 8 drill bit for installation into an acrylic base OR use a Ø5 16 drill...

Page 48: ...v e c a p inside 9 Apply a good quality mildew resistant silicone along the connection of the Wall Profile to the wall and the Panel Glass to the threshold Fig 9 8 Recheck the alignment and spacing of the Door Glass and Panel Glass 11 and test the operation of the Door After final adjustments of the Panel Glass 11 drill holes into the Glass Profile 10 through the predrilled holes in the Wall Profi...

Page 49: ...t Hand panel installation shown as an example 10 Mark the Glass Shelf 12 position on the wall According to the measurements in Fig 10a1 mark the drilling holes for the Shelf Brackets without nut 22 Drill the holes using a Ø5 16 drill bit and insert the Wall Anchors 13 Attach the Shelf Brackets without nut 22 to the wall using the Countersunk Screw ST4 2 40 23 and attach the Shelf Brackets with nut...

Page 50: ...INE PANEL Style C shower panel manual Ver 1 Rev 1 07 2018 14 2018 DreamLine All Rights Reserved Allow 24 hours for the silicone to fully cure before using the shower Fig 11 Fig 11 24 Hours 24 Hours ELEGANCE Style C UNIDOOR Style C Right Hand panel installation shown ...

Page 51: ...RE To ensure a long lasting finish wipe off the metal parts after each use with a soft cloth Do not use abrasive cleaners or cleaning products containing ammonia bleach or acid If accidentally used rinse the surface as soon as possible to prevent damage to the finish peeling or corrosion After cleaning the polished finishes rinse thoroughly and wipe dry with a soft cloth Clean stainless steel surf...

Page 52: ...Rights Reserved DreamLine All Rights Reserved TEL 866 731 2244 FAX 866 857 3638 DREAMLINE COM For more information on DreamLine Shower Doors and Enclosures please visit DreamLine com 2018 DreamLine All Rights Reserved ...

Reviews: