

WebSentinel™ PLUS Server
Installation Manual
The WebSentinel PLUS Server is recommended by Datalogic for use with
WebSentinel PLUS scan point monitoring system. The WebSentinel PLUS
server comes with the software preloaded and ready to connect to
Datalogic scanning and dimensioning systems. This document provides
information for a successful mechanical installation. For complete
information on WebSentinel PLUS,
see the
WebSentinel PLUS User’s
Manual.
UNPACKING INSTRUCTIONS
Carefully unpack the server from its box, and retain the box and packing
material in case the server ever needs to be shipped back to Datalogic.
Make sure the box has the following contents:
WebSentinel PLUS Server PC with attached mounting brackets/
flanges
Power
Supply
Power
Cable
Mounting brackets (already attached)
GENERAL MOUNTING GUIDELINES
It is important that you follow these general precautions when installing,
setting up, operating, maintaining, troubleshooting, or replacing any
Datalogic products, parts or related equipment.
As you plan and install your WebSentinel PLUS Server, be sure to keep the
following guidelines in mind:
Determine the proper orientation and position the server. Mount
the server so connectors are accessible.
Leave adequate clearances (approximately 300 mm [12 inches])
for wiring around the server for cabling.
Route wires carefully to reduce or minimize electrical noise.
When power and communication wiring must cross, make their
intersection perpendicular.
Proper grounding limits the effects of noise due to Electro-
magnetic Interference (EMI). Make sure the mounting structure
and power access is properly grounded.
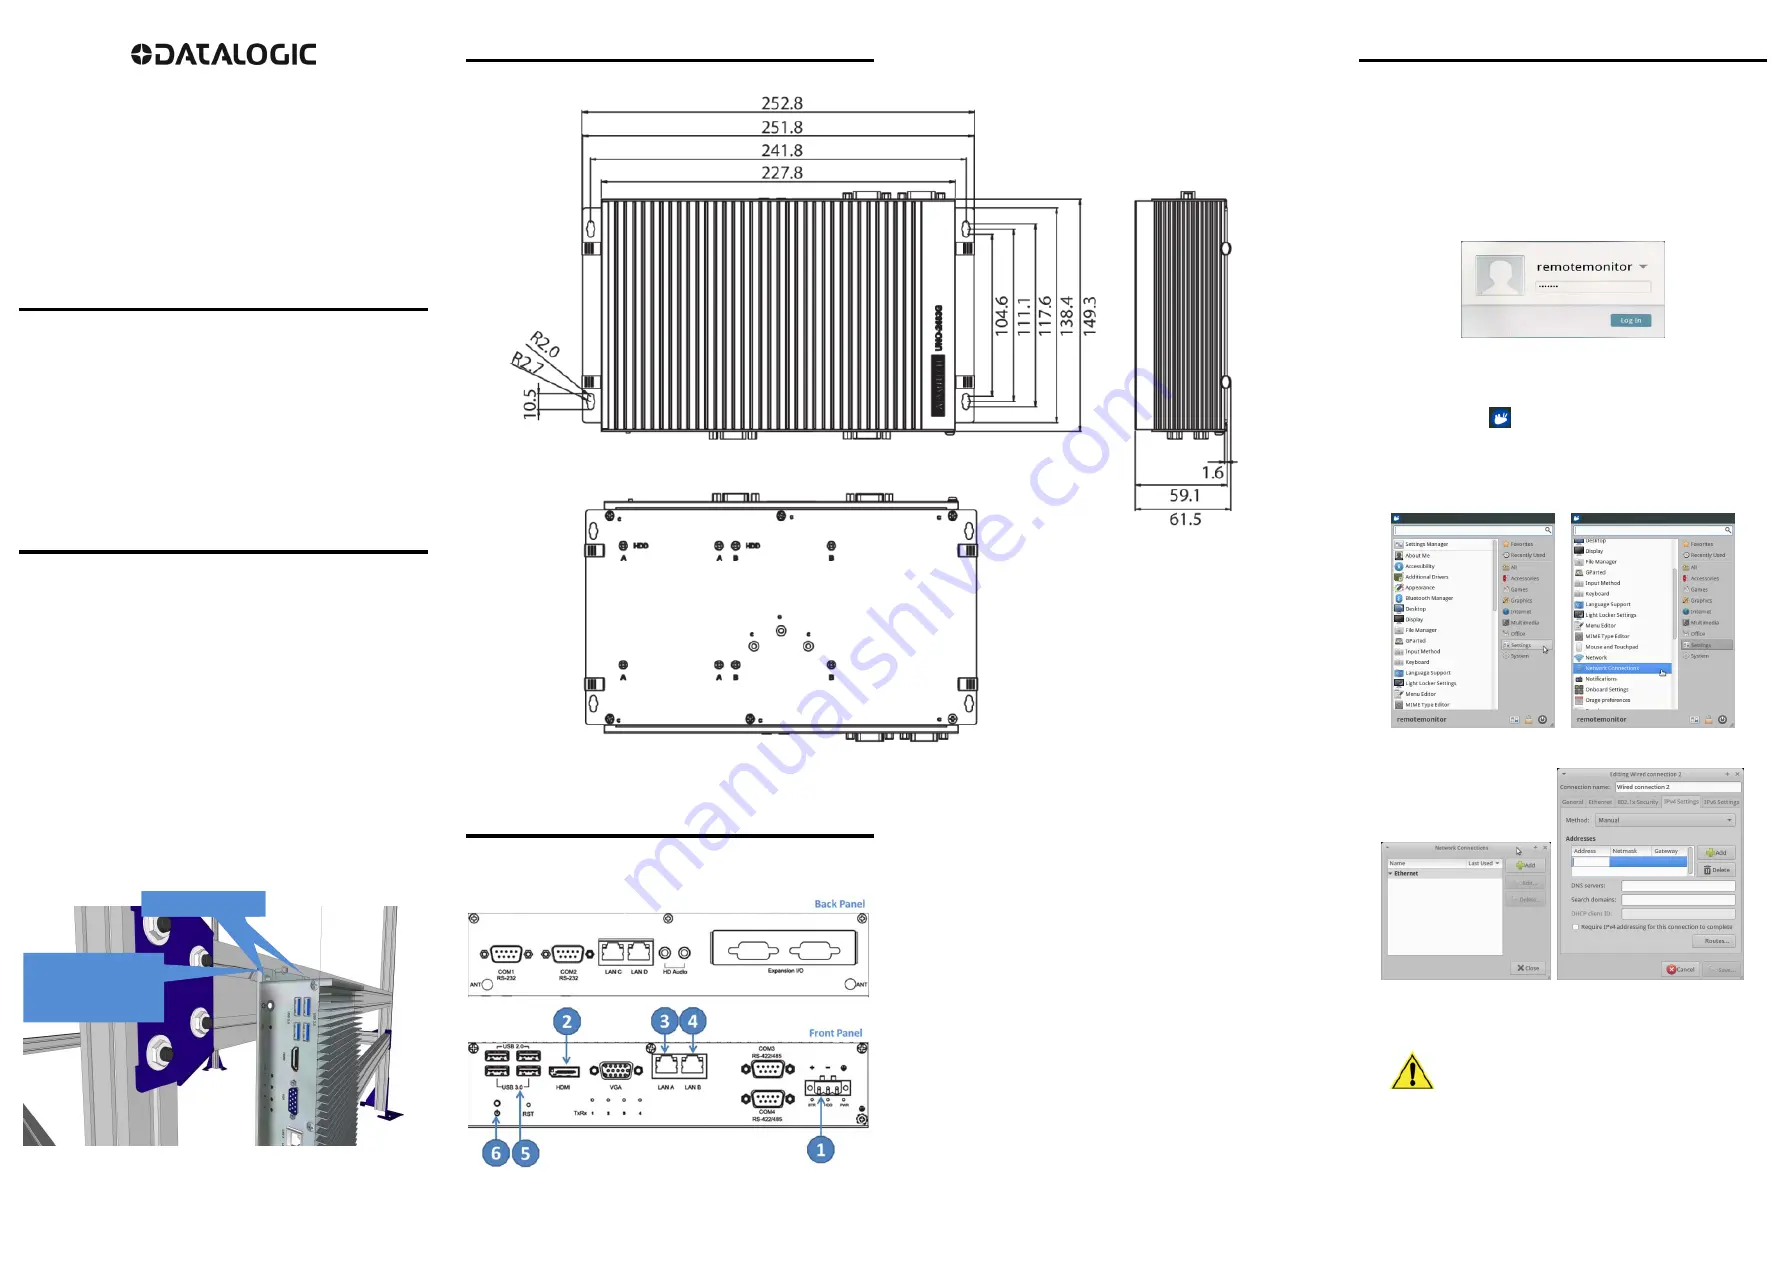
Figure 1: Mounting to Structure
MOUNTING DIMENSIONS
Figure 2: Mounting Dimensions
DATALOGIC WEBSENTINEL PLUS SERVER CONNECTIONS
Figure 3: Server Connections
1.
Power – Power supply connection
2. Digital Video – Monitor connections (optional, see Digital to Analog
converter below)
3.
LAN A – Connection to HOST Network
4.
LAN B – Connection to Device Network
5. USB 2.0 & 3.0 – Mouse and Keyboard connection (optional, see
section 2.6 Accessories)
6. Power
Switch
FIRST TIME STARTUP AND NETWORK CONFIGURATION
After the Datalogic server has been mounted, attach the power, monitor,
LAN 2 device network (and LAN 1 Host if used), keyboard, and mouse
cables as shown in section 2.5.1. The Datalogic WebSentinel PLUS server
uses a Linux operating system, which must be configured for your facility’s
static sorting/device network. If desired, the server can also configure to
connect to your facility’s Host network.
Use the following procedure to configure the network adapter settings.
1. Press the power switch to turn on the server. The Log In screen
appears.
2.
Select remotemonitor from the drop-down list.
3. Enter the default password, asiroot, and click Log In. The Linux
desktop is displayed.
4.
Click the start icon
in the upper left corner of the desktop. A Linux
menu appears.
5. Select
Settings
from the right side of the menu box, and then select
Network Connections
from the list on the left. The
Network
Connections
box opens.
6. Click
Add
. The
Editing
box opens.
7.
Select the Ipv4 Settings tab.
8.
Select Manual from the Method drop-down list.
IMPORTANT:
The IP addresses entered must be
a static IP assignment.
DO NOT USE DHCP
ADDRESS ASSIGNMENT
for the sorting/device
network.
9. Click
Add
, and enter the
Address
(IP address),
Netmask,
and
Gateway
in the fields provided. Contact the facility IT administrator for
the correct connection information.
10. Click
Save
.
11. If desired, add another connection for the facility Host network.
Mount the server to the
structure extrusion with
threaded screws
(920000080).
Mouning
Mounting brackets


