CUSHCRAFT LFA-2M9EL, Instruction Manual
The CUSHCRAFT LFA-2M9EL is a high-performance 2-meter amateur radio antenna designed for long-range communication. Ensure its optimal use with the comprehensive Instruction Manual available for free download at manualshive.com. This manual provides step-by-step guidance and useful tips to maximize the potential of your antenna.
Share
Download


Reviews:
No comments
Related manuals for LFA-2M9EL

Sure Cross MultiHop
Brand: Banner Pages: 6

UV-82
Brand: Baofeng Pages: 74

GDI-IR2600
Brand: Grace Digital Pages: 52
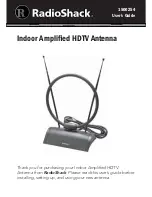
1500254
Brand: Radio Shack Pages: 8

ATS-909X2J
Brand: Sangean Pages: 69

QUEST PRO VQ4800
Brand: KING Pages: 20

9711QOR-86
Brand: Sea Tel Pages: 243

FLR3-400
Brand: Daktronics Pages: 4

RCP24
Brand: Easy wave Pages: 2

AK10
Brand: EnGenius Pages: 4

VIR810
Brand: Vooni Pages: 27

Halo
Brand: GDI Pages: 65

XRt12
Brand: Polk Audio Pages: 10

XMTUNER
Brand: Polk Audio Pages: 16

DAB 200
Brand: Schwaiger Pages: 24

DAB 100
Brand: Schwaiger Pages: 24

MD 87466
Brand: Medion Pages: 192

Yagi Y300 Series
Brand: ZCG Pages: 3


