


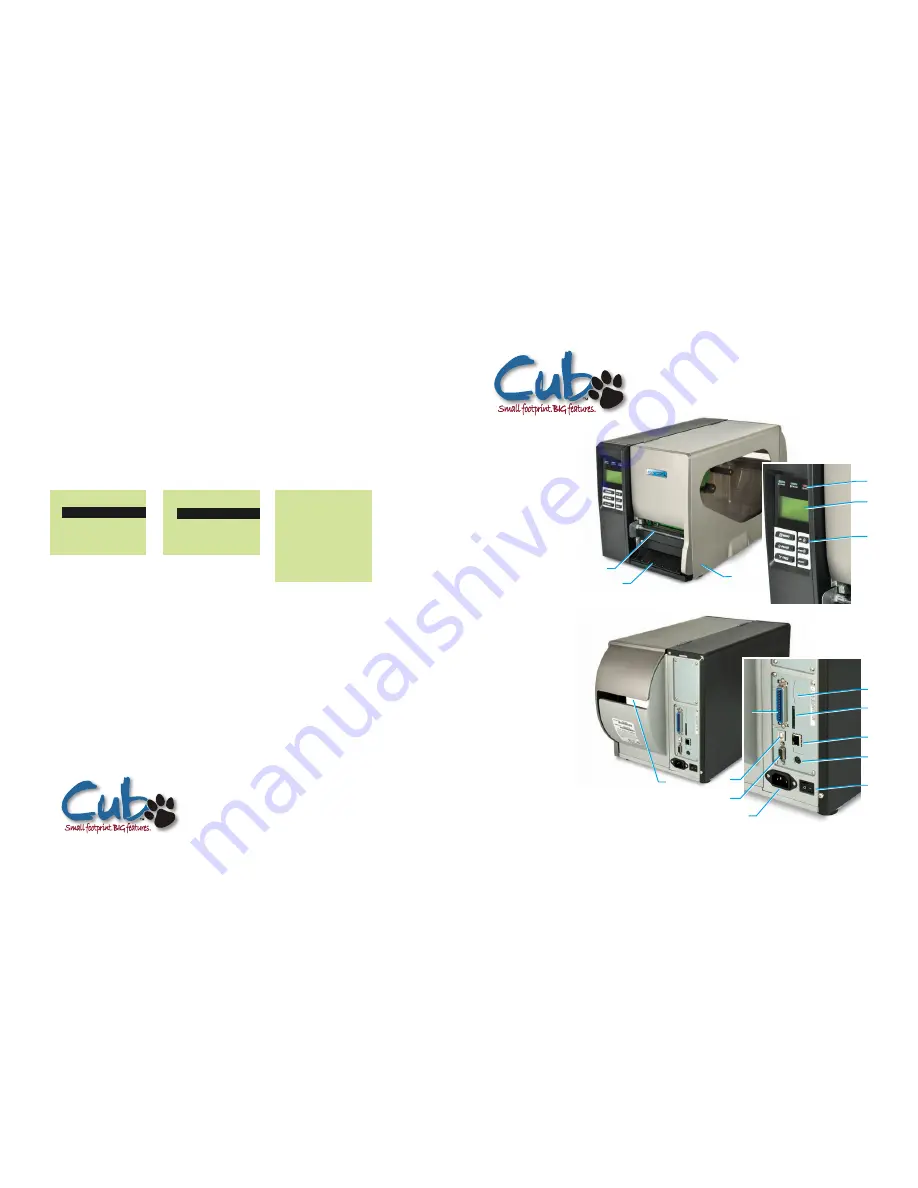
Front View
1. LED Indicator
2. LCD Display
3. Command Keys
4. Label Exit Point
5. Lower Front Cover
6. Media Cover Door
Rear View
1. FanFold Paper Slot
2. Centronics Interface
3. USB Interface
4. RS-232C Interface
5. AC Power
6. GPIO Interface
(optional)
7. SD Card Slot
8. Ethernet Inteface
9. PS/2 Interface
10 AC Power Switch
10
9
5
8
3
5
4
6
7
2
4
3
1
2
6
1
Viewing Network Status
continued from page 7
5. IP Address will now be highlighted press the printer’s
SELECT
button to view the printer’s current
IP Address, Subnet Mask and Gateway. To view the printer’s network card MAC Address press the
printer’s
DOWN
button, once MAC Address is highlighted press the printer’s
SELECT
button.
6. To return to the previous menu press the printer’s
MENU
button.
Configure (DHCP/ Static IP)
1. Follow steps 1-3 from viewing network status (above).
2. Status will now be highlighted press the printer’s
DOWN
button until Configure is highlighted,
once highlighted press the printer’s
SELECT
button.
3. The printer will now display DHCP and Static IP. The printer’s default method for obtaining an IP
address is DHCP. The printer will automatically use DHCP upon power up to obtain an IP address.
To turn DHCP off press the printer’s SELECT button while DHCP is highlighted. Press the printer’s
MENU button, the printer will reboot and the DHCP method will be disabled.
4. To set the printer’s Static IP address press the printer’s
DOWN
button to highlight Static IP.
Once Static IP is highlighted press the printer’s
SELECT
button. You can now enter the printer’s IP
Address, Subnet Mask & Gateway. To enter the value press the printer’s UP button. To advance to the
next number press the printer’s
DOWN
button. Once the value is entered press the printer’s
SELECT
button to advance to the next network setting. After all three values have been entered press the
printer’s
SELECT
button. The printer will reboot and your settings will be saved.
** For more information regarding network setup please see the user guide section 3.1.4. **
Ethernet 1/3
>
Status
Configure
Exit
IP Address
0.0.0.0
Subnet Mask
0.0.0.0
Gateway
0.0.0.0
Ethernet 1/3
>
IP Address
Configure
Exit
8
Cub CB-1024i and CB-1034i
Quick Start Installation Guide
Cub CB-1024i and CB-1034i
Quick Start Installation Guide
888-237-8525


