

Rugged, Reliable, Mobile, Secure
TM
1-800-260-9800
www.CRU-DataPort.com
The DataPort 25 Enhanced Carrier series is designed to provide
users the ultimate in data access flexibility. DataPort 25 Enhanced
Carriers are available in either USB (DataPort 25u, DataPort 25
USB-to-SATA) or USB and FireWire (DataPort 25c). DataPort 25
Enhanced Carriers are to be used as a portable stand-alone ex-
ternal hard drive enclosures and when inserted into the DataPort
25 frame will operate at full IDE or SATA transfer rates. If your
system provides standard USB or FireWire bus power the power
supply is not required, freeing users from the tether of a power
cord and providing access to your data anywhere.
DataPort 25 USB-to-SATA HDD Enhanced Carrier Install Guide
Frame Installation
Install the frame in an available 3.5” drive bay. Use the
case manufacturer’s rails if required. See CRU DataPort’s
website (www.CRU-DataPort.com) and the DataPort 25
Manual for more details.
Enhanced Carrier Operation
Warning!
Use caution when touching the connectors.
Internal damage could result from electrostatic discharge.
When used with the DataPort 25 Frame, the lock functions
as the power switch. The DataPort 25 Enhanced carrier
operates as a standard IDE or SATA device.
When used as a standalone USB device follow the direc-
tions below to set up.
Setting up the drive for Windows ME/2000/XP or Mac
OS 9.x/X
Connect the DataPort 25 Enhanced Carrier to an
available USB or FireWire port. No new drivers are
required. The hard disk drive will be found and a win-
dow will pop up stating that new hardware has been
detected. If the drive has previously been formatted,
the drive will be accessible through My Computer on
PCs or from the desktop on Macs.
Installing a hard drive in your DataPort 25 Enhanced
Carrier
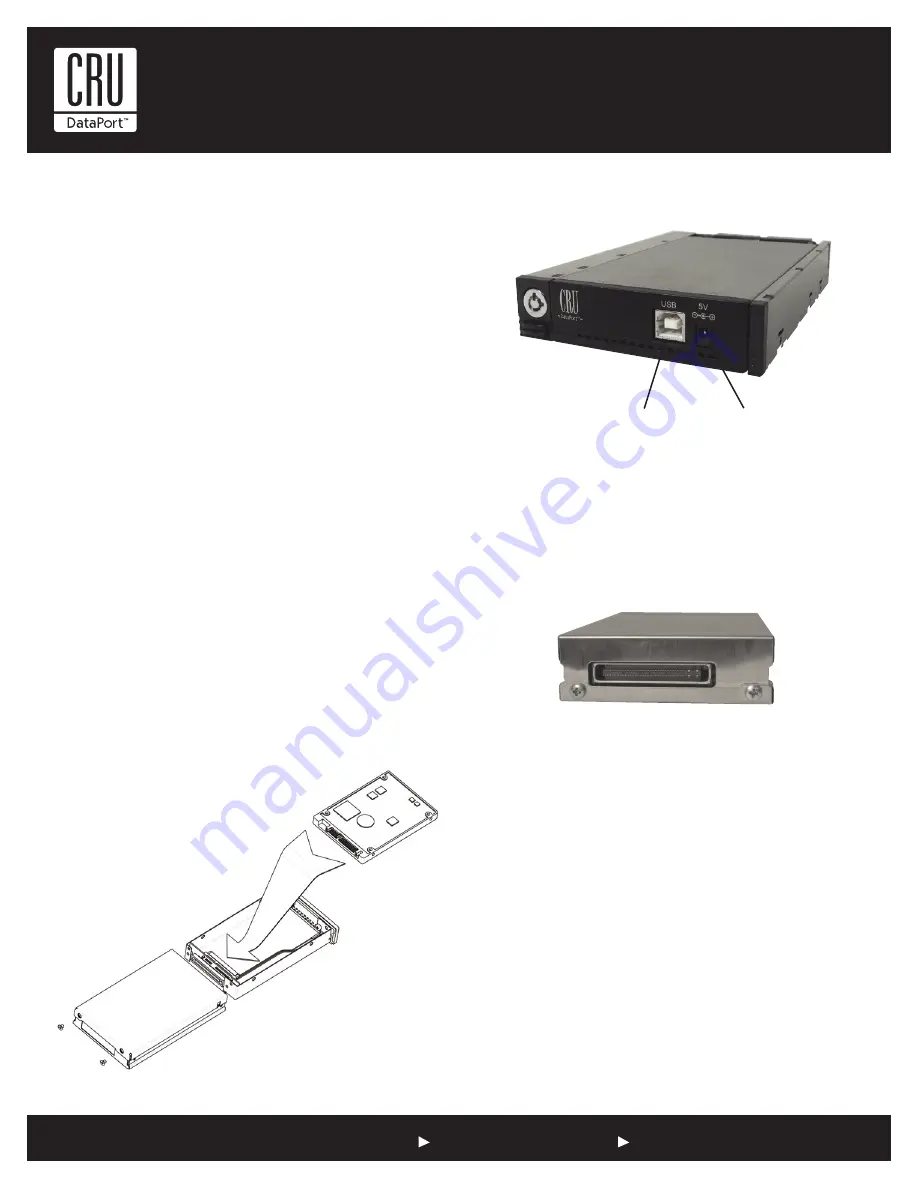
Power
USB
1. Remove the two screws from the back of the
Enhanced Carrier. Slide the metal cover off.
2. Install the hard drive upside-down. Connect the hard
drive (upside-down) to the connector on the circuit
board with the bottom of the hard drive facing
upwards. Then use the provided screws to secure the
hard drive.
3. Slide the cover back on to the carrier and secure it
with the cover screws.


