Code Soft s4, User Manual
The Code Soft s4 User Manual is a comprehensive guide to help you get the most out of your product. Download the manual for free from manualshive.com to learn about setup, troubleshooting, and maintenance. With step-by-step instructions and illustrations, you'll have all the information you need at your fingertips.
Share
Download


Reviews:
No comments
Related manuals for s4
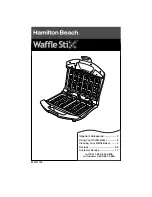
Waffle Stix
Brand: Hamilton Beach Pages: 10
26400
Brand: Hamilton Beach Pages: 10

26015
Brand: Hamilton Beach Pages: 2

26009
Brand: Hamilton Beach Pages: 2

MAGIC M2
Brand: Saeco Pages: 48

PerfectCoffee MC06
Brand: Waeco Pages: 88

TMCMRET
Brand: Toastmaster Pages: 12

3CF458X
Brand: BALAY Pages: 76

PL200K
Brand: 3M Pages: 23

LM1510
Brand: LabelMill Pages: 65

Coffee Vito
Brand: Schaerer Pages: 2

Q.5404
Brand: Qilive Pages: 96

LK-B20R
Brand: SEWOO Pages: 18

DeLonghi PICCOLO XS
Brand: Nescafe Dolce Gusto Pages: 21

2000 PLUS
Brand: DuraLabel Pages: 16

Baker's Select ABM6200
Brand: Welbilt Pages: 15

YU 2350
Brand: Orbegozo Pages: 18

EX 823
Brand: WHITE BROWN Pages: 16


