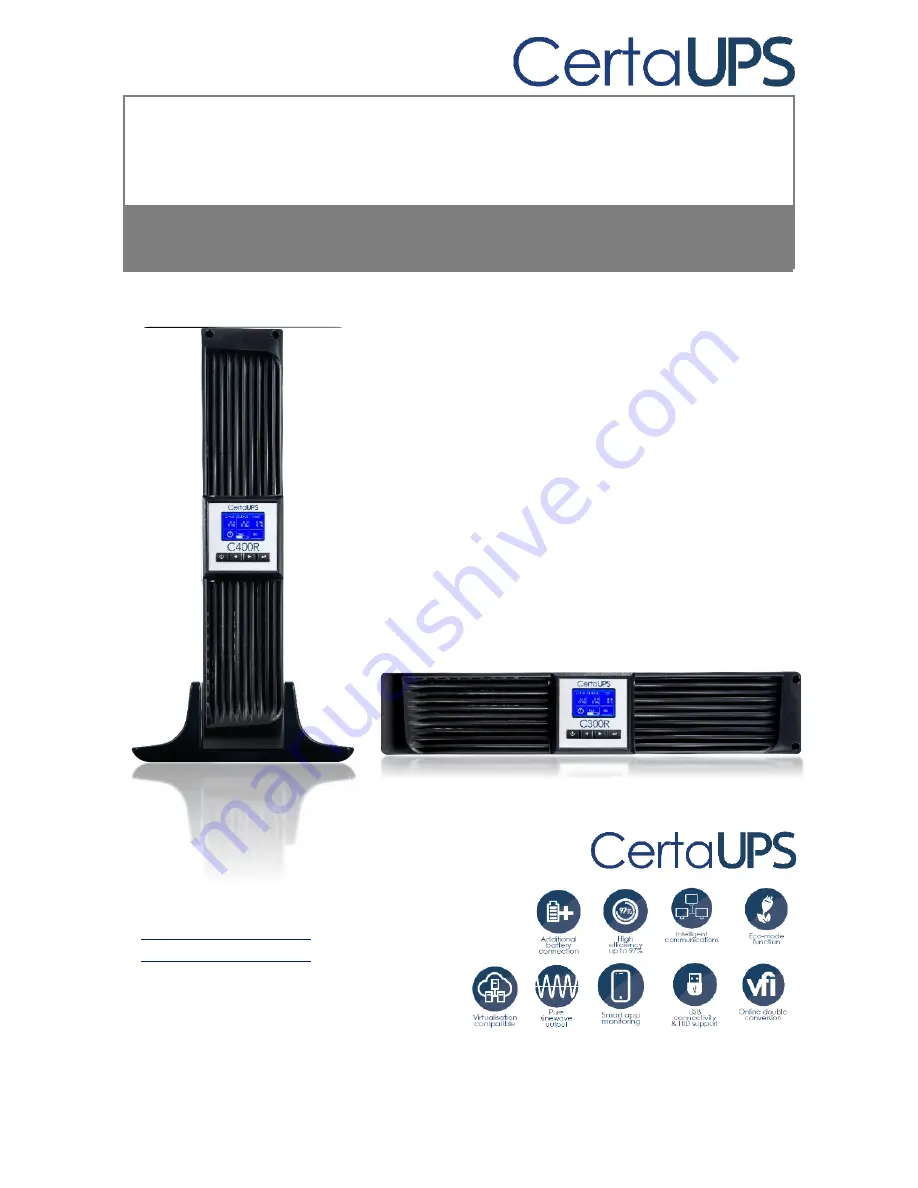
background image


C400R 1-3 kVA 

Rack/Tower 

1000-3000VA


Installation/Manual 

Service and support 

WWW.CERTAUPS.COM 
[email protected] 

T: +44 (0)1246 431 431 

Summary of Contents for C400R-010-B

Page 1: ...1 C400R 1 3 kVA Rack Tower 1000 3000VA Installation Manual Service and support WWW CERTAUPS COM INFO CERTAUPS COM T 44 0 1246 431 431 ...

Page 2: ...faults 9 1 3 1 UPS and battery care 9 1 3 2 Storing the UPS and batteries 10 1 3 3 Time to replace batteries 10 1 4 Transport 12 1 5 Storage 12 1 6 Standards 13 2 Description of commonly used symbols 14 3 Introduction 15 4 Connection 15 4 1 Inspection 16 4 2 Connection 16 UPS input connection 16 UPS output connection 16 4 3 Battery charge 17 ...

Page 3: ...attery mode 22 Fig 5 7 HE mode 24 Fig 5 8 Converter mode 25 Fig 5 9 Warning 25 Fig 5 11 Overload 26 Fig 5 12 Battery test 27 5 3 Turning the UPS on and off 27 5 4 LCD operation 29 6 Special function 37 6 1 HE function 37 6 2 Converter function 38 7 Trouble shooting 38 8 Maintenance 40 8 1 Operation 40 8 2 Storage 40 ...

Page 4: ...lues at 25 C 42 9 4 Dimensions and weights 42 10 Communication port 43 10 1 RS 232 and USB communication ports 43 10 2 RS 232 port 44 10 3 USB port 44 10 4 Installing an optional Network Management Card NMC 44 10 5 Dry contact port 45 11 Software 47 Free Software Download WinPower 47 12 Configuring UPS for EBM Numbers 48 Appendix Rear panel 49 ...

Page 5: ...etc to the UPS output Place cables in such a way that no one can step on or trip over them Use a reliable earth source The external battery source must be earthed Only connect the UPS to an earthed shockproof outlet socket The building outlet connection must be easily accessible to disconnect from the UPS When installing the UPS check that the sum of the leakage current of the UPS and the connecte...

Page 6: ...tup All 400R series are designed for tower and rack configurations They can be installed into a 19 server rack Please follow the instruction for Tower setup and Rackmount setup Tower setup This series of UPS can be placed both horizontally and vertically For a tower configuration UPS stands are provided to stabilise the UPS when positioned vertically The UPS stand must be attached to the bottom of...

Page 7: ...3 ...

Page 8: ...k rails with the rack mounting then slide the UPS into the rack rails and lock it in the rack mounting Once the UPS is secured in place the load can be connected 1 1 4 EBM Installation External Battery Module Connecting the EBM in Tower form 1 Slide the UPS and EBM vertically and place two UPS stands 1 either end of the UPS EBM 2 Attach the UPS to the EBM with the fastening plate 2 and screws prov...

Page 9: ... connect the battery terminal A from UPS terminal B shown as below Users need to remove the small blanking plate C on side of the front panel to allow the outlet wire of the EBM to pass through the gate and then reassemble front panel ...

Page 10: ...anel and unscrew the internal screws 4 Take off the front panel and connect the battery terminal A from UPS to EBM terminal B shown as below Users need to remove the small blanking plate C on side of the front panel to allow the outlet wire of the EBM to pass through the gate and then reassemble front panel 5 After securing the UPS into a rack load can be connected to the UPS Please make sure the ...

Page 11: ...rst EBM to the battery terminal E from the second EBM Users need to remove the small blanking plate C on side of the front panel to allow the outlet wire of the EBM to pass through the gate once complete reassemble the front panel Connecting the multiple EBMs in rack form 1 Connect the earthing line between the UPS and the first EBM then connect the earthing Line between the first EBM and the seco...

Page 12: ...all connected loads The UPS features its own internal current source batteries There is risk of electrical shock from the UPS output sockets or output terminal block even if the UPS is not connected to mains supply In order to fully disconnect the UPS first press the ON OFF button to turn off the UPS then disconnect the mains lead Ensure that no liquid or other foreign objects can enter the UPS Do...

Page 13: ...have a high short circuit current and pose a risk of shock Take all precautionary measures specified below and any other measures necessary when working with batteries remove all jewellery wristwatches rings and other metal objects only use only tools with insulated grips and handles When changing batteries always replace with the same quantity and the same type of batteries Do not attempt to disp...

Page 14: ...nnel away from batteries Batteries can present a risk of electrical shock or burn from high short circuit current The following precautions should be observed 1 Remove watches rings or other metal objects 2 Use tools with insulated handles 3 Do not lay tools or metal parts on top of batteries 4 Wear rubber gloves and boots 5 Disconnect the charging source prior to connecting or disconnecting batte...

Page 15: ...s 2 Slide and Pull the front panel left and then take it off 3 Disconnect the cable from the UPS and battery pack 4 Remove the right inner battery bracket 5 Pull the battery pack out onto flat area 6 Install new battery pack into UPS 7 Screw up the battery bracket and reconnect the battery cable A and B 8 Re install the front panel back to UPS ...

Page 16: ...ning Never dispose the batteries in a fire They may explode Do not open or modify the batteries Released electrolyte is harmful to the skins and eyes It may be toxic A battery can present a risk of electrical shock and high short circuit current To recycle the used batteries properly do not dispose of the UPS battery pack or batteries into the general waste Please follow your local laws and regula...

Page 17: ...C1 Harmonic Current IEC EN 61000 3 2 Voltage Fluctuation and Flicker IEC EN 61000 3 3 EMS ESD IEC EN 61000 4 2 Level 3 RS IEC EN 61000 4 3 Level 3 EFT IEC EN 61000 4 4 Level 4 SURGE IEC EN 61000 4 5 Level 4 CS IEC EN 61000 4 6 Level 3 MS IEC EN 61000 4 8 Level 3 Voltage Dips IEC EN 61000 4 11 Low Frequency Signals IEC EN 61000 2 2 ...

Page 18: ...nly used symbols Some or all of the following symbols may be used in this manual It is advisable to familiarize yourself with them and understand their meaning Alert you to pay special attention Protective Ground Alarm silence ...

Page 19: ... voltage which permanently supplies the loads Computers and peripherals are thus powered entirely by the mains voltage In the event of power failure the maintenance free batteries power the inverter This manual covers the UPS listed as follows Please confirm whether it is the model you intend to purchase by performing a visual inspection of the model number on the rear panel of the UPS Model No Ty...

Page 20: ...ed first The UPS System has no input breaker on the standard cabinet When installing the UPS the user needs to connect the external breakers and protective components in the input supply It is recommended to select an isolator instead of the traditional combination kit including breaker and fuse When selecting the ISOLATOR the user can refer to below table Model No UPS input isolator VOLTAGE CURRE...

Page 21: ... EPO status is disabled Disable the EPO status Enable the EPO status Normally closed Normally the EPO connector is closed with a wire on the rear panel Once the connector is open the UPS would stop the output until the EPO status is disabled Enable the EPO status Disable the EPO status 4 3 Battery charge Fully charge the batteries of the UPS system by leaving the UPS system connected to the mains ...

Page 22: ...P45 connectors Prepare the battery cable which should be able to carry the current of 50A for all models the cross section area should be greater than 4 mm2 for all model And battery wire colour is recommended as following GND Red wire Green Yellow wire Black wire The red wire is connected to the terminal of the battery The black wire is connected to the terminal of the battery Note the green yell...

Page 23: ... with dual colour backlight Standard back light is used to light up the display with white text and a blue background When the UPS has a critical alarm the backlight changes the text to dark amber and the background to amber See Figure below Fig 5 1 Online UPS Control Panel ...

Page 24: ...ain menu Press this button for 1s to exit the present menu to default system status display menu without executing a command or changing a setting Scroll up Press this button for 100ms 1s to scroll up the menu option Scroll down Press this button for 100ms 1s to scroll down the menu option Enter next menu tree Press this button for 100ms 1s to select the present menu option or enter next menu but ...

Page 25: ...splay the logo for several seconds and then enter to the default page which shows the UPS status summary The display automatically returns to the default UPS status summary screen when no button has been pressed for 15 minutes On the UPS status summary screen it provides the following information Status summary including mode and load Alarm status if any are present Notes alarm including fault and...

Page 26: ...or status 5 2 1 Line mode The example of LCD display in Line mode is shown in the following diagram 5 2 2 Battery mode The example of LCD display in battery mode is shown in the following diagram Fig 5 4 Battery mode When the UPS is running in battery mode the buzzer beeps once every 4 seconds Fig 5 3 Line mode ...

Page 27: ...n it is in bypass mode The power used by the load is supplied from the utility power via an internal filter The UPS will beep once every 2 minutes in bypass mode 5 2 4 Standby mode The LCD display in standby mode is shown in the following diagram Fig 5 5 Bypass mode Fig 5 6 Standby mode Input Output Load V 0 Hz 0 220 V Hz 60 0VA 0 W ...

Page 28: ...ode or Battery mode and the load supported from battery power Fig 5 7 HE mode The function could be enabled through the LCD setting or management software WinPower etc The transfer time of the output from HE mode to battery mode is less than 10ms this however can still be too long for some sensitive electrical equipment 5 2 6 Converter mode In converter mode the UPS will operate with a fixed outpu...

Page 29: ... The load should be derated to 70 in converter mode 5 2 7 Warning When a warning occurs the UPS will display the relevant warning Most warnings are not fatal and the UPS will continue to work but they should be paid attention to otherwise the UPS may fail The detailed warning table is shown in chapter of 7 Fig 5 9 Warning ...

Page 30: ...n red The detailed fault table is shown in chapter of 7 5 2 9 Other status When the UPS is overloaded the alarm will beep twice every second Some unnecessary loads should be removed to decrease the load connected to the UPS this should be less than 90 of its nominal power capacity Fig 5 11 Overload While doing the battery test the symbol of battery test would be shown on the display Fig 5 10 Fault...

Page 31: ...e UPS will alarm 5 3 Turning the UPS on and off Attention The UPS can only be turned on when connecting to the mains input for the first time Attention Please switch off all connected loads first before turning on the UPS Once operational switch on the loads one by one Switch off all of the connected loads before turning off the UPS Fig 5 13 Battery Fails ...

Page 32: ...ning on UPS without utility 1 Check all the connection is correct 2 By pressing button continuously for more than 1 second the buzzer will beep for 1 second and the UPS starts to turn on 3 At this time the fans begin to rotate and the LCD will display the CertaUPS logo The LCD will show the default UPS status summary screen after the UPS has finishing self test 4 A few seconds later the UPS switch...

Page 33: ... the default UPS status summary screen the user can get a variety of information about the current UPS status such as detailed measurements historical event log and identification information The settings of the UPS can also be configured to meet the users own requirements and optimise the functionality of the UPS 5 4 1 The main menu In the default UPS status summary screen when pressing or 1s det...

Page 34: ...us Event log Maintenance Control CONTROL Identification Settings Alarm 41 Output overload Battery Volt 54 8V Battery charging Charge level 100 Status Line Mode Running Time 0001 03 01 00 Input 230V 50Hz Output 230V 50Hz Load 3000VA 2700W ...

Page 35: ...he default UPS status summary menu By pressing 1s the display would return the last main menu tree Fig 5 15 UPS status menu tree UPS Status Event log Alarm 41 Output overload Battery Volt 54 8V Battery charging Charge level 100 Status Line Mode Running Time 0001 03 01 00 Input 230V 50Hz Output 230V 50Hz Load 3000VA 2700W By Pressing 1s By Pressing 1s By Pressing or 1s ...

Page 36: ...ened By press or 1s all the event could be displayed one by one The maximum number of records displayed is 50 When the number is larger than 50 the oldest one would be changed to the newest information By pressing 1s the display would return the last main menu tree Fig 5 16 Event menu tree Event Log Measurements By Pressing 1s By Pressing 1s 0001 05 01 00 Alarm 41 Output overload 1 3 0001 03 01 00...

Page 37: ...the output voltage and frequency the output current the load capacity the input voltage and frequency etc By pressing 1s the display would return the last main menu tree Fig 5 17 Measurement menu tree Press 1s UPS Status Measurements UPS Status Press 1s Output 1350W 1500VA DC Bus 325 1V 325 5V Temperature 22 C Battery 54 6V 100 Input 220 4V 60 0 Hz Output 220 4V 60 0 Hz Output 6 8A 75 Control ...

Page 38: ... then enter clear EPO status the UPS will then stop alarming and recover to bypass or standby mode The UPS then needs to be turned on by manual operation 5 Reset fault status if a fault is detected the UPS will enter Fault mode and generate an alarm To return to normal enter this menu to reset the error The UPS will then stop alarming and recover to bypass or standby mode The cause of the fault sh...

Page 39: ...egment 1 on Load segment 2 off Status Battery test OK Schedule battery test no Battery 54 6V 100 Clear EPO status Load segments Start Battery test Buzzer mute no Reset fault state Clear event log Restore factory settings Reset no Status Fault active Reset fault no Total events 50 Clear event log no ...

Page 40: ...tion information includes UPS serial number firmware serial number model type would be shown here By pressing 1s the display would return to the last main menu tree Fig 5 19 Identification menu tree Identification Settings By Pressing 1s By Pressing 1s Type Model C400R 010 B Serial number C0000000000 UPS firmware XXXXX XX Control By Pressing or 1s ...

Page 41: ...ction of HE function If the HE function is enabled the UPS powers the load directly from main power via internal filter while mains power is normal This is also referred to as economy mode Once the mains is lost or abnormal the UPS will transfer to Line mode or Battery mode and the load supported via battery power The benefit is overall high efficiency of 0 96 which in turn reduces power consumpti...

Page 42: ...tly first check the operating information on the LCD display Please attempt to solve the problem using the table below If the problem persists consult your dealer Problem Possible cause Remedy No indication no warning tone even though system is connected to mains power supply No input voltage Check building wiring socket outlet and input cable Emergency supply period shorter than nominal value Bat...

Page 43: ...Battery may need to be replaced Consult dealer Overload Alarm Code 41 42 43 Overload Check the loads and remove some non critical loads Check whether some loads have failed EPO active Alarm Code 71 EPO function is enabled Turn off the EPO switch Bus fault Low high Unbalance Soft start Alarm Code 22 21 23 25 UPS internal fault Consult dealer Inverter fault Low high soft start Alarm Code 33 32 34 UP...

Page 44: ...f external battery pack if applicable 6 Other information for complete description of the problem 8 Maintenance 8 1 Operation The UPS system contains no user serviceable parts If the battery service life 3 5 years at 25 C ambient temperature has been exceeded the batteries must be replaced In this case please contact your dealer 8 2 Storage If the batteries are stored in temperate climatic zones t...

Page 45: ...running while making sure the UPS will not shutdown during the replacement First if there is a battery breaker then turn it off first Disconnect the battery cable carefully and make sure no exposed wires can be touched Reconnect the new batteries to the UPS by following section 5 8 Then turn on the battery breaker and press the ON switch to make the UPS perform a battery test check whether the bat...

Page 46: ...es at 25 C Model No 100 Load 50 Load C400R 010 B 5 15 C400R 020 B 5 10 C400R 030 B 5 10 9 4 Dimensions and weights Model C400R 010 B C400R 010 C C400R 020 B C400R 020 C C400R 030 B C400R 030 C UPS Case Net weight kg 16 2 8 4 19 7 9 3 28 6 13 2 Dimension mm W x H x D 438x86 5x436 438x86 5x605 EBM Case Dimension mm W x H x D Net weight kg 6 8 6 7 9 3 Type 36V 48V 72V ...

Page 47: ...ort When a communication cable is installed the power management software can exchange data with the UPS The software polls the UPS for detailed information on the status of the UPS and power environment If a power emergency occurs the software initiates the saving of all data and an orderly shutdown of the equipment Pin Signal name Function Direction from the UPS 1 Unused Not applicable 2 TX Tran...

Page 48: ...able to the USB port on a computer 10 4 Installing an optional Network Management Card NMC Each UPS has one available intelligent slot which allows the installation of the optional NMC the NMC adds the additional functionality of TCP IP network connectivity via SNMP simple network management protocol After you install an NMC Card you can also connect an environmental monitoring probe to the UPS No...

Page 49: ... by default the output contact is Summary Alarm The signal input to control UPS On Off Maintain bypass status need to be configured by LCD setting menu or protocol command the default input contact is Disable Note The relay output contact must not be connected to any mains connected circuits Reinforced insulation to the mains is required The relay output contact has a maximum rating of 30VAC 1A an...

Page 50: ...escription Disable Disable the function UPS On One second pulse activate if active the UPS turns on when UPS is not on inverter It is the same as a remote button to control UPS status UPS Off One second pulse activate if active the UPS turns off when UPS is on inverter It is the same as a remote button to control UPS status Maintain bypass One second pulse activate if active the UPS will transfer ...

Page 51: ...LAN which communicated with a local computer through RS232 or USB protocol no matter how far from the UPSs Installation procedure 1 Go to the website http www certaups com software 2 Follow the instructions as described on the website to download the software 3 When downloading all required files from the internet enter the product key 511C1 01220 0100 478DF2A to install the software When the comp...

Page 52: ...tings until you reach the settings item EBM 3 Enter settings item Press the Enter button for longer than one second to enter the setting item 4 Select setting value Use the left and right buttons to select the number of EBMs according to your UPS configuration up to a maximum of 9 5 Confirm settings Press and hold the Enter button for one second and the UPS will then return to settings mode 6 Exit...

Page 53: ...on table and pictures are shown as below No C400R 010 B C C400R 020 B C C400R 030 B C 1 AC Output 2 EPO Dry in Communication Port 3 UPS Port 4 AC Input 5 Dry out 6 SNMP slot 7 RS232 8 Earth Line Port C400R 010 B C C400R 020 B C C400R 010 B C rear panel ...

Page 54: ...50 C400R 020 C rear panel C400R 030 B C rear panel The EBM rear panel description table and picture are shown as below C4BB3 C4BB4 C4BB5 EBM No C4BB3 C4BB4 C4BB5 EBM 1 Earth Line Port ...

Reviews: