background image


Operating Instructions 

(EN)


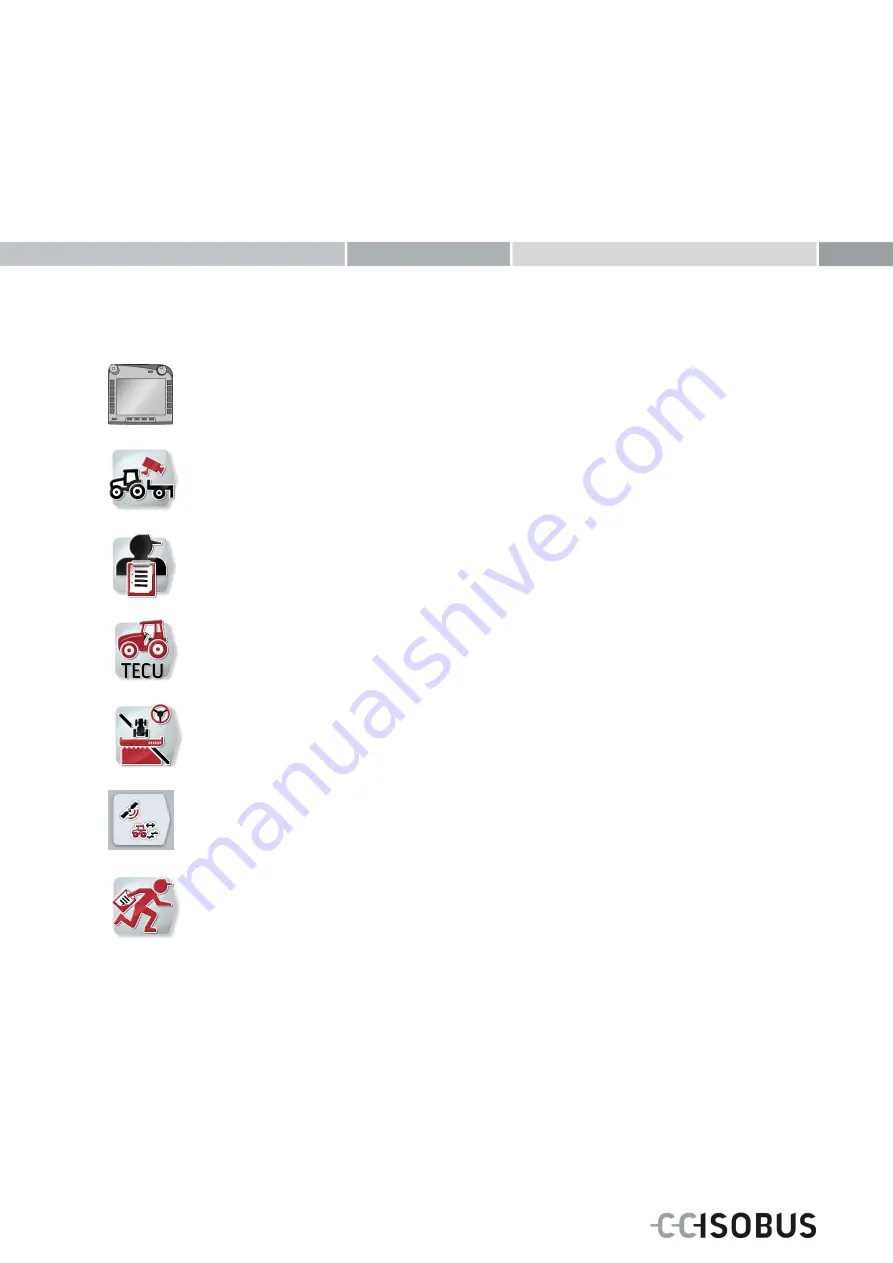
ISOBUS-Terminal CCI 100/200 

ISOBUS implement control 


CCI.Cam 

Visual implement monitoring 


CCI.Control 

Documentation and task management 


CCI.Tecu 

Tractor data 


CCI.Command 

GPS track guiding and section control 


CCI.GPS 

GPS settings and tractor geometry 


CCI.Courier 

Task data exchange between farm PC and terminal 


Summary of Contents for CCI 100

Page 1: ...ment control CCI Cam Visual implement monitoring CCI Control Documentation and task management CCI Tecu Tractor data CCI Command GPS track guiding and section control CCI GPS GPS settings and tractor geometry CCI Courier Task data exchange between farm PC and terminal ...

Page 2: ...ISOBUS Terminal CCI 100 200 ISOBUS implement control Operating instructions Reference Firmware v5 ...

Page 3: ...3 4 Interfaces 13 4 Set up for operation 14 4 1 Mounting the terminal 14 4 2 Connecting the Terminal 15 5 Operation 16 5 1 Switching on the terminal 16 5 2 Entering values 16 5 3 Setting up the terminal 21 5 4 Creating screenshots 72 5 5 ISOBUS auxiliary controls AUX Control 73 6 Troubleshooting 76 6 1 Terminal errors 76 6 2 Error messages 77 6 3 Service 78 7 Technical Information 79 7 1 Mechanica...

Page 4: ...ulting from the failure to observe these operating instructions 1 1 About the ISOBUS Terminal CCI 100 200 CCI 100 200 is a universal terminal and makes possible ISOBUS implement control The following CCI Apps can be used directly with the CCI 100 200 CCI Cam Visual implement monitoring CCI TECU Tractor data ISOBUS UT ISOBUS implement operation The following CCI Apps can be used on the CCI 100 200 ...

Page 5: ...on of indications in the operating instructions The safety indications in these operating instructions are specially identified Warning General Hazards This occupational safety symbol identifies general safety indications the non observance of which poses a danger for life and limb Carefully observe the indications regarding occupational safety and exert particular caution in these cases Caution T...

Page 6: ... to the terminal during maintenance work or when using a charging device on the battery of the towed production implement Never perform maintenance work or repairs when the device is switched on Disconnect the power supply to the terminal beforehand when welding on the tractor or an attached implement Only use a soft cloth moistened with clean water or a small amount of glass cleaning agent to cle...

Page 7: ...and electronic components comply with the EMC Directive 89 336 EC in its respectively valid version and that they bear the CE marking In order to retrofit mobile communication systems e g radio telephone it is important to meet the following requirements Only devices may be installed which are approved in accordance with valid farming regulations e g BZT Federal Office for Approval in Telecommunic...

Page 8: ...ch In order to do so the implement must support the stop function Note Under no circumstances does the stop switch intervene in tractor functions i e neither power take off nor hydraulic functions are compromised Further information on this point can be obtained from the implement operating instructions Pos 4 CC Isobus Sei tenumbruch 8 mod_1274446340522_0 doc 121469 1 ...

Page 9: ...der the flap 4 Interface strip 5 Nameplate 6 Softkey swap 3 2 Nameplate The nameplate features all important terminal information 1 Serial number 2 Manufacturer item number or material number 3 Terminal type CCI 100 or 200 4 Manufacturer information 5 Production date week and year 6 Hardware version Note The nameplates vary from manufacturer to manufacturer As such not all information is featured ...

Page 10: ...3 3 Operating elements The following operating elements are available on the terminal 1 Stop switch 2 Brightness sensor 3 Touchscreen 4 ESC button 5 Scroll wheel 6 Function keys 7 Acknowledgement button 8 i button 9 Toggle button 10 Home button 11 ON OFF ...

Page 11: ...orted or not 3 3 2 ESC button The ESC button is pressed to abort inputs and functions The modifications made are not accepted and the previous valid value is maintained Note The ESC button can only be used if there is an ESC button operable via the touchscreen on the display The function of button and push button is identical 3 3 3 Scroll wheel The scroll wheel is used for the direct quick input o...

Page 12: ...ement button The acknowledgement button ACK is used to confirm error messages 3 3 7 i button The i button is a freely assignable button It makes possible direct access to an app or device operation that has been selected in the user settings under Free button assignment see chapter 5 3 3 2 3 3 8 Toggle button Repeated quick pressing of the toggle button makes possible sequential toggling between d...

Page 13: ...te With some implements when changing from an active implement function operations being performed will automatically switch off For further information on this point consult the implement operating instructions 3 3 10 Touchscreen The terminal is equipped with a top quality touchscreen for menu navigation and the easy input of values and texts By touching the screen functions can be requested dire...

Page 14: ...hardware generation 1 or a round cap hardware generation 2 and 3 For a detailed description of the USB connection see chapter 5 4 Hardware generation 1 1 CAN1 IN 2 CAN1 OUT 3 CAN2 IN only CCI 200 4 Video IN 5 Signal ISO 11786 6 RS232 1 7 RS232 2 8 Wi Fi only CCI 200 9 LIN 10 ETHERNET only CCI 200 Hardware generation 2 and 3 1 CAN1 IN 2 CAN1 OUT 3 Signal ISO11786 RS232 1 RS232 2 4 Video IN 5 LIN 6 ...

Page 15: ... 1 Assemble the device support Figures 1 and 2 2 Mount the device support to the frame and to the terminal Figures 3 and 4 3 Select a suitable position in the tractor cab within the driver s field of vision for fitting the terminal Figures 5 and 6 4 Secure the terminal with the device support in the tractor cab Note Ensure that the screws are tightened firmly Secure the terminal so that it can be ...

Page 16: ...n to ISOBUS and power supply the type A cable is necessary Cable type A Proceed as follows to connect the terminal to the ISOBUS and the power supply 1 Connect the CAN1 IN and CAN1OUT interfaces on the terminal using the type A cable to the In cab socket of the tractor Pos 8 CC Isobus Sei tenumbruch 8 mod_1274446340522_0 doc 121469 1 ...

Page 17: ...use of both the terminal and the connected ISOBUS implements The values are modified by using the so called input dialogues These dialogues are shown above the current active operating screen After modification the input dialogue is closed and the user returns to the operating screen 5 2 1 Buttons in Input Dialogues By using the OK button the newly set target value is accepted in all input dialogu...

Page 18: ... 5 2 2 Entering numerical values If a parameter is selected from an operating screen which has a numerical value the input dialogue for numerical values appears There are three different dialogue formats 1 Number Block 2 Scroll wheel 3 Slider ...

Page 19: ...s the OK button The input dialogue is opened 2 Enter the new value The input method depends on the format of the input dialogue Number Block Enter the value using the buttons in the input dialogue or by turning the scroll wheel Scroll wheel Enter the value by turning the scroll wheel Slider Drag the slider or press the and buttons until the desired value is set Alternatively you can also enter the...

Page 20: ... Boolean value 1 In the operating screen select the parameter for which the value needs to be changed Press on the parameter on the touchscreen or turn the scroll wheel until the parameter is highlighted in white and then press on the scroll wheel Once the parameter is highlighted alternatively you can also press the OK button The input dialogue is opened 2 Enter the new value Press the square wit...

Page 21: ...ist 1 In the operating screen select the parameter for which the value needs to be changed Press on the parameter on the touchscreen or turn the scroll wheel until the parameter is highlighted in white and then press on the scroll wheel Once the parameter is highlighted alternatively you can also press the OK button A selection list opens 2 Select the new value from the list To do so press the but...

Page 22: ... button is highlighted white you can alternatively also press the scroll wheel or the OK F6 button Note A detailed description of the settings of a connected ISOBUS implement can be referred to in the operating instructions of the relevant implement You can directly access the settings F1 from the Main Menu From each submenu and their menu items you can return to the Main Menu directly by pressing...

Page 23: ...gs Offers setting options for language keyboard system of units and decimal symbol System settings Offers setting options for date and time app management CAN interfaces calibration of the touchscreen and access to the service menu Info and Diagnostics Provides information about the software and hardware of the terminal about the network members the internal RAM and error memory Makes it possible ...

Page 24: ...ighting Press the Display lighting button on the touchscreen The Display lighting screen opens More detailed information on Display lighting can be consulted in chapter 5 3 3 4 To change the sound Press the Sound button on the touchscreen The Sound screen opens More detailed information on sound can be consulted in chapter 5 3 3 5 App toggling Free button assignment Activate deactivate button sele...

Page 25: ...ighlighted in white and then press on the scroll wheel Once the button is highlighted you can alternatively also press the OK F6 button A selection list opens 2 Select the desired setting from the list To do so press the button with the app or turn the scroll wheel until the button is highlighted in white and then press on the scroll wheel The app appears in the selection window 3 Confirm your sel...

Page 26: ...button on the touchscreen or turn the scroll wheel until the button is highlighted in white and then press on the scroll wheel Once the button is highlighted you can alternatively also press the OK F6 button The following screen opens You have the following operating options Enter Day lighting Enter Night lighting Select Lighting Mode Enter Lighting threshold ...

Page 27: ...our entry with OK Note The value for the Display lighting is given as a percentage and can be adjusted in steps of 10 5 3 3 4 2 Enter Night lighting To enter the desired display brightness for night time operation proceed as follows 1 Press on the Night lighting button on the touchscreen or turn the scroll wheel until the button is highlighted in white and then press on the scroll wheel Once the b...

Page 28: ... or pressing the button with the lighting mode again or by pressing the scroll wheel 5 3 3 4 4 Enter Lighting threshold An on off point is specified for the display lighting The value provided by the brightness sensor is the reference variable The illumination is activated when exceeding the ON activation point and deactivated when undershooting the OFF activation point Proceed as follows to enter...

Page 29: ...nd button on the touchscreen or turn the scroll wheel until the button is highlighted in white and then press on the scroll wheel Once the button is highlighted you can alternatively also press the OK F6 button The following screen opens You have the following operating options Activate deactivate beeper Enter volume ...

Page 30: ...utton is highlighted you can alternatively also press the OK F6 button 2 Enter the Boolean value 3 Confirm your entry with OK 5 3 3 5 2 Enter volume To enter the beeper volume proceed as follows 1 Press on the Volume button on the touchscreen or turn the scroll wheel until the button is highlighted in white and then press on the scroll wheel Once the button is highlighted you can alternatively als...

Page 31: ...ngs of the terminal can be made in the tab Country settings You have the following operating options Select language Select keyboard Change to units Press the Units button on the touchscreen The Units screen opens More detailed information about Units can be found in chapter 5 3 4 3 Select decimal symbol ...

Page 32: ...ndow 3 Confirm your selection by pressing OK or pressing the button with the language again or by pressing the scroll wheel 5 3 4 2 Select keyboard To select a keyboard proceed as follows 1 Press on the Keyboard button on the touchscreen or turn the scroll wheel until the button is highlighted in white and then press on the scroll wheel Once the button is highlighted you can alternatively also pre...

Page 33: ... by pressing the scroll wheel 5 3 4 4 Select decimal symbol To select the decimal symbol proceed as follows 1 Press on the Decimal symbol button on the touchscreen or turn the scroll wheel until the button is highlighted in white and then press on the scroll wheel Once the button is highlighted you can alternatively also press the OK F6 button A selection list opens 2 Select the desired setting fr...

Page 34: ...ate and Time Press the Date and Time button on the touchscreen The Date and Time screen opens You can find more detailed information about Date and Time in chapter 5 3 5 3 Change to app management Press the App management button on the touchscreen The App management screen opens More detailed information on App management can be consulted in chapter 5 3 5 4 Interfaces CAN Perform touch calibration...

Page 35: ...on view opens Five crosses are displayed on the screen one after the other 2 On the touchscreen press as near to the centre of these crosses as possible 3 To finalise the calibration and to accept the values calculated touch any part of the screen Note If you do not touch the screen within 30 seconds the calibration is aborted and the previous values will be maintained 5 3 5 2 Call service area Ca...

Page 36: ... scroll wheel until the button is highlighted in white and then press on the scroll wheel Once the button is highlighted you can alternatively also press the OK F6 button The following screen opens You have the following operating options Enter date Enter time Select date format Select time format Activate deactivate GPS update Enter timezone Activate deactivate summer winter time ...

Page 37: ...scroll wheel Once the button is highlighted you can alternatively also press the OK F6 button 2 Enter the relevant value on the touchscreen using the number pad or the slider 3 Confirm your entry with OK 5 3 5 3 3 Select date format To select the date specification format proceed as follows 1 Press on the Date Format button on the touchscreen or turn the scroll wheel until the button is highlighte...

Page 38: ... pressing the button with the format again or by pressing the scroll wheel 5 3 5 3 5 Activate deactivate GPS update To activate deactivate GPS update proceed as follows 1 Press on the GPS update button on the touchscreen or turn the scroll wheel until the button is highlighted in white and then press on the scroll wheel Once the button is highlighted you can alternatively also press the OK F6 butt...

Page 39: ...ollows 1 Press on the am pm button on the touchscreen or turn the scroll wheel until the button is highlighted in white and then press on the scroll wheel Once the button is highlighted you can alternatively also press the OK F6 button A selection list opens 2 Select the desired setting from the list To do so press the button with the Setting or turn the scroll wheel until the button is highlighte...

Page 40: ...n the App management button on the touchscreen or turn the scroll wheel until the button is highlighted in white and then press on the scroll wheel Once the button is highlighted you can alternatively also press the OK F6 button The following screen opens You have the following operating options Activate deactivate apps ...

Page 41: ...with the name of the app to be activated deactivated or turn the scroll wheel until the button is highlighted in white and then press on the scroll wheel Once the button is highlighted you can alternatively also press the OK F6 button 2 Enter the Boolean value 3 Confirm your entry with OK Note To be able to access the activated apps the terminal must be restarted ...

Page 42: ...ite and then press on the scroll wheel Once the button is highlighted you can alternatively also press the OK F6 button The following screen opens Note The interface settings Management GSM Settings and Wi Fi settings are only available if the ConnectionManager app is activated The interface setting farmpilot is are only available if the farmpilot app is activated The Wi Fi interface setting is on...

Page 43: ...ISOBUS Terminal CCI 100 200 Operation 42 You have the following operating options Change to Management Switch to GSM settings Switch to Wi Fi settings Switch to farmpilot settings ...

Page 44: ...s on the Management button on the touchscreen or turn the scroll wheel until the button is highlighted in white and then press on the scroll wheel Once the button is highlighted you can alternatively also press the OK F6 button The following screen opens You have the following operating options Select connection ...

Page 45: ...el Once the button is highlighted you can alternatively also press the OK F6 button A selection list opens 2 Select the desired setting from the list To do so press the button with the Connection or turn the scroll wheel until the button is highlighted in white and then press on the scroll wheel The connection appears in the selection window 3 Confirm your selection by pressing OK or pressing the ...

Page 46: ...ttings button on the touchscreen or turn the scroll wheel until the button is highlighted in white and then press on the scroll wheel Once the button is highlighted you can alternatively also press the OK F6 button The following screen opens You have the following operating options Select sample configuration Insert settings yourself ...

Page 47: ...til the button is highlighted in white and then press on the scroll wheel The sample configuration appears in the selection window 3 Confirm your selection by pressing OK or pressing the button with the Sample configuration again or by pressing the scroll wheel 5 3 5 5 2 2 Insert settings yourself To enter the GSM settings yourself proceed as follows 1 Sequentially press the buttons APN User name ...

Page 48: ...te and then press on the scroll wheel Once the button is highlighted you can alternatively also press the OK F6 button The following screen opens You have the following operating options Switch to Wi Fi networks Press the Wi Fi networks button on the touchscreen The Wi Fi networks screen opens More detailed information about Wi Fi networks can be found in chapter 5 3 5 5 3 3 Activate deactivate DH...

Page 49: ...5 3 5 5 3 2 Enter network settings yourself To enter the Wi Fi settings yourself proceed as follows 1 Sequentially press the buttons IP address Subnet mask Standard gateway Primary DNS Secondary DNS and WINS server on the touchscreen or turn the scroll wheel until the button in question is highlighted in white and then press on the scroll wheel Once the button is highlighted you can alternatively ...

Page 50: ...on on the touchscreen or turn the scroll wheel until the button is highlighted in white and then press on the scroll wheel Once the button is highlighted you can alternatively also press the OK F6 button The following screen opens You have the following operating options Add Wi Fi network Edit Wi Fi network Delete Wi Fi network Update the list of Wi Fi networks ...

Page 51: ...erating screen opens 2 In the operating screen select all parameters one after the other To do so press the parameter on the touchscreen or turn the scroll wheel until the button is highlighted in white and then press the scroll wheel Once the button is highlighted you can alternatively also press the OK F6 button 3 Enter the new value on the touchscreen using the keyboard 4 Confirm your entry wit...

Page 52: ...e scroll wheel Once the button is highlighted you can alternatively also press the OK F6 button The following operating screen opens 2 In the operating screen select all parameters one after the other To do so press the parameter on the touchscreen or turn the scroll wheel until the button is highlighted in white and then press the scroll wheel Once the button is highlighted you can alternatively ...

Page 53: ...press the OK F6 button The context menu opens 2 Press on the Edit button on the touchscreen or turn the scroll wheel until the button is highlighted in white and then press on the scroll wheel The following operating screen opens 3 In the operating screen select the parameter for which the value needs to be changed To do so press the parameter on the touchscreen or turn the scroll wheel until the ...

Page 54: ...hlighted in white and then press the scroll wheel Once the button is highlighted you can alternatively also press the OK F6 button The context menu opens 2 Press on the Delete button on the touchscreen or turn the scroll wheel until the button is highlighted in white and then press on the scroll wheel 5 3 5 5 3 3 5 Update the list of Wi Fi networks To update the list of Wi Fi networks proceed as f...

Page 55: ... the touchscreen or turn the scroll wheel until the button is highlighted in white and then press on the scroll wheel Once the button is highlighted you can alternatively also press the OK F6 button The following screen opens You have the following operating options Activate deactivate Primary terminal Select Location of the terminal ...

Page 56: ...one primary terminal on the bus If an additional primary terminal is detected on the bus by the CCI 100 200 you will receive an error message Note An ISOBUS auxiliary control AUX is only displayed on the primary terminal 5 3 5 5 5 Select Location of the terminal To change the position of the terminal proceed as follows 1 Press on the Position of terminal button on the touchscreen or turn the scrol...

Page 57: ...onents of the terminal can be checked You receive the version information for installed apps Basic information on the implements connected to the ISOBUS can be called up You have the following operating options Change to the terminal information Change to the network member information Change to the storage information Change to self test Show error memory ...

Page 58: ...lso press the OK F6 button A chronologically ordered list of error messages opens 2 To view detailed information about one of the error messages on the touchscreen press the button with the error message or turn the scroll wheel until the button is highlighted in white and then press on the scroll wheel Once the button is highlighted you can alternatively also press the OK F6 button A screen opens...

Page 59: ...the Terminal button on the touchscreen or turn the scroll wheel until the button is highlighted in white and then press on the scroll wheel Once the button is highlighted you can alternatively also press the OK F6 button The following screen opens You have the following operating options Show software information Show hardware information ...

Page 60: ...formation a Package b Anedo Base System c Bootloader d Version number ISOBUS UT e Kernel f Version number MENU g Version number of the individual apps 5 3 6 2 2 Show hardware information To display the hardware information proceed as follows 1 Press on the Hardware button on the touchscreen or turn the scroll wheel until the button is highlighted in white and then press on the scroll wheel Once th...

Page 61: ...d in white and then press on the scroll wheel Once the button is highlighted you can alternatively also press the OK F6 button Network members are identified The following screen opens You have the following operating options Show information Filter list Reset filter Delete all object pools Delete actual object pool Note Buttons of implements whose object pool has been loaded once but which are no...

Page 62: ... e Source address 5 3 6 3 2 Filter list To filter the list of network members proceed as follows 1 Press the Filter list button F10 on the touchscreen The list of network members is filtered so that only the connected and active members are displayed 5 3 6 3 3 Reset filter To reset the filter setting proceed as follows 1 Press the Reset filter button F11 on the touchscreen The filter is automatica...

Page 63: ...highlighted in white and then press the scroll wheel Once the button is highlighted you can alternatively also press the OK F6 button A context menu opens 2 Press on the Delete a specific object pool button on the touchscreen or turn the scroll wheel until the button is highlighted in white and then press on the scroll wheel Note Initially the object pool remains in the list after deleting however...

Page 64: ...e Storage button on the touchscreen or turn the scroll wheel until the button is highlighted in white and then press on the scroll wheel Once the button is highlighted you can alternatively also press the OK F6 button The following screen opens You have the following operating options Show RAM Show internal storage Show Flash drive status ...

Page 65: ...creen or turn the scroll wheel until the button is highlighted in white and then press on the scroll wheel Once the button is highlighted you can alternatively also press the OK F6 button A screen opens with information about the capacity and usage of the internal memory 5 3 6 4 3 Flash drive status To display the flash drive status proceed as follows 1 Press on the Flash drive button on the touch...

Page 66: ...il the button is highlighted in white and then press on the scroll wheel Once the button is highlighted you can alternatively also press the OK F6 button The following screen opens You have the following operating options Show interface information Show Power supply Test touch Test function keys Test scroll wheel Test buzzer Show brightness sensor Test brightness Show stop switch ...

Page 67: ...he list To do so on the touchscreen press the button with the interface or turn the scroll wheel until the button is highlighted in white and then press on the scroll wheel Once the button is highlighted you can alternatively also press the OK F6 button A screen opens with information about the current status of the interface 5 3 6 5 2 Show Power supply To display power supply information proceed ...

Page 68: ...scroll wheel proceed as follows 1 Press on the Scroll wheel button on the touchscreen or turn the scroll wheel until the button is highlighted in white and then press on the scroll wheel Once the button is highlighted you can alternatively also press the OK F6 button A screen opens for testing the scroll wheel 2 Turn the scroll wheel clockwise The individual segments are highlighted 3 Press on the...

Page 69: ...utton on the touchscreen or turn the scroll wheel until the button is highlighted in white and then press on the scroll wheel Once the button is highlighted you can alternatively also press the OK F6 button A screen opens for testing the brightness 2 Test the brightness status F9 manual brightness entry F10 and F11 and perform the automatic brightness test F12 5 3 6 5 9 Show stop switch To display...

Page 70: ...e and then press on the scroll wheel Once the button is highlighted you can alternatively also press the OK F6 button A screen opens for testing the internet connection 2 Test the internet connection F12 The following information about the internet connection is displayed a Connection mode b Connection status c Result of the connection test d Internet address Note The internet connection test is o...

Page 71: ... trace button on the touchscreen or turn the scroll wheel until the button is highlighted in white and then press on the scroll wheel Once the button is highlighted you can alternatively also press the OK F6 button The following screen opens You have the following operating options Enter the CAN trace duration Start recording ...

Page 72: ... you can alternatively also press the OK F6 button 2 Enter the value on the touchscreen using the number pad or the slider 3 Confirm your entry with OK Note Values between 60 and 6000 are valid for the duration of the CAN trace 5 3 6 5 11 2 Start recording To start recording of the CAN trace proceed as follows 1 Press the Start recording button F12 on the touchscreen Recording of the CAN trace is ...

Page 73: ...rvice employee Note Screenshots can only be created with a flash drive inserted Hardware generation 1 HW1 Version 1 x Hardware generation 2 HW2 Version 2 x To take a screenshot proceed as follows 1 Open the flap To do so press on the grooved area and pull the notch at the same time HW1 or unscrew the cap in a clockwise direction HW2 2 Insert a flash drive 3 Press on the freely assignable button un...

Page 74: ...nal 5 5 2 Assignment To assign an implement function key to an operating element proceed as follows 1 Open the main menu 2 Select button AUX The operating screen AUX assignment opens with a list of the available implement functions 3 From the list select the required implement function The selection list Available AUX inputs appears 4 From the list select the required operating element of the auxi...

Page 75: ...g unit is now completed 5 5 4 Multiple assignment Some ISOBUS implements support so called multiple assignment in this case one operating element of an auxiliary operating unit can then be assigned to multiple implement functions To perform a multiple assignment proceed as follows 1 Perform steps 1 to 4 from chapter 5 5 2 multiple times When doing so assign the operating element of the auxiliary o...

Page 76: ...iliary operating unit with the assigned implement functions opens Note No changes to the assignment can be made in this operating screen To do this you must switch to the AUX assignments operating screen Note You can identify operating elements with multiple assignments by the symbol To check the assignment select the button on the touchscreen A list of implement functions opens that can be used w...

Page 77: ...implement is not displayed Bus terminator missing Check resistance Software is loaded however is not displayed Check whether the software can be manually started from the terminal main menu Connection error when uploading the software Check physical connection Contact the implement manufacturer s customer service The auxiliary operating unit AUX Control is not shown on the terminal An allocation o...

Page 78: ... network The VT cannot register with the network The terminal is set as the primary terminal The terminal must be registered as a secondary terminal Under CAN settings remove the check next to Primary terminal see chapter 5 3 5 5 4 Program cannot find a suitable update file Flash drive is not inserted Insert flash drive Update file is not available on the flash drive Copy update file to the flash ...

Page 79: ...To display the serial number proceed as follows 1 Press the home key to enter the main menu 2 Press the Settings button F1 in the main menu 3 Select the tab Info and Diagnostics 4 In the tab Info and Diagnostics press the button Terminal 5 On the touchscreen press button Hardware The following information field opens Pos 12 CC Isobus Seitenumbruch 8 mod_1274446340522_0 doc 121469 1 ...

Page 80: ...ions WxHxD mm 250 x 240 x 75 Casing Type PC ABS multi shell plastic casing Fastening 80mm x 80mm flange plate with 4 x M5threaded bush Operating Temperature C 20 to 70 Humidity Resistance 95 25 C 50 C 7 2 Electronics Supply voltage V Permitted Range V 12 and 24 9 30 Power consumption at 13 5 V 1 1 A 1 5 A Polarity Protection Present Display 8 4 TFT Display resolution px 640 x 480 ...

Page 81: ...00 M12x1 8 pole plug 1 Supply voltage 2 EMERGENCY STOP input 3 Switch on signal for ECU 4 EMERGENCY STOP supply 5 CAN Low 6 GND 7 CAN High 8 Shielding decoupled from earth CAN1 OUT CCI 100 CCI 200 M12x1 8 pole plug 1 Supply voltage 2 EMERGENCY STOP output 3 Switch on signal for ECU 4 EMERGENCY STOP supply 5 CAN Low 6 GND 7 CAN High 8 Shielding decoupled from earth Video CCI 100 CCI 200 M12x1 8 pol...

Page 82: ...e 2 Free 3 Mass 4 LIN bus USB CCI 100 CCI 200 USB host 2 0 1 Supply voltage 2 Data 3 Data 4 Mass Bluetooth CCI 200 Bluetooth Spec V2 0 DER Compliant Class 2 Output Power internal antenna Wi Fi CCI 200 54 Mbps 2 4 GHz IEEE 802 11b and 802 11g WPA WPA2 802 1x and 802 11i function only at 0 C 65 C Pin o Socket ...

Page 83: ...w 6 GND 7 CAN High 8 Shielding decoupled from earth CAN1 OUT CCI 100 CCI 200 M12x1 8 pole plug 1 Supply voltage 2 EMERGENCY STOP output 3 Switch on signal for ECU 4 EMERGENCY STOP supply 5 CAN Low 6 GND 7 CAN High 8 Shielding decoupled from earth Video CCI 100 CCI 200 M12x1 8 pole socket 1 Video signal 2 EIA RS 485 B 3 EIA RS 485 A 4 Supply voltage 5 EIA RS 485 A jumpered 3 pin 6 Supply voltage 7 ...

Page 84: ...9 RS232 1 RxD Receive 10 Ignition signal terminal 15 11 RS232 2 TxD Transmit 12 RS232 2 RxD Receive LIN CCI 100 CCI 200 M8x1 4 pole socket 1 Supply voltage 2 Free 3 Mass 4 LIN bus USB CCI 100 CCI 200 USB host 2 0 1 Supply voltage 2 Data 3 Data 4 Mass Bluetooth CCI 200 Bluetooth Spec V2 0 DER Compliant Class 2 Output Power internal antenna Wi Fi CCI 200 54 Mbps 2 4 GHz IEEE 802 11b and 802 11g WPA ...

Page 85: ...ISOBUS Terminal CCI 100 200 Menu structure 84 Pos 15 CC Isobus Menüstruktur 8 mod_1274875511036_6 doc 121659 1 1 8 Menu structure Pos 16 CC Isobus Seitenumbruch 8 mod_1274446340522_0 doc 121469 1 ...

Page 86: ...Specifies interfaces and data formats for tractors and implement ISOBUS ISO11783 International standard for data transfer between farming implements and devices Cable type A Connects the CAN1 IN and CAN1 OUT on the terminal to the In cab socket of the tractor Context menu Graphical user interface Facilitates editing copying deleting or adding of data LAN Local Area Network local network Network me...

Page 87: ...ting unit Also AUX Control ISOBUS auxiliary control units are for example joysticks or toggle switch strips An auxiliary control unit enables the comfortable and efficient operation of frequently used implement functions Ende der Liste für Textmar ke Inhalt ...

Page 88: ...pp toggling i button Day lighting Night lighting Lighting Mode Lighting threshold Brightness sensor Beeper Test touchscreen Language Keyboard Units Decimal symbol Date App management Testing Interfaces CAN Service menu Time Date format Time format GPS update Time zone AM PM Terminal information Network members Storage Self test Error memory Software information ...

Page 89: ...nternal storage Flash drive Show Power supply Test scroll wheel Test function keys Test brightness Test stop switch Enter CAN trace Interface management GSM Settings Wi Fi settings LAN settings Update the list of Wi Fi networks ...

Page 90: ...enter date 36 enter time 36 Enter timezone 37 Select am pm 38 Select date format 36 Select time format 37 Diagnostics 56 Display lighting 25 Enter Day lighting 26 Enter Lighting threshold 27 Night lighting 26 Select Lighting Mode 27 E Entering values 16 Entering Boolean values 19 Entering numerical values 17 Error messages 77 ESC button 10 F Finding the hardware version 8 Flash drive status 64 Fun...

Page 91: ...the terminal 15 Mounting the terminal 14 Show internal storage 64 Show RAM 64 Show serial number 78 Softkey swap 11 Sound 28 Activate deactivate beeper 29 Enter volume 29 Stop switch 10 Safety indications 7 Storage information 63 Structure 8 Switching on 16 Switching on the terminal 16 System settings 33 App management 39 Calibrate touchscreen 34 Call service area 34 CAN 54 Interfaces 41 Setting t...

Page 92: ...CCI Cam Visual implement monitoring Operating instructions Reference CCI Cam v5 ...

Page 93: ... 3 1 Mounting the terminal 5 3 2 Connecting the Terminal 5 3 3 Connecting to a camera 5 3 4 Connecting to multiple cameras 6 3 5 Installing the software 7 4 Operation 8 4 1 Program start 8 4 2 Main view one camera 9 4 3 Main view multiple cameras 11 4 4 Settings 14 5 Troubleshooting 21 5 1 Terminal errors 21 5 2 Error messages 21 6 Menu structure 23 7 Glossary 24 8 Buttons and icons 25 9 Index 26 ...

Page 94: ...sion number of the CCI Cam installed on your terminal proceed as follows 1 Press the home key to enter the main menu 2 Press the Settings button F1 in the main menu 3 Select the tab Info and Diagnostics 4 In the Info and Diagnostics tab press the button Terminal 5 Press the Software button on the touchscreen The version of the terminal software component is indicated In the information field that ...

Page 95: ...r for life and limb Carefully observe the indications regarding occupational safety and exert particular caution in these cases Caution This caution symbol identifies all safety indications referring to regulations directives or working procedures which must be observed Non observance can entail damage to or destruction of the terminal and other malfunctions Note The note symbol highlights operati...

Page 96: ... Instructions 3 2 Connecting the Terminal 3 2 1 Connecting to ISOBUS power supply Please refer to the information in Section 5 2 1 Connecting to ISOBUS power supply of the operating instructions for the ISOBUS CCI 100 200 terminal 3 3 Connecting to a camera A camera can be directly connected to the terminal via the Video interface Camera connection 2 1 7 6 5 4 3 8 The camera connection to the term...

Page 97: ...meras 3 4 1 With one multiplexer Up to eight cameras can be connected to the terminal via one multiplexer If more than 3 cameras are connected to the terminal via the multiplexer the multiplexer requires an external power supply Multiplexer connection Connection of the multiplexer to the terminal is similar to the connection of a camera via the video interface see chapter 3 3 ...

Page 98: ...ia one miniplexer Miniplexer connection Connection of the miniplexer to the terminal is similar to the connection of a camera via the video interface see chapter 3 3 3 5 Installing the software CCI Cam is included in the scope of delivery of the CCI ISOBUS terminal i e installation is neither possible nor required ...

Page 99: ...ighted in white and then press on the scroll wheel The following main view opens CCI Cam is subdivided into 3 areas 4 1 1 Main view one camera Shows the camera image of the only connected camera 4 1 2 Main view multiple cameras Shows the camera image of one of the connected cameras Facilitates switching between the images from different cameras 4 1 3 Settings Enables the assignment of a camera ima...

Page 100: ...camera This is the main view if only one camera is connected to the terminal The image from this camera is displayed in the main view You have the following operating options Select full screen mode Mirror image Take a snapshot Switch to settings ...

Page 101: ...responding function keys Note To exit full screen mode touch any area in the touchscreen or press the F8 function key or the scroll wheel 4 2 2 Mirror image To mirror the image along the vertical axis proceed as follows 1 Press the Mirror image button F9 on the touchscreen The image is displayed as a mirror image 4 2 3 Take a snapshot To take a snapshot proceed as follows 1 Connect a flash drive t...

Page 102: ...images from the selected cameras are displayed in the main view You have the following operating options Select full screen mode see chapter 4 2 1 Mirror image see chapter 4 2 2 Create a snapshot see chapter 4 2 3 Switch to the settings see chapter 4 4 Switch automatic camera switching on or off Show camera image Show additional cameras ...

Page 103: ...tic camera switching can only be turned on if several camera images have been activated for automatic mode see chapter 4 4 2 1 Note It is possible to select the camera images amongst which automatic switching takes place see chapter 4 4 2 1 and to set the time interval for switching of the camera images see chapter 4 4 1 4 3 2 Show camera image To show the image from a specific camera proceed as f...

Page 104: ...e chapter4 4 1 The button Show additional cameras only appears if at least one camera has been allocated to one of the function keys 3 2 4 2 or 5 2 To display additional cameras proceed as follows 1 Press the Show Additional Cameras button F6 on the touchscreen The additional cameras are displayed on the buttons F3 F5 Note The buttons for the cameras that are allocated to function keys 1 and 2 are...

Page 105: ... operating options Change to function key assignment Change to settings in automatic mode Enter time interval Activate deactivate video miniplexer Activate deactivate MiniView Reset all settings Note If you have activated the miniplexer the buttons Assignment and Automatic mode are greyed out as these setting options are then not necessary ...

Page 106: ...lexer Note If you are using a multiplexer an assignment of cameras to function keys is essential to make it possible to activate the camera images for the automatic camera change see chapter 4 4 2 1 To change the function key assignments proceed as follows 1 Press on the Assignment button on the touchscreen or turn the scroll wheel until the button is highlighted in white and then press on the scr...

Page 107: ...the button with the number of the function key 3 Confirm your selection with OK or press on the button with the function key number again Note It is recommended that the two most important cameras are assigned to function keys 1 and 2 You can always access the images of these two cameras directly in the main view Note Function keys 3 4 and 5 F3 F4 F5 can each be allocated to two cameras in CCI Cam...

Page 108: ...ed as follows 1 Press on the Automatic mode button on the touchscreen or turn the scroll wheel until the button is highlighted in white and then press on the scroll wheel Once the button is highlighted you can alternatively also press the OK F6 button The following screen opens You have the following operating options Activate deactivate camera images for automatic mode ...

Page 109: ...utton is highlighted you can alternatively also press the OK F6 button 2 Enter the Boolean value 3 Confirm your entry with OK Note In automatic mode changing between the activated camera images takes place automatically Pos 11 CC Isobus Pr obl embehebung 8 mod_1274441518516_6 doc 121418 122334444442 Note To be able to activate the camera images for automatic camera switching an allocation of camer...

Page 110: ...eactivate the miniplexer proceed as follows 1 Press on the Video Miniplexer button on the touchscreen or turn the scroll wheel until the button is highlighted in white and then press on the scroll wheel Once the button is highlighted you can alternatively also press the OK F6 button 2 Enter the Boolean value 3 Confirm your entry with OK 4 4 5 Activate deactivate MiniView The MiniView function make...

Page 111: ...I Cam should make the camera images available for other applications via the MiniView setting All other settings must be made in the respective applications 4 4 6 Reset all settings To reset all settings proceed as follows 1 Press the Reset button F1 on the touchscreen The settings are immediately reset to factory settings there is no warning message Note The factory setting for the time interval ...

Page 112: ...k physical connection Contact the implement manufacturer s customer service 5 2 Error messages The following overview shows error messages in CCI Cam their possible cause and how to rectify them Error Possible cause Rectification Video multiplexer could not be initialized Error at the cable connection Check the cable connection restart the terminal The required video source could not be opened 202...

Page 113: ...ndent on the implement A detailed description of these possible error messages and troubleshooting can be found to in the implement operating instructions Note If the implement cannot be operated check whether the stop switch is pressed in The implement cannot be operated until the button has been released ...

Page 114: ...s 17 CC Isobus Garanti e 8 mod_1274791954660_6 doc 121539 1 Pos 19 CC Isobus Kontaktadr essen 8 mod_1274446496959_6 doc 121502 1 Pos 20 CC Isobus Seitenumbruch 8 mod_1274446340522_0 doc 121469 Pos 21 CC Isobus Gl ossar 8 mod_1274961991767_6 doc 121689 1 ...

Page 115: ...o a multiplexer but with limited functions MiniView Enables the display of individual data elements in other applications e g implement values in CCI Command or camera images in implement operation Multiplexer Device for switching between video signals which facilitates operating multiple cameras over one video input Snapshot Records the currently displayed image Interface Part of the terminal whi...

Page 116: ...Full screen mode Snapshot Mirror image Switch automatic mode on off Settings Show camera image Show additional cameras Time interval Function key assignments Automatic mode settings Reset Select from a list Video miniplexer MiniView ...

Page 117: ... Main view multiple cameras 11 Main view one camera 9 Menu structure 23 MiniplexerConnection 7 Mirror image 10 Multiplexer connection 6 O Operation 8 P Program start 8 R Reference 3 Reset all settings 20 S Safety 4 Safety indications identification 4 Select full screen mode 10 Settings 14 Set up for operation 5 Show additional cameras 13 Show camera image 12 T Take a snapshot 10 Terminal Connectin...

Page 118: ...CCI Control Documentation and task management Operating instructions Reference CCI Control v4 ...

Page 119: ...ng the Terminal 8 3 2 Installing the software 10 3 3 Operating modes 11 4 Operation 12 4 1 General instructions 12 4 2 Program start 15 4 3 Database 17 4 4 Task data 65 4 5 Import task data 86 4 6 Export task data 88 4 7 Settings 90 5 Troubleshooting 95 5 1 Terminal errors 95 5 2 Error messages 96 6 Menu structure 100 7 Glossary 101 8 ISOBUS in functionalities 104 9 Buttons and icons 105 10 Notes ...

Page 120: ...OBUS CCI terminal proceed as follows 1 Press the home key to enter the main menu 2 Press the Settings button F1 in the main menu 3 Select the tab Info and Diagnostics 4 In the Info and Diagnostics tab press the button Terminal 5 Press the Software button on the touchscreen The version of the terminal software component is indicated in the information field that is now displayed 1 3 About CCI Contr...

Page 121: ... 4 Operation with implement 1 3 4 1 ISOBUS compatible Most modern ISOBUS implements are able to provide CCI Control with a series of process data Process data refers to implement specific information task specific information application data yield data The process data provided via the counters depends on the implement and is specified by the implement manufacturer After a task is started CCI Con...

Page 122: ... implement can be requested and displayed along with time and position information In addition ISOBUS implements can react to instructions from CCI Control The ISOBUS implement sends a device description DDD to CCI Control CCI Control uses this information to identify the functionality of the ISOBUS implement Based on the application maps created on the PC CCI Control is thus able to control the I...

Page 123: ...d the current position information via the ISOBUS The section specific fertilizer quantities are automatically set using the application map created on the PC Example 2 An easier case is that the CCI Control documents for example the bale number of a press This information as well as the recorded position information can be given to the customer in an invoice FMIS not available FMIS available Non ...

Page 124: ...on observance of which poses a danger for life and limb Carefully observe the indications regarding occupational safety and exert particular caution in these cases Caution This caution symbol identifies all safety indications referring to regulations directives or working procedures which must be observed Non observance can entail damage to or the destruction of the terminal as well as malfunction...

Page 125: ...g the Terminal 3 1 1 Connecting with a GPS receiver The use of a GPS receiver is required in order to process a section specific task For information please refer to the chapter Connecting with a GPS receiver in the CCI GPS operating instructions 3 1 1 1 GPS data requirements The following NMEA message packages enable error free operation with CCI Control GGA VTG ZDA GSA GGA RMC ZDA GSA GGA VTG RM...

Page 126: ...erface for online data transfer Note The apps CCI Courier or CCI farmpilot must be enabled for online data transfer This requires a GSM modem To connect the GSM modem with the terminal proceed as follows 1 Connect the GSM modem to serial interface 2 RS232 2 of the terminal Note Serial interface 2 RS232 2 of the terminal is factory set as follows 115200 baud 8N1 There is no need to change this sett...

Page 127: ...e nor required In order to be able to operate the software installed ex works a licence must be acquired As an option when purchasing the terminal The software is enabled ex works and can be used immediately Upgrade In the event of an upgrade the software is activated by our service partner Note If you own a licensed version of CCI Control the Control button is visible in the main menu of your ter...

Page 128: ... FMIS 2 Export the task data as ISO XML on a flash drive or via online transfer 3 Connect an ISOBUS implement to the tractor 4 Connect the GPS receiver to the tractor 5 Switch on the terminal 6 If necessary connect the flash drive to the terminal 7 Start CCI Control cf Section 4 2 8 Import the task data cf Section 4 5 9 Select the required task cf Section 4 4 2 3 10 Start the task cf Section 4 4 3...

Page 129: ...put dialogue changes colour and further keystrokes are ignored Delete the surplus characters and repeat the inputting process 4 1 2 Filter To filter a list of stored entries proceed as follows 1 Press the Filter button F2 on the touchscreen The following operating screen opens 2 Select the filtering criterion for the list To do so press the button with the required specification on the touchscreen...

Page 130: ...selection appears in the selection window 4 Confirm the selection with OK alternatively press the scroll wheel or press the button again with the required specification This will take you to the operating screen again To filter the list according to additional criteria proceed again as described above 5 Press the Back button F7 on the touchscreen You go back to the list with the saved entries to w...

Page 131: ...on F3 on the touchscreen Note The filter will be reset without an additional request 4 1 4 Sort To sort a saved list in alphabetical or reverse alphabetical order proceed as follows 1 Press the A Z or Z A F1 button on the touchscreen Note The manner of sorting that will be used when the button is pressed is indicated on the button ...

Page 132: ... is direct access to all functions via the start screen To switch to the CCI Control start screen proceed as follows 1 Press the Control button in the main menu of the terminal on the touchscreen or turn the scroll wheel until the button is highlighted in white and then press the scroll wheel The following start screen opens ...

Page 133: ...ng the task data 4 2 3 Import task data Change to the operating screen to import data The imported data usually contain master and task data Data is imported either via flash drive or via online transfer Caution All task and master data on the terminal are overwritten during import 4 2 4 Export task data The task data is exported either via a connected flash drive or via online transfer Here the m...

Page 134: ... information in relation to the task is summarised in the database Customers Farms Fields Drivers Implements Products Agricultural practices Techniques Crop types Crop varieties Note Editing of this master data as described in the following sections is not possible if the data originate from a task file created on a PC ...

Page 135: ...ote A customer is usually the owner or tenant of the farm on which the task is executed A customer can be referred to from a task a farm and a field Customer data include Surname First name Street Postcode Town Phone number Mobile phone number Note Fields with bold text are mandatory fields the other fields are optional fields ...

Page 136: ... the Add new button F10 The following operating screen opens 2 In the operating screen select all parameters one after the other To do so press the parameter on the touchscreen or turn the scroll wheel until the button is highlighted in white and then press the scroll wheel Once the button is highlighted you can alternatively also press the OK F6 button 3 Enter the new value on the touchscreen usi...

Page 137: ...also press the OK F6 button The context menu opens 2 Press the Edit Display button on the touchscreen or turn the scroll wheel until this button is highlighted in white and then press the scroll wheel The following operating screen opens 3 In the operating screen select the parameter for which the value needs to be changed To do so press the parameter on the touchscreen or turn the scroll wheel un...

Page 138: ...croll wheel until this button is highlighted in white and then press the scroll wheel Once the button is highlighted you can alternatively also press the OK F6 button The context menu opens 2 Press the Copy button on the touchscreen or turn the scroll wheel until this button is highlighted in white and then press the scroll wheel The following operating screen opens Note The copy is identified by ...

Page 139: ... scroll wheel until this button is highlighted in white and then press the scroll wheel Once the button is highlighted you can alternatively also press the OK F6 button The context menu opens 2 Press the Delete button on the touchscreen or turn the scroll wheel until this button is highlighted in white and then press the scroll wheel Note A customer can only be deleted if not active in a task farm...

Page 140: ...the customer comprise the farm A customer can have several farms A farm can be referred to from a task and a field The farm data are comprised of Farm name Street Postcode City Customer Note Fields with bold text are mandatory fields the other fields are optional fields Note The customer field is used to allocate a customer to the farm The customer is usually also the farm owner ...

Page 141: ...tton F10 The following operating screen opens 2 In the operating screen select all parameters one after the other To do so press the parameter on the touchscreen or turn the scroll wheel until the button is highlighted in white and then press the scroll wheel Once the button is highlighted you can alternatively also press the OK F6 button 3 Enter the new value on the touchscreen using the keyboard...

Page 142: ...ss the OK F6 button The context menu opens 2 Press the Edit Display button on the touchscreen or turn the scroll wheel until this button is highlighted in white and then press the scroll wheel The following operating screen opens 3 In the operating screen select the parameter for which the value needs to be changed To do so press the parameter on the touchscreen or turn the scroll wheel until the ...

Page 143: ...el until this button is highlighted in white and then press the scroll wheel Once the button is highlighted you can alternatively also press the OK F6 button The context menu opens 2 Press the Copy button on the touchscreen or turn the scroll wheel until this button is highlighted in white and then press the scroll wheel The following operating screen opens Note The copy is identified by 1 sequent...

Page 144: ...ll wheel until this button is highlighted in white and then press the scroll wheel Once the button is highlighted you can alternatively also press the OK F6 button The context menu opens 2 Press the Delete button on the touchscreen or turn the scroll wheel until this button is highlighted in white and then press the scroll wheel Note A farm can only be deleted if not active in a task or field and ...

Page 145: ...omprised of Field name Area Customer Farm Crop type Crop variety Note Fields with bold text are mandatory fields the other fields are optional fields Note The allocation of the customer to the field is realised via the customer The customer is usually also the field owner The farm also enables allocating the area to a property Moreover a crop type and crop variety can be allocated to the field ...

Page 146: ...CCI ControlCCI Control Operation 29 You have the following operating options Import field boundary in shape format Add field Edit Display field Copy field Delete field Call up Map View preview ...

Page 147: ...undary that is to be imported To do so press the button with the required field boundary on the touchscreen or turn the scroll wheel until this button is highlighted in white and then press the OK button F6 The field boundary is now imported 6 If required now perform optional step 2 and the remainder of chapter 4 3 3 2 4 3 3 1 2 Online import To import an online field boundary proceed as follows 1...

Page 148: ...s 2 In the operating screen select all parameters one after the other To do so press the parameter on the touchscreen or turn the scroll wheel until the button is highlighted in white and then press the scroll wheel Once the button is highlighted you can alternatively also press the OK F6 button 3 Enter the new value on the touchscreen using the keyboard 4 Confirm your entry with OK ...

Page 149: ...press the OK F6 button The context menu opens 2 Press the Edit Display button on the touchscreen or turn the scroll wheel until this button is highlighted in white and then press the scroll wheel The following operating screen opens 3 In the operating screen select the parameter for which the value needs to be changed To do so press the parameter on the touchscreen or turn the scroll wheel until t...

Page 150: ...heel until this button is highlighted in white and then press the scroll wheel Once the button is highlighted you can alternatively also press the OK F6 button The context menu opens 2 Press the Copy button on the touchscreen or turn the scroll wheel until this button is highlighted in white and then press the scroll wheel The following operating screen opens Note The copy is identified by 1 seque...

Page 151: ...e scroll wheel until this button is highlighted in white and then press the scroll wheel Once the button is highlighted you can alternatively also press the OK F6 button The context menu opens 2 Press the Delete button on the touchscreen or turn the scroll wheel until this button is highlighted in white and then press the scroll wheel Note A field can only be deleted if not active in a task and if...

Page 152: ...Map View preview opens You have the following operating options Magnifying the map view Press the Zoom in button F4 on the touchscreen Shrinking the map view Press the Zoom out button F5 on the touchscreen 4 3 3 7 Export field boundary in shape format To export a field boundary proceed as follows 1 Go to the operating screen of the field cf 4 3 3 3 2 Press the Export field boundary in shape format...

Page 153: ...executes the planned task and operates the implement The driver data are comprised of Name First name Street Postcode City Phone number Mobile phone number Note Fields with bold text are mandatory fields the other fields are optional fields You have the following operating options Add driver Edit show driver Copy driver Delete driver ...

Page 154: ...ns 2 In the operating screen select all parameters one after the other To do so press the parameter on the touchscreen or turn the scroll wheel until the button is highlighted in white and then press the scroll wheel Once the button is highlighted you can alternatively also press the OK F6 button 3 Enter the new value on the touchscreen using the keyboard 4 Confirm your entry with OK ...

Page 155: ...s the OK F6 button The context menu opens 2 Press the Edit Display button on the touchscreen or turn the scroll wheel until this button is highlighted in white and then press the scroll wheel The following operating screen opens 3 In the operating screen select the parameter for which the value needs to be changed To do so press the parameter on the touchscreen or turn the scroll wheel until the b...

Page 156: ...croll wheel until this button is highlighted and then press the scroll wheel Once the button is highlighted you can alternatively also press the OK F6 button The context menu opens 2 Press the Copy button on the touchscreen or turn the scroll wheel until this button is highlighted in white and then press the scroll wheel The following operating screen opens Note The copy is identified by 1 sequent...

Page 157: ...the scroll wheel until this button is highlighted in white and then press the scroll wheel Once the button is highlighted you can alternatively also press the OK F6 button The context menu opens 2 Press the Delete button on the touchscreen or turn the scroll wheel until this button is highlighted in white and then press the scroll wheel Note A driver can only be deleted if not active in a task and...

Page 158: ...cated to the task during the planning of a task using an FMIS If no implement is allocated to a task an allocation is carried out based on the task description and the implement characteristics The implement data consists of Implement name ISOBUS name Note Only the implement name can be edited The remaining data serve as information only and are automatically read from the implement if made availa...

Page 159: ... button is highlighted you can alternatively also press the OK F6 button The context menu opens 2 Press the Edit Display button on the touchscreen or turn the scroll wheel until this button is highlighted in white and then press the scroll wheel The following operating screen opens 3 In the operating screen select the parameter for which the value needs to be changed To do so press the parameter o...

Page 160: ... turn the scroll wheel until this button is highlighted in white and then press the scroll wheel Once the button is highlighted you can alternatively also press the OK F6 button The context menu opens 2 Press the Delete button on the touchscreen or turn the scroll wheel until this button is highlighted in white and then press the scroll wheel Note An implement can only be deleted if not active in ...

Page 161: ...d to or removed from a field as part of an agricultural practice e g fertiliser pesticide or harvested product A product is indicated solely by the Product name Note Fields with bold text are mandatory fields the other fields are optional fields You have the following operating options Add product Edit Display product Copy product Delete product ...

Page 162: ...ens 2 In the operating screen select all parameters one after the other To do so press the parameter on the touchscreen or turn the scroll wheel until the button is highlighted in white and then press the scroll wheel Once the button is highlighted you can alternatively also press the OK F6 button 3 Enter the new value on the touchscreen using the keyboard 4 Confirm your entry with OK ...

Page 163: ...lso press the OK F6 button The context menu opens 2 Press the Edit Display button on the touchscreen or turn the scroll wheel until this button is highlighted in white and then press the scroll wheel The following operating screen opens 3 In the operating screen select the parameter for which the value needs to be changed To do so press the parameter on the touchscreen or turn the scroll wheel unt...

Page 164: ...scroll wheel until this button is highlighted in white and then press the scroll wheel Once the button is highlighted you can alternatively also press the OK F6 button The context menu opens 2 Press the Copy button on the touchscreen or turn the scroll wheel until this button is highlighted in white and then press the scroll wheel The following operating screen opens Note The copy is identified by...

Page 165: ...n the scroll wheel until this button is highlighted in white and then press the scroll wheel Once the button is highlighted you can alternatively also press the OK F6 button The context menu opens 2 Press the Delete button on the touchscreen or turn the scroll wheel until this button is highlighted in white and then press the scroll wheel Note A product can only be deleted if not active in a task ...

Page 166: ...task using an FMIS An application technique such as tillage Plough Grubber etc can also belong to an agricultural practice Note Agricultural practices refer to the activities performed on the field such as fertilising or sowing An agricultural practice is indicated solely by the Name You have the following operating options Add agricultural practice Edit Display agricultural practice Copy agricult...

Page 167: ...ting screen opens 2 In the operating screen select all parameters one after the other To do so press the parameter on the touchscreen or turn the scroll wheel until the button is highlighted in white and then press the scroll wheel Once the button is highlighted you can alternatively also press the OK F6 button 3 Enter the new value on the touchscreen using the keyboard 4 Confirm your entry with O...

Page 168: ... is highlighted you can alternatively also press the OK F6 button The context menu opens 2 Press the Edit Display button on the touchscreen or turn the scroll wheel until this button is highlighted in white and then press the scroll wheel The following operating screen opens 3 In the operating screen select the parameter for which the value needs to be changed To do so press the parameter on the t...

Page 169: ... on the touchscreen or turn the scroll wheel until this button is highlighted in white and then press the scroll wheel Once the button is highlighted you can alternatively also press the OK F6 button The context menu opens 2 Press the Copy button on the touchscreen or turn the scroll wheel until this button is highlighted in white and then press the scroll wheel The following operating screen open...

Page 170: ...actice on the touchscreen or turn the scroll wheel until this button is highlighted in white and then press the scroll wheel Once the button is highlighted you can alternatively also press the OK F6 button The context menu opens 2 Press the Delete button on the touchscreen or turn the scroll wheel until this button is highlighted in white and then press the scroll wheel Note An agricultural practi...

Page 171: ...ngs to the agricultural practice that may be allocated to a task when planning the task with the FMIS For example the Plough and Grubber techniques belong to the agricultural practice of tillage A technique is indicated solely by the Name You have the following operating options Add technique Edit Display technique Copy technique Delete technique ...

Page 172: ...pens 2 In the operating screen select all parameters one after the other To do so press the parameter on the touchscreen or turn the scroll wheel until the button is highlighted in white and then press the scroll wheel Once the parameter is highlighted you can alternatively also press the OK F6 button 3 Enter the new value on the touchscreen using the keyboard 4 Confirm your entry with OK ...

Page 173: ...atively also press the OK F6 button The context menu opens 2 Press the Edit Display button on the touchscreen or turn the scroll wheel until this button is highlighted in white and then press the scroll wheel The following operating screen opens 3 In the operating screen select the parameter for which the value needs to be changed To do so press the parameter on the touchscreen or turn the scroll ...

Page 174: ...the scroll wheel until this button is highlighted in white and then press the scroll wheel Once the button is highlighted you can alternatively also press the OK F6 button The context menu opens 2 Press the Copy button on the touchscreen or turn the scroll wheel until this button is highlighted in white and then press the scroll wheel The following operating screen opens Note The copy is identifie...

Page 175: ...n or turn the scroll wheel until this button is highlighted in white and then press the scroll wheel Once the button is highlighted you can alternatively also press the OK F6 button The context menu opens 2 Press the Delete button on the touchscreen or turn the scroll wheel until this button is highlighted in white and then press the scroll wheel Note A technique can only be deleted if not active ...

Page 176: ...u item Note Crop type refers to the type of species or plant such as corn or barley A crop type is indicated solely by the Name Note Fields with bold text are mandatory fields the other fields are optional fields You have the following operating options Add crop type Edit Display crop type Copy crop type Delete crop type ...

Page 177: ...opens 2 In the operating screen select all parameters one after the other To do so press the parameter on the touchscreen or turn the scroll wheel until the button is highlighted in white and then press the scroll wheel Once the button is highlighted you can alternatively also press the OK F6 button 3 Enter the new value on the touchscreen using the keyboard 4 Confirm your entry with OK ...

Page 178: ...atively also press the OK F6 button The context menu opens 2 Press the Edit Display button on the touchscreen or turn the scroll wheel until this button is highlighted in white and then press the scroll wheel The following operating screen opens 3 In the operating screen select the parameter for which the value needs to be changed To do so press the parameter on the touchscreen or turn the scroll ...

Page 179: ...rn the scroll wheel until this button is highlighted in white and then press the scroll wheel Once the button is highlighted you can alternatively also press the OK F6 button The context menu opens 2 Press the Copy button on the touchscreen or turn the scroll wheel until this button is highlighted in white and then press the scroll wheel The following operating screen opens Note The copy is identi...

Page 180: ... or turn the scroll wheel until this button is highlighted in white and then press the scroll wheel Once the button is highlighted you can alternatively also press the OK F6 button The context menu opens 2 Press the Delete button on the touchscreen or turn the scroll wheel until this button is highlighted in white and then press the scroll wheel Note A crop type can only be deleted if not active i...

Page 181: ...ties can be found under the Crop varieties menu item Note Crop variety refers to a special variety or breed of a crop type A crop variety is indicated solely by the Name Note There are no adjustable settings under this menu item The information about the crop varieties can only be imported ...

Page 182: ...k has one of several possible processing statuses at any given time Planned A new task which has not yet been processed Active The currently active task Only one task can be active at any given time To start another task the active task must be paused or stopped Paused A task that has been paused It can be resumed at any time Stopped A stopped task It cannot be resumed but remains in the list of s...

Page 183: ... Operation 66 4 4 2 Tasks The task list is brought up via the Tasks menu item You have the following operating options Sort task list Add task Show task Edit task Copy task Delete task Import application map in shape format ...

Page 184: ...t of saved tasks proceed as follows 1 Press the Z A button F1 on the touchscreen The symbol on the button automatically changes to the sorting symbol after removal 2 Press the Sort by distance F1 button on the touchscreen The list of saved tasks is sorted by distance of field assigned to task from current location The closest field is shown first Note The manner of sorting that will be used when t...

Page 185: ... wheel Once the button is highlighted you can alternatively also press the OK F6 button 4 Enter the task name via the keyboard on the touchscreen and select the remaining information from the respective lists 5 Confirm your entry with OK Note The city is assigned via the customer and cannot be selected individually Note The crop type and crop variety are assigned via the field and cannot be select...

Page 186: ...creen press the button with the task or turn the scroll wheel until this button is highlighted in white and then press the scroll wheel Once the button is highlighted you can alternatively also press the OK F6 button The context menu opens 2 Press the Edit button on the touchscreen or turn the scroll wheel until this button is highlighted in white and then press the scroll wheel The tab Edit task ...

Page 187: ...he context menu opens 2 Press the Copy button on the touchscreen or turn the scroll wheel until this button is highlighted in white and then press the scroll wheel Note The detailed view of the copy is brought up immediately The following operating screen opens Note The copy is identified by 1 sequential numbering after the task name Note All static task data plus all application maps belonging to...

Page 188: ...screen or turn the scroll wheel until this button is highlighted in white and then press the scroll wheel Once the button is highlighted you can alternatively also press the OK F6 button The context menu opens 2 Press the Delete button on the touchscreen or turn the scroll wheel until this button is highlighted in white and then press the scroll wheel Note Tasks can only be deleted if they have Pl...

Page 189: ...rectly from the connected storage medium 4 4 2 7 1 Import from a flash drive To import an application map from a flash drive proceed as follows 1 Save the shape data on a flash drive 2 Connect the flash drive to the terminal 3 Press the Import application map in shape format button F9 on the touchscreen The following operating screen opens 4 Press on the Flash drive button or turn the scroll wheel...

Page 190: ...eel until this button is highlighted in white and then press the OK button F6 6 Select the column with the data from the application map To do so on the touchscreen press on the button with the column or turn the scroll wheel until the button is highlighted in white 7 Confirm your selection with OK or press once again on the column highlighted in white The following selection list opens ...

Page 191: ...l wheel until the button is highlighted in white The following selection list opens 9 Select the units To do so on the touchscreen press on the button with the unit or turn the scroll wheel until the button is highlighted in white 10 Confirm your selection with OK or press once again on the button highlighted in white The application map is now imported ...

Page 192: ...urier 2 Press the Import application map in shape format button F9 on the touchscreen The following operating screen opens 3 Press on the Online transfer button or turn the scroll wheel until the button is highlighted in white and then press on the scroll wheel Once the button is highlighted you can alternatively also press the OK F6 button 4 Now perform step 5 and the remainder of chapter 4 4 2 7...

Page 193: ...urrent duration and the task specific data Starting pausing and stopping of the task Counters Display of the total duration and the counter readings transferred from the implement Map Display and editing of the map assigned to the task as well as the corresponding application maps Comments Display and editing of comments including date and time Edit task Display and editing of the saved data of th...

Page 194: ... options Start task Press the Start button F5 on the touchscreen Task process is started The display indicates the current duration Pause active task Press the Pause button F5 on the touchscreen From the selection list select the reason for pausing The current duration is added to the total duration to date Resume task Press the Resume button F5 on the touchscreen Task process is started The displ...

Page 195: ...he terminal the next time it is started up Press the OK button on the touchscreen to resume the task Press the ESC button on the touchscreen to pause the task The Active task tab opens automatically Note Only one task can be running at any one time If you start or resume a task while another task is running a message appears that the active tasks must first be paused Press the OK button on the tou...

Page 196: ... Switch to the counter readings of a different implement Press the Switch Counter Readings button F6 on the touchscreen The counter readings of the other connected implement are displayed Note This function is only available if more than one ISOBUS implement is connected Note The implement name is shown in the second row If you change to the counter readings of another implement the name changes ...

Page 197: ...o the task is displayed in this tab You have the following operating options Magnifying the map view Press the Zoom in button F4 on the touchscreen Shrinking the map view Press the Zoom out button F5 on the touchscreen Show application maps Export implement data Adjust setpoint ...

Page 198: ...ws 1 Press the Adjust setpoint button F11 on the touchscreen 2 Enter the percentage value by which the setpoint is to be adjusted via either the number pad in the touchscreen the scroll wheel or the slider 3 Confirm your entry with OK Note The setpoint adjustment can take any value between 95 and 200 Note The selected percentage value is added to the output value or subtracted from it Example The ...

Page 199: ...ur saved comments can be found under this tab To add a new comment proceed as follows 1 On the touchscreen press on the Add new button F10 2 Enter the new comment on the touchscreen using the keyboard 3 Confirm your entry with OK Note Saved comments cannot be deleted ...

Page 200: ...can be accessed under this tab You have the following operating options Edit task To see which operating options you have please refer to chapter 4 4 2 4 Call up database Press on the Database button F3 To see which operating options you have in the database please refer to Section 4 3 ...

Page 201: ...4 4 4 3 6 Report This tab contains a summary of the task data You have the following operating options Generate report Press the Generate Report button F10 on the touchscreen The report is exported as PDF with the task Configure report ...

Page 202: ...wing operating screen opens 2 Select the parameters which need to be displayed in the task report To do so press the parameter on the touchscreen or turn the scroll wheel until the button is highlighted in white and then press the scroll wheel Once the button is highlighted you can alternatively also press the OK F6 button 3 Enter the Boolean value 4 Confirm your entry with OK ...

Page 203: ...scroll wheel until this button is highlighted in white and then press the scroll wheel Once the button is highlighted you can alternatively also press the OK F6 button The following operating screen opens 4 Select the task data that needs to be imported To do so press the button with the task data on the touchscreen alternatively switch between the different sets of task data using the Up F10 and ...

Page 204: ...rocess can take a few minutes CCI Control will restart automatically after the data has been imported Note If the task data are primarily imported via online transfer the Delete task data after import function should be activated cf Section 4 7 3 3 ...

Page 205: ...ask data to be transferred online is required To export task data proceed as follows 1 Press the Export task data button on the touchscreen or turn the scroll wheel until this button is highlighted in white and then press the scroll wheel Once the button is highlighted you can alternatively also press the OK F6 button Note If no app allowing the online transfer of task data is enabled the task dat...

Page 206: ... the scroll wheel Once the button is highlighted you can alternatively also press the OK button 3 Confirm the selection with OK 4 The task data are exported Note The task data are saved on the flash drive in the TASKDATA folder and the TASKDATA TC_yyyymmdd_hhmm sub folder The subfolder name contains the date and time of the export procedure This means that several export processes can be performed...

Page 207: ...ere you can activate and deactivate Auto logging and Notification functions and call up Advanced settings You have the following operating options Activate deactivate Auto logging Activate deactivate Notifications Bring up screen for Advanced settings ...

Page 208: ... a task is started while the auto logging function is activated automatic documenting is paused If this task is stopped automatic recording is started again Note The task data documented via the auto logging function must be exported see Section 4 6 Tasks that are older than 7 days are automatically deleted 4 7 2 Activate deactivate Notifications If the terminal is switched off during an active ta...

Page 209: ...tings button on the touchscreen or turn the scroll wheel until this button is highlighted in white and then press the scroll wheel Once the button is highlighted you can alternatively also press the OK F6 button The following screen opens You have the following operating options Enter function instance Enter time delay Delete task data after import ...

Page 210: ...ively also press the OK F6 button 2 Enter the value on the touchscreen using the number pad or the slider 3 Confirm your entry with OK Note The function instance can take any value between 1 and 32 Note Default setting for the function instance is 1 Note The terminal must be restarted after changing the settings 4 7 3 2 Enter time delay To enter the time delay for the notification upon leaving the...

Page 211: ...mpletely full over the course of time the task data can be automatically deleted from the internal hard disk after importing To activate deactivate this function proceed as follows 1 Press the Delete task data after import button on the touchscreen or turn the scroll wheel until this button is highlighted in white and then press the scroll wheel Once the button is highlighted you can alternatively...

Page 212: ... not correctly connected Check ISOBUS connection Ignition is not switched on Start tractor The software of the connected implement is not displayed Bus terminator missing Check resistance Software is loaded however is not displayed Check whether the software can be manually started from the terminal start menu Connection error when uploading the software Check physical connection Contact the imple...

Page 213: ...ctive task and call up map view again No map information No application map was allocated to the current task Create an application map using an FMIS and allocate it to the task The task report could not be generated Error during exporting Documentation or master data is corrupted Cannot delete The element to be deleted cannot be deleted Entry cannot be deleted because it has not been created on t...

Page 214: ...ing used Impl disconnected The implement being used in the active task was logged off The ISOBUS plug of the implement was pulled out Reconnect the implement s plug Storage space low The available storage space is low Please stop the active task and export the data The available internal storage space is low Finish active task and export data to an external storage medium Storage space insufficien...

Page 215: ... map failed Import of field boundary failed Error while trying to open shape file Error while trying to open database file Unsupported type of shape file Shape file contains invalid data The shape file contains more than 254 treatment zones The shape file contains more than 1024 points The shape file contains no data ...

Page 216: ...iled description of these possible error messages and troubleshooting can be found to in the implement operating instructions Note If the implement cannot be operated check whether the Stop switch has been pressed The implement cannot be operated until the button has been released Pos 12 CC Isobus Seitenumbruch 8 mod_1274446340522_0 doc 121469 ...

Page 217: ...obus Menüstruktur 8 mod_1274875511036_6 doc 121659 1 6 Menu structure Pos 16 CC Isobus Seitenumbruch 8 mod_1274446340522_0 doc 121469 Pos 17 CC Isobus Garanti e 8 mod_1274791954660_6 doc 121539 1 Pos 19 CC Isobus Kontaktadr essen 8 mod_1274446496959_6 doc 121502 1 Pos 20 CC Isobus Seitenumbruch 8 mod_1274446340522_0 doc 121469 ...

Page 218: ...n The operating screen is comprised of the values and operating elements shown on the screen The touchscreen can be used to directly select the elements shown Farm Also known as a holding All fields which are in possession of the customer belong to a farm A customer can have multiple farms Boolean value A Boolean value is a value whereby it is only possible to choose between true false on off yes ...

Page 219: ...d as part of an agricultural practice e g fertiliser pesticide or harvested product Process data Parameters which an implement can make available to CCI Control during the work working state consumption etc These are then adopted in the task data file for later evaluation Interface Part of the terminal which is used to communicate with other devices Serial interface The terminal has two serial int...

Page 220: ...itive screen for operation of the terminal Wi Fi WLAN Wireless Local Area Network Wireless local network XML Extended Markup Language Logical markup language and both successor and enhancement of HTML XML permits the specification of its own language elements so that other markup languages such as HTML or WML can be defined by using XML Ende der Liste für Textmar ke Inhalt ...

Page 221: ...ble Here the data exchange between the FMIS and the task controller is realised in ISO XML data format Hence tasks can be conveniently imported into the task controller and or the finished documentation can then be exported again Task controller geo based variables Additionally offers the possibility of also collecting position related data or the planning of position related tasks for example usi...

Page 222: ...uct List of agricultural practices Agricultural practice List of crop types Crop type List of tasks Active task Counters Comment Edit task Map Start or resume task processing Report Stop task processing Pause task processing Switch counter readings Show application maps Configure Call up database Import task data Export task data Flash drive NAND Flash Map view preview Generate report ...

Page 223: ...t Change up Change down Confirm selection or entry Address Phone number Mobile phone number Filter Reset filter Sort from A Z Sort from Z A Select from a list Import application map or field boundary in shape format Adjust setpoint Export application map or field boundary in shape format ...

Page 224: ...107 10 Notes ...

Page 225: ...lete 22 Edit 20 show 20 D Database 17 Driver show 38 Drivers 36 E Enter function instance 93 Enter time delay 93 Error messages 96 F Farm 23 Add 24 Copy 26 Delete 27 Edit 25 show 25 Field 28 Add 31 Call up Map View preview 35 Copy 33 Delete 34 Edit 32 Export shape data 35 Import shape data 30 show 32 Filter application 12 Reset 14 FMIS Operation with an FMIS 5 Section specific processing 4 G Gloss...

Page 226: ...unning task 77 S Safety instructions 7 Section specific processing 4 Settings 90 Auto Logging 91 Function instance 93 Notifications 91 Time delay 93 Set up for operation 8 Shape format Export field boundary 35 Import application map 72 Import field boundary 30 Standalone mode 4 T Task data 65 Task data Delete automatically 94 export 88 Import 86 Task status 65 Tasks 66 Add 68 Copy 70 Delete 71 Det...

Page 227: ...110 Edit 38 ...

Page 228: ...CCI TECU Tractor data Operating instructions Reference CCI TECU v6 ...

Page 229: ...ecting to the signal connector 7 3 2 Connecting with IRB upgrade cable set 9 3 3 Installing the software 9 4 Operation 10 4 1 Program start 10 4 2 Main view 11 4 3 List of tractors 15 4 4 Passive mode 32 4 5 Hectare counter and documentation 33 5 Troubleshooting 36 5 1 Terminal errors 36 5 2 Error messages 36 6 Menu structure 38 7 Glossary 39 8 Buttons and icons 41 9 Service and development 43 10 ...

Page 230: ...tion ensured These operating instructions must be read and understood prior to setting up the software to avoid problems in the application 1 2 Reference These operating instructions describe the CCI TECU version CCI TECU v6 In order to query the version number of the CCI TECU installed on your CCI ISOBUS terminal proceed as follows 1 Press the home key to enter the main menu 2 Press the Settings ...

Page 231: ...on Using CCI TECU tractor information is read out via the signal connector and transferred to the ISOBUS implement 1 3 1 Active passive mode If only CCI TECU is available on the tractor it works automatically in active mode In active mode 1 CCI TECU reads out the signal connector signals 2 CCI TECU calculates values for speed power take off speed and 3 point hitch position and 3 CCI TECU sends the...

Page 232: ... configuration parameters or to adopt a defined state CCI TECU offers the delayed switch off as an additional function for all tractors that are equipped with the ISOBUS IRB upgrade cable set of the CCI Note The delayed switch off is available for all terminals from hardware generation 2 ...

Page 233: ... life and limb Carefully observe the indications regarding occupational safety and exert particular caution in these cases Caution This caution symbol identifies all safety indications referring to regulations directives or working procedures which must be observed Non observance can entail damage to or the destruction of the terminal as well as malfunctions Note The note symbol highlights operati...

Page 234: ...nstructions of your terminal 3 1 Connecting to the signal connector CCI TECU evaluates the existing tractor information on the signal connector of the tractor speed power take off speed etc and transmits this information to all ISOBUS implements A signal cable is required for connecting the terminal to the signal connector Signal cable To connect the terminal to the signal connector of the tractor...

Page 235: ...ance already covered As such the real speed can be calculated PTO sensor It emits a specific number of electrical pulses in proportion to the power take off speed As such the power take off speed can be calculated 3 point hitch sensor It provides an output voltage which is proportional to the current position of the 3 point hitch Note On a hardware generation 1 type terminal CCI TECU in this versi...

Page 236: ...the terminal to the ISOBUS and the power supply 1 Connect interfaces CAN1 IN and CAN1OUT on the terminal with the M12 connectors on the IRB upgrade cable set via the type B cable 3 3 Installing the software CCI TECU is included in the scope of delivery of the CCI ISOBUS terminal i e installation is neither possible nor required Pos 8 CC Isobus Sei tenumbruch 8 mod_1274446340522_0 doc 121469 ...

Page 237: ...e scroll wheel The following main view opens CCI TECU is subdivided into 4 areas 4 1 1 Main view The main view is used to show the speed power take off speed and 3 point hitch and enables direct access to all TECU functions 4 1 2 List of tractors Input or modification of tractor data 4 1 3 Hectare counter The hectare counter allows you to measure and display the actual working time distance travel...

Page 238: ...place the tachometer of the tractor This speed control may not be used when driving on routes where road traffic regulations apply You have the following operating options Change to the list of tractors Press the List of Tractors button F8 on the touchscreen More detailed information about the list of tractors can be found in chapter 4 3 Change to the hectare counter Press the Hectare counter butt...

Page 239: ...the scroll wheel until the button is highlighted in white 3 Confirm your selection by pressing OK or pressing the button with the tractor name again 4 2 2 Edit the selected tractor To edit the data of the selected tractor proceed as follows 1 Press the Edit button F2 on the touchscreen A detailed view of the selected tractor is opened 2 Select all tabs to be modified in the detailed view To do so ...

Page 240: ...Ground speed sensor To select the speed sensor proceed as follows 1 Press the Select Speed Sensor button F4 on the touchscreen The symbol beneath the speed display indicates which sensor is selected Ground speed sensor is selected Wheel speed sensor is selected 2 Select the desired setting Note With a terminal of hardware generation 1 match the selection to the signal cable used ...

Page 241: ...e when replacing an electronic hoisting gear control the display of the 3 point hitch between working and transport position may fluctuate To prevent this from happening we recommend pressing the Set working position button F4 several centimetres before the 3 point hitch in the working position Note The working position must be set at the start of the activity to ensure the correct function of the...

Page 242: ...Tractors menu item The tractor data consists of the tractor name a comment and the tractor settings Note The current tractor is identified with a small red tractor symbol in the bottom right corner of the button You have the following operating options Add tractor Edit tractor Copy tractor Delete tractor ...

Page 243: ...roceed as follows 1 In the list of tractors select the tractor whose information is to be changed To do so on the touchscreen press the button with the tractor name or turn the scroll wheel until the button is highlighted in white and then press on the scroll wheel Once the button is highlighted you can alternatively also press the OK F6 button The context menu opens 2 Press the Edit button on the...

Page 244: ...d view of the copied tractor is opened Note The copy is identified by Copy after the tractor name 4 3 2 2 Delete tractor To delete a tractor proceed as follows 1 In the list of tractors select the tractor whose information is to be deleted To do so on the touchscreen press the button with the tractor name or turn the scroll wheel until the button is highlighted in white and then press on the scrol...

Page 245: ...in the tractor settings the signal connector has been selected as the signal source for the 3 point hitch These are organised as follows Overview This shows the speed settings PTO settings and the 3 point hitch settings Comment This shows a comment with a maximum of 160 characters Tractor settings This shows the tractor name and the settings for wheel speed sensor ground speed sensor PTO sensor an...

Page 246: ...CCI TECU Operation 19 4 3 3 1 Overview This tab shows the settings for speed the power take off and the 3 point hitch ...

Page 247: ...options Add comment Edit comment 4 3 3 2 1 Add comment To add a comment proceed as follows 1 Press on the empty button on the touchscreen or on the scroll wheel or on the OK button F6 2 Enter the comment on the touchscreen using the keyboard 3 Confirm your entry with OK 4 3 3 2 2 Edit comment To edit a comment proceed as follows 1 Press on the button on the touchscreen with the comment or on the s...

Page 248: ... switch off delay value Unlock X Sensor Note With a terminal of hardware generation 1 you can either select wheel or ground speed sensor as the signal source The other sensor is automatically shown as n a The selection is mutually exclusive With a terminal of hardware generation 2 or higher both speed signals can be used simultaneously Note If CCI TECU is in passive mode see chapter 4 4 it is not ...

Page 249: ...characters 4 3 3 3 2 Select signal source To select the signal source for wheel speed sensor ground speed sensor PTO sensor and 3 point hitch sensor proceed as follows 1 on the touchscreen press the button with the sensor or turn the scroll wheel until the button is highlighted in white and then press on the scroll wheel Once the button is highlighted you can alternatively also press the OK F6 but...

Page 250: ...ay proceed as follows 1 Press the Power management button on the touchscreen or turn the scroll wheel until this button is highlighted in white and then press the scroll wheel Once the button is highlighted you can alternatively also press the OK F6 button 2 Enter the Boolean value 3 Confirm your entry with OK Note The delayed switch off is available for all terminals from hardware generation 2 No...

Page 251: ...ed To configure the terminal s input circuit proceed as follows 1 Press the X Sensor button on the touchscreen or turn the scroll wheel until this button is highlighted in white and then press the scroll wheel Once the button is highlighted you can alternatively also press the OK F6 button 2 Enter the Boolean value 3 Confirm your entry with OK ...

Page 252: ...the sensor data sheet this can be entered directly In order to obtain information which is as accurate as possible the value should actually be obtained using a calibration Note The valid value range for the number of pulses is between 200 and 30000 Pul 100m Note The more accurate the value is the more precise the speed indication You have the following operating options Enter the wheel speed sens...

Page 253: ... on the touchscreen using the number pad or the slider 3 Confirm your entry with OK Note The valid value range for the number of pulses is between 200 and 30000 Pul 100m 4 3 3 4 2 Enter the ground speed sensor value Proceed as follows to enter the value for the pulses per 100 metres for the ground speed sensor 1 Press on the Ground speed sensor button on the touchscreen or turn the scroll wheel un...

Page 254: ...yed by the hectare counter proceed as follows 1 Press the Hectare counter preference button on the touchscreen or turn the scroll wheel until this button is highlighted in white and then press the scroll wheel Once the button is highlighted you can alternatively also press the OK F6 button A selection list opens 2 For the hectare counter source select between wheel speed sensor and ground speed se...

Page 255: ...rn the scroll wheel until the button is highlighted in white and then press on the scroll wheel Once the button is highlighted you can alternatively also press the OK F6 button Note The selection between wheel and ground speed sensor for the calibration is only necessary for a terminal of hardware generation 2 version 2 x when both speed sensors are being used simultaneously see chapter 4 3 3 3 Th...

Page 256: ...ke off revolution Note Refer to your tractor s technical information to consult the value to be entered Note The valid value range for the number of pulses is between 1 and 40 Pulses revolution A frequent value in practice is 6 Pulses revolution You have the following operating options Enter Pulses revolution value ...

Page 257: ... follows to enter the value for the pulses per revolution 4 Press on the Pulses revolution button on the touchscreen or press on the scroll wheel or on the OK button F6 5 Enter the new value on the touchscreen using the number pad or the slider 6 Confirm your entry with OK ...

Page 258: ...ate Proceed as follows to calibrate the voltage values for the 3 point hitch 1 Press the Calibrate button F3 on the touchscreen The calibration menu opens 2 Lift the 3 point hitch to the maximum position and then press on the MAX F3 button on the touchscreen 3 Lower the 3 point hitch to the minimum position and then press on the MIN F4 button on the touchscreen 4 Confirm the values with OK Note A ...

Page 259: ...ailable by the other TECUs are identified by a blue frame and a blue i If all signals are read and made available via the ISOBUS a connection with the signal connector is not necessary If not all signals are transmitted then missing information can be made available via CCI TECU In this case a connection with the signal connector and as necessary a calibration see chapter 4 3 3 4 3 4 3 3 5 1 and 0...

Page 260: ...ted via the ISOBUS 4 5 2 Hectare counter In the Hectare counter screen there is information on Working width of the active implement Speed source for hectare counter Working time Distance travelled and Worked area You can reset the counters individually at any time Thus you can use the hectare counter to record the actual working time the distance travelled and ground coverage A total value and a ...

Page 261: ... the button Working Width on the touchscreen or press on the scroll wheel 2 Enter the new value on the touchscreen using the number pad or the slider 3 Confirm your entry with OK Note The valid range for the working width lies between 0 0 and 99 0 metres The value entered for the working width must be as accurate as possible to enable an exact calculation of the worked area Note The value entered ...

Page 262: ...nly be determined based on the position of the 3 point hitch see also chapter 4 2 4 Possible other factors for the working position such as the state of hydraulics or power take off cannot be evaluated by CCI TECU Working width User input The working width entered by you see also chapter 4 5 2 1 the input should be as accurate as possible Total area Calculated value The calculation of the total ar...

Page 263: ... s customer service 5 2 Error messages The following overview shows error messages in CCI TECU their possible cause and how to rectify them Error Possible cause Rectification Cannot delete tractor There is only one tractor or you are trying to delete the active tractor There is only one tractor in the list of tractors If you want to delete the last tractor in the list it is not possible The select...

Page 264: ...CU changes to display mode because another TECU of higher priority was detected Please check the tractor settings Another TECU is connected to the BUS It is present in another terminal or in your tractor If the other TECU makes the necessary information available then it is correct that CCI TECU changes into passive mode If you want to make the information available with CCI TECU then you must dea...

Page 265: ...enüstruktur 8 mod_1274875511036_6 doc 121659 1 6 Menu structure Pos 17 CC Isobus Garanti e 8 mod_1274791954660_6 doc 121539 1 Pos 19 CC Isobus Kontaktadr essen 8 mod_1274446496959_6 doc 121502 1 Pos 20 CC Isobus Seitenumbruch 8 mod_1274446340522_0 doc 121469 Pos 21 CC Isobus Gl ossar 8 mod_1274961991767_6 doc 121689 1 ...

Page 266: ...Context menu Graphical user interface Facilitates editing copying deleting or adding of data Implement Towed or attached implement An implement with which a task can be executed Passive mode If there is a Primary TECU in the tractor the terminal TECU changes to the passive mode automatically Primary TECU TECUs are already installed in tractors at the factory Ground speed sensor It emits a specific...

Page 267: ... the tractor information such as the driving speed or the power take off speed Terminal ISOBUS CCI 100 or CCI 200 terminal Touchscreen Touch sensitive screen for operation of the terminal PTO sensor Serves for detecting the speed of the power take off It emits a specific number of electrical pulses in proportion to the power take off speed Ende der Liste für Textmar ke Inhalt ...

Page 268: ...osition Wheel speed sensor is selected Overview Comment Tractor settings Speed Power take off 3 point hitch Wheel speed sensor Ground speed sensor PTO sensor 3 point hitch sensor Wheel speed sensor PTO settings Ground speed sensor Hectare counter source Start flag Target flag Calibrate Establish maximum 3 point hitch position Establish minimum 3 point hitch position Time Distance Area Working widt...

Page 269: ...2 Change to the right Change to the left Change up Change down Confirm selection or entry Select from a list Activate data transfer to the task controller Deactivate data transfer to the task controller ...

Page 270: ...ng width DDI 67 Total Area DDI 116 Effective Total Distance DDI 117 Ineffective Total Distance DDI 118 Effective Total Time DDI 119 Ineffective Total Time DDI 120 Work State DDI 141 PGNs CCI TECU uses the following PGNs PGN 00FE4316 in PGN 00FE4316 in out PGN 00FE4516 in out PGN 00FE0916 out PGN 00FE4916 in out PGN 00FE4816 in out ...

Page 271: ...Power take off 29 Power Take Off Enter Pulses revolution value 30 PTO settings 29 R Reference 3 S Safety 6 Safety indications identification 6 Sensors Select speed sensor 13 Set working position 14 Set up IRB upgrade cable set 9 Set up for operation 7 Installing the software 9 Signal connector Sensors 8 Speed 25 Calibrate 28 Enter the ground speed sensor value 26 Enter the wheel speed sensor value...

Page 272: ...CCI Command GPS track guiding and section control Operating instructions Reference CCI Command v4 ...

Page 273: ...n Control 11 3 3 2 Parallel Tracking 11 4 Operation 12 4 1 General instructions 12 4 2 Program start 13 4 2 1 Settings 13 4 2 2 Map view 13 4 3 Settings 14 4 3 1 Overview 15 4 3 2 Fields 16 4 3 3 Geometry 24 4 3 4 Parallel Tracking 32 4 3 5 Section Control 41 4 4 Map view 55 4 4 1 Headland management 59 4 4 2 Selecting headland mode 64 4 4 3 Obstacles 65 4 4 4 GPS correction 67 4 4 5 Map Settings ...

Page 274: ...3 5 3 Buttons are greyed out 82 5 4 Error messages 83 5 5 Diagnostics 84 5 5 1 Check external lightbar 84 6 Menu structure 85 7 Glossary 86 8 ISOBUS functionalities 88 9 Buttons and icons 89 10 Index 92 ...

Page 275: ...r to setting up the software to avoid problems in the application They must always be stored so that any employee may access them 1 2 Reference These operating instructions describe the app in its version CCI Command v4 with the modules CCI Command Parallel Tracking and CCI Command Section Control In order to query the version number of the CCI Command installed on your CCI ISOBUS terminal proceed...

Page 276: ...e necessary steering corrections The tracks can be recorded as straight A B lines or as curves 1 3 2 CCI Command Section Control Using GPS the module automatically switches off the sections of a pesticide sprayer a fertilizer upon passing over field boundaries and already treated areas and switches them back on upon leaving them Possible overlaps double treatments are thus reduced to a minimum and...

Page 277: ... the driver around the field Likewise it is possible to plot a headland area without a field boundary Upon reaching these areas the implement sections are automatically switched off For the final working of the headland the virtual headland is simply deactivated This functionality is primarily used with planting devices and seed drill implements but also when using certain crop protection products...

Page 278: ... of the worked area working state of the implement is transferred if an active task exists An ISOBUS and task controller enabled implement corresponds to the AEF functionalities TC BAS and TC GEO see chapter 8 1 3 4 3 ISOBUS enabled and Section Control enabled When operating with an ISOBUS and Section Control enabled implement the following functions are available to you 1 Parallel Tracking workin...

Page 279: ...ations regarding occupational safety and exert particular caution in these cases Caution This caution symbol identifies all safety indications referring to regulations directives or working procedures which must be observed Non observance can result in damage to or the destruction of the terminal as well as malfunctions Note The note symbol highlights operation tips and other particularly useful i...

Page 280: ...or information please refer to the chapter Connecting with a GPS receiver in the CCI GPS operating instructions 3 1 1 1 GPS data requirements The following framework conditions must be adhered to for operation with Command Baud 19200 GGA RMC VTG 5 Hz GSA 1 Hz GSV optional 1 Hz 3 1 2 Connecting with the external lightbar CCI L10 CCI Command provides the option of using the external lightbar CCI L10...

Page 281: ...der to be able to operate the software installed ex works a licence must be acquired As an option when purchasing the terminal The software is enabled ex works and can be used immediately Upgrade In the event of an upgrade the software is activated by our service partner Note If you own a licensed version of CCI Command the CCI Command button is visible in the start menu of your terminal ...

Page 282: ...ntrol operating mode and change to map view see chapter 4 1 6 Mark out the field boundary see chapter 4 4 1 7 Mark out a reference track see chapter 4 4 8 8 Process the field in operating modes Parallel Tracking and Section Control 3 3 2 Parallel Tracking To work with the Parallel Tracking module proceed as follows 1 Start CCI Command see chapter 4 2 2 Make the settings for Parallel Tracking see c...

Page 283: ... calling up the map operating mode Section Control is automatically activated If your return to the settings Section Control is automatically paused Call up the map Activate operating mode Section Control Switch to Settings Pause operating mode Section Control If no implement data was transferred the upper area of the button is greyed out Section Control is not available however the map can be cal...

Page 284: ...Press on the Command button in the main menu of the terminal on the touchscreen or turn the scroll wheel until the button is highlighted in white and then press on the scroll wheel The following start screen opens CCI Command is subdivided into 2 areas 4 2 1 Settings Selection of the Field entry of the settings for geometry Parallel Tracking and Section Control 4 2 2 Map view Parallel Tracking Sec...

Page 285: ...iew Display of the settings for Field geometry Parallel Tracking and Section Control Fields Display of the Field and the worked area and management of the saved Fields Geometry Display and editing of the geometry settings Parallel Tracking Display and editing of the settings for Parallel Tracking Section Control Display and editing of the settings for Section Control ...

Page 286: ...CCI Command Operation 15 4 3 1 Overview This tab shows a summary of the most important information for the Field geometry Parallel Tracking and Section Control ...

Page 287: ...displays the field name the field boundaries the worked area and the obstacles You have the following operating options Select Field Save Field Import Field s Export Field s Delete the currently selected Field Find Field Delete worked area Edit name ...

Page 288: ...list of the stored Fields opens 2 Select a Field from the list To do so press the button with the field name on the touchscreen or turn the scroll wheel until this button is highlighted in white and then press the scroll wheel 3 Confirm your selection by pressing OK pressing the scroll wheel or pressing the button with the field name once more Note After starting CCI Command you can immediately st...

Page 289: ...ing the keyboard 4 Confirm your entry with OK The Fields tab opens again The copied field is selected Importing exporting fields You have the following options for the importing and exporting of field data 1 Import of field boundaries in shape format 2 Export of field data in shape format 3 Data backup or data exchange between CCI terminals The data of an individual field or all fields can be impo...

Page 290: ...el until the button is highlighted in white 7 Confirm your entry with OK The selection list changes The individual elements are now displayed that are located in the selected file 8 Select the desired element for import To do so press on the button with the desired selection or turn the scroll wheel until the button is highlighted in white and then press on the scroll wheel The element is imported...

Page 291: ...able 3 Press the Import field s F10 button on the touchscreen The Import data context menu opens 4 Select the option Single field or Field database To do so press on the button with the desired selection or turn the scroll wheel until the button is highlighted in white and then press on the scroll wheel Note By importing a single field it is added to the field database on the terminal Caution The ...

Page 292: ...ay take some time if All fields is selected Note The shape data contain in addition to the field boundaries reference lines worked areas created headlands obstacles and reference points 4 3 2 6 Export single field field database To export the current field or the entire field database proceed as follows 1 Connect the flash drive to the terminal As soon as the flash drive has been identified the ex...

Page 293: ... To use this function you require GPS reception 4 3 2 9 Delete worked area If you want to re work an already worked field you must delete the worked area The worked area can be identified by the blue marking To delete the worked area of the current field proceed as follows 1 Press the Delete worked area button F4 on the touchscreen 2 Confirm the prompt for confirmation with OK The blue marking is ...

Page 294: ...efully you have positioned the GPS aerial on the tractor The tractor geometry settings must be made in the CCI GPS app To do so take the information from the chapter Geometry settings of the CCI GPS operating instructions 1 GPS aerial 2 Tractor reference point 3 Connection point 4 Implement reference point ...

Page 295: ...mplement design the distance between the navigation point and Connection point the delay times and the number of sections are shown in the left display area You have the following operating options Show Section Geometry Select Connection point Selecting the implement type Enter delay times ...

Page 296: ...in the direction of travel C Distance between the tractor reference point and the Connection point in the direction of travel D Distance between the Connection point and the implement reference point in the direction of travel Points 1 GPS aerial 2 Tractor reference point 3 Connection point 4 Implement reference point Note The implement reference point is at the mid point of the first axle If the ...

Page 297: ...ection Geometry button F12 on the touchscreen The view for the Section Geometry opens The position of the sections relative to the implement reference point is shown schematically in the top left box In this way it is possible to see at a glance whether the sections all lie on a line or whether different distances have been set in the direction of travel The units currently being used are shown in...

Page 298: ...e value that is displayed in the bottom box are shown in the top right box Symbol top right box Symbol bottom box Meaning Number of section in direction of travel counted from the left Working width of the section Working depth of the section Switch on delay Switch off delay Distance between the implement reference point and the section in the direction of travel Distance between the implement ref...

Page 299: ...ently used implement mounting proceed as follows 1 Press on the Implement mounting button on the touchscreen or turn the scroll wheel until the button is highlighted in white and then press on the scroll wheel The following selection list opens 2 Select the actual implement mounting from the list To do so on the touchscreen press the button with the mounting or turn the scroll wheel until the butt...

Page 300: ...nts are being used the position of the sections changes for curved tracks When using the setting Trailed and Self propelled the position of the sections is calculated for curved tracks middle and right image With attached implements it remains fixed left image ...

Page 301: ...ghlighted you can alternatively also press the OK F6 button The following selection list opens 2 Select the desired implement type from the list To do so on the touchscreen press the button with the implement type or turn the scroll wheel until the button is highlighted in white and then press on the scroll wheel The implement type appears in the selection window 3 Confirm your selection by pressi...

Page 302: ...nual entry is not possible The implement delay times are displayed in the Section geometry view see chapter 4 3 3 1 To change the delay times the implement operation must be called up You can find more information in the operating instructions for your implement To enter the delay times proceed as follows 1 In the touchscreen press on the buttons Switch on delay button 3 and Switch off delay butto...

Page 303: ...necessary settings for Parallel Tracking are made in this tab You have the following operating options Enter working width Enter the overlap value Select Guidance Mode Enter the Beds value Headland track 2 activate deactivate half width Change to lightbar ...

Page 304: ...r pad or the slider 3 Confirm your entry with OK Note The value entered for the working width must be as accurate as possible to enable an exact calculation of the worked area The valid range for the working width is between 0 0 and 99 0 metres Note If the working width is transferred from the implement the button is greyed out Manual entry is not possible The implement working width is displayed ...

Page 305: ...a negative value must be entered This results in the distance between the lead tracks being increased by the entered value In this way overlapping is avoided and missed areas can occur 4 3 4 2 Enter the overlap value Proceed as follows to enter the Overlap value 1 Press on the Overlap button on the touchscreen or turn the scroll wheel until the button is highlighted in white and then press on the ...

Page 306: ...traight line This makes possible the reliable driving into the tracks in the headland area 4 3 4 3 Select Guidance Mode To select the guidance mode proceed as follows 1 Press on the Guidance mode button on the touchscreen or turn the scroll wheel until the button is highlighted in white and then press on the scroll wheel Once the button is highlighted you can alternatively also press the OK F6 but...

Page 307: ... out The lightbar display then relates to the highlighted lead tracks 4 3 4 4 Enter the Beds value Proceed as follows to enter the value for the beds 1 Press on the Beds button on the touchscreen or turn the scroll wheel until the button is highlighted in white and then press on the scroll wheel Once the button is highlighted you can alternatively also press the OK F6 button 2 Enter the value on t...

Page 308: ...es 0 and 1 is taken as a half working width The working of the second track in the headland mus then be performed with the half working width 4 3 4 5 Headland track 2 activate deactivate half width To activate deactivate half width for track 2 in the headland proceed as follows 1 Press on the Headland track 2 half width button on the touchscreen or turn the scroll wheel until the button is highlig...

Page 309: ...bar In order to change to the lightbar settings proceed as follows 1 Press the Lightbar button F12 on the touchscreen The following screen opens You have the following operating options Enter the Look Ahead time Enter the LED Distance value ...

Page 310: ...2 rows of light segments The bottom segments 2 indicate the actual deviation from the lead track The top segments 1 indicate a steering suggestion and help the driver to return to the lead track The current deviation from the track is also shown as a number 3 ...

Page 311: ...K F6 button 2 Enter the value on the touchscreen using the number pad or the slider 3 Confirm your entry with OK Note Values between 1 and 10 are valid for the Look ahead time 4 3 4 6 2 Enter the LED Distance value You specify what deviation a segment of the lightbar represents To enter the value for the LED Distance proceed as follows 1 Press on the LED Distance button on the touchscreen or turn ...

Page 312: ...n this tab You have the following operating options Overlap in driving direction Select the degree of overlap Enter the overlap tolerance Enter the field boundary overlap tolerance Enter the headland distance Set reverse gear detection Only activate deactivate Section Control in the headland ...

Page 313: ...ns 4 3 5 1 Overlap in driving direction Proceed as follows to enter the overlap value 1 Press on the Overlap in driving direction button on the touchscreen or turn the scroll wheel until the button is highlighted in white and then press on the scroll wheel Once the button is highlighted you can alternatively also press the OK F6 button 2 Enter the value on the touchscreen using the number pad or t...

Page 314: ...ority is complete working or an avoidance of double treatments 0 The section is switched off before an overlap occurs When working in this mode no missed areas result left graphic 50 The section is switched off if half of this section is located in the region of an already worked area middle graphic 100 The section is only switched off if it is completely located in the region of an already worked...

Page 315: ... also press the OK F6 button A selection list opens 2 Select the desired setting from the list To do so on the touchscreen press the button with the degree of overlap or turn the scroll wheel until the button is highlighted in white and then press on the scroll wheel The degree of overlap appears in the selection window 3 Confirm your selection by pressing OK or pressing the button with the degree...

Page 316: ...can occur that the outer section is temporarily displayed over an already worked area although actually no double treatment is occurring In general the cause is GPS drift see also the infobox on GPS drift page 67 For a degree of overlap of 0 the outer section is switched off in this case A fluttering continuous switching on and off can occur This fluttering can be prevented by setting the overlap ...

Page 317: ...anner for a set overlap tolerance of 100 In runs over already worked areas e g the headland it may arise that the outer sections switch on in an undesired way Causes for this are GPS drift or a track that has not been precisely followed The overlap tolerance can prevent the unwanted switching on of the sections ...

Page 318: ...reen or turn the scroll wheel until the button is highlighted in white and then press on the scroll wheel Once the button is highlighted you can alternatively also press the OK F6 button 5 Enter the value on the touchscreen using the number pad or the slider 6 Confirm your entry with OK Note Values between 0 cm and half of the outer section are valid for the overlap tolerance ...

Page 319: ...rom the recommended value you must check whether working beyond the field boundary is acceptable 4 3 5 4 Enter the overlap tolerance at field boundary Caution Check carefully whether treatment beyond the field boundary is acceptable Once the work is carried out the setting must be set back to 0 cm Proceed as follows to enter the overlap tolerance for the field boundaries 1 Press on the Overlap tol...

Page 320: ... leaving an already treated area here headland Consequently the fertilizer is switched on and off at different points The correct dimension for the headland distance is influenced by the implement s throwing characteristics and the working width of the fertilizer distributor 1 Switch on point 2 Switch off point ...

Page 321: ...re automatically transferred To enter the value for the headland distance proceed as follows 1 Press on the Headland distance button on the touchscreen or turn the scroll wheel until the button is highlighted in white and then press on the scroll wheel Once the button is highlighted you can alternatively also press the OK F6 button 2 Enter the value on the touchscreen using the number pad or the s...

Page 322: ...g If the indicated driving direction does not correspond to the actual driving direction you can correct the driving direction manually see chapter 4 4 9 This is required if backwards travel has started after switching on of the terminal To detect the driving direction CCI Command evaluates the direction of travel signal of the tractor TECU If this is not available the position information of the ...

Page 323: ...o press the OK F6 button 2 Select the desired setting from the list To do so press on the desired button on the touchscreen or turn the scroll wheel until the button is highlighted in white and then press on the scroll wheel The desired setting appears in the selection window 3 Confirm your entry with OK Note Dependent on the quality of the GPS receiver incorrect detections can occur e g in shadow...

Page 324: ...result in undesired switching off of the outer sections If this cannot be avoided through adapting of the overlap tolerance see overlap tolerance infobox In this case the function Section control only in the headland helps to avoid sowing windows The automatic switching on and off of the section only takes place in the marked headland marked grey and not on the worked area marked blue ...

Page 325: ...headland proceed as follows 1 Press on the Section control only in the headland button on the touchscreen or turn the scroll wheel until the button is highlighted in white and then press on the scroll wheel Once the button is highlighted you can alternatively also press the OK F6 button 2 Enter the Boolean value 3 Confirm your entry with OK ...

Page 326: ...tic Section Control is paused When exiting map view via the home or toggle button automatic Section Control continues operating in the background 4 4 Map view Pressing the button Map F1 takes you out of the Settings tab back to the map view The map view is the CCI Command working area Automatic Section Control is activated here Note Dependent on the implement used different buttons are available ...

Page 327: ...ed information about Settings can be found in chapter 4 3 Switch to headland management Selecting headland mode Call up Obstacles Call GPS Correction Call up Map Settings Create delete a field boundary Set A point record reference track Correcting direction of travel Change Section Control mode Switch on off manual highlighting of the area travelled over ...

Page 328: ... Control Mode 6 Infobox speed working width degree of overlap guidance mode 7 Section status display 8 Remaining area not yet worked 9 Field size if no field boundary exists the already worked area is indicated 10 Worked area 11 Repeated worked area 12 GPS Info signal strength number of satellites used signal type 13 North arrow 14 Field boundary 15 Grid size working width alignment North ...

Page 329: ...he map The map rotates about the implement The arrow 1 indicates the position of the tractor reference point aerial position According to the set geometries the sections 2 are positioned behind it The white line 3 appears if the working depth is set for the sections This is for example supported by a number of fertilizers ...

Page 330: ... a field boundary has already been created see chapter 4 4 1 Note The selection Delete headland is only available if at least one saved headland exists You have the following operating options Change to individual headland recording Press the Individual button on the touchscreen The Headland recording map view opens You can find more detailed information about headland recording in chapter 4 4 1 1...

Page 331: ...th is created along the field boundary Note To be able to add a headland a field boundary must first be created see chapter 4 4 1 4 4 1 2 Delete headland To delete a saved headland proceed as follows 1 Press on the Delete headland button on the touchscreen or turn the scroll wheel until the button is highlighted in white and then press on the scroll wheel Once the button is highlighted you can alt...

Page 332: ...ch to headland recording proceed as follows 1 Press on the Individual button on the touchscreen or turn the scroll wheel until the button is highlighted in white and then press on the scroll wheel Once the button is highlighted you can alternatively also press the OK F6 button The following screen opens You have the following operating options Set A point record reference track see chapter 4 4 8 M...

Page 333: ...ecise driven route starts 2 Drive along the route 3 Press the Mark curves F3 button on the touchscreen again Recording of the headland along the precise driven route starts The recorded headland is saved 4 4 1 5 Mark line To mark a line when recording the headland proceed as follows 1 Press the Mark line F4 button on the touchscreen The start point is set 2 Drive to the point that is to form the e...

Page 334: ...and thus the headland marker can be manually changed see chapter 4 4 1 6 If the width of the marker is bigger than the working width the position of the headland marker can be changed The setting can be changed between central default and right or left outside of the implement Selecting right or left outside edge as the setting makes it possible for example to drive with the implement directly alo...

Page 335: ...land free The light grey area is not displayed The headland is available for working the sections are not switched off here Mode 3 Headland with lead tracks Lead tracks are displayed in the headland The reference for these lead tracks is the field boundary The headland can be worked 4 4 2 Selecting headland mode To switch between headland modes proceed as follows 1 Press the Change headland mode b...

Page 336: ...bstacles To switch to the Obstacles screen proceed as follows 2 Press the Obstacles button F10 on the touchscreen The following screen opens You have the following operating options Set obstacle Position obstacle Delete all obstacles ...

Page 337: ...y a flashing red spot 4 In the touchscreen press on the buttons Left F3 Right F4 Up F5 and Down F6 to position the obstacle Note Pressing the buttons causes the obstacle to be shifted 1 metre in the respective direction 5 To save the obstacle in the current position leave the view Obstacles and return to the normal map view 4 4 3 2 Delete all obstacles To delete the obstacles proceed as follows 1 ...

Page 338: ...tes in the sky the calculated position of a point moves over time This is referred to as drift The GPS Correction makes it possible to compensate for this drift 4 4 4 GPS correction You can use the button GPS Correction F11 in the map view to carry out the GPS correction the buttons are assigned new functions You have the following operating options Move reference track Manually move reference tra...

Page 339: ... Note This function is only available if a reference track has been recorded Only the reference track is moved If the entire field is to be corrected a reference point must be set see chapter 4 4 4 3 4 4 4 3 Set reference point In the first working the reference point should be set close to a field Select a point which can subsequently be used for calibration by approaching it from exactly the sam...

Page 340: ...cisely to the already set reference point Due to the shift caused by the GPS drift the reference point in the map view will no longer lie below the actual position 4 4 4 4 Calibrate reference point To calibrate the reference point proceed as follows 1 Press the Calibrate reference point button F12 on the touchscreen The reference point is moved to its current position ...

Page 341: ...Settings F12 button in the main view to get to map settings These can be used to switch individual elements of the map view and audible warning signals on or off The elements are displayed in the map and the warning signal can sound if the check mark is set ...

Page 342: ...Lightbar on or off Switch the Section Status on or off Switch the infobox on or off Switch the GPS Infobox on or off Switch the compass on or off Switch the grid on or off Switch MiniView on or off Switch the Field boundary alert sound on or off Switch the Obstacle alert sound on or off ...

Page 343: ...K F6 button 2 In the input dialogue select the desired setting 3 Confirm your setting with OK or by pressing the scroll wheel 4 4 5 2 Switch an audible warning signal on off To switch the audible warning signal on or off upon reaching the field boundary or an obstacle proceed as follows 1 Press the button on the touchscreen with the required display or turn the scroll wheel until the button is hig...

Page 344: ...played in the MiniView without having to exit the map view of CCI Command Note The implement data displayed in MiniView must be made available by the implement However not all implements support this function If the implement does not provide any data the display remains empty ...

Page 345: ...he field without a field boundary 2 Press the Create field boundary button F1 on the touchscreen The field boundary is created and saved on the outside edge of the already worked area Gaps are closed by a matched line Nevertheless it is worthwhile travelling around the full periphery of the field as the calculations do not necessarily correspond to the actual course of the field boundary The butto...

Page 346: ...ically started Note One reference track is saved per field If you set a new A point the existing reference track is overwritten Confirmation of the prompt for confirmation is necessary to do this 4 4 9 Correcting direction of travel If reverse gear detection is activated see also chapter 4 3 5 6 CCI Command automatically detects the direction of travel To correct the detected direction of travel p...

Page 347: ...mplement operation See the manufacturer s operating instructions for the procedure 4 4 10 Change Section Control mode The change into manual mode and auto mode takes place via the same button F4 The system changes according to which mode is currently selected Switch Section Control into auto mode Switch Section Control into manual mode To change between manual mode and Section Control auto mode pr...

Page 348: ...highlighted no longer highlighted in blue on the map The button F2 changes from Selection on to Selection off and vice versa dependent on which function has just been chosen To change between manual mode and Section Control auto mode proceed as follows 1 Press the Auto mode or Manual mode button F6 on the touchscreen The mode changes and the symbol on the F6 button changes Note This function is on...

Page 349: ...n Terminal is not correctly connected Check the ISOBUS connection The software of the connected implement is not displayed Bus terminator missing Check resistance Software is loaded however is not displayed Check whether the software can be manually started from the terminal start menu Connection error when uploading the software Check physical connection Contact the implement manufacturer s custo...

Page 350: ...ield the implement was briefly switched on at another point Delete field data see 4 3 2 7 and re work the field The current lead track is not highlighted blue No sections are currently switched on for the implement If no sections are switched on the track that was last used for working is highlighted in blue This is to aid better re finding of this track e g after filling of the implement Referenc...

Page 351: ...t geometry settings Refer to the implement operating instructions to see how these can be changed Incorrect setting of the position of the Connection point aerial Re measure and check the settings in CCI GPS Check the selection of the Connection point in CCI Command Incorrect delay times If these are transferred from the implement consult the implement operating instructions If these were set by y...

Page 352: ...ing 81 Error Possible cause Rectification approach Section Control does not switch The function Section control only in the headland is activated Deactivate the function Section control only in the headland see chapter 4 3 5 7 ...

Page 353: ...ng instructions of your implement to find them Enter working width Working width is transferred by the ISOBUS implement and automatically displayed see above Enter value for headland distance dashes appear in the field The connected implement does not correspond to class 5 fertilizer The headland distance only fulfils its purpose with fertilizers According to the ISO standard fertilizers conform t...

Page 354: ...adland The value 0 00 m is entered for the headland distance Enter a value greater than 0 00 m for the headland distance see chapter 4 3 5 5 Import field boundary Export field Flash drive is not plugged in or is not yet detected Plug in flash drive and wait until the terminal detects it 5 4 Error messages Note The error messages shown on the terminal depend on the connected implement A detailed de...

Page 355: ...ightbar proceed as follows 1 Press the home key to enter the main menu 2 Press the Settings button F1 in the main menu 3 Select the tab Info and Diagnostics 4 In the tab Info and Diagnostics press the button L10 The view for the L10 opens Pos 12 CC Isobus Seitenumbruch 8 mod_1274446340522_0 doc 121469 ...

Page 356: ...ure 85 Pos 13 CC Isobus Technische Daten 8 mod_1274446461913_6 doc 121475 12222 Pos 15 CC Isobus Menüstruktur 8 mod_1274875511036_6 doc 121659 1 6 Menu structure Pos 20 CC Isobus Seitenumbruch 8 mod_1274446340522_0 doc 121469 ...

Page 357: ...on and the changing position of the satellites in the sky the calculated position of a point moves This is referred to as GPS drift GSM Global System for Mobile Communication Standard for fully digital mobile phone networks that is primarily used for telephony and text messaging such as SMS Headland Control Virtual headland ISOBUS ISO11783 International standard for data transfer between farming i...

Page 358: ...section e g during spraying the time from the command Switch on section until when the agent is actually applied Look ahead The look ahead time specifies the time interval for calculation of the steering suggestion For example a greater time for the look ahead time gives the driver more time to react to the steering suggestion ...

Page 359: ...O XML data format Hence tasks can be conveniently imported into the task controller and or the finished documentation can then be exported again Task controller geo based variables Additionally offers the possibility of also collecting position related data or the planning of position related tasks for example using application maps Task Controller Section Control Deals with the automatic switchin...

Page 360: ...all up Service menu Select from a list Delete Edit Confirm entry or selection Save field Delete worked area Import field boundary Export field Search fields Headland track 2 half width Section geometry Connection point Implement type Switch on delay Switch off delay Working width Omission Overlapping Guidance mode A B mode Curve mode Beds Lightbar settings Look Ahead time LED Distance Settings Deg...

Page 361: ...d boundary Alert obstacle Create Field boundary Delete field boundary Create headland Change headland mode Delete headland Correcting direction of travel Switch on manual highlighting of the area travelled over Switch off manual highlighting of the area travelled over Switch Section Control into auto mode Switch Section Control into manual mode Set A point record reference track Move reference tra...

Page 362: ...91 Mark line Change the position of the marker Move reference track to the left Move reference track to the right ...

Page 363: ...rnal lightbar connecting 9 F Field Copy 18 Delete 22 Delete worked area 22 Edit name 22 export 18 Export field s 21 Export shape data 21 find 22 import 18 Import field s 20 Import shape data 19 save 18 select 17 Settings 16 Field boundary create 74 delete 74 Overlap tolerance 48 Switch alarm off 72 G Geometry 24 Section Geometry 26 Glossary 86 GPS Switch alarm off 72 GPS correction 67 GPS receiver...

Page 364: ...ing width 33 Parallel Tracking Enter overlap 34 Parallel Tracking Select guidance mode 35 Parallel Tracking Enter beds 36 Parallel Tracking Lightbar 38 Parallel Tracking Reference track 75 Program start 13 R Record headland mark curves 62 mark line 62 Reference 4 Reference point calibrate 69 set 68 Reference track move 68 record 75 Set A point 75 Reverse gear detection 52 S Safety instructions 8 S...

Page 365: ...94 Import field boundary 18 19 Switch an audible warning signal on off 72 T TC BAS 88 TC GEO 88 TC SC 88 Troubleshooting 78 ...

Page 366: ...CCI GPS GPS settings and tractor geometry Operating instructions Reference CCI GPS v2 ...

Page 367: ...Copyright 2015 Copyright by Competence Center ISOBUS e V Albert Einstein Straße 1 D 49076 Osnabrück Version number v2 05 ...

Page 368: ...ation of indications in the operating instructions 5 3 Set up for operation 6 3 1 Connecting the Terminal 6 4 Operation 8 4 1 Program start 8 4 2 GPS info 9 4 3 GPS settings 10 4 4 Geometry settings 13 5 Troubleshooting 18 5 1 Errors during operation 18 6 Menu structure 19 7 Glossary 20 8 Buttons and icons 21 9 Index 22 ...

Page 369: ...terminal proceed as follows 1 Press the home key to enter the main menu 2 Press the Settings button F1 in the main menu 3 Select the tab Info and Diagnostics 4 In the tab Info and Diagnostics press the button Terminal 5 Press the Software button on the touchscreen The version of the terminal software component is indicated in the information field that is now displayed 1 3 About CCI GPS CCI GPS is...

Page 370: ...b Carefully observe the indications regarding occupational safety and exert particular caution in these cases Caution This caution symbol identifies all safety indications referring to regulations directives or working procedures which must be observed Non observance can entail damage to or the destruction of the terminal as well as malfunctions Note The note symbol highlights operation tips and o...

Page 371: ...al 3 1 1 Connecting to a GPS receiver Depending on the model a GPS receiver is connected to the serial interface RS232 1 of the terminal or to the ISOBUS 3 1 1 1 NMEA 0183 serial Note Serial interface 1 RS232 1 of the terminal is factory set as follows 4800 baud 8N1 The baud rate must be matched to the GPS receiver used 3 1 1 2 NMEA 2000 ISOBUS The GPS receiver is connected to the CAN Bus no confi...

Page 372: ...about GPS receivers and settings at http www cc isobus com produkte gps Note The CCI Apps place different demands on the quality and accuracy of the GPS messages For navigation FieldNav and documentation CCI Control simple data records are sufficient as provided by inexpensive receivers For lane guidance and section control CCI Command receivers with Egnos correction and accuracies of 20 to 30 cm ...

Page 373: ...he main menu of the terminal on the touchscreen or turn the scroll wheel until the button is highlighted in white and then press on the scroll wheel The following start screen opens Three tabs are displayed in CCI GPS The following information and setting options are organised in these GPS info Display of the latest received GPS data GPS settings Display and setting of the GPS source and baud rate...

Page 374: ... values for speed course time signal quality and HDOP are given HDOP is a quality value for the current GPS signal A smaller HDOP means better GPS quality At the top right there is an indication of which message packages the GPS receiver sends black sent grey not sent Note If the GSV signal is not sent then no satellites can be displayed on the graticule This has no effect on functionality The GSV...

Page 375: ...CCI GPS Operation 10 4 3 GPS settings This tab displays the GPS source and the baud rate You have the following operating options Select GPS source Enter baud rate ...

Page 376: ...reen press on the button with the GPS source or turn the scroll wheel until the button is highlighted in white The GPS source then appears in the selection window 3 Confirm your selection with OK or press once again on the GPS source highlighted in white Serial or CAN connection of a GPS receiver There are two options for connection of a GPS receiver If the receiver has a serial output then this i...

Page 377: ...ens 3 Select the desired baud rate in the selection list To do so on the touchscreen press on the button with the baud rate or turn the scroll wheel until the button is highlighted in white The baud rate then appears in the selection window 4 Confirm your selection with OK or press once again on the baud rate highlighted in white Note The baud rate is automatically set if the CAN bus is selected a...

Page 378: ...the coupling point is entered separately for four different mountings So that for example the correct distance is used in CCI Command after coupling up of an implement only the currently used mounting must be selected If the settings in CCI GPS were made carefully re measuring is no longer necessary See also the chapter Geometry from the CCI Command operating instructions 4 4 Geometry settings In ...

Page 379: ... using chalk next to the tractor and then measure this distance 4 4 1 Enter distance A Proceed as follows to enter distance A 1 Press on the A button on the touchscreen or turn the scroll wheel until the button is highlighted in white and then press on the scroll wheel Once the button is highlighted you can alternatively also press the OK F6 button 2 Enter the value on the touchscreen using the nu...

Page 380: ... between the tractor reference point and GPS aerial Optimally you should mark the mid point of the rear axle and the position of the aerial on the ground using chalk next to the tractor and then measure this distance Fit the aerial centrally if possible In the case shown distance B can be set equal to 0 00m ...

Page 381: ...To select the mounting proceed as follows 1 Press on the Mounting button on the touchscreen or turn the scroll wheel until the button is highlighted in white and then press on the scroll wheel Once the button is highlighted you can alternatively also press the OK F6 button The following selection list opens 2 Select the desired mounting in the selection list To do so on the touchscreen press on th...

Page 382: ... the ground using chalk next to the tractor and then measure this distance 4 4 4 Enter distance C Proceed as follows to enter distance C 1 Press on the C button on the touchscreen or turn the scroll wheel until the button is highlighted in white and then press on the scroll wheel Once the button is highlighted you can alternatively also press the OK F6 button 2 Enter the value on the touchscreen u...

Page 383: ...the CAN Bus Incorrect GPS source selected Under GPS settings see chapter 4 3 check whether the GPS source is selected that is currently being used Incorrect baud rate set When using serial data under GPS settings see chapter 4 3 set the same baud rate with which your receiver is configured Incorrect configuration of the receiver Check which configuration is necessary for your application see for e...

Page 384: ...CC Isobus Seitenumbruch 8 mod_1274446340522_0 doc 121469 Pos 17 CC Isobus Garanti e 8 mod_1274791954660_6 doc 121539 1 Pos 19 CC Isobus Kontaktadr essen 8 mod_1274446496959_6 doc 121502 1 Pos 20 CC Isobus Seitenumbruch 8 mod_1274446340522_0 doc 121469 ...

Page 385: ...ngs and tractor geometry GPS Global Positioning System GPS is a system for satellite supported position determination HDOP Quality value for GPS signals ISOBUS ISO11783 International standard for data transfer between farming implements and devices Terminal ISOBUS CCI 100 or CCI 200 terminal Touchscreen Touch sensitive screen for operation of the terminal Ende der Liste für Textmar ke Inhalt ...

Page 386: ...nter baud rate Select mounting Confirm selection or entry Enter distance A Enter distance B Enter distance C GPS info GPS settings Geometry settings Adjustable drawbar Towing hitch ball Drawbar coupling 3 point hitch Change to the right Change to the left Change up Change down ...

Page 387: ...eometry Distance A 14 Distance B 16 Distance C 17 set 13 Glossary 20 GPS receiver connecting 6 11 NMEA 0183 serial 6 NMEA 2000 ISOBUS 6 GPS receivers 7 GPS source 11 I Introduction 4 M Menu structure 19 P Program start 8 S Safety instructions 5 Select mounting 16 Settings 10 baud rate 12 GPS source 11 Set up for operation 6 T Troubleshooting 18 ...

Page 388: ...CCI Courier Task data exchange between farm PC and terminal Operating instructions Reference CCI Courier v2 0 ...

Page 389: ...2 Copyright 2014 Copyright by Competence Center ISOBUS e V Albert Einstein Str 1 D 49076 Osnabrück Version number v2 01 ...

Page 390: ...m 7 3 3 Installing the software 8 4 Operation 9 4 1 General instructions 9 4 2 Preparations 10 4 2 1 FTP 10 4 2 2 Email 10 4 3 Program start 11 4 3 1 Main view 11 4 3 2 Settings 11 4 4 Main view 12 4 4 1 Activate deactivate data exchange 13 4 4 2 Delete data from the inbox 13 4 5 Settings 14 4 5 1 General 15 4 5 2 FTP settings 17 4 5 3 Email settings 19 5 Troubleshooting 21 5 1 Terminal errors 21 ...

Page 391: ...n order to query the version number of the CCI Courier installed on your CCI ISOBUS terminal proceed as follows 1 Press the home key to enter the main menu 2 Press the Settings button F1 in the main menu 3 Select the tab Info and Diagnostics 4 In the tab Info and Diagnostics press the button Terminal 5 Press the Software button on the touchscreen The version of the terminal software component is i...

Page 392: ...rver 3 Task and log data can be evaluated and further processed in the FMIS 1 3 2 Flow chart Email operating mode 1 Create task file FMIS data in ISO XML format and store in your desired location Send an email to the terminal with the task file in the attachment The user name of the Courier account must be in the subject line Courier receives the email 2 Import task file into CCI Control process t...

Page 393: ... and limb Carefully observe the indications regarding occupational safety and exert particular caution in these cases Attention This attention symbol identifies all safety indications which refer to regulations directives or working procedures which it is essential to observe Non observance can entail damage to or the destruction of the terminal as well as malfunctions Note The note symbol highlig...

Page 394: ...g Instructions 3 2 2 Connecting to a GSM modem To exchange task data CCI Courier requires a mobile telephony interface for online data transfer A GSM modem is required for this and can be ordered using the article number ArtNummer GSM Proceed as follows to connect the GSM modem with the terminal 1 Connect the GSM modem to serial interface 2 RS232 2 Note The setting of serial interface 2 RS232 2 of...

Page 395: ...vated in the settings of your Terminal so that the app is visible in the start menu Proceed as follows 1 Press the Settings button F1 in the main menu of the touchscreen 2 In the touchscreen press on the System settings tab or select it using the arrow keys F8 F2 3 On the touchscreen press on the App management button or turn the scroll wheel until the button is highlighted in white and then press...

Page 396: ...ain view and Settings When changing between the two areas note the following If the button Active is checked data exchange is active No settings can then be made The Settings F1 button is greyed out To be able to access to the Settings operating mask data exchange must be deactivated see chapter 4 4 1 ...

Page 397: ...e given it in the general settings of your Courier account see chapter 4 5 1 1 2 Within this folder create a sub folder with the name TODO and a sub folder with the name COMPLETE 4 2 2 Email The following preparations must be made for the Email operating mode 1 Open an email account or select an existing email account This is used by CCI Courier for the receipt and sending of task data ...

Page 398: ... wheel until the button is highlighted in white and then press on the scroll wheel The following main view opens After the corresponding settings have been made see chapter 4 5 further user entries in CCI Courier are not necessary CCI Courier is subdivided into 2 areas 4 3 1 Main view Activation deactivation of the data exchange see chapter 4 4 1 Information on the status of the connection plus in...

Page 399: ...the email account Inbox Indicates whether new data is available for import to the terminal or the status of downloading Outbox Indicates whether new data is available for export from the terminal or the sending status You have the following operating options Activate deactivate data exchange Delete data from the inbox Switch to settings In the Touchsreen press on the Settings button F1 More detail...

Page 400: ... Data exchange active button on the touchscreen or turn the scroll wheel until the button is highlighted in white and then press on the scroll wheel Once the button is highlighted you can alternatively also press the OK F6 button 2 Enter the Boolean value 3 Confirm your entry with OK 4 4 2 Delete data from the inbox To delete data from the inbox proceed as follows 1 Press the Delete button F12 on ...

Page 401: ...the creating of a Courier account and the selecting of the operating mode FTP The settings for FTP operating mode are made here Email The settings for Email operating mode are made here To switch between tabs proceed as follows 1 In the touchscreen press on the corresponding tab or select it using the arrow keys F8 F2 ...

Page 402: ...ourier Operation 15 4 5 1 General This tab shows the settings for the Courier account and the operating mode You have the following operating options Enter the Courier account name Select the operating mode ...

Page 403: ...entry with OK Note The name of your Courier account must comprise only numbers and letters special characters and blank spaces are not permitted 4 5 1 2 Select the operating mode Select the operating mode The job data can either be sent and received via your FTP server or email To select the operating mode proceed as follows 1 Press on the Mode button on the touchscreen or turn the scroll wheel un...

Page 404: ...I Courier Operation 17 4 5 2 FTP settings The settings for FTP operating mode are made in this tab You have the following operating options Select sample configuration Select FTP server for data exchange ...

Page 405: ...n or turn the scroll wheel until the button is highlighted in white and then press on the scroll wheel Once the button is highlighted you can alternatively also press the OK F6 button Enter the IP address or URL of your FTP server Confirm your entry with OK F6 2 In the touchscreen press on the button User name and enter the user name via the keyboard on the touchscreen with which CCI Courier shoul...

Page 406: ...CCI Courier Operation 19 4 5 3 Email settings The settings for Email operating mode are made in this tab You have the following operating options Select the email account for data exchange ...

Page 407: ...word and enter the password of the CCI Courier email account Confirm your entry with OK Continue with step 8 if you could select the email provider of the email account of CCI Courier in step 2 5 In the touchscreen press on the button POP3 server and enter the incoming mail server of the CCI Courier email account Confirm your entry with OK 6 In the touchscreen press on the button SMTP server and e...

Page 408: ...he ISOBUS connection 5 2 Errors during operation Error Possible cause Rectification approach Data exchange via FTP or the GSM modem does not function Since December 2013 some T Mobile calling plans have blocked the FTP port Calling plan upgrade after prior consultation with T Mobile 5 3 Error messages 5 4 Diagnostics os 13 CC ISOBU S Technische D aten 8 mod_1274446461913_6 doc 121475 12222 Pos 15 ...

Page 409: ...CCI Courier Menu structure 22 6 Menu structure Pos 20 CC ISOBUS Seitenumbruch 8 mod_1274446340522_0 doc 121469 Pos 21 CC ISOBUS Glossar 8 mod_1274961991767_6 doc 121689 1 ...

Page 410: ...sages such as SMS IP address An IP address is an address in computer networks It is allocated to devices that are connected to the network making them accessible ISO XML ISOBUS specific format for task data files based on XML ISOBUS ISO11783 International standard for data transfer between farming implements and devices POP3 server Incoming mail server Interface Part of the terminal which is used ...

Page 411: ...change Delete Call up settings Confirm entry or selection Settings cannot be called because data exchange is active Change to the left No data available for deleting Change down Switch to general settings Change to the right Switch to FTP settings Change up Change up Switch to E mail settings ...

Page 412: ...ry 23 GSM modem 7 I Introduction 4 IP address 18 M Main view 11 12 connection status 12 inbox 12 outbox 12 O Operating mode 16 Operation 9 General instructions 9 P Preparations 10 Email 10 FTP 10 R Reference 4 S Safety 6 Safety instructions 6 Settings Select sample configuration 18 Settings 11 14 Courier account 16 FTP 17 General 15 operating mode 16 Settings Set up FTP server 18 Settings Email 19...

Reviews: