background image

E-2

QUICK REFERENCE

1

LOCK

2

2

LOCK

1

On the bottom of the camera, slide the
battery compartment cover lock towards
the front of the camera (

1

1

1

1

1

) to release the

cover.

Grasping both sides of the battery com-
partment cover, swing it open (

2

2

2

2

2

).

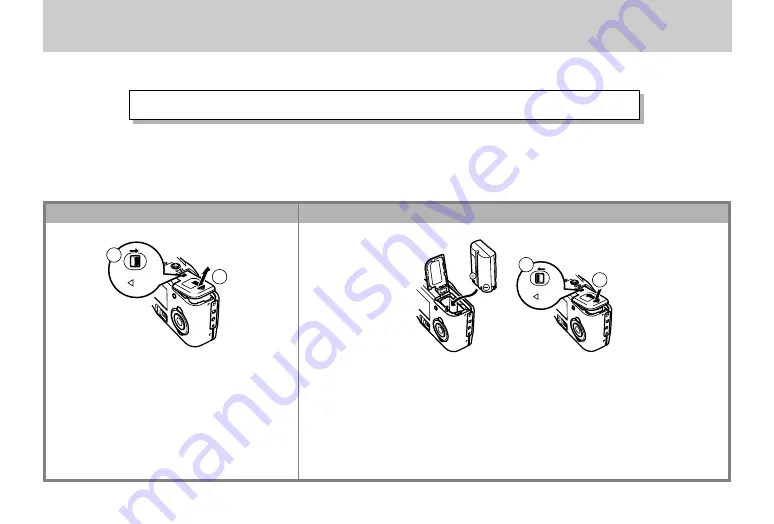
Load batteries so their plus (+) and minus (–) ends are facing as shown
in the illustration.

Close the battery compartment cover (

1

1

1

1

1

), and then slide the battery

compartment cover lock towards the back of the camera to lock the
cover in place (

2

2

2

2

2

).

2

The section provides a general outline of operational procedures.

Loading Batteries (page  E-41)

*

 Be sure to use the AC adapter/charger to charge the battery before using it.

1

Summary of Contents for QV-3EX

Page 1: ...open 2 2 2 2 2 Load batteries so their plus and minus ends are facing as shown in the illustration Close the battery compartment cover 1 1 1 1 1 and then slide the battery compartment cover lock towards the back of the camera to lock the cover in place 2 2 2 2 2 2 The section provides a general outline of operational procedures Loading Batteries page E 41 Be sure to use the AC adapter charger to c...

Page 2: ... memory card into the camera so the arrow on the front of the card is pointed up If the memory card eject button is extended press it back down before inserting the memory card Eject button Loading a Memory Card page E 36 Loaded in the camera when you purchase Surface marked with arrow should face up ...

Page 3: ...camera for the first time Failure to set the date and time correctly will cause the wrong names to be assigned to data files and improper operation of the camera s date and time stamp feature Be sure that you set the correct date and time before using the camera Setting the Current Date and Time page E 48 ...

Page 4: ...old it there The monitor screen image may become dim when you press the shutter button half way The camera s Auto Focus feature automatically focuses the image Pressing down the Power Function switch slide it to REC After confirming that the Auto Focus operation is complete the operation lamp lights green press the shutter button 3 Recording Images page E 50 ...

Page 5: ...F PLAY MF INFO CARD 2 1 Pressing down the Power Function switch slide it to PLAY This turns on power and displays recorded images on the monitor screen Use and to scroll through the images stored in camera memory Playing Back Images page E 83 ...

Page 6: ... check to make sure that you really want to delete the image you selected Press MENU to exit the image delete operation Use and to select the image you want to delete Pressing down the Power Function switch slide it to PLAY Use 왔 to select Yes and then press Deleting Images page E 96 ...

Page 7: ...ra E 36 Removing a Memory Card from the Camera E 37 Formatting a Memory Card E 38 E 41 POWER SUPPLY Loading the Battery E 41 Using AC Power E 45 Power Save Settings E 46 E 48 SETTING THE CURRENT DATE AND TIME Setting the Date and Time E 48 Selecting the Date Format E 49 E 50 RECORDING Turning Camera Power On and Off E 50 Using the Shutter Button E 50 Recording a Single Snapshot Image E 51 Recordin...

Page 8: ...OLDER TYPES Memory Card Folder Precautions E 92 Selecting a Folder for Playback E 93 E 94 IMAGE PROTECTION Protecting and Unprotecting a Single Image E 94 Protecting Folders E 95 Protecting and Unprotecting All Images on a Memory Card E 95 E 96 DELETING IMAGES Deleting the Currently Selected Image E 96 Deleting a Single Image E 97 Deleting All the Images in a Folder E 98 Deleting All Unprotected I...

Page 9: ...tant data on other media to protect against its loss Windows and Internet Explorer are registered trademarks of Microsoft Corporation Macintosh is a registered trademark of Apple Computer Inc CompactFlash and logo are registered trademarks of SanDisk Corporation Other company product and service names used herein may also be trademarks or service marks of others The USB driver uses software by Pho...

Page 10: ...sequence you want using a DPOF compatible printer DPOF can also be used by pro fessional print services when specifying images to produce prints Continuous recording page E 61 Continuous recording of high quality images at 1 second in tervals when the monitor screen is turned off is just like have a motor drive on the camera DCF Data Storage page E 109 DCF Design rule for Camera File system data s...

Page 11: ...CCD Images are recorded by a 3 34 megapixel CCD for amazing resolution and clarity Some slight image noise may be caused when using slow shutter speeds Easy to understand graphic interface page E 31 All camera operations can be performed on graphic based in teractive menu screens A CASIO high resolution HAST LCD makes screen images clearer and more colorful than ever be fore Easy connection to oth...

Page 12: ...ndscape Mode with built in color filter Night Scene AEB Mode page E 63 page E 70 page E 69 page E 62 Aperture Priority Auto Mode Manual Mode Manually set the shutter speed and aperture to suit the type of image you are recording page E 72 page E 71 ...

Page 13: ...FEATURES E 14 00 2 1 Self timer Date and Time Stamping 9 image Screen page E 74 page E 48 page E 88 Display Zoom Macro Feature page E 65 page E 86 Histogram page E 32 87 ...

Page 14: ...FEATURES E 15 Image Protection page E 94 Slide Show page E 89 ...

Page 15: ...es the danger of fire and electrical shock Never use the camera outdoors in the rain or snow at the seashore or beach in the bathroom etc Should foreign matter or water ever get into the camera immediately turn power off unplug the AC adapter from the power outlet and contact your dealer or nearest CASIO service provider Using the camera under these conditions creates the danger of fire and electr...

Page 16: ...especially one parked in the sun In areas subject to strong vibration Physical damage and malfunction of this camera can cause the image data stored in its memory to be deleted Be sure to always keep backup copies of data by transfer ring them to personal computer memory Never open the battery compartment cover disconnect the AC adapter from the camera or unplug it from the wall socket while recor...

Page 17: ...dicate mal function and normal operation should return at higher tem peratures Condensation When you bring the camera indoors on a cold day or other wise expose it to a sudden change of temperature there is the possibility that condensation can form on the exterior or on interior components Condensation can cause malfunc tion of the camera so you should avoid exposing it to con ditions that might ...

Page 18: ...to use the procedure on page E 48 to set the time and date before using the camera for the first time File name assignment and date and time stamping will not be performed correctly if the time and date are wrong Monitor Screen Recording The image shown on the monitor screen during recording is intended for composition purposes only so its quality does not match that of the image as it is recorded...

Page 19: ...erference in a residential installation This equipment generates uses and can radiate radio frequency energy and if not installed and used in accordance with the instructions may cause harmful interfer ence to radio communications However there is no guarantee that interference will not occur in a particular installation If this equipment does cause harmful interference to radio or television rece...

Page 20: ...ms shown below are included with your camera If something is missing contact your dealer as soon as possible Camera Soft case CD ROM Memory card 8 MB CompactFlash card Loaded in the camera when you purchase it Strap Video cable Data Transfer Cable Special USB cable ...

Page 21: ...er s Guide AC power cord DC cord AC Adapter Charger BC 7LA Manual AC Adapter Charger User s Guide The shape of the AC power cord plug varies according to country or geographic area Lithium Ion Rechargeable Battery User s Guide Bundled Software User s Manual ...

Page 22: ...djust the length of the strap This way you can make it a short hand strap or a longer shoulder or neck strap Using the Strap Around your neck Slide the stopper to adjust the length of the strap Around your wrist Slide the stopper to adjust the length of the strap On your belt Use your hook to attach the strap to your belt etc Slide the stopper to adjust the length of the strap ...

Page 23: ...other application Never swing the camera around by the strap Carrying the camera so it is swinging freely from the strap can cause it to become damaged by bumping against other objects It also creates the danger of the camera becoming caught in a door or on other ob jects resulting in personal injury NOTE You can attach the loop on the soft case to the hook on the strap while using the camera This...

Page 24: ...show the names of each component button and switch on the camera Shutter button page E 51 Lens page E 19 Exposure sensor page E 57 Self timer lamp page E 30 Viewfinder page E 54 Flash page E 56 Indicator display page E 33 Dial page E 51 Terminal Panel Cover page E 27 ...

Page 25: ... REC OFF PLAY MF INFO CARD Focus Folder button pages E 64 65 Self Timer Delete button pages E 74 96 Flash lamp page E 29 Power Function switch pages E 50 Power Function Lamp pages E 50 LCD page E 31 DISP button pages E 31 35 MENU button page E 35 Operation lamp page E 29 button 왘 왗 왖 왔 ...

Page 26: ...ver page E 36 Memory card cover release page E 36 DIGITAL VIDEO OUT USB DC IN 6V CARD Tripod screw hole Battery compartment lock page E 41 Battery compart ment cover page E 41 Always keep the terminal panel cover in place whenever you are not using the terminals When the cover is removed keep it out of the reach of small children who may accidentally swallow it and take care that you do not lose i...

Page 27: ...ower Function lamp This lamp lights or flashes to indi cate the status of the operation you are performing as described below Power Function lamp REC Mode Lamp Color Green Red On Power is on Flashing Camera is starting up A memory card write op eration is being per formed Camera is powering down REC OFF PLAY PLAY Mode Lamp Color Green Red On Power is on Flashing Camera is starting up Camera is pow...

Page 28: ...d browser is being created Shutter Button Pressed Half Way Lamp Color Green Red On Auto focus operation is complete Auto focus operation failed PLAY Mode Lamp Color Green Red Flashing Delete operation is in progress Format opera tion is in progress Low battery warning Card browser is being created Memory card abnormality IMPORTANT Never open the memory card cover while the Power Function lamp or O...

Page 29: ...sh ing an error message appears on the monitor screen re gardless of whether the monitor screen is turned on or off REC Mode Partial Shutter Button Lamp Color Amber On Ready to fire Lamp Color Amber Flashing Flash is charging Low battery warning Flash lamp Self timer lamp This lamp flashes when the self timer is performing a timer operation prior to releasing the shutter Self timer lamp ...

Page 30: ...Bilder P1 bis P9 Kontinuierlicher Modus Modusanzeige AEB Modus Modusanzeige AEB Qualität FINE Fein NORMAL Normal ECONOMY Sparsam Restliche Anzahl von Seiten Blitzlicht Modus Automatisch Keine Blitzlicht ausgeschaltet Blitzlicht eingeschaltet Reduzierung von Blendung Punktbelichtungs messungsanzeige Blendenwert Verschlusszeitenwert Bildgröße 2016 x 1536 1008 x 768 EV Umschaltung Anzeigen eingeschal...

Page 31: ...te oder hohe Helligkeitspegel rechte Seite enthalten Falls ein Histogramm ein Muster zeigt das zu sehr nach einer Seite neigt dann können Sie die Belichtungskompensation ein stellen Seite G 59 oder den Modus mit automatischer Blendenpriorität A Modus verwenden und die Blende einstel len Seite G 71 oder den manuellen Modus M Modus ver wenden um die Verschlusszeit und die Priorität einzustellen WICH...

Page 32: ...Blitzlichtmodus Blendenwert Verschlusszeitenwert Anzeigedisplay Das an der Oberseite der Kamera angeordnete Anzeige display zeigt während der Aufnahme von Bildern die ver schiedenen Statusanzeigen der Kamera an Das Anzeigen display ist besonders dann nützlich wenn der Monitor bildschirm ausgeschaltet ist Indikator für manuellen Scharfeinstellmodus Indikator für unendlich Indikator für ausge schalt...

Page 33: ...e um die Menüanzeige zu er halten Der Inhalt der Menüanzeige hängt davon ab ob Sie den PLAY oder REC Modus aktiviert haben Während die Menüanzeige in dem REC Modus am Display angezeigt wird drücken Sie die DISP Taste um zwischen dem grund legenden Menü und dem weiterführenden Menü umzuschal ten In dieser Bedienungsanleitung wird immer das grundle gende Menü für Posten verwendet die sowohl im grund...

Page 34: ...nü und dem weiterführen den Menü umzuschalten 3 Die 왘 왗 왔 und 왖 Tasten verwenden um die gewünschte Kategorie bzw Funktion zu wählen dann die Taste drücken 왘 왗 왔 왖 Wahl eines Postens Führt eine Wahl aus MENU Kehrt an die vorhergehende Bildschirmanzeige zurück oder bricht die Einstellungen ab Nehmen Sie die Einstellungen in Übereinstimmung mit den Anweisungen vor die am Monitorbildschirm angezeigt w...

Page 35: ...rive for image storage IMPORTANT Make sure that the power of the camera is turned off before you insert or remove a memory card When inserting a memory card into the camera make sure that the card is oriented correctly Make sure that the correct side of the card is facing up and that you insert the correct end of the card into the camera Inserting a Memory Card into the Camera 1 Open the memory ca...

Page 36: ...ard slot immediately turn off power unplug the AC adapter and contact your original retailer or nearest CASIO Service Provider Never eject the CompactFlash card while the card slot is facing downwards Doing so creates the danger of the CompactFlash card falling which can corrupt im age data on the card Never remove the memory card from the camera while Power Function lamp or Operation lamp is flas...

Page 37: ...re to use only CASIO brand CompactFlash cards Proper operation with other memory cards is not guaran teed Static electricity electrical noise and other electrical phe nomena can cause corruption or even total loss of the data stored on a memory card Because of this you should always make backup copies of important images on other media magnetic optical disk floppy diskette computer hard disk etc M...

Page 38: ...and cause mal function Never remove the battery unplug the AC adapter or sub ject the camera to impact while the Power Function lamp or Operation lamp is flashing Doing so can cause malfunc tion of the microdrive The microdrive is a very high precision device Dropping the camera can result in malfunction of the microdrive even though the camera is undamaged Take extra care when handling the camera...

Page 39: ... can be stored in each folder The following shows a typical file name 11070026 JPG Month Day Serial number Extension JPG or AVI When you try to save the 251st image to a folder the cam era automatically creates a new folder and store the image there The above maximum numbers of files and folders are ab solute maximums The actual numbers of folders and files may be less due to memory card capacity ...

Page 40: ...1 in the illus tration Next slide the cover in the direction in dicated by arrows 2 2 2 2 2 and open the cover 2 Orient the battery as shown in the illustration and load it into the camera 3 While pushing the battery compartment cover in the direction indicated by arrow 1 1 1 1 1 slide it shut and then slide the lock in the direction in dicated by arrow 2 2 2 2 2 2 LOCK 1 1 LOCK 2 The camera is de...

Page 41: ...tery power Use the button to turn off the flash when you are not using it You can also use the power save settings E 46 to protect against wasting battery power when you forget to turn off the camera Approximate Continuous Record Time 65 minutes 390 shots with the monitor screen turned on 270 minutes 1 620 shots with the monitor screen turned off Battery Type NP L7 Lithium Ion Rechargeable Battery...

Page 42: ...ittent Operation Intermittent operation dramatically reduces battery ca pacity You can expect about one hour of operation about 55 images under room temperature 25 C when repeating a cycle during which you spend 10 minutes recording one image per minute with flash followed by one minute of playback and then nine minutes of power off The same sequence as described above results in about 12 minutes ...

Page 43: ... comes with the lithium ion battery and the AC adapter charger before using them Auto Power Off Battery Powered Operation Only Power automatically turns off whenever you do not perform any camera operation for a specific period See page E 46 for details about how you can specify the Auto Power Off time To restore power hold down the Power Function switch and slide it to OFF and then back to REC or...

Page 44: ...f fire or elec trical shock Use only the optional AC adapter specified for this camera Should the cord of the AC adapter become damaged exposed internal wiring request a replacement from an authorized CASIO ser vice provider A damaged AC adapter cord cre ates the danger of fire or electrical shock Use only the BC 7LA AC adapter charger or the AD C620 AC adapter only to power the camera Using any o...

Page 45: ... plugged into the camera Always use the AC adapter to power the camera whenever it is connected to a computer Power Save Settings The settings described below let you specify sleep and auto power off trigger times that help to conserve valuable battery power SLEEP The monitor screen enters a sleep state if no operation is performed for a speci fied amount of time in the Record Mode Pressing any bu...

Page 46: ... Initializing Power Save Trigger Times Use the following procedure to return SLEEP and AUTO POWER OFF trigger time settings to their initial factory de faults SLEEP 1 minute AUTO POWER OFF 2 minutes IMPORTANT Note that performing the following procedure to initial ize the power save trigger time settings also initializes mode memory page E 78 1 Pressing down the Power Function switch slide it to R...

Page 47: ...nected to the AC Adapter Charger with the DC cord while charging the battery A flashing time display indicates that the time and date clock settings have been cleared Use the procedure on this page to make the correct time and date set tings If you do not set the camera s built in clock to the cur rent date and time all images are recorded with the default date and time which probably is not your ...

Page 48: ...y 1 2000 You can select any one of the following formats for the above date 00 5 1 1 5 00 5 1 00 1 Press MENU 2 Select SET UP Date Style 3 Use 왔 and 왖 to select the date format you want and then press 4 After making all the settings on the monitor screen press to register them ...

Page 49: ...er it has been turned off by auto power off hold down the Power Function switch and slide it to OFF and then back to REC or PLAY REC OFF PLAY Using the Shutter Button The following steps describe how to operate the shutter but ton so that Auto Focus has a chance to focus the image 1 Press the shutter button about half way The Auto Focus feature automatically focuses the im age The Operation lamp l...

Page 50: ...Power Function switch slide it to REC 3 After composing the image on the monitor screen press the shutter button about half way and hold it there REC OFF PLAY The monitor screen image may become dim when you press the shutter button half way The camera s Auto Focus feature automatically fo cuses the image The Operation lamp lights green and the Auto Focus Frame in the monitor screen turns green wh...

Page 51: ...the image due to camera movement IMPORTANT Never remove the memory card from the camera while images are being saved to the memory card which is indicated when the Power Function lamp is flashing Doing so will cause the images you just re corded to be lost The record mode does not change immediately if you change the Record Mode Dial setting while images are being saved to the memory card Turning ...

Page 52: ... focusing distances when Auto Focus is unable to focus Well lit Location 1 5 meters 4 9 minimum With Flash Approximately 2 meters 6 6 Depending on actual conditions a green Operation lamp and Auto Focus Frame do not necessarily guarantee that the image is in focus Also dim lighting can cause Auto Focus to take a long time CAUTION Never open the battery compartment cover discon nect the AC adapter ...

Page 53: ...not appear while the monitor screen is turned off The message appears for each image recorded when the battery level is while using a microdrive Auto Focus Frame Focus Range Frame Short distance to subject Using the Viewfinder for Recording The illustrations below show what you see when you look through the viewfinder to compose an image for recording Note that the focus range frame is valid for s...

Page 54: ...ven though a different object is within the Auto Focus Frame Locking the focus also locks the exposure setting 1 Align the Auto Focus Frame with the subject you want to lock on and press the shutter but ton half way down The monitor screen image may become dim when you press the shutter button half way The Auto Focus frame turns green when the image is in focus 2 While keeping the shutter button d...

Page 55: ...e the flash unit is charging Camera Shake Indicator The camera shake indicator appears on the monitor screen when a slow shutter speed is being used Indicator None Flash Mode Auto Flash Flash Off Flash On Red eye Reduction Description Flash is automatically enabled and disabled in accordance with expo sure conditions Flash is never fired regardless of exposure conditions Flash is always fired rega...

Page 56: ...es within the range of about 0 7 meters 2 3 to 3 meters 9 8 values with fully open aperture Flash does not work well outside these ranges Depending on operating conditions type of batteries being used temperature etc it may take up to 40 seconds for the flash unit to charge The flash is disabled during movie and continuous re cording which is indicated by the flash icon appearing on the monitor sc...

Page 57: ...ng Quality Settings The camera has three quality modes FINE NORMAL ECONOMY To determine the number of images that can be stored on a memory card CompactFlash card or microdrive of a dif ferent capacity multiply the capacities in the table below by the appropriate value The actual number of images that can be stored in memory cannot be specified precisely because the amount of memory required for s...

Page 58: ...E function that automati cally changes shutter speed and aperture in accordance with available light In addition you can also manually adjust the exposure to compensate for backlighting indirect indoor lighting dark backgrounds and other special conditions Press DISP to turn on the monitor screen page E 31 Exposure compensation is disabled in the Manual Mode M Mode 1 Use 왘 and 왗 to perform exposur...

Page 59: ...rows pointing left negative correction or right positive correction The normal maximum range for exposure compensa tion is 2EV to 2EV Under certain conditions how ever the camera may impose lower maximum values when exposure compensation would result in an im age that is too dark or too light The exposure compensation value automatically re verts to zero whenever the shutter button is pressed You ...

Page 60: ...wer Function switch slide it to REC 2 Press MENU 3 Select Functions 1 Drive Mode Con tinuous Functions 1 appears on the advanced menu only The indicator is on the monitor screen while the Continuous Shutter Mode is selected 4 Compose the image and then record it Focus is locked when you record the first image and this setting is applied to all subsequent images The flash does not fire in the Conti...

Page 61: ...ss MENU 3 Use 왘 왗 왔 and 왖 to select DRIVE MODE and then press On the advanced menu select Functions 1 Drive Mode 4 Use 왔 and 왖 to select AEB and then press This causes the recording mode indicator on the moni tor screen to change to AEB indicating you are in the AEB Mode 5 Compose the image and then record it Since three images are recorded it may take some time for them all to be saved to the mem...

Page 62: ...wer Function switch slide it to REC 2 Press or 왖 to display the current digital zoom factor on the right side of the monitor screen If you are in the Aperture Priority Auto Mode A Mode Manual Mode M Mode or Landscape Mode press to display the digital zoom factor Be sure you make aperture and color filter settings before pressing to make digital zoom settings page E 70 to 72 3 While the digital zoo...

Page 63: ...flashing on the monitor screen use 왗 왔 or 왘 왖 to focus the image 왗 왔 Narrows the focus range 왘 왖 Widens the focus range If you do not perform any focus operation for about two seconds the indicator stops flashing After stops flashing you can use 왘 and 왗 to adjust exposure compensation EV If stops flashing before you have a chance to focus press to make flash again Pressing while is flashing change...

Page 64: ...til the indicator appears on the monitor screen Each press of cycles the focus mode in the following sequence Auto Focus Manual Focus Infinity Macro 3 Compose the image and then record it Infinity Mode Recording Use the Infinity Mode when recording images of scenery or objects that are far away This mode performs Auto Focus in the vicinity of infinity 1 Pressing down the Power Function switch slid...

Page 65: ...d and saved on a computer that is set up to support use of CompactFlash cards For such a computer install QuickTime which comes bundled with the camera NORMAL 1 Pressing down the Power Function switch slide it to REC 2 Align the dial with 3 Compose the image and then press the shutter button to start recording See Playing Back a Movie on page E 84 for details on playing back a movie Movie recordin...

Page 66: ... front of the lens during the 10 second pe riod before you pressed the shutter button Pressing the shutter button while STAND BY is still on the monitor screen records everything that went on in front of the lens during the period from when you pressed the shutter button half way down and when you pressed it all the way down In this case the re cording will be less than 10 seconds long NOTE Movie ...

Page 67: ... onwards aim the camera fur ther to the left and overlap the next image with the pre vious one on the monitor screen Up to nine images can be grouped into a panorama Press MENU when you want to stop a panorama re cording operation Aperture setting and white balance settings are locked when you record the first image of a panorama and these settings are applied to all subsequent images in that pano...

Page 68: ... The shutter speed is quite slow in the Night Scene Mode so be sure to use a tripod to hold the camera steady Slow shutter speed also causes slow monitor screen refresh Because of this the image recorded may be slightly different from the image that was on the moni tor screen when you pressed the shutter button Auto Focus is difficult in the dark If you experience problems use manual focusing page...

Page 69: ...Program AE Mode P Mode indoors out doors on a cloudy day etc The effects of the color filters are cancelled out when you are using monochrome or sepia recording or manual white balance page E 73 75 Use the monitor screen to compose your images when us ing the Landscape Mode 1 Pressing down the Power Function switch slide it to REC 2 Align the dial with 3 Use 왔 and 왖 to select the color filter you ...

Page 70: ...he dial with Aperture Priority Image Recording You can select an aperture of F2 6 F4 2 or F6 6 A larger aperture indicated by a smaller aperture value narrows the focus range while a smaller aperture widens the focus range Wide aperture Decreased aperture 3 Use 왔 and 왖 to select the aperture setting you want to use 4 Compose the image and then record it Aperture value Wide Decreased F2 6 F4 2 F6 6...

Page 71: ...e the shutter speed setting you want to use 5 Compose the image and then record it IMPORTANT You can check your settings by pressing the shutter button about half way down If the image is either un derexposed or overexposed the aperture and shutter speed settings on the monitor screen turn orange Though you will be able to record the resulting image probably will not be the desired brightness If t...

Page 72: ...a Note that you cannot con vert an image to color after recording it in monochrome or sepia 1 Pressing down the Power Function switch slide it to REC 2 Press MENU 3 Use 왘 왗 왔 and 왖 to select COLOR and then press On the advanced menu select Functions 2 Color 4 Use 왔 and 왖 to select B W or Sepia and then press 5 Compose the image and then record it ...

Page 73: ... Records about two seconds after the shutter button is pressed Use this method to avoid camera movement caused when the shut ter button is pressed 1 Pressing down the Power Function switch slide it to REC 2 Press Each press of cycles the self timer in the se quence 10SEC 10SEC 2SEC 2SEC Off 3 Compose the image and then record it The Self timer lamp flashes with the passage of each second You can c...

Page 74: ... Manual Functions 1 appears on the advanced menu only 4 While the camera is pointed at a white sheet of paper or other white surface that fills the entire monitor screen press DISP to start the manual white balance adjustment operation Advancing to step 5 without pressing DISP in the above step returns the camera to the white balance setting that was obtained the last time you performed the manual...

Page 75: ...d by the camera when you turn it on You can specify power on de faults for focus flash metering white balance flash inten sity syncro speed and sensitivity The following tables show the items for which you can specify power on defaults Note the following rules concern ing power on defaults There are two sets of power on defaults named Mode 1 and Mode 2 When On is specified for an item the camera r...

Page 76: ...lable Options Mode Memory Status Metering White Balance Flash Intensity Sync Speed Sensitivity Multi Average Spot Auto Daylight Shade Tungsten Fluorescent Manual Strong Normal Weak Fast Normal Slow High Normal On Off Turning power on default settings on and off 1 Pressing down the Power Function switch slide it to REC 2 Press MENU 3 Select Options Options appears on the advanced menu only 4 Select...

Page 77: ... defaults and the power save settings IMPORTANT Note that performing the following procedure to initial ize power on defaults also initializes power save trig ger time settings page E 47 1 Perform steps 1 through 3 under Turning power on defaults on and off 2 Select Power Save Mode 1 or Mode 2 3 Select Power Save Mode 1 or Mode 2 4 Select Restore The following table shows the power on defaults sta...

Page 78: ...alance and other settings to suit specific conditions and preferences Each REC menu has two formats a basic menu and an advanced menu Press DISP to toggle be tween the basic menu and advanced menu NOTE Focus Flash Metering White Balance Flash Inten sity Sync Speed and Sensitivity settings are retained when camera power is turned off by only if you specify them as power on defaults page E 76 All ot...

Page 79: ...e Mode BASIC Metering This setting specifies how the shutter operates Single Allows recording of five images at an interval of about 2 5 seconds Continuous Allows recording of sequential images at an interval of about 1 second while the shutter button is held down when the monitor screen is turned off AEB Records three versions of the same image with different EV settings With any of the above set...

Page 80: ...light Shade Tungsten Fluorescent Manual Daylight Outdoors Shade Blue tinted sunlight Tungsten Red tinted incandescent light Fluorescent Green tinted fluorescent light Manual Sets up the camera for recording of a white sheet of paper under currently available light page E 75 Select the setting for the flash intensity you want to use Strong Normal Weak Select the sync speed you want to use Fast Norm...

Page 81: ...al NTSC Video format in the United States and Japan PAL Video format in Europe and other areas This setting lets you select either English or Japa nese as the display language Use this item to turn the key input confirmation tone off and on Set Up Options Power Save Mode 1 Mode 2 This item can be used to make power save settings to preserve battery power Sleep Off 30sec 1min 2min Auto Power Off 2m...

Page 82: ... scroll through the images stored in camera memory Press 왘 to scroll forward and 왗 to scroll back Hold ing down either button scrolls at high speed NOTES If you hold down the Power Function switch and slide it to PLAY immediately after you record an image the image is immediately stored in memory The image that initially appears on the monitor screen in the PLAY mode is a preview image The full of...

Page 83: ...playing back the movie You can use 왘 forward and 왗 reverse while playing back a movie to change the playback direc tion To enlarge the movie image so it fills the entire moni tor screen press DISP Pressing the DISP again re turns the image to its original small size Pressing during movie play pauses playback Press again to resume playback While movie playback is paused you can use 왘 for ward and 왗...

Page 84: ...o play back 3 Press to start panorama playback You can change the direction of a panorama that is playing back by pressing 왘 or 왗 Pressing DISP changes to a small image display Press DISP again to return to the full screen size Pressing during panorama play pauses play back Press again to resume playback While panorama playback is paused you can use 왘 forward and 왗 reverse to move frame by frame t...

Page 85: ...display the image you want to enlarge 3 Press to enter the Digital Zoom Mode This causes a view frame and the current factor to ap pear on the monitor screen You can exit the Digital Zoom Mode by pressing MENU 4 Press to cycle through the zoom factors 5 Use 왘 왗 왔 and 왖 to shift the view frame to different parts of the image 6 When the view frame is located at the part of the image you want to enla...

Page 86: ...Size 7Histogram 1 1 1 1 1Flash 2 2 2 2 2Light Metering 3 3 3 3 3Aperture 4 4 4 4 4Shutter Speed 5 5 5 5 5REC Mode 6 6 6 6 6Data Size 7 7 7 7 7Histogram Flash on Flash off Red eye reduction MULTI Multi metering AVG Average metering SPOT Spot metering M MODE Manual Mode A MODE Aperture Priority Auto Mode P MODE Program AE Mode Night Scene Mode Landscape Mode Movie Mode Panorama Mode Use the histogra...

Page 87: ...tion is displayed on the first image only Displaying Nine Images The following operation lets you simultaneously view nine images on the same screen This capability is especially useful when playing back to the screen of a connected TV and can be used to display a catalog of products etc 1 Pressing down the Power Function switch slide it to PLAY 2 Press MENU 3 Select 9 MULTI The first image of the...

Page 88: ...es 왘 왗 or DISP to return to the normal single image display 26 27 1 2 3 4 5 6 7 8 9 10 11 12 13 14 15 16 17 18 19 20 21 22 23 24 25 Slide Show Slide Show automatically scrolls through the images stored in memory You can also specify how much time should be allowed between each image IMPORTANT Auto Power Off page E 44 is disabled whenever Slide Show is being used This means you should not leave Sli...

Page 89: ...Menus The PLAY menus provide you with control over the display format and DPOF settings image delete and save opera tions and other settings The PLAY mode has only one menu format basic It does not have an advanced menu like the REC mode PLAY Menus See Menu Screens on page E 34 for information about how to use menus 9 MULTI SLIDE SHOW PROTECT Display nine images on the monitor screen Automatically...

Page 90: ...Use this item to select the Card Browser file type Off Type1 Type2 Type3 Type4 Format Select this item to format a memory card Date Use this item to specify the format of the date that appears in the monitor screen and to adjust the date setting Style Year Month Day Day Month Year Month Day Year Adjust Video Out This item can be used to specify the format of the video output signal NTSC Video form...

Page 91: ...to a folder the cam era automatically creates a new folder and store the image there The above maximum numbers of files and folders are ab solute maximums The actual numbers of folders and files may be less due to memory card capacity and the size of each image Panorama images are divided into multiple images and stored on the memory card See USING CompactFlash CARDS WITH YOUR COM PUTER on page E ...

Page 92: ...3 Selecting a Folder for Playback 1 Pressing down the Power Function switch slide it to PLAY 2 Press 3 Use 왘 and 왗 to select the folder you want to select for playback 4 Press to playback the first image in the folder ...

Page 93: ...want to protect im ages against accidental deletion A protected image cannot be deleted until it is unprotected You can protect and unprotect a single specific image all the images in a particu lar folder or all images currently on the memory card IMPORTANT Formatting a memory card page E 38 deletes all im ages on the card even if some or all of the images are protected Protecting and Unprotecting...

Page 94: ...es it is protected IMPORTANT The above procedure batch protects each of the im ages in the folder There is no procedure for batch unprotecting the contents of a folder Each image must be unprotected one by one Protecting and Unprotecting All Images on a Memory Card 1 Perform steps 1 through 2 under Protecting and Unprotecting a Single Image 2 Select PROTECT All 3 Select Protect or Unprotect The ma...

Page 95: ...th Deleting All Unprotected Images page E 99 operation which deletes all un protected images in memory A protected image cannot be deleted See Image Protection on page E 94 for details on protecting and unprotecting images Deleting the Currently Selected Image 1 Pressing down the Power Function switch slide it to PLAY 2 Use 왘 and 왗 to display the image you want to delete 3 Press You can still use ...

Page 96: ...3 Select DELETE Select 4 Select the image you want to delete Protected images are not displayed Note that the first time you display an image its mark is turned on 1 2 3 4 1 2 3 NOTE The camera does not maintain open spaces in its memory Deleting an image causes all images follow ing the deleted image to be shifted up ...

Page 97: ... without deleting anyting When the above procedure is performed while there are protected images in memory the first of the pro tected images appears on the monitor screen after the unprotected images are deleted 5 Press 왔 or 왖 to toggle the mark of the selected image on and off If you want to delete more than one image repeat steps 4 and 5 6 After all the images you want to delete are se lected s...

Page 98: ... MENU 3 Select DELETE All 4 Select Yes to delete all unprotected images or No to abort the delete operation without deleting anything When the above procedure is performed while there are protected images in memory the first of the pro tected images appears on the monitor screen after the unprotected images are deleted ...

Page 99: ...rocedure you can turn the mark on and off for each individual image DPOF The letters DPOF stand for Digital Print Order Format which is a format for record ing on a memory card or other medium which digital camera images should be printed and how many copies of the image should be printed DPOF makes it possible for a DPOF compatible printer or professional print ser vice to print images from a mem...

Page 100: ...AY 2 Press MENU 3 Select DPOF Folder 4 Use 왘 and 왗 to select the folder you want to print 5 Press 왔 or 왖 to toggle the mark on print or off do not print 6 Use 왔 and 왖 to specify the number of cop ies of each image you want to print 7 Press IMPORTANT If the folder you select for printing already contains im ages whose mark is turned on print selecting the folder using the above proceudure can cause...

Page 101: ...ngs select Cancel print order 4 Press If you selected Cancel print order in step 3 pressing the shutter button returns to the playback screen 5 Use 왔 and 왖 to specify the number of cop ies of each image you want to print 6 After you are finished press to exit the image specification procedure The above procedure causes the mark to appear on all the images in memory ...

Page 102: ...cable that comes with camera IMPORTANT Be sure to turn off both the camera and other equip ment before making any connections Check the documentation that comes with your other equipment for information you may need to know when making connections Leaving the same image displayed on a television or computer display screen for very long periods can cause the image to be burned in on the screen When...

Page 103: ...ve a video input terminal like the one shown in the illustration to connect to this camera Battery capacity page E 31 and other displays that normally appear on the camera s monitor screen are also displayed on the television screen Selecting the Video Output Signal Mode You can select either of two common video output modes NTSC or PAL The video system you should use depends on the country where ...

Page 104: ...our computer System Requirements Windows IBM PC AT or compatible com puter pre installed with Windows Me 98 or upgraded from Win dows 98 to Windows 2000 Me 486 or higher CPU Pentium recommended CD ROM drive for installa tion Keyboard and mouse or equivalent input device USB port Operation is not guaranteed un der the following conditions A computer upgraded from Win dows 95 or Windows 3 1 to Win d...

Page 105: ...This simply means that the cable is con nected but does not mean that the camera is being recognized by the computer as an external storage device Perform the required operation on your com puter to check whether the camera is being recog nized by the computer as an external storage device USB data communication becomes enabled when ever you connect the USB cable regardless of whether the camera i...

Page 106: ...ing the digital camera with the Data Transfer Cable After connecting the camera to the computer press ing down the Power Function switch slide it to PLAY and then turn on the computer Note that data commu nication with a computer is not possible while the Power Function switch is in the REC position Never connect or disconnect the cable while Photo Loader is running Doing so can cause problems wit...

Page 107: ... Card Slot in sert the camera s memory card into the slot PC Card Slot In this case you need an optionally available CASIO CA 10 PC Card Adapter See the instructions that come with the PC Card Adapter and the documentation that comes with your computer for details on using this type of configuration Other Desktop Computer Configurations Some desktop computers require a separately available PC card...

Page 108: ...F protocol your CASIO digi tal camera also shows dates in image folder names and im age file names which helps to make data management easier CompactFlash Card Directory Tree Card Browser Files Files and folders required for the Card Browser display Card Browser Files Files and folders required for the Card Browser display DCIM Parent Folder INDEX HTM Card Browser Main File QVCAM QVS Management Fi...

Page 109: ...Management File Contents Information about folder management image sequence etc Card Browser Folder Contents Files used by the card browser Card Browser File Contents Data used by the card browser Main Image Folder Contents Image files recorded by the camera Main Image File Contents Still image file recorded by the camera Main Movie File Contents Movie file recorded by the camera Preview Folder Co...

Page 110: ...d for playback on the camera This camera does not recognize any folder name besides DCIM The above is also true about the names of folders inside the DCIM folder These folders must be returned to the names assigned to them by the camera whenever you copy the DCIM folder back to the memory card for playback on the camera Never delete or modify the QVS file in any way We also strongly recommend that...

Page 111: ... folder NOTE Pressing DISP in place of in step 3 immediately starts Card Browser file generation which is indicated by the message One moment please on the moni tor screen Never turn off camera power while this message is on the display IMPORTANT Though the camera s monitor screen goes blank when you turn off power the Power Function lamp or Op eration lamp continues to flash for some time as the ...

Page 112: ...ra power How to use the HTML file Viewing HTML File Contents Load the CompactFlash card into a card slot of your com puter page E 106 Now drop the INDEX HTM file in the DCIM folder onto your Web browser to display a list of all images contained on the CompactFlash card For information about importing data from a memory card see Setting Up to Access CompactFlash Card Contents from Your Computer E 1...

Page 113: ...documentation that comes with Photo Loader for details Before using the CompactFlash card again after storing its images on other media delete all its current files or refor mat the card In the case of Type1 and Type3 Slide Show displays 1008 x 768 size images in the same size as 2016 x 1536 images The index screen uses the contents of the Preview Folder page E 109 Images copied from another digit...

Page 114: ...n Power Supply Recording No power Sudden power failure indicator on LCD No recording when shutter button is pressed Auto Focus cannot focus the image 1 Correctly load a battery page E 41 2 Replace the battery with a new one page E 41 3 Use only the specified AC adapter or AC adapter charger 1 Turn power back on 2 Replace the battery with a new one page E 41 Replace the battery with a new one page ...

Page 115: ... during self timer operation Monitor screen image is out of focus Poor color and brightness when indoors Cannot perform movie re cording Recorded image is not saved Make sure the subject you want to focus is within the Auto Focus Frame when you record the image Replace the battery with a new one page E 41 1 Focus the image before recording it 2 Use the Program AE Mode P Mode for scenery and group ...

Page 116: ...meras that do not support DCF are different from the one used by this camera This camera cannot read cards re corded with such cameras 1 Connect correctly using the video cable page E 104 2 Set up the TV correctly 3 Change the video mode Use the Photo Loader application to download ed ited images back to the camera Unprotect the images you want to delete page E 94 1 Reflection from sunlight or lig...

Page 117: ...r the communication operation over the USB cable is complete unplug the USB cable from the camera Some functions are not available for playback of certain types of images Malfunction due to static electrical charge or strong impact Camera is connected to a computer 1 The camera is in the Sleep state 2 Communication over the USB cable is in progress Symptom Probable Cause Action Other Cannot select...

Page 118: ...d also press the MENU button and format the memory card in the camera but doing so deletes all image files currently stored on the memory card The memory card is not formatted Format the memory card before trying to use it page E 38 There is no memory card installed in the camera Can t play PANORAMA CF ERROR You must format the CompactFlash card before using it with this camera FORMAT MENU MESSAGE...

Page 119: ...ge you are try ing to record cannot be compressed for some rea son Try changing the angle of the camera to the subject Battery power is low Camera power turns off automatically shortly after this message appears No images are stored in memory card The JPEG image file you are trying to display is ei ther corrupted or is a format that is not compatible with this camera ...

Page 120: ...mal focus 0 5m to 1 6 to Macro focus 10cm to 50cm 3 9 to 19 7 approximately 10cm to 3 9 to with manual focus from surface of pro tective lens filter Exposure Control Light Metering Multi pattern average spot by CCD Exposure Program AE Aperture priority AE Manual expose Exposure Compensation 2EV to 2EV 1 3EV units Exposure Range Approximately EV4 to EV6 Shutter CCD electronic shutter mechanical shu...

Page 121: ...age with im age data auto calendar up to 2049 Input Output Terminals DIGITAL IN OUT USB port special mini port AC adapter connector VIDEO OUT NTSC PAL Power Supply Lithium Ion Rechargeable Battery NP L7 AC adapter AD C620 AC Adapter Charger BC 7LA Continuous recording values show the number of shots without using the flash The number of shots depends on use of the flash and whether flash is turned...

Page 122: ...power is resumed either by loading a fresh battery or connecting to an AC power outlet you will have to set the correct time and date again The liquid crystal panel built into this camera is the product of preci sion engineering with a pixel yield of 99 99 This also means however that 0 01 of the pixels can be expected to fail to light or to remain lit at all times For the latest information about...

Reviews: