Bruce Goldsmith Design ANDA, Owner'S Manual
The Bruce Goldsmith Design ANDA is a high-quality paragliding harness designed for safety and comfort. For detailed instructions on how to set up and use your harness, please download the free Owner's Manual from our website. The manual provides step-by-step guidance to help you maximize your flying experience.
Share
Download


Reviews:
No comments
Related manuals for ANDA
IV
Brand: Lancair Pages: 53
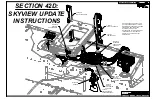
RV-12
Brand: Van's Aircraft Pages: 34
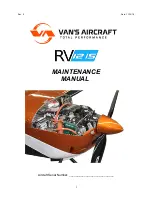
RV 12iS
Brand: Van's Aircraft Pages: 222

SAVANNAH S
Brand: ICP Pages: 132

XCitor
Brand: Fresh Breeze Pages: 38

BION
Brand: Nova Pages: 33

Fifty Five X
Brand: S-TEC Pages: 78

PIPER 18
Brand: ITV Pages: 29

WASABI
Brand: ITV Pages: 52

FLEX-ONE
Brand: Adventure Pages: 32

V-Speed
Brand: Tecnam Pages: 12

METIS 2 Series
Brand: SKY PARAGLIDERS Pages: 55

Bonanza V35B-TC
Brand: Beechcraft Pages: 115

SECOND CHANCE 118
Brand: CHARLY Pages: 28

BRIGHT III
Brand: Gradient Pages: 16

Sonic Silhouette
Brand: SonicDad Pages: 25


