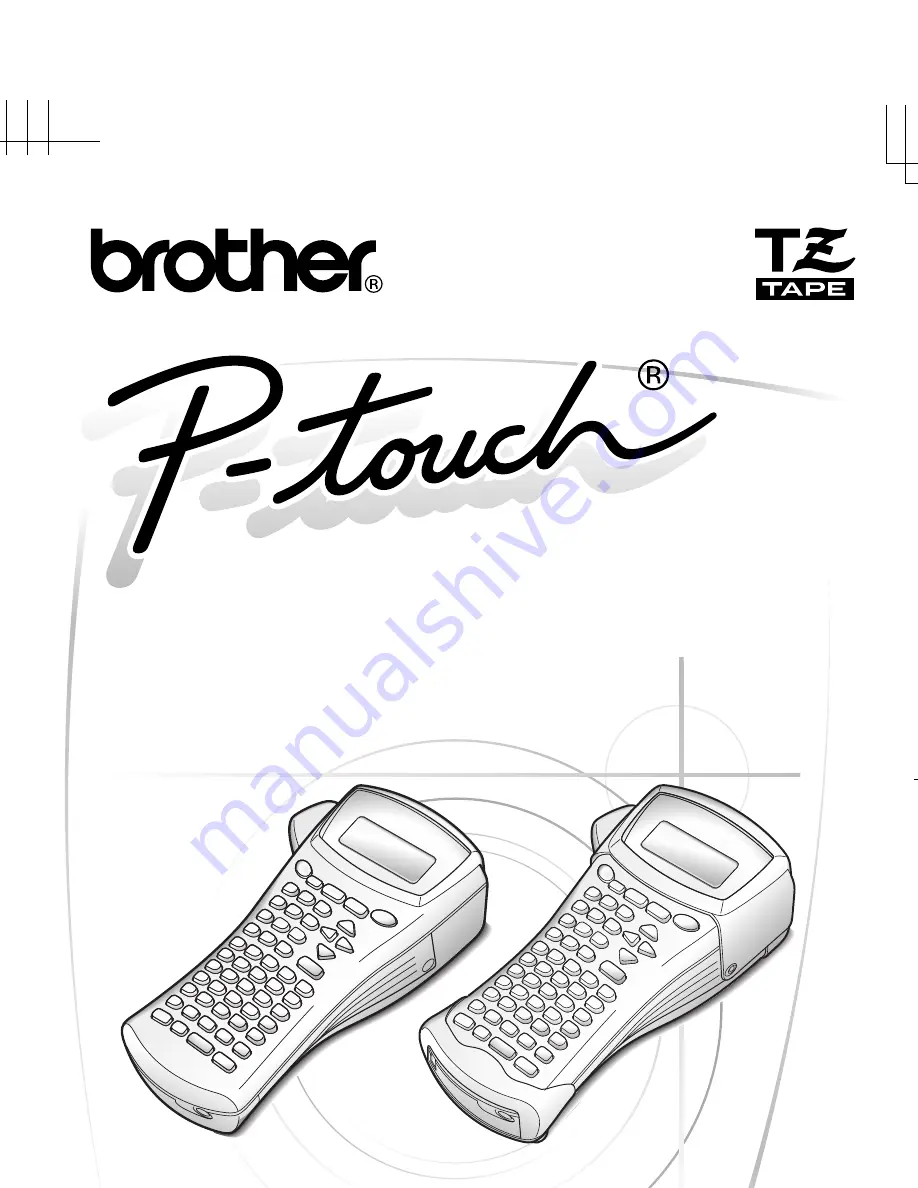
background image

USER’S GUIDE
MODE D´EMPLOI

1400/1650

Printed in China
Imprimé en Chine
LN9981001

• Read this User’s Guide before you start using your P-touch.
• Keep this User’s Guide in a handy place for future reference.

• Lisez attentivement ce guide avant d’utiliser le P-touch pour la première fois.
• Conservez ce guide dans un lieu sûr en vue de référence ultérieure.

USER’S GUIDE
MODE D´EMPLOI

Summary of Contents for P-touch 1400

Page 1: ...USER S GUIDE MODE D EMPLOI 1400 1650 USER S GUIDE MODE D EMPLOI ...

Page 2: ...USER S GUIDE ...

Page 3: ...earby for future reference Canadian Department of Communications Compliance Statement This digital apparatus does not exceed the Class B limits for radio noise emissions from digital apparatus as set out in the interference causing equipment standard entitled Digital Apparatus ICES 003 of the Department of Communications Switching the language of the messages between English and French 1 Erase all...

Page 4: ...s 10 Selecting a Label Type Mode 10 Normal and Vertical Modes 10 Rotate Mode and Rotate Repeat Mode 11 Flag Mode 12 Port Panel Modes 13 3 Basic Functions 15 Performing Basic Operations 15 Choosing functions parameters settings and groups 15 Choosing the default setting 15 Confirming a choice 15 Cancelling a choice 15 Inputting Label Data 16 Entering and editing text 16 Entering an accented charact...

Page 5: ...ction 39 Calibrating the label length 39 Specifying if the PERSONAL symbol category is continually updated 40 Changing the units of measure 40 Changing the language 40 Displaying version information 40 5 Using P touch With a Computer for PT 1650 only 41 Installing the Software Printer Driver 42 Before installation 42 Installing the P touch Editor 3 2 software 43 Installing the USB printer driver 4...

Page 6: ...e data 54 Backing up restoring P touch data 57 6 Appendix 58 Troubleshooting 58 Error Message List 59 Machine Specifications 63 Hardware 63 Software 63 Accessories For Canada Only 64 Index 68 Contact Information For Canada Only 72 ...

Page 7: ...iv ...

Page 8: ...al Description Top view bottom view Tape cutter button USB port for PT 1650 only Keyboard AC adapter connector Display Back cover Cassette release lever Print head Tape exit slot Tape cassette compartment Battery compartment Top view Bottom view ...

Page 9: ...lock number page 17 A Label Type setting page 10 B Width setting page 27 C Size setting pages 26 27 D Length setting page 24 E Caps mode page 16 F Insert mode page 17 G Shift mode page 16 H Code mode page 16 I Power key page 9 J Backspace key pages 15 18 K Arrow keys page 15 L Return key pages 15 17 M Global format key pages 26 N Auto Format keys page 30 O Feed key page 31 P Print key page 31 Q La...

Page 10: ... Block number page 17 A Label Type setting page 10 B Width setting page 27 C Size setting pages 26 27 D Length setting page 24 E Caps mode page 16 F Insert mode page 17 G Shift mode page 16 H Code mode page 16 I Power key page 9 J Backspace key pages 15 18 K Arrow keys page 15 L Return key pages 15 17 M Global format key pages 26 N PF keys page 30 O Feed key page 31 P Print key page 31 Q Label Typ...

Page 11: ... s edge Use only the AC adapter designed exclusively for this machine Use of any other adapter will void the warranty Do not try to disassemble the AC adapter When the machine is not to be used for a long period of time disconnect the AC adapter and remove the batteries to prevent them from leaking and damaging the machine Use six AA alkaline or rechargeable Ni Cd or Ni MH batteries Never try to d...

Page 12: ...rgeable Ni Cd or Ni MH batteries can be used instead of six alkaline batteries The rechargeable batteries cannot be recharged by leaving them in the P touch with the AC adapter connected Instead recharge the batteries by using a battery charger designed specifically for the type of batteries used For more details on the rechargeable batteries refer to the instructions provided with them Do not use...

Page 13: ...in the display and stored in the memory will be lost Since the enclosed batteries begin discharging from the time that the unit is shipped from the factory their life span may not meet specifications depending on when the unit is put into use Notes on tape cassettes Before installing the tape cassette make sure that the end of the tape feeds under the tape guides If the tape cassette to be install...

Page 14: ...round sharp bends and cylindrical objects we recommend using Flexible ID Tape Labels made with Flexible ID Tape are not designed for use as electrical insulation When wrapping labels around cylindrical objects the diameter of the object should be at least 1 8 3 mm otherwise the label should be wrapped as a flag and the FLAG Label Type mode should be used In addition the overlapping ends of the lab...

Page 15: ...tape cutter Notes on cleaning the print head rollers If a blank horizontal streak appears through the label text clean the machine s print head The print head can be cleaned more easily if the optional print head cleaning cassette TZ CL4 is used Before cleaning the print head and rollers press o to turn off the P touch and then remove the batteries and disconnect the optional AC adapter Be extreme...

Page 16: ...uch for an extended period of time When the power is disconnected all text shown in the display and stored in the memory will be lost Turning the P touch On Off Press o to turn on or turn off the P touch If batteries are installed or the P touch has remained plugged in using the AC adapter the previous session s text is displayed when the P touch is turned on again This feature allows you to stop ...

Page 17: ...ns If ROTATE ROT REP PORT PANEL or FLAG was selected continue with the following steps 4 Press l or r until the desired parameter is displayed 5 Press u or d until the desired setting is displayed or use the number keys to type in the desired setting 6 Press n to apply the selected settings 7 Type the text for each label in a separate text block 8 Print the labels To print a single copy of each la...

Page 18: ...he label so that it can easily be read from any angle After selecting the ROTATE or ROT REP Label Type mode specify the length of each label and a frame style if desired BLK LEN block length 0 80 to 8 00 20 to 200 mm Default 1 20 30 mm FRAME OFF Default OFF A single block of text can contain a maximum of 7 text lines and with the ROT REP Label Type mode only the text lines that fit within the labe...

Page 19: ...tyle if desired and whether or not to rotate the text FLAG flag diameter 0 00 to 4 00 0 to 100 mm Default 0 25 7 mm FLAG LEN flag length 0 40 to 8 00 10 to 200 mm Default 1 20 30 mm FRAME OFF Default OFF ROTATE OFF ON Default OFF A single block of text can contain a maximum of 7 text lines For labels to be attached to cables and wires we recommend using Flexible ID Tape To wrap Flexible ID Tape ar...

Page 20: ... label useful for a row of equally spaced switches fuses or connectors on a patch panel In addition the text blocks can be printed in the order that they were typed in or in the opposite order After selecting the PORT or PANEL Label Type mode specify the length of each text block or label and select a frame style if desired For the PANEL Label Type mode select whether the text blocks are printed i...

Page 21: ...sive Tape The PRINT parameter is only available with the PANEL Label Type mode Using the Numbering function with the PANEL Label Type mode makes it easy to create a single label of multiple blocks containing ascending characters which can be used for example to label patch panels as shown above Simply type in one block of text and then use the Numbering function to print several copies of the text...

Page 22: ...f S T appears press u to select the previous item or d to select the next item Choosing the default setting To select the default setting of a function or parameter press e Confirming a choice To select an item from a list to apply a selected setting or to answer yes press n Cancelling a choice To quit a function and return to the previous display without changing the text or to answer no press b ...

Page 23: ...ew and edit the text or you can select the various functions and settings To move the cursor left right up or down press l r u or d To move the cursor to the beginning of the current line of text press g then l To move the cursor to the end of the current line of text press g then r To move the cursor to the beginning of the entered text press g then u To move the cursor to the end of the entered ...

Page 24: ...current position instead of inserting it press i to exit Insert mode The number of text lines that can be printed depends on the width of the tape The line number on the display indicates the line number of the text block A single label can only contain a maximum of fifty text blocks The number of the block that the cursor is in is indicated at the bottom of the display All texts blocks have the s...

Page 25: ...unction The following accented characters are available 1 Press g then s The message ACCENT a u A U appears 2 Press the key of the letter in the desired accented character until the desired character is selected 3 Add the accented character s to the text To add a single accented character or the last one in a series skip to step 5 To add a series of accented characters to the text press g then n 4...

Page 26: ... letter key An accented character can also be selected by typing in the corresponding code from the table above For example typing A2 then pressing n adds Ä to the text Since this machine is not specifically designed for special bar code label making some bar code readers may not be able to read the labels Bar code readers may not be able to read bar codes printed with certain ink colors on certai...

Page 27: ...acter and then press s Press u or d until the desired special character is displayed and then press n to add the character to the data Refer to the tables below for a list of the special characters that are available To change the data or WIDTH or UNDER parameter settings of a bar code that has already been added to the text position the cursor below the bar code mark and then press g then c If th...

Page 28: ... To add a single symbol or the last one in a series skip to step 6 To add a series of symbols to the text press g then n 5 For each additional symbol repeat steps 2 through 4 Symbol Character Symbol Character Symbol Character Symbol Character 0 SPACE 18 36 BEL 54 EM 1 19 37 BS 55 SUB 2 20 38 HT 56 ESC 3 21 39 LF 57 4 22 40 VT 58 FS 5 23 41 FF 59 6 24 42 CR 60 GS 7 25 43 SO 61 8 26 44 SI 62 RS 9 27...

Page 29: ...n the keypad To use a symbol on a key press g to enter Code mode and then press the key for the symbol INTERNATIONAL CHARACTERS G 00 01 02 03 04 05 06 07 08 09 10 11 12 13 14 15 16 17 00 01 02 03 04 05 00 01 02 03 04 05 06 00 01 02 03 04 05 06 07 00 01 02 03 04 05 06 07 08 09 00 01 02 03 04 05 06 07 08 00 01 02 03 04 05 06 07 08 09 10 11 12 13 14 Category Symbols PUNCTUATION BUSINESS MATHEMATICS B...

Page 30: ... 23 24 25 26 27 28 29 30 31 32 33 40 41 42 34 35 36 37 38 39 00 01 02 03 04 05 06 00 01 02 00 01 02 03 NUMBER PICTOGRAPH PROHIBITION WARNING COMMUNICATIONS OTHERS ELECTRICAL ELECTRONIC Category Symbols H I J K L M N Z PERSONAL CATEGORY 1 2 1 3 1 4 A maximum of 16 most recently selected symbols are automatically saved in the PERSONAL symbol category ...

Page 31: ...ins for the left and right sides of the text can be specified 1 Press g then A 2 Press l or r until MARGIN is displayed 3 Press u or d until the desired margin setting is displayed or use the number keys to margine type in the desired setting 4 Press n Once the PERSONAL symbol category becomes full newly selected symbols will overwrite older ones unless the Symbol Save function is set to OFF Refer...

Page 32: ...g then B 2 Press u or d until the desired frame setting is displayed 3 Press n The selected setting is applied to the entire text The following frame styles are available Frame Setting Sample Frame Setting Sample 1 8 2 9 3 10 4 11 5 12 6 13 7 14 ...

Page 33: ...ected setting is only applied to the text line that the cursor is positioned in With the default character size setting AUTO the largest possible text size is automatically selected depending on the width of the installed tape and the number of lines in the text Since the text sizes that can be printed depends on the width of the tape the following table shows the maximum text size that can be use...

Page 34: ... the cursor to the line of text whose character width you wish to change 2 Press g then E 3 Press l or r until WIDTH is displayed 4 Press u or d until the desired character width setting is displayed 5 Press n The selected setting is only applied to the text line that the cursor is positioned in The following width sizes are available for each text size as shown Width Size NORMAL NARROW MINIMUM WI...

Page 35: ...text Formatting the character style of a line 1 Move the cursor to the line of text whose character style you wish to change 2 Press g then D 3 Press u or d until the desired character style setting is displayed 4 Press n The selected setting is only applied to the text line that the cursor is positioned in The following text styles are available Style Setting Sample Style Setting Sample NORMAL IT...

Page 36: ...ines in the text 1 Press t 2 Press l or r until ALIGN is displayed 3 Press u or d until the desired setting is displayed 4 Press n The selected setting is applied to the entire text The following alignment settings are available LEFT CENTER RIGHT JUSTIFY ...

Page 37: ...the template that you wish to use is assigned 2 Press n The first field for the selected template is displayed Key Template Name Tape Width Label Length Template Fields Sample 1 BIN BOX 3 4 2 80 18 mm 70 mm 1 SYMBOL 2 TEXT1 3 TEXT2 4 BAR CODE 2 ASSET1 1 3 30 24 mm 84 mm 1 TEXT1 2 TEXT2 3 BAR CODE 3 ASSET2 1 3 15 24 mm 80 mm 1 TEXT 2 BAR CODE 4 ASSET3 1 1 65 24 mm 41 mm 1 TEXT 2 BAR CODE 5 ASSET4 1...

Page 38: ...r left corner of the display Feeding tape To feed out 1 23 mm of tape press f The message FEED is displayed Printing a label To print out a label press p The message WORKING then COPIES followed by the number of the label being printed is displayed Accented characters page 18 symbols page 21 and bar codes page 19 can be entered in the template fields To quit using the template display the last fie...

Page 39: ...aracters The Numbering function can be used to print several copies of the same text while incrementing the values of certain characters letters numbers or bar code data after each label is printed This type of automatic incrementation is very useful when printing serial number labels production control labels or other labels requiring ascending codes 1 Press g then a If the Cut function is set to...

Page 40: ...s the tape cutter button to cut off the label and continue printing Be sure to cut the tape within 5 minutes from the time that the message appears For the different options available for cutting the tape refer to Selecting how tape is fed and cut on page 38 Letters and numbers increase as shown below 0 Î 1 Î 9 Î 0 Î A Î B Î Z Î A Î a Î b Î z Î a Î A0Î A1 Î A9Î B0 Î Spaces shown as underlines _ in...

Page 41: ...umber of each copy is displayed while it is being printed Printing mirrored labels This function prints your label so that the text can be read from the adhesive side of the tape If mirror printed labels are attached to glass or some other transparent material they can be read correctly from the opposite side 1 Press g then a 2 Press l or r until MIRROR is displayed To specify settings for additio...

Page 42: ...ate is being used For example by combining the operations for the Repeat Printing function and the Numbering function to print two copies of a label with 1 selected as the numbering field and three increments the labels shown above will be printed When using the Mirror Printing function the text should be printed on clear tape To specify settings for additional Print Option functions instead of co...

Page 43: ...or more space is necessary the Clear function can be used to delete text files Storing label text 1 Press m 2 Press u or d until STORE is displayed 3 Press n 4 Press u or d until the file number where you wish to store the text is displayed 5 Press n If the maximum number of characters has already been stored the error message MEMORY FULL appears in the display If this occurs an existing text file...

Page 44: ...o be deleted To delete a single file skip to step 6 To select multiple files press e The current file number is highlighted Continue selecting text files by repeating step 4 then pressing e until all files that you wish to delete are selected To delete all files press g then e 6 Press n The message OK TO CLEAR or CLEAR ALL if all files were selected appears 7 Press n The text stored in the selecte...

Page 45: ...g is selected the last label in the previous session remains in the machine is not fed out so that the next label can be printed without wasting tape When the last label is printed press f to feed the chain of labels and then press the tape cutter button to cut it The following settings are available The default setting is 1 1 Press g then Z 2 Press l or r until CUT is displayed 3 Press u or d unt...

Page 46: ...bel length If the length of the printed label does not correspond to the length specified with the Length function the printed label length can be recalibrated with the Length Adjust function by selecting a setting between 1 and 3 The default setting is 0 1 Press g then Z 2 Press l or r until LENGTH ADJUST is displayed 3 Press u or d until the desired setting is displayed and then press n If TEXT ...

Page 47: ...ters mm or inches inch The default setting is inch 1 Press g then Z 2 Press l or r until UNITS is displayed 3 Press u or d until the desired setting is displayed and then press n Changing the language The language of the menus settings and messages can be changed by selecting ENGLISH or FRANÇAIS The default setting is ENGLISH 1 Press g then Z 2 Press l or r until LANGUAGE is displayed 3 Press u or...

Page 48: ...you to expand the P touch s capabilities to create customized labels Databases created with P touch Editor or in the csv format provide you with convenient access to large amounts of data for example customer lists and inventory which can be used to print labels User defined character images in the bmp format can be used to enhance labels with characters that are not available on the P touch Backu...

Page 49: ... AT or compatible Operating system Microsoft Windows 98 98 SE Me 2000 Professional XP Professional or XP Home Edition Processor Pentium 166 MHz or higher XP Professional and XP Home Edition Pentium 300 MHz or higher Memory At least 64 MB XP Professional and XP Home Edition 128 MB or higher Hard disk free space At least 20 MB 100 MB for a full installation Monitor 800 x 600 dpi SVGA High Color or h...

Page 50: ...o select which options to install After P touch Editor is installed a dialog box appears allowing you to select whether or not to install the printer driver 7 Click Yes The first Driver Setup dialog box appears informing you that the P touch printer driver will be installed 8 Continue with the procedure in Installing the USB printer driver on page 44 9 When installation of P touch Editor is finish...

Page 51: ...hed and suggesting that the computer be restarted select the option for restarting the computer click Finish to restart the computer and then remove the CD ROM from the CD ROM drive To uninstall the P touch Editor 3 2 software double click Add Remove Programs Add or Remove Programs in Windows XP in the Control Panel window and then follow the instructions that appear Do not connect the P touch to ...

Page 52: ...ars indicating that the Found New Hardware Wizard has finished installing the printer driver for the P touch 5 Click Finish A dialog box appears indicating that the installation is finished 6 Select Yes I want to restart my computer now or Yes restart immediately if the printer driver was installed separately click Finish to restart the computer and then remove the CD ROM from the computer If a Dr...

Page 53: ...User s Guide is an HTML document a browser is needed to read it To view the User s Guide from the CD ROM 1 Start up Windows Explorer 2 Select the CD ROM drive 3 Double click the Ptouch folder 4 Double click the Manual folder 5 Double click Main htm To view the User s Guide installed on the hard disk 1 Click Start in the taskbar to display the Start menu 2 Point to Programs 3 Point to P touch Edito...

Page 54: ... characters available with P touch Editor are not available with the P touch machine Bar codes specified with settings not compatible with the P touch bar codes settings will not print correctly A template created with P touch Editor should have a fixed length with a maximum of 39 1 m The template and database should be created so that no more than approximately 500 characters per label will be pr...

Page 55: ...the property dock Page Properties Although the screens shown in the following explanations are for Windows 98 98 SE and Me the operations for Windows 2000 and XP are the same unless specifically mentioned Menu bar Property dock Layout area Print area Draw toolbar Status bar Title bar Rulers Cursor Standard toolbar Object dock Database Properties icon Page Properties icon Font Properties icon Layou...

Page 56: ...ead bar codes printed with certain ink colors on certain label tape colors Be sure to test the bar code reader to make sure that it can read printed bar codes in the environment where you plan to use them The bar codes protocols that can be used are limited to those available with the P touch Refer to page 19 for a list of the available bar code protocols Although the screens shown in the followin...

Page 57: ...h Editor 3 2 CD ROM for more details Using a function available with Microsoft Access 97 Excel files can be linked to mdb files With this function data changed in Excel is automatically updated with P touch Editor Transferring Data To From a Computer A template database or a user defined character image character not available on the P touch can be transferred from the computer and assigned to a P...

Page 58: ...e data that you wish to transfer 5 For each template or a user defined character image that you want transferred click Change PF Key Mapping and then select the PF key where you wish to assign the data 6 Click Start to begin transferring the data A dialog box appears indicating that the data is being transferred 7 When the message The transfer was completed successfully appears click OK 8 On the P...

Page 59: ...ain one database at a time However the database can be replaced or updated When data is downloaded to a PF key it replaces the preset template initially available on the P touch To restore the initial templates use Transfer Manager to download the pd3 files from the folder located at etc Transfer in the P touch Editor folder Only one character image or template can be assigned to a PF key If a cha...

Page 60: ...le database record to be printed in the template 3 Press u or d to highlight the desired record and then press n 4 To edit any text in the record press u or d to display the text and then type in the new text 5 Press p To select a range of database records to be printed in the template 3 Press u or d to highlight a record and then press n 4 Press g then a The message CLEAR TEXT PRINT DATABASE appe...

Page 61: ... is fed and cut on page 38 To search for a specific record while the database data is displayed in step 2 above refer to Searching the database on page 56 To view other fields in the record selected in step 3 press l or r When editing data as described in step 4 of the procedure for printing a single database record the database remains unchanged When printing a range of database records the text ...

Page 62: ...either TEXT PRINT or DATA PRINT when g then a is pressed At this time select DATA PRINT If TEXT PRINT is selected the special printing functions for printing multiple copies of labels refer to page 32 printing multiple copies with incremental characters refer to page 32 printing a range of text blocks refer to page 34 or printing the label text as a mirror image refer to page 34 are available To s...

Page 63: ...racters 1 Press g and e until the search screen is displayed 2 Type in the characters that you wish to search for 3 Press n The first record after the currently selected one that contains the entered characters appears To display a record with a specific number 1 Press g and e until the jump screen is displayed 2 Press u or d until the desired record number is displayed or use the number keys to t...

Page 64: ...estore P touch data backed up on the computer click the PC Printer tab 4 From the File List select the data that you wish to back up or restore 5 Click Start A dialog box appears indicating that the data is being transferred 6 When the message The transfer was completed successfully appears click OK Only the selected data will be backed up or restored To select more than one file hold down the key...

Page 65: ...ace them with new ones 4 The printed characters are not formed properly If you are using batteries they may have a low charge Try using the AC adapter or replace the batteries with new ones 5 A blank horizontal line appears through the printed label Clean the print head as explained on Cleaning the print head rollers and tape cutter on page 8 6 Striped tape appears You have reached the end of the ...

Page 66: ... 50 BUFFER EMPTY This message appears if no text has been typed in when you try to print or Preview function Type in some text before trying to perform any of these operations BUFFER FULL This message appears if you try to add a character a space a new line a new block a symbol an accented character or a bar code after the maximumnumber of characters has already been entered Delete some existing t...

Page 67: ...more than 1000 copies were selected with the Print Option functions Note the number of copies plus the number of sequential labels cannot exceed 1000 Select less than 1000 copies CUTTER ERROR This message appears if the tape cutter button was pressed in when p was pressed or the tape was being fed Release the tape cutter button If p was pressed press f to feed out any printed tape If the problem c...

Page 68: ...e is not installed when printing an Auto Format template created for 1 2 12 mm wide tape Install a 1 2 12 mm wide tape cassette INSERT 12mm TAPE INSERT 3 8 TAPE This message appears if a 3 8 9 mm wide tape cassette is not installed when printing an Auto Format template created for 3 8 9 mm wide tape Install a 3 8 9 mm wide tape cassette INSERT 9mm TAPE INSERT 1 4 TAPE This message appears if a 1 4...

Page 69: ... XX BLOCK This message appears if the size of the text is larger than the width of the installed tape Reduce the size of the characters install a tape with a greater width or select the AUTO text size setting TEXT TOO LONG This message appears if the length of the text is longer than the label length that has been set with the Length function Press A and then select a longer label length Reduce th...

Page 70: ...4 D 3 3 8 H 131 mm W 235 mm D 86 mm H Without tape cutter button 4 1 2 W 9 1 4 D 3 3 8 H 114 mm W 235 mm D 86 mm H Weight PT 1400 1 23 lb 560 g Dimensions PT 1650 With tape cutter button 5 1 4 W 9 7 16 D 3 7 16 H 133 mm W 239 mm D 87 mm H Without tape cutter button 4 1 2 W 9 7 16 D 3 7 16 H 116 mm W 239 mm D 87 mm H Weight PT 1650 1 36 lb 615 g Character fonts 1 built in font Helsinki Character si...

Page 71: ...651 Black characters on yellow adhesive 1 28 99 TZ 252 Red characters on white adhesive 1 28 99 TZ 253 Blue characters on white adhesive 1 28 99 TZ 354 Gold characters on black adhesive 1 31 99 TZ 155 White characters on clear adhesive 1 32 95 TZ 355 White characters on black adhesive 1 31 99 TZ B51 Black characters on fluorescent orange adhesive 1 35 99 3 4 18 mm TZ 141 Black characters on clear ...

Page 72: ...1 Black characters on red adhesive 1 20 99 TZ 435 White characters on red adhesive 1 24 99 TZ 531 Black characters on blue adhesive 1 20 99 TZ 631 Black characters on yellow adhesive 1 20 99 TZ 731 Black characters on green adhesive 1 20 99 TZ M31 Black characters on matte clear adhesive 1 20 99 3 8 9 mm TZ 121 Black characters on clear adhesive 1 16 99 TZ 221 Black characters on white adhesive 1 ...

Page 73: ...ve tape 1 23 99 TZ S231 Black characters on white strong adhesive tape 1 23 99 TZ S631 Black characters on yellow strong adhesive tape 1 23 99 3 8 9 mm TZ S221 Black characters on white strong adhesive tape 1 21 99 1 4 6 mm TZ S211 Black characters on white strong adhesive tape 1 19 99 Stock No Description Qty Package Price 1 24 mm TZ FX251 Black characters on white flexible ID tape 1 31 99 3 4 18...

Page 74: ...s on white adhesive 1 49 95 Stock No Description Qty Package Price 1 2 12 mm TZ FA3 Blue characters on white adhesive 1 34 95 Stock No Description Qty Package Price 3 4 18 mm Stamp Area 9 55 mm SK MB Additional stamper for Large stamp with black ink 1 49 95 Stock No Description Qty Package Price TZ CL4 Cleaning Tape 1 24 99 UNO737022 Lettering Stick 1 1 21 AD 60 AC adapter 1 34 95 AD 24 AC adapter...

Page 75: ...nting 38 character size 26 style 28 width 27 choosing 15 default setting 15 cleaning print head 8 rollers 8 tape cutter 8 Clear function 18 Code indicator 2 3 confirming 15 Contrast function 38 copies 32 cursor 16 Cut function 38 cut pause 38 D database record range 53 databases 53 54 Label Type mode 55 searching 56 default setting 15 deleting memory files 37 text 18 display 2 contrast 38 E error ...

Page 76: ...tor 2 3 K keyboard 2 L label margins 24 Label Type key 2 3 Label Type mode 10 databases 55 Label Type setting indicator 2 3 language 40 LCD display 2 left text alignment 29 indicator 2 3 length adjustment 39 Length function 24 length indicator 2 3 local formatting character size 26 character style 28 character width 27 locked up 58 low battery indicator 2 3 lowercase letters 16 M Margin function 2...

Page 77: ...mode 11 S searching 56 selecting 15 16 default setting 15 Setup key 38 Shift indicator 2 3 Shift mode 16 size 26 indicator 2 3 Space key 15 16 storing 36 Strong Adhesive Tape 7 style 28 Symbol key 21 T tape cassettes 5 cutter 8 templates Auto Format 30 P touch Editor 52 text alignment 29 size 26 size adjustment 39 style 28 width 27 width adjustment 39 Transfer Manager 51 Transfer mode 50 troublesh...

Page 78: ...71 ...

Page 79: ... latest drivers http www brother ca or http www brother com Pour de l information sur les produits et pour télécharger les dernier pilotes http www brother ca ou http www brother com Accessories Supplies Accessoires et fournitures To order Brother Accessories or supplies by Visa or MasterCard you may call toll free 1 877 BROTHER 1 877 276 8437 or to order by mail complete the accessories order for...

Page 80: ...select the desired items 2 Complete the order form indicating the quantity of each item for your records 3 Enter the total on the Supply Accessory Total line below for your records 4 Add appropriate sales tax and shipping handling costs for your records 5 Have your Visa or MasterCard number and expiration date available G S T R100663764 P S T 100100117TQ0001 Prices subject to change without notice...

Page 81: ...atest drivers http www brother ca or http www brother com Pour de l information sur les produits et pour télécharger les dernier pilotes http www brother ca ou http www brother com Accessories Supplies Accessoires et fournitures To order Brother Accessories or supplies by Visa or MasterCard you may call toll free 1 877 BROTHER 1 877 276 8437 or to order by mail complete the accessories order form ...

Page 82: ...select the desired items 2 Complete the order form indicating the quantity of each item for your records 3 Enter the total on the Supply Accessory Total line below for your records 4 Add appropriate sales tax and shipping handling costs for your records 5 Have your Visa or MasterCard number and expiration date available G S T R100663764 P S T 100100117TQ0001 Prices subject to change without notice...

Page 83: ...MODE D EMPLOI ...

Page 84: ... cette P touch ne cesseront de vous étonner que ce soit à l usine ou sur le terrain La P touch est très facile à utiliser Cependant nous vous conseillons de lire ce manuel avant la première utilisation et de le garder à porter de main si vous souhaitez le consulter ultérieurement Avis de conformité aux normes du ministères des communications du Canada Cet appareil numérique respecte les limites d ...

Page 85: ...d un mode de Format d étiquette 10 Modes Normal et Vertical 10 Mode Rotation et mode Rotation et répétition 11 Mode Drapeau 12 Modes Port Panel panneau 13 3 Fonctions de base 15 Opérations élémentaires 15 Choix de fonctions de paramètres de configurations et de groupes 15 Choix de la configuration par défaut 15 Confirmation d un choix 15 Annulation d un choix 15 Saisie de données 16 Saisie et modi...

Page 86: ...e 39 Calibrage de la longueur de l étiquette 40 Mise à jour régulière de la catégorie personnelle de symboles 40 Changement des unités de mesure 40 Changement de la langue 41 Affichages des informations relatives aux versions 41 5 Utilisation de la P touch avec un ordinateur pour PT 1650 seulement 42 Installation du logiciel et du pilote d imprimante 43 Avant l installation 43 Installation du logi...

Page 87: ...Sauvegarde Restauration des données de la P touch 58 6 Annexes 59 Détection de pannes 59 Liste des messages d erreur 60 Spécifications de l appareil 65 Matériel 65 Logiciel 65 Accessoires Canada seulement 66 Index 70 Information sur les contacts Canada seulement 74 ...

Page 88: ...iv ...

Page 89: ...et face arrière Levier du coupe ruban Port USB Clavier Prise pour l adaptateur secteur Ecran Couvercle arrière Levier de dégagement de la cassette Tête d impression Fente de sortie du ruban Compartiment de la cassette de ruban Compartiment des piles Face avant Face arrière ...

Page 90: ...7 A Paramètre Format d étiquette page 10 B Paramètre Largeur page 27 C Paramètre Taille page 26 27 D Paramètre Longueur page 24 E Mode Maj majuscules page 16 F Mode Insertion page 17 G Mode Shift majuscule page 16 H Mode Code page 16 I Touche d Alimentation page 9 J Touche de Correction page 15 18 K Touches de Déplacement du curseur page 15 L Touche de Retour à la ligne page 15 17 M Mise en page g...

Page 91: ...re Format d étiquette page 10 B Paramètre Largeur page 27 C Paramètre Taille page 26 27 D Paramètre Longueur page 24 E Mode Maj majuscules page 16 F Mode Insertion page 17 G Mode Shift majuscule page 16 H Mode Code page 16 I Touche d Alimentation page 9 J Touche de Correction page 15 18 K Touches de Déplacement du curseur page 15 L Touche de Retour à la ligne page 15 17 M Mise en page générale pag...

Page 92: ...ilisez uniquement l adaptateur secteur spécialement conçu pour cet appareil L utilisation de tout autre adaptateur annulera la garantie Ne démontez jamais l adaptateur secteur Si vous n utilisez pas l appareil pendant une longue période débranchez l adaptateur secteur et ou retirez les piles pour éviter qu elles ne fuient et n endommagent l appareil Utilisez six piles AA alcalines ou rechargeables...

Page 93: ...ant les piles La P touch fonctionne avec six piles AA Vous pouvez utiliser des piles rechargeables Ni Cd ou Ni MH à la place des 6 piles alcalines Ne rechargez jamais les piles lorsqu elles se trouvent dans l appareil relié au secteur par l adaptateur Utilisez à la place un chargeur de piles spécialement conçu pour le type de piles utilisé Pour de plus amples informations sur les piles rechargeabl...

Page 94: ...us vos messages y compris ceux mémorisés seront perdus Le déchargement des piles fournies commençant dès leur départ de l usine leur durée peut ne pas correspondre aux spécifications en fonction du moment de la première utilisation de l appareil Remarques sur les cassettes de ruban Avant d introduire la cassette veillez à faire passer l extrémité du ruban sous les guides Si le ruban de la nouvelle...

Page 95: ... par exemple sur des surfaces anguleuses ou rondes nous vous recommandons d utiliser un ruban ID Flexible Les étiquettes de rubans ID Flexibles ne sont pas isolantes Le diamètre de l objet sur lequel vous souhaitez apposer une étiquette doit être au moins égal à 1 8 po 3 mm S il est inférieur apposez l étiquette comme un drapeau et utilisez le mode de type d étiquette DRAPEAU En outre les rebords ...

Page 96: ...uban Remarques sur le nettoyage de la tête d impression et des rouleaux Si des lignes blanches apparaissent au milieu des caractères imprimés nettoyez la tête d impression de l appareil La tête d impression se nettoiera plus facilement si vous utilisez une cassette de nettoyage pour tête d impression en option TZ CL4 Avant de nettoyer la tête d impression et les rouleaux appuyez sur o pour éteindr...

Page 97: ...cteur si vous savez que vous n utiliserez pas l appareil pendant une période prolongée Lorsque vous débranchez l appareil tous vos messages y compris ceux mémorisés seront perdus Mise en marche Arrêt de la P touch Appuyez sur o pour allumer ou éteindre la P touch Lorsque vous mettez l appareil sous tension qu il fonctionne sur piles ou sur secteur il affiche le texte de la dernière utilisation Cet...

Page 98: ...ase Si vous avez sélectionné ROTATATION ROT REP PORT PANNEAU ou DRAPEAU observez les étapes suivantes 4 Appuyez sur l ou r jusqu à ce que le paramètre souhaité s affiche 5 Appuyez sur u ou d jusqu à ce que le paramètre souhaité s affiche ou utilisez les touches numériques pour saisir le paramètre souhaité 6 Appuyez sur n pour appliquer les paramètres sélectionnés 7 Saisissez le texte de chaque éti...

Page 99: ...ilement depuis n importe quel point Après avoir sélectionné le mode de Format d étiquette ROTATATION ou ROT REP précisez la longueur de chaque étiquette et un style d encadrement le cas échéant B LONG longueur du bloc 0 80 à 8 00 po 20 à 200mm Par défaut 1 20 po 30 mm CADRE NON Par défaut NON Un seul bloc de texte peut contenir au maximum 7 lignes et avec le mode de format d étiquette ROT REP seul...

Page 100: ... du drapeau 0 00 à 4 00 po 0 à 100 mm Par défaut 0 25 po 7 mm DRAP L longueur du drapeau 0 40 à 8 00 po 10 à 200 mm Par défaut 1 20 po 30 mm CADRE NON Par défaut NON ROTATATION NON OUI Par défaut NON Un bloc de texte peut contenir au maximum 7 lignes Pour les étiquettes qui seront enroulées autour de câbles et de fils nous recommandons d utiliser du ruban ID Flexible Lorsque vous enroulez un ruban...

Page 101: ...teurs de fusibles ou de connecteurs placés régulièrement sur un panneau de répartition De plus les blocs de texte peuvent être imprimés dans l ordre où ils ont été saisis ou dans l ordre inverse Après avoir sélectionné le mode PORT ou PANNEAU précisez la longueur de chaque bloc de texte ou étiquette et sélectionnez un style d encadrement le cas échéant Pour le mode PANNEAU indiquez si les blocs de...

Page 102: ...PANNEAU L utilisation de la fonction Numérotation avec le mode de format d étiquette PANNEAU permet de créer facilement une seule étiquette composée de plusieurs blocs de caractères croissants Cette fonction permet par exemple d étiqueter des panneaux de répartition comme illustré ci dessus Tapez simplement un bloc de texte puis utilisez la fonction Numérotation pour imprimer plusieurs copies du b...

Page 103: ...nner l élément précédent ou sur d pour sélectionner l élément suivant Choix de la configuration par défaut Pour sélectionner la configuration par défaut d une fonction ou d un paramètre appuyez sur e Confirmation d un choix Pour sélectionner un élément dans une liste pour appliquer une configuration sélectionnée ou pour répondre oui appuyez sur n Annulation d un choix Pour quitter une fonction et ...

Page 104: ...rses fonctions et configurations Pour déplacer le curseur vers la gauche la droite le haut ou le bas appuyez sur l r u ou sur d Pour positionner le curseur au début de la ligne en cours appuyez sur g puis sur l Pour positionner le curseur à la fin de la ligne en cours appuyez sur g puis sur r Pour positionner le curseur au tout début de la ligne de texte saisi appuyez sur g puis sur u Pour déplace...

Page 105: ...sérer appuyez sur i pour quitter le mode Insertion Le nombre de lignes de texte qu il est possible d imprimer dépend de la largeur du ruban Le numéro de ligne affiché à l écran indique le numéro de la ligne dans le bloc de texte Une étiquette peut contenir un maximum de 50 blocs de texte Le numéro du bloc dans lequel se trouve le curseur est indiqué au bas de l écran Les blocs de texte possèdent t...

Page 106: ... caractères accentués ci dessous sont disponibles 1 Appuyez sur g puis sur s Le message ACCENT a u A U s affiche 2 Appuyez sur la lettre du caractère accentué souhaité jusqu à ce que le caractère souhaité soit sélectionné 3 Ajoutez les caractères accentués au texte Pour ajouter un seul caractère accentué ou le dernier caractère accentué d une série passez à l étape 5 Pour ajouter une série de cara...

Page 107: ...sélectionner un caractère accentué en saisissant le code correspondant indiqué dans le tableau ci dessus Par exemple en saisissant A2 puis en appuyant sur n vous ajoutez le caractère Ä au texte Cette machine n étant pas spécialement conçue pour produire des codes barres il est possible que certains lecteurs de codes barres ne puissent pas lire les étiquettes Certains lecteurs de codes barres ne pe...

Page 108: ...ter le caractère spécial puis appuyez sur s Appuyez sur u ou d jusqu à ce que le caractère spécial s affiche puis appuyez sur n pour ajouter le caractère aux données Consultez les tableaux ci dessous pour connaître la liste des caractères spéciaux disponibles Pour modifier les données ou la configuration des paramètres LARGEUR ou SOUS d un code barres déjà inséré dans le texte positionnez le curse...

Page 109: ...lectionné 4 Ajoutez le s symbole s au texte Pour ajouter un seul symbole ou le dernier symbole d une série passez à l étape 6 Pour ajouter une série de symboles au texte appuyez sur g puis sur n Symbole Caractère Symbole Caractère Symbole Caractère Symbole Caractère 0 ESPACE 18 36 BEL 54 EM 1 19 37 BS 55 SUB 2 20 38 HT 56 ESC 3 21 39 LF 57 4 22 40 VT 58 FS 5 23 41 FF 59 6 24 42 CR 60 GS 7 25 43 SO...

Page 110: ... en appuyant sur n vous ajoutez le symbole au texte Certains symboles sont imprimés en couleur sur le clavier Pour utiliser un symbole imprimé sur une touche appuyez sur g pour passer au mode Code puis appuyez sur la touche portant le symbole G 00 01 02 03 04 05 06 07 08 09 10 11 12 13 14 15 16 17 00 01 02 03 04 05 00 01 02 03 04 05 06 00 01 02 03 04 05 06 07 00 01 02 03 04 05 06 07 08 09 00 01 02...

Page 111: ...05 06 07 08 09 10 11 12 13 14 15 16 17 18 19 20 21 22 23 24 25 26 27 28 29 30 31 32 33 40 41 42 34 35 36 37 38 39 00 01 02 03 04 05 06 00 01 02 00 01 02 03 H I J K L M N Z 1 2 1 3 1 4 Les 16 symboles sélectionnés en dernier sont enregistrés automatiquement dans la catégorie personnelle de symboles ...

Page 112: ... droite et à gauche du texte peut être configurée 1 Appuyez sur g puis sur A 2 Appuyez sur l ou sur r jusqu à ce que MARGE s affiche 3 Appuyez sur u ou sur d jusqu à ce que la largeur de marge souhaitée s affiche ou utilisez les touches numériques pour saisir la valeur souhaitée 4 Appuyez sur n Lorsque la catégorie personnelle de symboles est pleine les nouveaux symboles sélectionnés effacent les ...

Page 113: ... ce que la configuration du cadre souhaitée s affiche 3 Appuyez sur n La configuration sélectionnée est appliquée à l ensemble du texte Les styles d encadrement ci dessous sont disponibles Configu ration de l enca drement Exemple Configu ration de l enca drement Exemple 1 8 2 9 3 10 4 11 5 12 6 13 7 14 ...

Page 114: ...Appuyez sur n La taille sélectionnée n est appliquée qu à la ligne de texte où se situe le curseur Si la configuration de la taille des caractères par défaut AUTO est sélectionnée la taille maximale du texte est automatiquement sélectionnée en fonction de la largeur donnée du ruban inséré et du nombre de lignes dans le texte Les tailles de texte imprimables étant fonction de la largeur du ruban le...

Page 115: ...onnez le curseur sur la ligne de texte dont vous souhaitez modifier la largeur des caractères 2 Appuyez sur g puis sur E 3 Appuyez sur l ou sur r jusqu à ce que LARGEUR s affiche 4 Appuyez sur u ou sur d jusqu à ce que la largeur des caractères souhaitée s affiche 5 Appuyez sur n La largeur sélectionnée n est appliquée qu à la ligne de texte où se situe le curseur Les largeurs ci après sont dispon...

Page 116: ...orme du style des caractères pour une seule ligne 1 Positionnez le curseur sur la ligne de texte dont vous souhaitez modifier le style des caractères 2 Appuyez sur g puis sur D 3 Appuyez sur u ou sur d jusqu à ce que le style de caractère souhaité s affiche 4 Appuyez sur n Le style sélectionné n est appliqué qu à la ligne de texte où se situe le curseur Les styles de texte ci dessous sont disponib...

Page 117: ... Appuyez sur t 2 Appuyez sur l ou sur r jusqu à ce que ALI H s affiche 3 Appuyez sur u ou sur d jusqu à ce que l alignement souhaité s affiche 4 Appuyez sur n L alignement sélectionné est appliqué à l ensemble du texte Les alignements ci dessous sont disponibles GAUCHE CENTRE DROITE JUST ...

Page 118: ...ique associée au modèle que vous souhaitez utiliser 2 Appuyez sur n Le premier champ du gabarit sélectionné s affiche Touche Nom du gabarit Largeur du ruban Longueur de l étiquette Champs du gabarit Exemple 1 POU BELLE 3 4 po 2 80 po 18 mm 70mm 1 SYMBOLE 2 TEXTE1 3 TEXTE2 4 CODEBAR 2 ACTIF1 1 po 3 30 po 24 mm 84 mm 1 TEXTE1 2 TEXTE2 3 CODEBAR 3 ACTIF2 1 po 3 15 po 24 mm 80 mm 1 TEXTE 2 CODEBAR 4 A...

Page 119: ...d impression appuyez sur g puis sur p La longueur de l étiquette est indiquée dans l angle en bas à gauche de l écran Avance du ruban Pour faire avancer le ruban de 1 po 23 mm appuyez sur f Le message AVANCE s affiche Des caractères accentués page 18 des symboles page 21 et des codes barres page 19 peuvent être insérés dans les champs du gabarit Pour quitter un gabarit affichez le dernier champ et...

Page 120: ... p CONFIRME s affiche dans le menu Options d impression 5 Appuyez sur n ou sur p pour lancer l impression du nombre de copies spécifié Le numéro de chaque copie s affiche lors de l impression de l étiquette Pour terminer l impression appuyez sur o pour mettre la P touch hors tension Si la fonction Coupure est définie sur 1 ou sur 3 le message COUP RUBAN CONT s affiche après l impression de chaque ...

Page 121: ...n Le message FIN s affiche 7 Appuyez sur u d l ou r jusqu à ce que le dernier caractère à inclure dans le champ de numérotation clignote 8 Appuyez sur n CONFIRME s affiche dans le menu Options d impression 9 Appuyez sur n ou sur p pour lancer l impression du nombre d étiquettes spécifié Le numéro de chaque copie s affiche lors de l impression de l étiquette Si la fonction Coupure est définie sur 1...

Page 122: ...être sélectionné par texte Un champ de numérotation doit être entièrement compris dans une ligne de texte d un seul bloc Un champ de numérotation peut compter au maximum cinq caractères Si vous insérez dans le champ de numérotation un caractère non alphanumérique tel qu un symbole seuls les lettres et le nombre inscrits dans le champ de numérotation seront incrémentés lors de l impression des étiq...

Page 123: ... d impression De nombreuses fonctions spéciales d impression peuvent être combinées selon les conditions mode du Format d étiquette sélectionné utilisation d un gabarit Par exemple si l on combine la fonction Imprimer de nouveau et la fonction Numérotation pour imprimer deux copies d une étiquette avec comme champ de numérotation 1 et trois incréments les étiquettes présentées ci dessus seront imp...

Page 124: ...sée pour supprimer des fichiers texte Stockage de texte d étiquette 1 Appuyez sur m 2 Appuyez sur u ou sur d jusqu à ce que ENTRÉE s affiche 3 Appuyez sur n 4 Appuyez sur u ou sur d jusqu à ce que le numéro du fichier dans lequel vous souhaitez stocker le texte s affiche 5 Appuyez sur n Si le nombre maximum de caractères stockés a déjà été atteint le message d erreur MÉMOIRE PLEINE s affiche à l é...

Page 125: ...onner plusieurs fichiers appuyez sur e Le numéro du fichier en cours est sélectionné Continuez de sélectionner les fichiers texte en répétant l étape 4 puis appuyez sur e jusqu à ce que tous les fichiers à supprimer soient sélectionnés Pour supprimer tous les fichiers appuyez sur g puis sur e 6 Appuyez sur n Le message OK POUR EFFACER ou EFFACER TOUT si tous les fichiers sont sélectionnés s affich...

Page 126: ...la session en cours ne soit imprimée Si vous sélectionnez un paramètre configuré sur Impression en série la dernière étiquette de la session de travail précédente reste dans l appareil elle n avance pas ainsi l impression de l étiquette suivante peut se faire sans gaspillage de ruban Lorsque la dernière étiquette est imprimée appuyez sur f pour faire avancer la série d étiquettes et appuyez ensuit...

Page 127: ...ILLE TEXTE si ce texte défini avec le paramètre de taille AUTO est plus long que l étiquette choisie La valeur par défaut est TAILLE TEXTE 1 Appuyez sur g puis sur Z 2 Appuyez sur l ou sur r jusqu à ce que RÉDUCT AUTO s affiche 3 Appuyez sur u ou sur d jusqu à ce que le paramètre souhaité s affiche puis appuyez sur n Si la fonction LARGEUR TEXTE est sélectionnée et que vous souhaitez ajouter du te...

Page 128: ... personnelle de symboles est pleine vous pouvez choisir de continuer à ajouter des symboles dans cette catégorie en effaçant les anciens symboles OUI ou d arrêter d ajouter des symboles dans cette catégorie NON La configuration par défaut est OUI 1 Appuyez sur g puis sur Z 2 Appuyez sur l ou sur r jusqu à ce que SYMBOL UPDATE s affiche 3 Appuyez sur u ou sur d jusqu à ce que le paramètre souhaité ...

Page 129: ...qu à ce que la langue souhaitée s affiche puis appuyez sur n Affichages des informations relatives aux versions Vous pouvez utiliser cette fonction pour afficher des informations relatives à la version du logiciel P touch ainsi qu au jeu de symboles intégré 1 Appuyez sur g puis sur Z 2 Appuyez sur l ou sur r jusqu à ce que INFO VERSION s affiche 3 Appuyez sur u ou sur d jusqu à ce que les informat...

Page 130: ...a P touch pour créer des étiquettes personnalisées En outre les bases de données créées avec P touch Editor ou au format csv vous fournissent l accès à une grande quantité de données par exemple des listes de clients ou des inventaires pouvant servir à l impression des étiquettes Vous pouvez utiliser des images de caractères programmables au format bmp afin de mettre en valeur les étiquettes grâce...

Page 131: ... ou compatible Système d exploitation Microsoft Windows 98 98 SE Me 2000 Professional XP Professional ou XP Home Processeur Pentium 166 MHz ou supérieur éditions XP Professional et XP Home Pentium 300 MHz ou supérieur Mémoire Minimum 64 Mo éditions XP Professional et XP Home 128 Mo ou plus Espace disque disponible Minimum 20 Mo 100 Mo pour une installation complète Ecran 800 x 600 dpi SVGA Couleur...

Page 132: ... Une fois le logiciel P touch Editor installé une boîte de dialogue vous permettant de choisir ou non d installer le pilote d imprimante s affiche 7 Cliquez sur Oui La première boîte de dialogue d installation du pilote s affiche vous informant que le pilote d imprimante de la P touch va être installé 8 Observez la procédure indiquée dans la section Installation du pilote d imprimante USB à la pag...

Page 133: ...oîte de dialogue s affiche vous indiquant que l installation est terminée et que l ordinateur doit être redémarré sélectionnez l option de redémarrage cliquez sur Terminer pour redémarrer l ordinateur puis retirez le CD ROM du lecteur Pour désinstaller le logiciel P touch Editor 3 2 double cliquez sur Ajout Suppression de programmes Ajout ou suppression des programmes sous Windows XP dans la fenêt...

Page 134: ...riel détecté a terminé l installation du pilote d imprimante pour la P touch 5 Cliquez sur Terminer Une boîte de dialogue s affiche vous indiquant que l installation est terminée 6 Sélectionnez Oui je veux redémarrer mon ordinateur maintenant ou Oui redémarrer maintenant si le pilote a été installé séparément cliquez sur Terminer pour redémarrer l ordinateur puis retirez le CD ROM du lecteur Si un...

Page 135: ...ocument HTML vous avez besoin d un navigateur pour le consulter Pour visionner le mode d emploi à partir du CD ROM 1 Démarrez l explorateur Windows 2 Sélectionnez le lecteur de CD ROM 3 Double cliquez sur le dossier P touch 4 Double cliquez sur le dossier Manuel 5 Double cliquez sur Main htm Pour visionner le mode d emploi installé sur le disque dur 1 Cliquez sur Démarrer dans la barre des tâches ...

Page 136: ...vec le logiciel P touch Editor ne le sont pas sur l appareil Les codes barres dont les paramètres ne sont pas compatibles avec ceux de la P touch ne seront pas imprimés correctement La longueur maximale d un gabarit créé avec P touch Editor est de 39 po 1 m Créez les gabarits et les bases de données de manière à ce que les étiquettes imprimées ne contiennent pas plus de 500 caractères Les champs s...

Page 137: ...rre des propriétés Propriétés de page Bien que les fenêtres présentées ci dessous apparaissent sous Windows 98 98 SE et Me les opérations effectuées sous Windows 2000 et XP sont identiques sauf indication contraire Barre de menus Barre des propriétés Zone de mise en page Zone d impression Barre d outils de dessin Barre d état Barre de titre Règles Curseur Barre d outils standard Barre d objets Icô...

Page 138: ...encres de certaines couleurs sur des rubans de certaines couleurs Veillez à tester le lecteur de codes barres pour vous assurer qu il peut lire des codes barres imprimés à l endroit où vous souhaitez les apposer Les protocoles de codes barres pouvant être utilisés se limitent à ceux disponibles avec la P touch Vous trouverez la liste des protocoles de codes barres disponibles à la page 19 Bien que...

Page 139: ... informations reportez vous au mode d emploi figurant sur le CD ROM de P touch Editor 3 2 Vous pouvez relier des fichiers à des fichiers mdb à l aide d une fonction disponible sous Microsoft Access 97 Grâce à cette fonction les données modifiées sous Excel sont automatiquement mises à jour avec le logiciel P touch Editor Transfert des données vers depuis un ordinateur Vous pouvez transférer un gab...

Page 140: ... Pour chaque gabarit ou image de caractère programmable à transférer cliquez sur Changer l attribution de la touche PF et sélectionnez la touche à laquelle vous souhaitez attribuer les données 6 Cliquez sur Démarrer pour commencer le transfert des données Une boîte de dialogue s affiche vous indiquant que les données sont en cours de transfert 7 Lorsque le message Le transfert a réussi s affiche c...

Page 141: ...ts spécifiques La P touch ne peut contenir qu une base de données à la fois Cependant cette base de données peut être remplacée et mise à jour Lorsque les données sont transférées sur une touche PF elles remplacent les gabarits initialement disponibles sur la P touch Pour restaurer le gabarit initial utilisez Transfer Manager pour télécharger les fichiers pd3 à partir du dossier situé dans etc Tra...

Page 142: ...ionner l enregistrement souhaité puis appuyez sur n 4 Si vous souhaitez modifier le texte de l enregistrement appuyez sur u ou sur d pour afficher le texte puis saisissez le nouveau texte 5 Appuyez sur p Si vous souhaitez sélectionner un ensemble d enregistrements de bases de données à imprimer dans le gabarit 3 Appuyez sur u ou sur d pour sélectionner un enregistrement puis appuyez sur n 4 Appuye...

Page 143: ...38 Pour rechercher un enregistrement spécifique lors de l affichage des données de la base de données étape 2 ci dessus reportez vous à la section Recherche dans la base de données à la page 57 Pour afficher les autres champs de l enregistrement sélectionné à l étape 3 appuyez sur l ou sur r Lorsque vous modifiez des données comme indiqué à l étape 4 de la procédure d impression d un seul enregist...

Page 144: ...erez invité à choisir entre OPTION TEXTE ou DONNÉES D IMPR après avoir appuyé sur g puis sur a Sélectionnez DONNÉES D IMPR Si vous sélectionnez OPTION TEXTE les fonctions d impression servant à imprimer plusieurs copies d étiquettes voir page 32 à imprimer des copies en incrémentant certains caractères voir page 33 à imprimer certains blocs de texte voir page 34 et à imprimer le texte de l étiquet...

Page 145: ...enregistrement contenant des caractères spéciaux 1 Appuyez sur g et sur e jusqu à ce que la fenêtre de recherche s affiche 2 Saisissez les caractères à rechercher 3 Appuyez sur n Le premier enregistrement suivant celui que vous venez de sélectionner et qui contient les caractères saisis s affiche Pour afficher un enregistrement ayant un numéro spécifique 1 Appuyez sur g et e jusqu à ce que la fenê...

Page 146: ...r votre ordinateur cliquez sur l onglet Imprimante PC 4 Dans la liste des fichiers sélectionnez les données à sauvegarder ou à restaurer 5 Cliquez sur Démarrer Une boîte de dialogue s affiche vous indiquant que les données sont en cours de transfert 6 Lorsque le message Le transfert a réussi s affiche cliquez sur OK Seules les données sélectionnées seront sauvegardées ou restaurées Pour sélectionn...

Page 147: ...imés sont mal formés Si vous utilisez des piles celles ci sont peut être faibles Branchez l adaptateur secteur ou remplacez les piles usées par des piles neuves 5 Une ligne blanche apparaît sur les caractères imprimés Nettoyez la tête d impression comme expliqué dans la section Nettoyage de la tête d impression des rouleaux et du coupe ruban à la page 8 6 Un morceau de ruban rayé apparaît Vous ave...

Page 148: ...message s affiche si le texte ou le numéro d enregistrement indiqué ne peut pas être trouvé dans la base de données Recherchez un texte ou un numéro d enregistrement différent ENTRER ABCD AU DÉBUT FIN Ce message s affiche si les données du code barres ne commencent et ne finissent pas par une lettre comprise entre A et D lorsque le protocole CODABAR est sélectionné Saisissez une lettre comprise en...

Page 149: ...sette de ruban de 3 4 po 18 mm de large n est pas installée lors de l impression d un gabarit de Format automatique créé pour un ruban de 3 4 po 18 mm Installez une cassette de ruban de 3 4 po 18 mm de large FIX À 18mm FIX À 1 po Ce message s affiche si une cassette de ruban de 1 po 24 mm de large n est pas installée lors de l impression d un gabarit de Format automatique créé pour un ruban de 1 p...

Page 150: ... pouvoir entrer davantage de texte MÉMOIRE VIDE Ce message apparaît si vous n avez pas saisi de texte avant d essayer d imprimer ou d utiliser la fonction Aperçu Entrez du texte avant d effectuer ces opérations PAS DE DATABASE OU FORMAT INCO pour PT 1650 seulement Ce message s affiche si vous n avez pas téléchargé de base de données dans l appareil lorsque vous appuyez sur g puis sur i Téléchargez...

Page 151: ...équentielles ne doivent pas dépasser 1 000 Sélectionnez moins de 1 000 exemplaires TROP HAUT XX BLOC Ce message s affiche si la largeur du texte est supérieure à celle de la cassette de ruban installée Réduisez la taille des caractères installez une cassette de ruban plus large ou sélectionnez la configuration AUTO de la taille du texte TROP LONG Ce message s affiche si le texte est plus long que ...

Page 152: ... apparaît si vous avez associé des piles neuves et usagées ou si vous avez mélangé des piles de types alcaline Ni Cd et Ni MH de fabricants ou de modèles différents ou si vous avez installé des piles rechargées et déchargées Remplacez les piles par 6 piles neuves AA de même type Si vous avez installé des piles rechargeables rechargez les toutes VERIF PARA TYPE ÉT Ce message s affiche si vous modif...

Page 153: ... 1 4 po p 3 3 8 po h 131 mm l 235 mm p 86 mm h Sans le levier du coupe ruban 4 1 2 po l 9 1 4 po p 3 3 8 po h 114 mm l 235 mm p 86 mm h Poids PT 1400 1 23 lb 560 g Dimensions PT 1650 Avec le levier du coupe ruban 5 1 4 po l 9 7 16 po p 3 7 16 po h 133 mm l 239 mm p 87 mm h Sans le levier du coupe ruban 4 1 2 po l 9 7 16 po p 3 7 16 po h 116 mm l 239 mm p 87 mm h Poids PT 1650 1 36 lb 615 g Polices...

Page 154: ...ctères noirs sur ruban adhésif jaune 1 28 99 TZ 252 Caractères rouges sur ruban adhésif blanc 1 28 99 TZ 253 Caractères bleus sur ruban blanc 1 28 99 TZ 354 Caractères dorés sur ruban adhésif noir 1 31 99 TZ 155 Caractères blancs sur ruban clair 1 32 95 TZ 355 Caractères blancs sur ruban adhésif noir 1 31 99 TZ B51 Caractères noirs sur ruban adhésif fluorescent 1 35 99 18 mm 3 4 po TZ 141 Caractèr...

Page 155: ...s noirs sur ruban adhésif rouge 1 20 99 TZ 435 Caractères blancs sur ruban adhésif rouge 1 24 99 TZ 531 Caractères noirs sur ruban adhésif bleu 1 20 99 TZ 631 Caractères noirs sur ruban adhésif jaune 1 20 99 TZ 731 Caractères noirs sur ruban adhésif vert 1 20 99 TZ M31 Caractères noirs sur ruban adhésif transparent mat 1 20 99 9 mm 3 8 po TZ 121 Caractères noirs sur ruban adhésif transparent 1 16 ...

Page 156: ... 1 23 99 TZ S231 Caractères noirs sur ruban de forte adhérence blanc 1 23 99 TZ S631 Caractères noirs sur ruban de forte adhérence jaune 1 23 99 9 mm 3 8 po TZ S221 Caractères noirs sur ruban de forte adhérence blanc 1 21 99 6 mm 1 4 po TZ S211 Caractères noirs sur ruban de forte adhérence blanc 1 19 99 No d article Description Qté carton Prix 24 mm 1 po TZ FX251 Caractères noirs sur ruban ID Flex...

Page 157: ...lanc 1 49 95 No d article Description Qté carton Prix 12 mm 1 2 po TZ FA3 Caractères bleus sur ruban adhésif blanc 1 34 95 No d article Description Qté carton Prix 18 mm 3 4 po Espace Utilisable 9 55 mm SK MB Bloc supplémentaire pour grand tampon avec encre noire 1 49 95 No d article Description Qté carton Prix TZ CL4 Ruban de nettoyage 1 24 99 UNO737022 Bâtonnet de lettrage 1 1 21 AD 60 Adaptateu...

Page 158: ...orie personnelle de symboles 23 Réglage 40 Choix 15 16 Configuration par défaut 15 Clavier 2 Code barres Caractères spéciaux 20 Configuration par défaut 15 Confirmation 15 Connexion USB 45 46 Contraste de l écran 39 Copies 32 Coupe ruban 8 Curseur 16 D Détection de pannes 59 E Ecran 2 Ecran à cristaux liquides 2 Ensemble d enregistrements de bases de données 54 Ensemble de blocs 34 F Fonction Acce...

Page 159: ...2 3 Motion 2 3 Nombre de blocs 2 3 Paramètre Format d étiquette 2 3 Piles faibles 2 3 Style typographique contour 2 3 Style typographique gras 2 3 Style typographique italique 2 3 Taille 2 3 Installation Pilote d imprimante 45 P touch Editor 43 L Largeur 27 Indicateur 2 3 M Majuscules 16 Marges d étiquettes 24 Messages d erreur 60 Minuscules 16 Mise en forme 26 27 28 Mise en forme générale Largeur...

Page 160: ...typographique contour Indicateur 2 3 Style typographique gras Indicateur 2 3 Style typographique italique Indicateur 2 3 Suppression de texte 18 Fichiers mémoire 37 T Taille 26 Indicateur 2 3 Tête d impression 8 Texte Alignement 29 Largeur 27 Modification de la largeur 39 Modification de la taille 39 Style 28 Taille 26 Touche Avance du ruban 31 Touche d Alimentation 2 3 9 Touche d Avance du ruban ...

Page 161: ...73 ...

Page 162: ... the latest drivers http www brother ca or http www brother com Pour de l information sur les produits et pour télécharger les derniers pilotes http www brother ca ou http www brother com Accessories Supplies Accessoires et fournitures To order Brother Accessories or supplies by Visa or MasterCard you may call toll free 1 877 BROTHER 1 877 276 8437 or to order by mail complete the accessories orde...

Page 163: ...ités 2 Remplissez le bon de commande en indiquant la quantité requise pour chaque article pour vos dossiers 3 Reportez le total à la ligne Total fournitures accessoires ci dessous pour vos dossiers 4 Ajoutez la taxe de vente et les frais d expédition manutention appropriés pour vos dos siers 5 Ayez à votre disposition votre numéro de carte Visa ou MasterCard ainsi que sa date d expiration TPS N R ...

Page 164: ...the latest drivers http www brother ca or http www brother com Pour de l information sur les produits et pour télécharger les derniers pilotes http www brother ca ou http www brother com Accessories Supplies Accessoires et fournitures To order Brother Accessories or supplies by Visa or MasterCard you may call toll free 1 877 BROTHER 1 877 276 8437 or to order by mail complete the accessories order...

Page 165: ...ités 2 Remplissez le bon de commande en indiquant la quantité requise pour chaque article pour vos dossiers 3 Reportez le total à la ligne Total fournitures accessoires ci dessous pour vos dossiers 4 Ajoutez la taxe de vente et les frais d expédition manutention appropriés pour vos dos siers 5 Ayez à votre disposition votre numéro de carte Visa ou MasterCard ainsi que sa date d expiration TPS N R ...

Page 166: ......

Reviews: