background image

Installation and User Instructions

PLN-6TMW

en

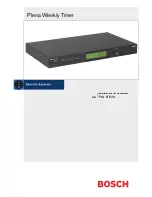
Plena Weekly Timer

Summary of Contents for PLN-6TMW

Page 1: ...Installation and User Instructions PLN 6TMW en Plena Weekly Timer ...

Page 2: ...en 2 Important safeguards Prior to installing or operating this product always read the Important Safety Instructions which are available as a separate document 9922 141 7014x These instructions are supplied together with all equipment that can be connected to the mains Thank you for choosing a Bosch Security Systems product ...

Page 3: ... 3 3 Installation 14 3 4 External connections 14 3 4 1 Connect the back up power supply 14 3 4 2 Connecting other Plena devices 15 3 4 3 Power 16 4 Switch on and off 17 4 1 Switch on 17 4 2 Switch off 17 5 Setting the date and time 19 5 1 Summer and Winter daylight saving time settings 19 6 Manual settings 21 6 1 Selecting a program 21 6 2 Activating an output contact 21 6 3 Temporarily pausing ev...

Page 4: ...8 7 System settings 31 8 7 1 System setting 31 8 7 2 Time settings 31 8 8 Schedule programming 32 8 8 1 Schedule programming 33 8 8 2 Upload configuration 35 8 9 Download schedule 36 8 10 Modify password 37 8 11 Save configuration file 37 8 12 Open configuration file 38 9 Technical data 39 9 1 Electrical 39 9 2 Performance 39 9 3 Audio inputs 39 9 4 Audio outputs 39 9 5 Mechanical 39 9 6 Interconn...

Page 5: ...osely related to the effect that may be caused if it is not observed These alerts from least severe effect to most severe effect are Note Alert containing additional information Usually not observing a note alert does not result in damage to the equipment or personal injuries Caution The equipment can be damaged if the alert is not observed Warning Persons can be severely injured or the equipment ...

Page 6: ...s etc These can be converted to non metric units using the following information table 1 1 Conversion of units of length 1 in 25 4 mm 1 mm 0 03937 in 1 in 2 54 cm 1 cm 0 3937 in 1 ft 0 3048 m 1 m 3 281 ft 1 mi 1 609 km 1 km 0 622 mi table 1 2 Conversion of units of mass 1 lb 0 4536 kg 1 kg 2 2046 lb table 1 3 Conversion of units of pressure 1 psi 68 95 hPa 1 hPa 0 0145 psi Note 1 hPa 1 mbar F 9 5 ...

Page 7: ...o work worship trade or to relax It is a family of system elements that are combined to create public address systems tailored for virtually any application The range includes mixers preamplifiers power amplifiers a music source unit a digital message manager a feedback suppressor call stations an All in One system a voice alarm system a timer a charger The various elements are designed to complem...

Page 8: ...Bosch Security Systems 2006 05 9922 141 50741 en Plena Weekly Timer Installation and User Instructions System overview en 8 Intentionally left blank ...

Page 9: ...ware is being used The intuitive front panel allows users to easily switch between the two programmable schedules The programmable output contacts can also be manually activated allowing for random events to take place for example if a door lock has to be suddenly opened before the scheduled time the user can push one of the 6 output contact buttons on the front panel of the unit The Timer will re...

Page 10: ...chematic overview of the Plena Weekly Timer Cinch Cinch Chime Generator Push Buttons LEDs 1 2 3 1 2 3 Sync USB AC DC Power Supply F1 230V 115V 24V VCA Display RS 232 Connector External Display Block Converter DC DC Converter Power Supply Rotary Selector 5V I O Expander Trigger Out 3x DIP Switch 1 2 Main µC Clock IN XLR XLR 3 4 5 6 ...

Page 11: ...d indicator LEDs 1 through 6 3 Save settings button saves date and time set up saves programed events 4 Set button starts date and time set up sequence starts and stops programming sequence 5 Pause button temporarily suspends events and deletes events when in the programming mode 6 Main display shows time and program settings 7 Reset button for resetting the software of the Timer use a pin to acti...

Page 12: ...dicates that the Timer is running 5 SET indicates that Set can be pressed at any time to leave the programming sequence without changing the settings 6 Sun symbol indicates that Summer time daylight saving time is selected see section 5 1 7 Chime symbol showing the status of the chime 8 BackGround music symbol with dB setting 9 Chime volume 10 BackGround music volume 11 Time in hours and minutes 1...

Page 13: ... output male 5 Trigger outputs 1 through 6 6 Sync input for synchronizing the Timer with an external source 7 24V DC in for backup power supply 8 Type plate including 12nc number and serial number 9 DIP switches 3pcs for Summer Winter time daylight saving time and service setup 10 RS 232 connector for connecting clock display 11 USB connector for connecting external PC 12 Earth connection screw 13...

Page 14: ...ack mounting brackets are supplied see figure 3 5 for installation details 3 4 External connections 3 4 1 Connect the back up power supply The Timer has two 24 Vdc screw terminals 7 for connecting a backup power supply You must connect an earth 12 to the unit to increase the electrical stability of the system figure 3 5 Brackets for rack mounting figure 3 6 Back up battery connections 12 VDC 12 VD...

Page 15: ... through XLR output male The cinch input and XLR input as well as the cinch output and XLR output are connected in parallel see figure 3 1 This means that the Timer can be connected to other Plena devices using any combination of audio loop through inputs and outputs For example the PLN DVDT cinch out can be connected to the Timer cinch in and the Timer XLR out can be connected to the Mixer Amplif...

Page 16: ...o the O position see figure 3 8 2 Make sure the voltage selector 115V 230V 13 is correctly set for the country s main voltage see figure 3 8 3 Use the mains lead to connect the Timer to the power supply see figure 3 8 Caution Potential equipment damage Before connecting the mains lead always check the voltage selector on the rear panel of the Timer figure 3 8 Mains lead Line fuse T10L250V 13 14 ...

Page 17: ...sition If mains power or back up power is available the Program LEDs 1 and Contact LEDs 2 on the front of the Timer will be momentarily lit during initial system power up and the main display will come on see figure 4 2 4 2 Switch off Set the power switch 14 on the rear of the Timer to the O position see figure 4 1 Caution Potential equipment damage Before applying power always check the voltage s...

Page 18: ...Bosch Security Systems 2006 05 9922 141 50741 en Plena Weekly Timer Installation and User Instructions Switch on and off en 18 Intentionally left blank ...

Page 19: ...now complete 9 Press the Save button to save your settings The normal run screen will be displayed 5 1 Summer and Winter daylight saving time settings The clock can be set for European or North American Summer Winter time daylight saving time To do this 1 Locate the set of DIP switches on the rear panel see figure 5 2 2 Set the DIP switches according to table 5 1 Note You can also use the Plena We...

Page 20: ...ted option 3 in the above table you can use the Program buttons on the front panel see figure 3 2 to manually switch between Summer and Winter time To do this Press and hold in Program button 1 to switch to Summer time daylight saving time A small symbol of the sun will be displayed Press and hold in Program button 2 to switch back to Winter time The small symbol of the sun will disappear ...

Page 21: ...put is activated the Contact LED will come on see figure 6 2 6 3 Temporarily pausing events Press the Pause button on the front panel to temporarily suspended all events The word Paused will appear in the display next to the button 6 4 Setting BGM levels Turn the rotary selector to manually set the BGM levels The Timer will then automatically select the programmed volume at the start of the next e...

Page 22: ...Bosch Security Systems 2006 05 9922 141 50741 en Plena Weekly Timer Installation and User Instructions Manual settings en 22 Intentionally left blank ...

Page 23: ...out if required 7 2 Programming an event 1 Make sure the Timer is switched on see section 4 2 Momentarily press and release the Set button The Program LEDs on the front panel will be alternately lit see figure 7 1 3 Press and hold in the Program button for the program you want to edit The selected Program LED will remain lit 4 Press and hold in the rotary selector to start the programming sequence...

Page 24: ...e 7 2 and then push the rotary selector to confirm the setting 14 Press the Save button to save the programmed event After a few seconds the full display will re appear and the word RUN will be displayed in the top left hand corner This indicates that programming of the event is complete and that the Timer is running 15 To program the next event repeat from step 2 Note If at this point you only wa...

Page 25: ... immediately switched off pulsed Closed and then immediately open A message is started No event selected The symbol is only used for the Plena Weekly Timer Configuration software If you do not want to select an event using the display turn the rotary selector until no symbol is displayed Open Nothing happens Note The output contacts are Normally Open NO contacts Note When an event is started the s...

Page 26: ...e editing that event as further described in section 7 2 press the Pause button to delete the entry After a few seconds the full display will re appear and the word RUN will be displayed in the top left hand corner This indicates that editing of the event is complete and that the Timer is running press the rotary selector to confirm the new event as described in step 8 of section 7 2 Note Once you...

Page 27: ...stems Before installing the software make sure the PC is working correctly and is free of viruses all other programs have been closed 8 3 Installing the software Proceed as follows 1 Put the Plena CD ROM in the CD ROM drive of the PC The CD ROM starts automatically and a window similar to the one in figure 8 1 will appear If the CD ROM does not start automatically Go to Start Run Enter X index htm...

Page 28: ... in figure 8 4 will appear 5 Follow the instructions on the window and then click Next The software will start to install see figure 8 5 6 Wait until the installation is complete A window similar to the one in figure 8 6 will appear 7 Click Finish to complete the installation process The software is now ready to use figure 8 4 Start installation figure 8 5 Installing the software figure 8 6 Instal...

Page 29: ...ilar to the one in figure 8 9 will appear 3 Enter the password 12345678 in the Enter password field and click the OK button The main menu will appear see figure 8 10 Note The configuration software can be also used when the PC is not connected to the Timer for example to program a new schedule at home figure 8 7 Connecting a PC to the Timer Note Make sure you disconnect the USB cable from the Time...

Page 30: ...gure 8 11 8 6 2 System settings Use the System settings window to enter the global system settings and time settings see section 8 7 8 6 3 Schedule programming Use the Schedule programming button to Edit the programing for schedule 1 or 2 Upload the edited schedule to the Plena Weekly Timer 8 6 4 Download schedule Use the Download schedule button to download schedules from the Timer to the PC 8 6 ...

Page 31: ... PC clock Click the By input time radio button and then the Set button to manually set the Plena Weekly Timer to the required time Click on the dates and times individually and use the arrows to adjust the settings After clicking the Set button the new time settings will be uploaded to the Plena Weekly Timer If the PC and Timer are not connected a message will be displayed to connect the USB cable...

Page 32: ... edited schedule to the Plena Weekly Timer 1 From the main menu click the Schedule programming button The following window will appear see figure 8 13 2 Click the Edit schedule programing 1 button The Schedule programming window will appear see section 8 8 1 figure 8 13 Programming and upload buttons Note The edit program function for schedule 1 and schedule 2 is identical Therefore for simplicity...

Page 33: ...he type of chime or trigger required see figure 8 14 1 Click the day tab at the top of the window to display the day that you want to update 2 Click the New button to add a new entry or the Edit button to edit an existing entry See the explanation of the various fields Time Chime Chime volume BGM etc on the following page 3 After changing the parameters click Save to save your settings figure 8 14...

Page 34: ...as six output contacts see figure 3 4 Each output has four trigger settings see table 7 2 Delete Click on an entry to select it An orange box will appear around the event to show that it is selected Click the Delete button to delete the entire entry Copy and Paste Use the Copy and Paste buttons to copy single events or all the events of one day to another day To copy and paste single events to ano...

Page 35: ... programming button The following window will appear see figure 8 15 2 Click Upload configuration The following window will appear see figure 8 16 showing that uploading is taking place When uploading is complete this window will close figure 8 15 Programming and upload buttons figure 8 16 Uploading data to the Plena Weekly Timer Note Make sure you disconnect the USB cable before using the Timer I...

Page 36: ...he area where you want to save the configuration file and then click Save If you click No the software will start to download the schedule from the Plena Weekly Timer to the PC and the Downloading window will appear see figure 8 19 When downloading is complete this window will close figure 8 17 Download schedule dialog box Caution The downloaded schedule will overwrite the schedule in the PC If yo...

Page 37: ...sword must have a minimum of four characters The password is also case sensitive Therefore pay attention to capital letters when entering the new password 4 Confirm the password and then click OK 8 11 Save configuration file Use the Save configuration file button to save the current configuration file 1 From the main menu click the Save configuration file button The following window will appear se...

Page 38: ...ration file button to open an existing configuration file 1 From the main menu click the Open configuration file button The following window will appear see figure 8 23 2 Select the configuration file that you want to open and then click Open The configuration will be loaded and displayed on the Schedule programming window see figure 8 14 figure 8 23 Open configuration file window ...

Page 39: ... brackets with feet Weight 3 kg Color Charcoal with silver Mains supply Euro socket with built in fuse 24DC back up power Removable Euro style screw terminal System configuration RJ 45 connector Operating temperature 10 to 55 ºC Storage temperature 40 to 70 ºC Relative humidity 95 Front panel LCD display Schedule and contact LEDs Schedule selection 2 push buttons Contact out selection 6 push butto...

Page 40: ...Bosch Security Systems 2006 05 9922 141 50741 en Plena Weekly Timer Installation and User Instructions Technical data en 40 Intentionally left blank ...

Page 41: ......

Page 42: ...For more information visit www boschsecuritysystems com Bosch Security Systems B V Data subject to change without notice 2006 05 9922 141 50741 en ...

Reviews: