WARRANTY INFORMATION
3 MANUAL OFF MODE: In the MANUAL OFF mode
the wired lights are off.You can push MAN
button to ON mode and turn the wired lights ON.
4 MANUL ON MODE: In the MANUAL ON mode
the wired lights are on. You can push MAN
button to OFF mode and turn the wired lights OFF.
MAN MODES
1 AUTO ON MODE:In AUTO ON mode the wired lights are on. The wired lights
will be off until the next programming OFF time.
You can push MAN button while in AUTO mode
to manually override the program and turn the wired
lights on or off. The programmed switching
2 AUTO OFF MODE:In the AUTO OFF mode the wired lights are off. The wired
lights will be on until the next programming on
time.You can push MAN button while in AUTO
mode to manually override the program and turn
times remain.
the wired lights on or off. The programmed
switching times remain
04
05
06
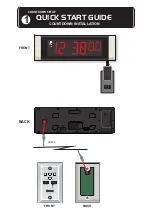
INSTALLATION INSTRUCTIONS
repair, opened, taken apart or otherwise modified; (c) unit not used in
accordance with instruction; (d) damages exceeding the cost of the product;
(e) finish on any portion of the product, such as surface and weathering,
as this is considered normal wear and tear; (g) transit damage, initial
installation costs, removal costs, or rein-installation costs.
This warranty service is available by returning the product with proof
dealer from whom the unit was purchased.
of purchase, purchase date and a description of the problem to the
If within three(3) years from the date of purchase, this product fails due
to a defect in material or workmanship, we will repair or exchange it, at
its sole option free of charge. This warranty does not apply to: (a) damage
to units caused by accident, dropping or abuse in handling, acts of God
or any negligent use; (b) units which have been subject to un-authorized
FUNCTION FOR" DST" "RND" " RCL"
1 DST----Press and hold the HOUR button for 5 seconds, entering into the Daylight
Saving Time(DST) mode and time on clock will advance one hour; Press and hold for
another 5 seconds to cancel the DST function and time on clock will fall back one hour.
2 RND---Press and hold the MIN button for 5 seconds, entering into the Random
of the programmed settings.
Press and hold the MIN button for another 5 seconds to cancel the function.
Vacation option for extra security by varying the ON/OFF times within 30 minutes
3 RCL---It allows you to disable or enable the programmed ON/OFF settings.
a. push and release the RCL, the display will replace the setting with dashes.
b. repush and release the RCL, the display will show the previous programmed settings.
Nov.2010