


©2021 baby jogger NWL0001151803C 7/21
KEEP INSTRUCTIONS FOR FUTURE USE
Do not install or use this child restraint until you read and understand
the instructions in this manual
.
FAILURE TO PROPERLY USE THIS CHILD RESTRAINT INCREASES THE RISK OF
SERIOUS INJURY OR DEATH IN A SUDDEN STOP OR CRASH
.
babyjogger.com
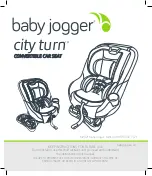
city turn
TM
CONVERTIBLE CAR SEAT
CONVERTIBLE CAR SEAT