

421.785UK User Manual
Recharge: 10W Wireless Charging
Digital Alarm Clock
Black: 421.785UK, White: 421.786UK
User Manual
Start the day fully charged and ready to go. This versatile alarm clock is the perfect fit for bedside tables, with clear LED
display and a sleek, contemporary design. You can also wirelessly charge your compatible devices, just place your device
on the alarm clock and wake up to a full battery without the need for additional wires.
•
Stylish and modern design with easy to read white LED clock display
•
Supports fast charging for Samsung 10W and iPhone 7.5W (fast charge mains adaptor required)
•
5W Universal Qi certified charging mode for other devices
•
12-hour and 24-hour, 3-function alarm clock
•
Thermometer displaying current room temperature
•
Available in attractive black and white satin finishes
Technical Specification:
Input
5V 1.5A, 9V 1.67A
Output
5W, 7.5W, 10W
Dimensions
160 x 75 x 40mm
Weight
230g
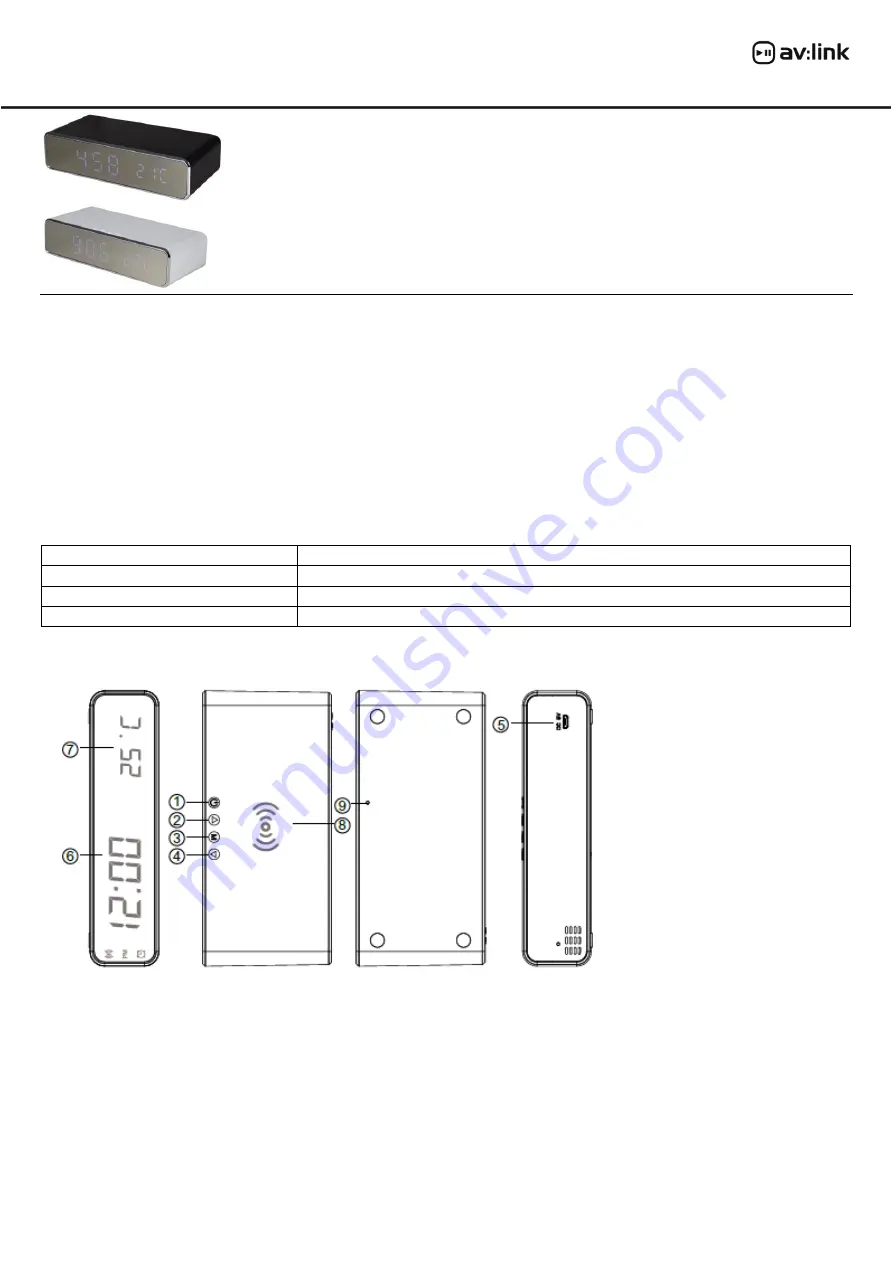
Controls Diagram:
1.
Display on/off button
2.
Up adjust button
3.
Menu button
4.
Down adjust button
5.
Micro USB charging port
6.
Time/date display
7.
Temperature display
8.
Fast wireless charging plate
9.
Reset aperture
General Usage:
•
Setting the time:
On first use to set the Recharge
’
s internal clock to the correct time, first switch the unit on by
pressing the Display on/off button (
1
). Next long press the Menu button (
3
) and select between 12H or 24H time
display. Use the up adjust and down adjust buttons (
2
and
4
) to make your selection then press the Menu button (
3
)
to confirm. Next set the hour and minutes using the same method always confirming your selection with the Menu
button (
3
).
•
Setting the year and date:
Press the Menu button (
3
) to change to date view mode then long press again to
adjust the date. First set the current year using the up adjust and down adjust buttons (
2
and
4
) and Menu button
(
3
) to confirm followed by the month and day settings accordingly.


