©Austral Surveillance 2012
Mini DVR Cam
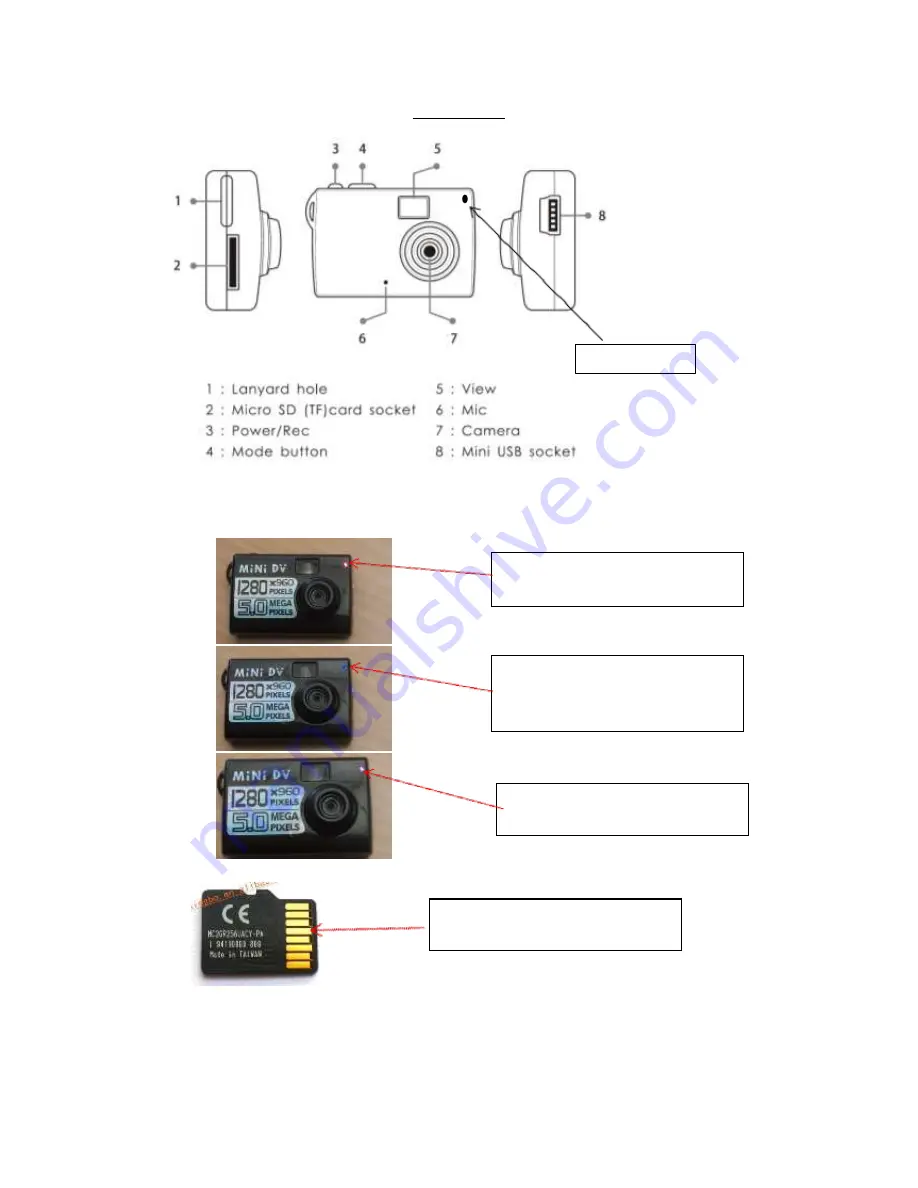
PARTS DESCRIPTION
a)
Light indicator:
b) Micro SD Card socket: Insert the micro SD card (4Gb included) into the socket.
c) Power Button: Press to turn device on and off as well as starting and stopping video and
sound recording.
d) USB Socket: Connect the USB cable provided to charge device from your computer and
also transfer data.
Light indicator
Insert micro SD card this way with
the front of the camera towards
you.
Red light means device is switched
on in video mode and ready to use.
Blue light after switching on means
device is starting up. If light is
constant then photo mode is on.
Pink light means device is in sound
recording mode.