ATEN Video Extender Rack Mount Kit
VE-RMK 1U Quick Start Guide
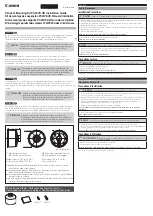
Package Contents
1 x VE-RMK1U Frame
4 x 1U Mounting Plates
5 x Plastic Captive Screws
6 x Hexagon Head Screws
12 x Countersunk Head Screws
Note:
Please make sure that all package
contents are present and that nothing is
damaged in shipping. If you encounter any
problems, contact your local sales
representative for more information.
Installation
Different ATEN devices use different sets of screw holes on the mounting plate to install. Use
the table below to find out:
Whether if your ATEN device is built-in with rack ears
The alignment line that your ATEN device uses
Models
Mounting Plate
Category
Not Equipped with
Rack Ears
Equipped with
Rack Ears
Alignment
Line
Max. No.
of Units.
CE
CE100
-
Line A
4 units
VE
VE560, VE600A, VE602,
VE800A, VE803, VE810
VE601, VE801,
VE811, VE901
VE150A, VE170, VE172R,
VB802
-
Line B
3 units
Note:
For details on models not listed in the table, refer to the
VE-RMK 1U Installation Guide
,
which can be downloaded from the product web page.
Installing Devices with Rack Ears
1. Align the device to its alignment line
as illustrated, latch one of the rack
ears onto the protruded dot on the
mounting plate, and secure the device
to the mounting plate using the
supplied hexagon head screw.
Example:
VE801
2. Position the VE-RMK 1U frame on the
front of your rack, align the holes in
the frame with the holes in the rack,
and then secure the frame to the rack
with self-prepared screws.
3. Follow the steps in
Installing Devices to the Rack
to finish the installation.