


Notebook PC Upgrade Guide
1
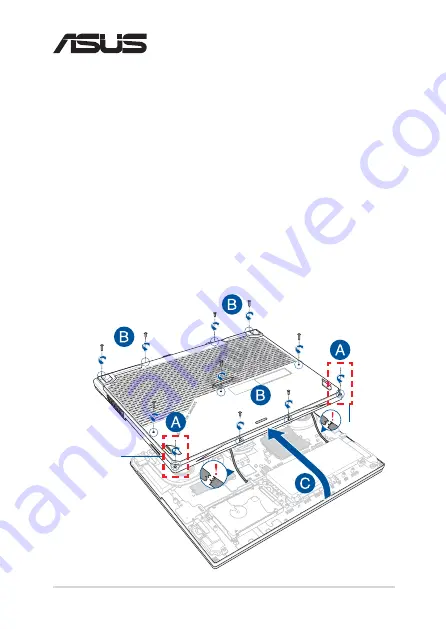
Removing the compartment cover
A.
Loosen the Cover Screw without removing the screw from the
cover.
B.
Remove the screw(s) from the Notebook PC’s compartment cover.
C.
To prevent pulling on and causing damage to the cables
connected, slightly lift the cover to reveal the compartment
without removing the cover completely.
E15058
Upgrade Guide
Cover Screw
Cover Screw
Summary of Contents for G531GW
Page 12: ...12 Notebook PC Upgrade Guide ...


