SAFETY INFORMATION
• Read all installation instructions before beginning; if not qualified, do not
attempt installation. Contact a qualified electrician.
• To reduce the risk of fire, electric shock, or injury to persons, pay close
attention to this manual and stay within its guidelines when using this
product. Save these instructions for future use.
• Do not cover this product as the covering may cause rope to overheat,
melt, or ignite.
• Do not operate Trulux® tape light while on the reel, nor while it is coiled.
• This IP54 rated tape light is cULus Listed and suitable for indoor use in
dry and damp locations, but not for direct contact with water or moisture.
• Do not submerge flexible light in liquids nor use the product in
the vicinity of standing water or other liquids, or where water can
accumulate.
• Do not route the cord or tape light through walls, ceilings, doors,
windows, or any similar part of the building structure.
• Secure tape light using only the attached adhesive strip.
• Do not secure this product or its cord with staples, nails, or like means
that may damage the outer jacket or cord insulation.
• Do not use if there is any damage to the tape light, LED diodes, or power
cord insulation; inspect periodically.
• Do not install on gates or doors, or where subject to continuous flexing.
• Do not install in tanks or enclosures of any kinds.
• This kit includes a 24V DC plug-in power supply (3A) that is cULus Listed
for dry location use. Use only the power supply provided. This power
supply allows for a maximum run of 16.4 feet of tape light. Do not exceed
16.4 feet oftape light in any single run.
• The RF remote controller included utilizes a 3V CR2025 battery; only
replace with same battery type. Please dispose of batteries properly.
Batteries are not a toy! If swallowed, contact local emergency services
immediatley.
These products may represent a possible shock or fire
hazard if improperly installed or attached in any way.
Products should be installed in accordance with these
instructions, current electrical codes, and/or the current
National Electric Code (NEC).
Use only included 24V DC driver. Factory warranty will
be void if used with a non-recommended power supply,
transformer, or driver.
To reduce the risk of fire, electric shock or injury to
persons, make sure that the electrical power to the
system is disconnected at the source prior to installation
or any servicing.
Never fold Trulux® tape light or bend past the minimum
bending radius of 1” whether lighted or unlighted.
Page 1 of 2
©2018 American Lighting, Inc. REV1807 www.AmericanLighting.com
11775 E. 45th Ave. Denver, CO 80239 Ph: 1-800-880-1180 Fax: 303-695-7633
WARNING
WARNING
WARNING
WARNING
TRULUX
®
TUNABLE CCT (IP54)
KIT
24V
INSTALLATION INSTRUCTIONS
HTL-TW-5MKIT
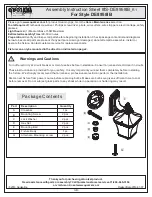
KIT CONTENTS:
(1) 16.4ft (5m) Reel of Trulux® Tunable CCT IP54 (unjacketed) tape light
(1) Inline LED Controller/Receiver
(1) Tunable CCT Radio Frequency Remote Control
(1) 24V DC Power Supply (3A)
(1) 15ft Reel of 20AWG wire
(3) Tape-to-Tape snap connectors
(6) Tape-to-Wire snap connectors
INSTALLING TRULUX® TAPE LIGHT (See Figure 1):
Make all connections and mount in place prior to providing power to system. Trulux® Tape Light includes a 3M adhesive backing: Allow
adhesive to cure 24 hours prior to first use. This product is designed to be mounted to a smooth, clean, non-moving surface.
1. Determine the placement of tape light and whether there will be cuts, splices, or jumpers needed. Make any cuts, splices, or
jumps prior to moving on to Step 2. See CUTTING & LINKING TRULUX® TAPE LIGHT KITS on next page for more information on
cutting and/or linking Trulux® Tape Light. Consider the placement of the power supply and ensure there is no tension from start of
tape light to power supply.
2. Peel the protective backing from the tape light and press the Trulux® tape light into place. For best results, once the VHB protective sheet
is removed, the tape should not be repositioned, removed, or re-used.
3. Connect the mating DC plugs from the start of the tape light reel to the LED controller/receiver.
4. Connect the mating DC plugs from the LED controller/receiver to the DC power supply.
5. Plug DC power supply into standard 120V wall socket.
FIGURE 1
24V DC Plug-In Power Supply
LED Controller/Receiver
Trulux Tunable CCT Tape Light
Pre-Attached Connection
To 120V