ZyXEL Communications IES-2500 User Manual Download Page 3

IES-2500 User’s Guide 

Interference Statements and Warnings 

iii 

Interference Statements and Warnings 

FCC 

Interference Statement: 

This device complies with Part 15 of the FCC rules. Operation is subject to the following two conditions: 

(1) This device may not cause harmful interference. 

(2) This device must accept any interference received, including interference that may cause undesired operations. 

FCC Warning! 

This equipment has been tested and found to comply with the limits for a Class A digital device, pursuant to Part 15 
of the FCC Rules. These limits are designed to provide reasonable protection against harmful interference in a 
commercial environment. This equipment generates, uses, and can radiate radio frequency energy and, if not 
installed and used in accordance with the instruction manual, may cause harmful interference to radio 
communications. Operation of this equipment in a residential area is likely to cause harmful interference in which 
case the user will be required to correct the interference at his own expense. 

CE Mark Warning: 

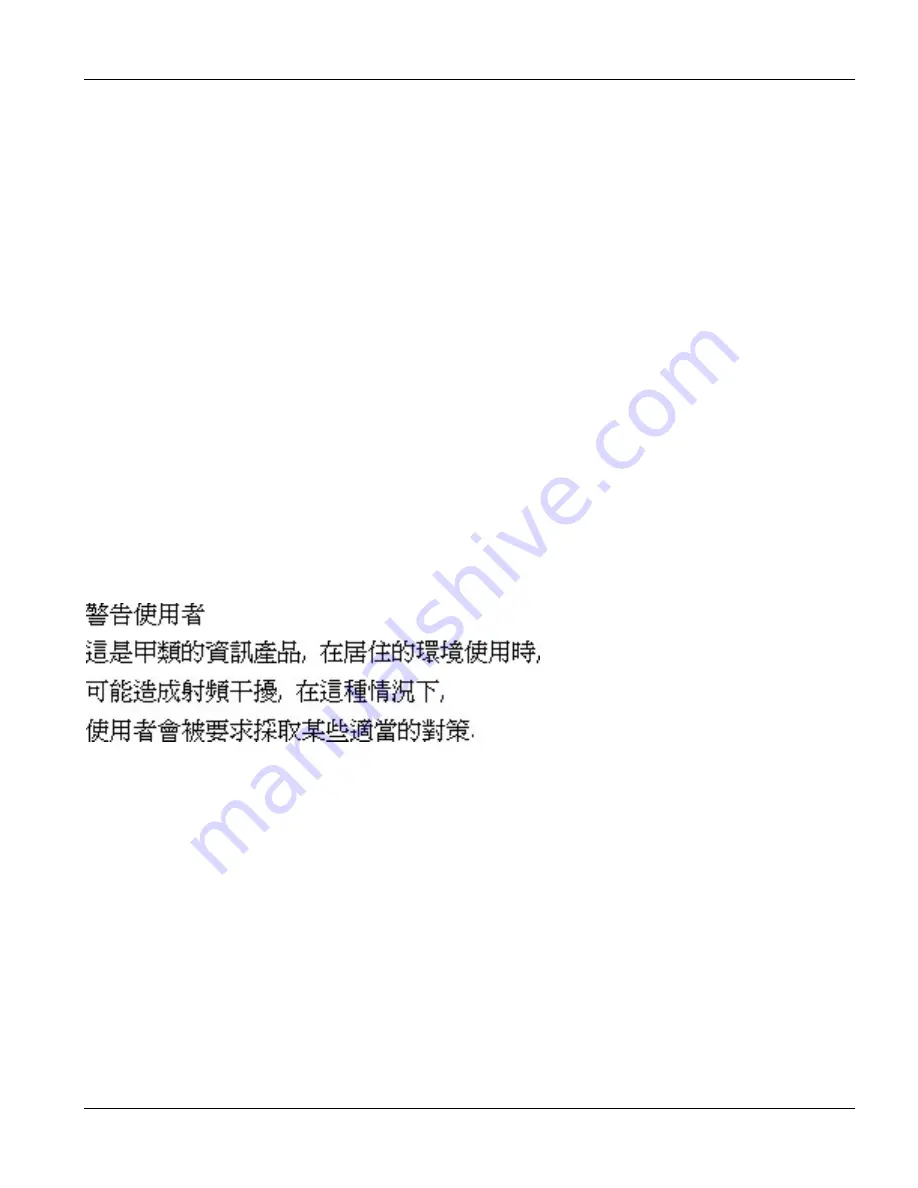
This is a class A product. In a domestic environment this product may cause radio interference in which case the 
user may be required to take adequate measures. 

Taiwanese BSMI A Warning: 


Certifications 

Refer to the product page at www.zyxel.com. 


Summary of Contents for IES-2500

Page 1: ...IES 2500 Integrated Ethernet Switch Version 1 00 September 2003 User s Guide...

Page 2: ...yXEL Communications Corporation Published by ZyXEL Communications Corporation All rights reserved Disclaimer ZyXEL does not assume any liability arising out of the application or use of any products o...

Page 3: ...limits are designed to provide reasonable protection against harmful interference in a commercial environment This equipment generates uses and can radiate radio frequency energy and if not installed...

Page 4: ...act of God or subjected to abnormal working conditions Note Repair or replacement as provided under this warranty is the exclusive remedy of the purchaser This warranty is in lieu of all other warran...

Page 5: ...com www europe zyxel com WORLDWIDE sales zyxel com tw 886 3 578 2439 ftp europe zyxel com ZyXEL Communications Corp 6 Innovation Road II Science Based Industrial Park Hsinchu 300 Taiwan support zyxel...

Page 6: ......

Page 7: ...Chassis Installation 2 1 2 1 General Installation Instructions 2 1 2 2 Rack mounted Installation Requirements 2 1 2 3 Mounting the IES 2500 Chassis on a Rack 2 1 Chapter 3 Card Installation 3 1 3 1 In...

Page 8: ...ling the Fan Module 7 1 Chapter 8 Power Maintenance 8 1 8 1 Procedure to Change an IES 2500 Power Fuse 8 1 8 2 Procedure to Reconnect the Power 8 1 Chapter 9 Hardware Troubleshooting 9 1 9 1 The SYS o...

Page 9: ...g Splitter Chassis Card Thumbscrews 3 4 Figure 3 9 Loosening Splitter Chassis Card Thumbscrews 3 5 Figure 3 10 Removing a Splitter Chassis Card 3 5 Figure 4 1 IES 2500 Front Panel Telco 50 Connections...

Page 10: ...ist of Tables Table 9 1 SYS LED Troubleshooting 9 1 Table 9 2 ALM LED Troubleshooting 9 1 Table 9 3 DSL LED Troubleshooting 9 2 Table 9 4 Voice Troubleshooting 9 2 Table 9 5 WAN Link Troubleshooting 9...

Page 11: ...itter chassis and its cards The IES 2500M is the IES 2500 main chassis The IES 2000ST is the IES 2000 splitter chassis with Telco 50 connectors The IES 2000SW is the IES 2000 splitter chassis with wir...

Page 12: ......

Page 13: ...Hardware Overview I Part I Hardware Overview This part introduces the Integrated Ethernet Switch and gives some application examples...

Page 14: ......

Page 15: ...perfect DSL provider solution The IES 2500 platform allows for convenient management and support of various DSL technologies It has the ability to hold a maximum of six VDSL line cards without a mana...

Page 16: ...twork Integrated Services Digital Network switch Hot Swappable DSL Line Cards The IES 2500 uses hot swappable DSL line cards Hot Swappable Splitter Cards The IES 2500 uses hot swappable splitter cards...

Page 17: ...pport more subscribers 1 4 Applications The following sections describe example applications for the IES 2500 This figure gives an example overview Figure 1 3 Application Overview Example 1 4 1 IP DSL...

Page 18: ...tenant unit MTU that leverages the existing phone line wiring to provide Internet access to subscribers in the building A subscriber connects a computer to the phone line in a unit using an ADSL mode...

Page 19: ...IES 2500 User s Guide Card Installation 1 5 Figure 1 5 MTU Application Example...

Page 20: ......

Page 21: ...Installation II Part II Installation This part describes how to install the IES 2500 chassis and cards...

Page 22: ......

Page 23: ...chassis Step 6 Refer to the chapter on power connections for instructions on making power connections and turning on the IES 2500 2 2 Rack mounted Installation Requirements Make sure the rack will sa...

Page 24: ...already attached to the chassis on one side of the rack lining up the screw holes on the bracket with the screw holes on the side of the rack see the figure shown next Step 2 Use the screwdriver to i...

Page 25: ...ard is necessary Step 1 Grasp the center of the front panel of the card with one hand and place the other hand under the card to support it Step 2 Insert the card halfway into the slot and spread the...

Page 26: ...sconnect all cables from the card Step 2 Loosen the two thumbscrews Step 3 Pull the two ejector levers firmly until the front of the card is clear of the chassis Pull the ejector levers until they are...

Page 27: ...IES 2500 User s Guide Card Installation 3 3 IES 2500 Figure 3 4 Loosening Main Chassis Card Thumbscrews IES 2500 Figure 3 5 Opening the Ejector Levers IES 2500 Figure 3 6 Removing a Main Chassis Card...

Page 28: ...to install a splitter card in the splitter chassis Step 1 Install the splitter card in the same slot number on the splitter chassis as the corresponding line card in the main chassis the management sw...

Page 29: ...the cable from the card Step 2 Loosen the two thumbscrews Step 3 Grasp the handles on the front panel of the card and start to pull the card out Step 4 After you have the card partially out of the ch...

Page 30: ......

Page 31: ...Connections III Part III Connections This part describes how to make the front panel connections connect the IES 2500 to a Main Distribution Frame MDF and connect the power...

Page 32: ......

Page 33: ...the optional Telco 50 cable to connect the DSL line card s front panel Telco 50 connector to the corresponding splitter card s front panel Telco 50 connector See the hardware specifications in the ap...

Page 34: ...IES 2500 User s Guide 4 2 Front Panel Connections Figure 4 2 IES 2500 Front Panel Telco 50 Connections 6 VLC 1124L cards...

Page 35: ...to the User s Guide of your management switch card for details on how to make the management connections 5 2 MDF Main Distribution Frame An MDF is usually installed between subscribers equipment and...

Page 36: ...ignal It feeds the DSL signal to the DSL line card and diverts the voice signal to the CO Telco 50 connector or wire wrapping pins on the splitter chassis s rear panel Connect the CO Telco 50 connecto...

Page 37: ...stall the IES 2500 for data access only No connection from the Telco 50 CO connector is necessary You may connect using an MDF or attach RJ 11 connectors to the non IES 2500 end of the Telco 50 cable...

Page 38: ...nd user and CO Connections This installation scenario requires three MDFs Please refer to the following figure for the connection schema MDF 1 is the original MDF used for telephone connections only M...

Page 39: ...2 using a punch down tool Step 6 Connect the upper ports of MDF 2 to the lower ports of MDF 1 using telephone wires Step 7 Connect the upper ports of MDF 1 to the telephone company Step 8 Telephone s...

Page 40: ...MDF 3 to the upper ports of MDF 2 for those users that want DSL service Users who want telephone service only retain the original connection from the top port of MDF 2 to the bottom port of MDF 1 Step...

Page 41: ...appropriate power source Keep the IES 2500 power switch in the OFF position until you come to procedure for turning on the power 6 2 Power Connections The IES 2500 power connection and power switch ar...

Page 42: ......

Page 43: ...Maintenance IV Part IV Maintenance This part describes how to change the IES 2500 fuses and fan module It also gives troubleshooting instructions...

Page 44: ......

Page 45: ...dule The IES 2500 fan module is at the left on the front panel of the main chassis Perform the following procedure to remove the fan module in order to change a fan fuse or the fan module Step 1 Loose...

Page 46: ...IES 2500 User s Guide 7 2 Fan Maintenance Figure 7 2 Removing the IES 2500 Fan Module Figure 7 3 IES 2500 Fan Fuses Fuses...

Page 47: ...Use a flat head screwdriver or similar tool to gently pry the power fuse holder out of the power receptacle Step 4 Replace any fuses that are burnt out see the hardware specifications in the appendix...

Page 48: ......

Page 49: ...tch card are when the management switch card s voltage or temperature is outside of the normal range The ALM alarm LEDs on the DSL line cards light when the card is overheated and or voltage readings...

Page 50: ...ne speed is consistent between the IES 2500 side and the CPE Customer Premise Equipment side 9 If your line quality is low you may need to select a slower line speed for both the IES 2500 and CPE side...

Page 51: ...ine if there is a wiring problem If the connection is good the telephone will return a dial tone Letters in the figure shown next indicate the systematic tests to be done Suppose you re using installa...

Page 52: ...e is no dial tone then the problem is between MDF 1 and MDF 2 Check the telephone wire and connections between MDFs 1 and 2 C Disconnect the Telco 50 cable from the splitter chassis Telco 50 CO connec...

Page 53: ...r E Reconnect the Telco 50 cable to the splitter chassis Telco 50 USER connector Connect a telephone to a lower port of MDF 3 If there is no dial tone then the problem is between the splitter chassis...

Page 54: ......

Page 55: ...Appendices and Index V Part V Appendices and Index This part includes appendices and an index...

Page 56: ......

Page 57: ...hock from lightning Always disconnect all telephone lines from this device before servicing or disassembling Fuse Warning Replace a fuse only with a fuse of the same type and rating Fan Module Warning...

Page 58: ......

Page 59: ...cards You can use 5 ADSL cards with one Management Switch Card MSC or use 6 VLC1124L line cards The IES 2000ST rear panel has six pairs of Telco 50 connectors that correspond to the splitter cards Co...

Page 60: ...00 Power Cord 18 or larger AWG American Wire Gauge is a measurement system for wire that specifies its thickness As the thickness of the wire increases the AWG number decreases Power Consumption This...

Page 61: ...connectors on the IES splitter chassis rear panel The pin assignments for the IES splitter chassis with wire wrapping pins are the same as the ones shown for the Telco 50 connectors Note that the USER...

Page 62: ...the hardware Telco 50 connectors Chart 9 Hardware Telco 50 Connector Port and Pin Numbers PORT NUMBER PIN NUMBER PORT NUMBER PIN NUMBER 1 25 50 13 13 38 2 24 49 14 12 37 3 23 48 15 11 36 4 22 47 16 10...

Page 63: ...hock A Fan Fuse 7 1 Fan Maintenance 7 1 Fan Module 7 1 Fan Module Warning A FCC iii FCC Warning iii Features 1 2 Front Panel 1 1 Fuse Ratings D Fuse Warning A General Syntax Conventions xi Glossary an...

Page 64: ...Module 1 2 Power Wire D Preface xi Punch down Tool 5 2 PWR LED 9 1 PWR LED Does Not Turn On 9 1 Rack 2 1 Rack 19 Inch C Rack 482 6mm C Rack mounted Installation Requirements 2 1 Reconnect the Power 8...

Page 65: ...2 Telephone Wire D Temperature E Testing In house Wiring 9 4 Trademarks ii Turn on the Power 6 1 8 1 USER C 5 3 5 5 5 6 USER Telco 50 Connectors G Voice Troubleshooting 9 2 WAN Link Troubleshooting 9...

Reviews: