34
35
4 Preparing the device for use
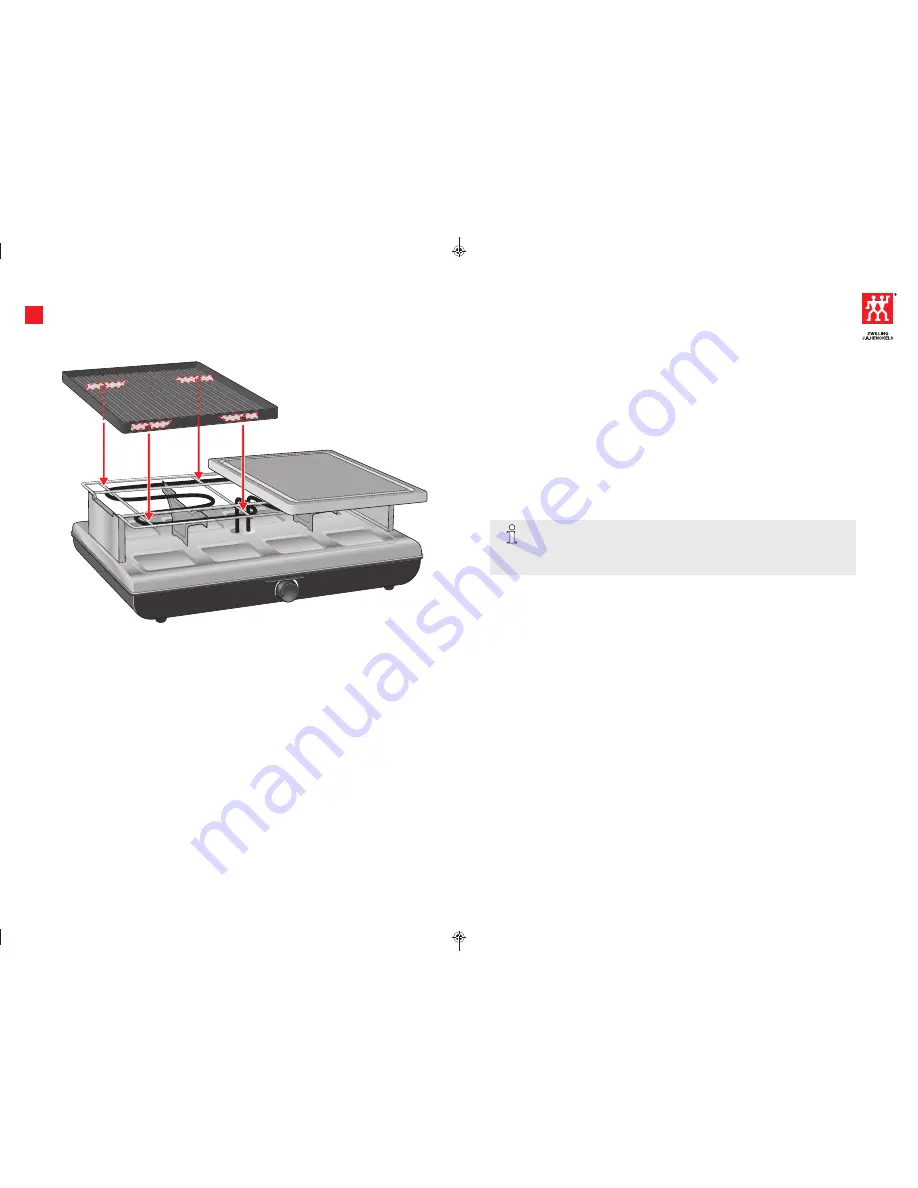
4.3 Attaching the griddle
1. Always position the griddle on the left side of the device (as seen from the front, see fig. 5).
2. Make sure that the griddle is secure and that the braces on the frame fit in to the four feet on the
underside of the griddle (see fig. 5).
4 Preparing the device for use
4.4 Plugging in and heating up the grill
1. Uncoil the mains lead fully.
2. Position the lead such that it does not interfere, does not pose a tripping hazard, cannot be
grasped accidentally and cannot come into contact with hot parts.
3. Make sure that the power controller is in the “MIN” position before plugging the device in.
4. Plug the device in to an easily accessible and correctly installed, earthed socket.
The indicator light next to the power controller is not yet illuminated.
The device is not yet heating up.
5. Turn the power controller to the “MAX” position.
The indicator light is illuminated when the device is heating up.
NOTICE:
When using for the first time the device may release odours and thin smoke.
This is normal. The odour that emanates during first use will dissipate after a
couple of minutes.
6. Pre-heat the device without any food or pans at the maximum power (“MAX” position) for at
least 10 minutes.
The stone slab requires a further 25 minutes before it is at a temperature suitable for grilling.
Nevertheless, you can still use the griddle and raclette function during this time.
GB
Fig. 5: Attaching the griddle
0101343Y1_Raclette_Bedienung_D-GB_04-14.indd 34-35
0101343Y1_Raclette_Bedienung_D-GB_04-14.indd 34-35
10.04.14 09:55
10.04.14 09:55


