background image


1

PREFACE


We express our sincere thanks for purchasing this Digital Photo Frame (DPF)!   
Before operating this DPF, be sure to read this user manual carefully. After 
reading it, please keep it in a safe place for future reference. 
We reserve the right to make changes to this DPF, Software and/or this User 
Manual without notice.  Please visit our company’s website listed on the 
product packaging for additional product information and/or updates.     


NOTE:

 The pictures, diagrams and certain functions described in this manual 

may differ from the actual product due to different models. 


PRECAUTIONS 

Before operating this DPF, please read the following precautions 

carefully: 


Do not operate this DPF in extremely cold, hot, dusty or damp 

environment 


Avoid putting this DPF under direct sunlight 


Do not scrub this DPF with a hard item; it may result in scratches 

on the screen and/or damage to the hardware 


Never spray or pour liquid directly onto the screen or plastic 

casing.    Clean the case, LCD screen and buttons with slightly damp 
soft cloth. 


To avoid permanent data loss, do not insert or remove memory 

card while the power is ON, or remove USB cable while pictures are 
being copied to the memory card or built-in memory


Keep this DPF and all accessories out of reach of children. 


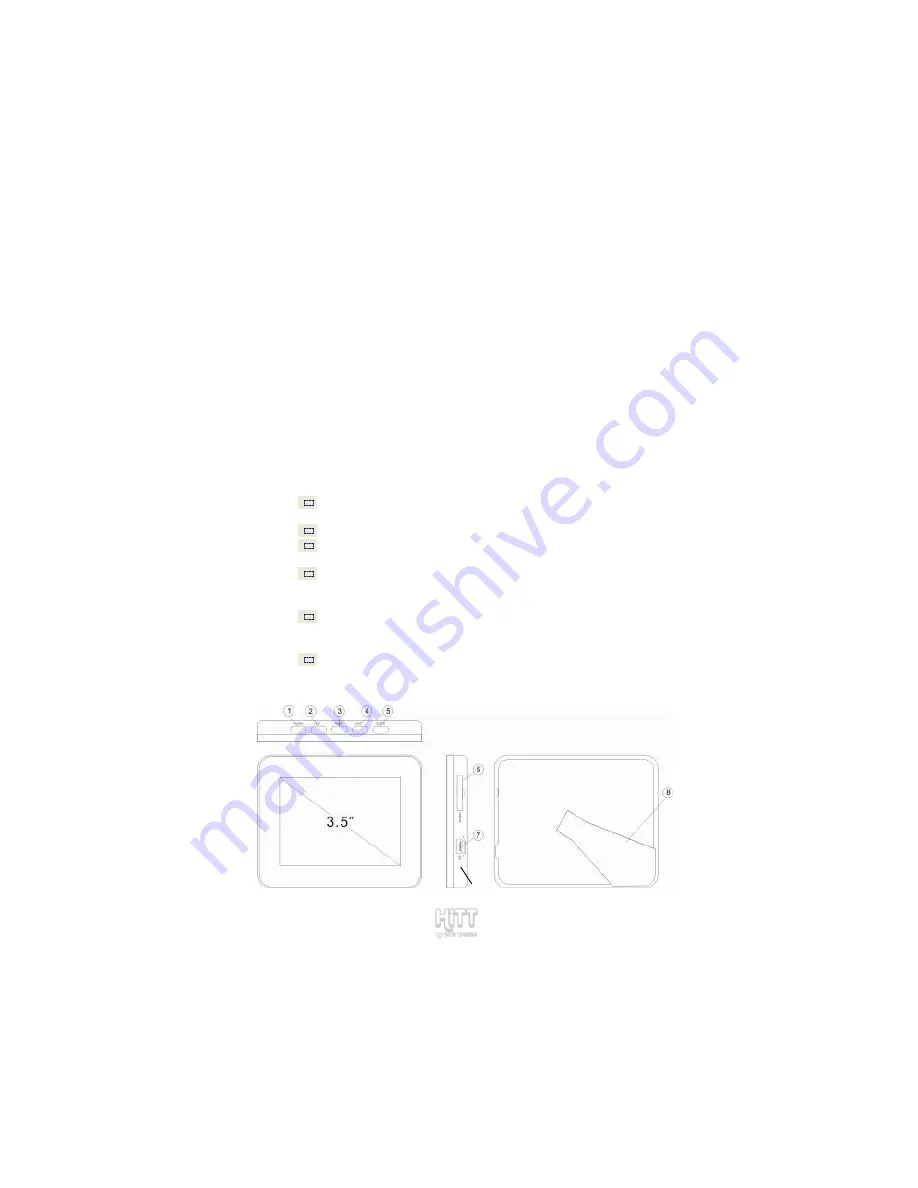
BUTTONS & INTERFACE 


RESET 

Summary of Contents for HF-ZP035W

Page 1: ...t dark gray screen please connect frame to the AC adapter and RESET the frame To reset use something pointy to press the RESET button which is inside the small hole right below the USB port on the fra...

Page 2: ...duct due to different models PRECAUTIONS Before operating this DPF please read the following precautions carefully Do not operate this DPF in extremely cold hot dusty or damp environment Avoid putting...

Page 3: ...function menu Press this button to enable USB Connect Mode to transfer pictures when the frame is connected to a computer using USB cable 5 ENTER Press this button to accept menu option selection Pre...

Page 4: ...is one in the card slot else the pictures will be displayed from built in memory While in SLIDESHOW mode press POWER button to pause SLIDESHOW Only works when pictures are displayed from SD card Press...

Page 5: ...the built in memory NOTE There is 32MB of built in memory which holds about 90 pictures and requires the include DPFMate350 software to copy pictures to the built in memory Remove SD card to display...

Page 6: ...en press ENTER key to complete selection NOTE Press ENTER button while displaying calendar to Enter Date and Time Change Mode Once in Date and Time Change Mode YEAR starts flashing Use LEFT or RIGHT k...

Page 7: ...Enter to confirm selection and move to change MINUTES Use LEFT or RIGHT key to change Minute Press Enter to confirm selection and move to change SECONDS Use LEFT or RIGHT key to change Seconds Press...

Page 8: ...change the option Use RIGHT or LEFT key to select one of the following available options No Effect random UP DOWN Black Shutter 1 Shutter2 Roll Push UP Fade OUT COMB Center Plus Cheese Two lines Four...

Page 9: ...LEFT key to select one of the following available options 1 to 8 Press ENTER key to confirm selection and move to the next SETUP option or press EXIT key to return to the Main Menu AUTO OFF Press ENT...

Page 10: ...ry CHARGE BATTERY SUPPLY POWER FROM COMPUTER S USB PORT When the USB cable is properly connected Charging message is displayed on the display indicating the battery is getting charged It can take up t...

Page 11: ...d by pressing EXIT key User can launch DPFMate350 exe to install DPFMate350 application or PhotoViewer application in some software versions If an error message is displayed open MacDPFMate350 zip fil...

Page 12: ...ears on the computer when the computer successfully recognizes the frame and DPFMate350 software is automatically started NOTE If DPFMate350 application is not launched automatically open Windows Expl...

Page 13: ...area display s computer s hard drive and other storage devices connected to the computer where pictures are saved source files PIC AREA This area displays selected picture which can be rotated resized...

Page 14: ...Area move red box using the mouse to select different area of the picture Zoom Out Zoom Out on picture in Preview Area move red box using the mouse to select different area of the picture RotateL Rota...

Page 15: ...te all files marked for deletion from frame s built in memory Select All Select all pictures in the Selection Area for deletion or making a backup copy Delete Mark picture s for deletion in Selection...

Page 16: ...ing out the USB cable while downloading pictures doing so may destroy information on the frame COPYING PICTURES TO AN SD CARD INSERTED IN SD CARD SLOT ON THE FRAME DPFMate350 application is NOT requir...

Page 17: ...r a full charge Supported Photo Format JPEG Internal Memory 32MB approximately 90 pictures Standard SD MMC Card Up to 8GB OSD Languages English Chinese Slideshow Interval 5 Seconds 10 Seconds 15 Secon...

Page 18: ...re not of resolution higher than 8 Mega Pixels Q What can I do if frame does not respond when any of the buttons are pressed on the frame or shows a blank screen A Reset the frame by using something p...

Page 19: ...80 of their rated capacity and batteries that leak during warranty period are covered by this limited warranty Miscellaneous This warranty does NOT cover defects or damage that result from a improper...

Page 20: ...g USA Inc The information contained in this User Manual is believed to be correct at the time of printing HiTT reserves the right to change or modify any information or specifications without notice T...

Reviews: