Zoom MRS-4 Operation Manual Download Page 6

When you start to use the MRS-4 for recording, you must choose whether to create a new song or
open an existing song for modification. 

1.

Connect the monitor system to the MASTER [L]/[R] jacks. 

To use headphones for monitoring, connect them to the [PHONES] jack. 

2.

Make sure that a SmartMedia card is inserted in the SmartMedia card slot. Then
turn power on in the order MRS-4 

monitor system. 

When the MRS-4 is turned on, it automatically checks whether the inserted SmartMedia
card already contains any songs. 

When there are no songs on the SmartMedia card 

A new song is automatically created, and the display shows the following information. This
display condition is called the "main screen". The main screen is the starting point for all
operations. 

When there are songs on the SmartMedia card 

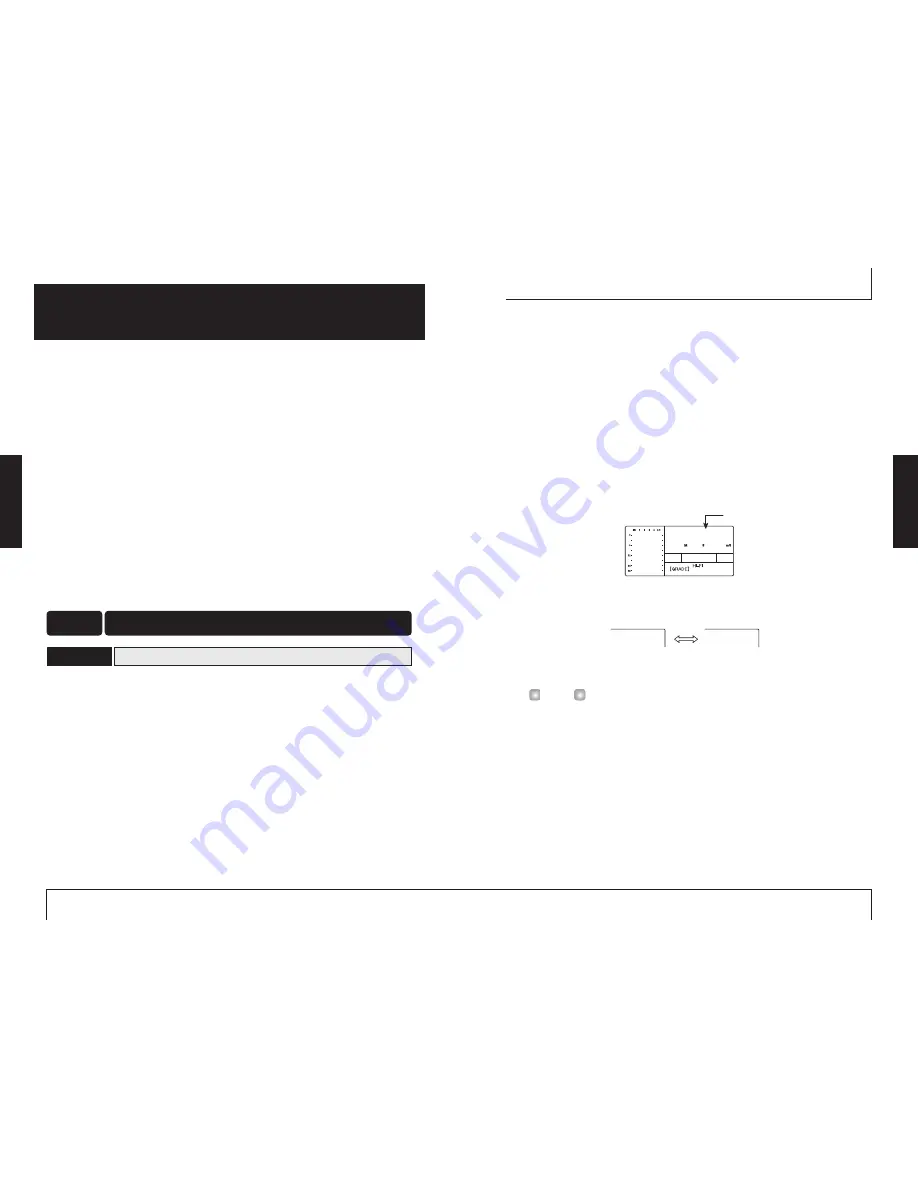
The following two indications appear alternately on the display. 

When you press the [ENTER/YES] key in this condition, a new song is created, and the
main screen appears. The recording will be automatically set to HiFi. 

• If you press the [EXIT/NO] key at the above screen, or if no key is operated for 5

seconds, the most recent song is automatically read into the unit. (For information on
how to create a new song after a song has been read in, see page 47.) 

• If required, change the recording grade setting (

p. 49). 

H

INT

NEWSONG

YES NO

 000000

Current position within the song 

Basic

O

peration

ZOOM 

MRS-4

11

Operation is divided into four major steps. 

Step 1: Preparations for recording 

Make the necessary connections and prepare to record a song. 

Step 2: Recording the first track 

Use the insert effect on the input signal if necessary and record the first track. 

Step 3: Overdubbing 

While listening to the recorded track, record the second and subsequent tracks
(overdubbing). 

Step 4: Mixdown 

Adjust the level, panning, and EQ for each recorded track, and apply the send/return
effect to create a stereo mix. Apply the mixdown effect to the signal, and then send the
result to the master recorder. 

In the MRS-4, all data required to play a piece you have created is collectively referred to as a
"song". 

A song contains the following information. 

All recording data from the recorder section 

All settings of the mixer section 

All settings of the effect section 

Other settings such as for metronome and tuner functions 

Up to 15 songs can be stored on one SmartMedia card, provided that there is enough capacity. By
reading a song stored on a card back into the MRS-4, all previous settings are recreated (except
for fader setting positions). 

Creating a new song

1-1

Preparations for recording

Step 1

ZOOM 

MRS-4

Basic

O

peration

10

Basic Operation 

This section describes basic operation steps of the MRS-4, starting with preparations for
recording and continuing through the final mixdown process.

Summary of Contents for MRS-4

Page 1: ... are no empty tracks the MRS 4 allows you to bounce existing material onto 2 tracks while performing simultaneous playback of 4 tracks Versatile effects The MRS 4 incorporates an insert effect for processing the input signal a send return effect for use in a mixer loop and a mixdown effect for use on the master bus Other sophisticated features Metronome MIDI output AUX input long stroke faders and...

Page 2: ...he possibility of interference cannot be ruled out entirely With any type of digital control device the MRS 4 included electromagnetic interference can cause malfunctioning and can corrupt or destroy data Care should be taken to minimize the risk of damage Cleaning Use a soft dry cloth to clean the MRS 4 If necessary slightly moisten the cloth Do not use abrasive cleanser wax or solvents such as p...

Page 3: ...quipment such as a computer or digital camera you must format the card again in the MRS 4 as described on page 53 SmartMedia Correct Wrong Mixer section Effect section 1 1 2 3 4 5 6 7 8 2 V take 3 4 Track Currently selected V takes Introduction ZOOM MRS 4 5 Internal configuration The MRS 4 is divided internally into the following three sections Recorder section The MRS 4 is a 4 track recorder that...

Page 4: ...R key INPUT LEVEL controls 1 2 ON OFF keys 1 2 MIXDOWN key SEND RETURN key METRONOME key BOUNCE key Card access indicator Track status keys 1 4 Track faders 1 4 MASTER status key MASTER fader ZERO U key REW T key FF Y key STOP P key PLAY R key REC O key PARAMETER VALUE keys ENTER YES key EXIT NO key DC 9V jack POWER switch MIDI OUT connector MASTER L R jacks PHONES jack INPUT 1 INPUT 2 jacks AUX I...

Page 5: ...ashes while the unit is powered from batteries the batteries are exhausted Replace the batteries as soon as possible NOTE Four IEC R6 size AA batteries MRS 4 underside NOTE Turning power off Turning power on Connections ZOOM MRS 4 9 ZOOM MRS 4 Connections 8 Connections When a line level signal such as that from a CD player or rhythm machine is connected to the AUX IN L MONO R jacks it will be outp...

Page 6: ...setting p 49 HINT NEWSONG YES NO 000000 Current position within the song Basic Operation ZOOM MRS 4 11 Operation is divided into four major steps Step 1 Preparations for recording Make the necessary connections and prepare to record a song Step 2 Recording the first track Use the insert effect on the input signal if necessary and record the first track Step 3 Overdubbing While listening to the rec...

Page 7: ... key is lit the input is active To record from an instrument with stereo output such as a synthesizer connect the L R output of the device to the INPUT 1 INPUT 2 jacks and set both ON OFF keys 1 2 to ON The MRS 4 can accept up to two simultaneous input signals 3 While playing the instrument use the INPUT LEVEL control 1 to adjust the input sensitivity The signal input level appears on the level me...

Page 8: ...ile using the metronome sounds as a guide HINT HINT MASTER If no recording track is selected MASTER If a recording track track 1 is selected 1 Track 1 Track 2 Track 1 Track 2 Lit in green Out Lit in red Muting off Muting on Selected as recording track Status key Selecting and recording to a track 2 3 ZOOM MRS 4 15 The up down PARAMETER VALUE keys change the right hand setting value When the highes...

Page 9: ... playback causes punch in and pressing the key during recording causes punch out PLAY R key Starts playback from the current position HINT NOTE Click ClickClick Click Ding Tick Tick Tick Ding Tick Tick Tick Record Precount ZOOM MRS 4 16 This section describes how to record another instrument on track 2 while listening to the guitar recorded in step 2 track 1 1 Connect the instrument or mic to the ...

Page 10: ...18 To listen to the final mix on the monitor system during mixdown set the master recorder to monitor the input source For details refer to the documentation of the master recorder 2 Make sure that all status keys are lit in green 3 Set the ON OFF keys 1 2 and the METRONOME key to OFF It is also possible to add the input signal from inputs 1 2 to the mix In this case set the desired ON OFF key to ...

Page 11: ...the setting value When STL stereo link is ON all parameters for tracks 1 and 2 and tracks 3 and 4 are linked except for the V take selection The FADER parameter is only for display and cannot be changed When the respective fader is moved the indication changes NOTE HINT HIEQ ON HIG 0 HIG 0 HIG 1 ZOOM MRS 4 20 LOEQ Switches low EQ on or off LOG Adjusts low EQ boost cut from 12 dB to 12 dB This para...

Page 12: ...ONE 10 Adjusts the delay time in the range from 2 50 ms TIME 2 TIME 50 Parameter This is a mono doubling delay which adds a slightly delayed component to the original sound giving the sound more body Higher settings produce more delayed components DOUBLE0 DOUBLE9 Algorithm 3 DOBLE 0 DOBLE 9 TIME 2 TIME 50 Adjusts the delay time in the range from 50 250 ms TIME 50 TIME 250 Parameter This is a mono ...

Page 13: ...n the next page POWER 0 Mixdown effect MASTER L R MASTER 1 2 3 4 Using the mixdown effect 4 4 ZOOM MRS 4 25 4 To change the setting use the up down PARAMETER VALUE keys 5 To return to the algorithm display press the EXIT NO key 6 When the algorithm and parameter setting for the send return effect has been made press the EXIT NO key several times to return to the main screen The send return effect ...

Page 14: ...e algorithm The up down PARAMETER VALUE keys change the setting value When the highest or lowest setting is reached the unit switches to the next algorithm Pressing the left right PARAMETER VALUE keys changes directly to the next algorithm 3 Press the EXIT NO key The main screen returns BOOST 5 VOCAL 0 POWER 8 POWER 9 BOOST 0 ZOOM MRS 4 26 POWER 0 POWER 9 This effect adds fat bass and more power t...

Page 15: ... In this example let s select V take 8 4 Press the EXIT NO key several times to return to the main screen REC 8 REC CR BOUNCE 1 1 2 3 4 5 6 7 8 2 3 4 Track Bounce V take Reference Recorder ZOOM MRS 4 29 Using V takes Each track 1 4 of the recorder contains eight virtual tracks called V takes For each track you can select one take which will be used for recording and playback For example you can sw...

Page 16: ... ZOOM MRS 4 31 Carrying out the bounce function 5 Adjust the level balance pan and EQ of tracks 1 4 6 Press the BOUNCE key The BOUNCE key lights up and the bounce function is activated If desired you can also use the send return effect and mixdown effect during bounce For details see page 21 25 7 On the main screen press the status keys 1 2 for the bounce target tracks 1 2 so that the keys are lit...

Page 17: ...ress the AUTO PUNCH IN OUT button once more This sets the Out point at which recording will end The AUTO PUNCH IN OUT button changes from flashing to constantly lit The In Out points can also be set while the recorder is operating Carrying out auto punch in out 6 Move to a point several measures earlier than the In point 7 Repeatedly press the status key of the track on which you want to punch in ...

Page 18: ...ation is for information only The measure indication cannot be used to move to a point in the song 2 To return to time indication press the left PARAMETER VALUE key once Marking a point in a song marker function You can assign up to 50 marks in a song at any desired location allowing you to quickly move to that point later This is convenient when you want to play back repeatedly from a specific lo...

Page 19: ...s back a desired region of the song This is useful when you want to listen to the same region repeatedly 1 Move to the point at which you want to begin repeat playback and press the A B REPEAT key The A B REPEAT key flashes and the repeat start location point A is specified 2 Move to the point at which you want to end repeat playback and press the A B REPEAT key The A B REPEAT key will change from...

Page 20: ...rameter of the other track also changes accordingly except V take selection When the fader for the odd numbered track is operated the level in both tracks changes The fader of the even numbered track is inactive The PAN parameter operates as a BALANCE parameter that adjusts the level balance between the two left and right channels 5 To cancel the stereo link set the STL parameter to OFF STL ON STL...

Page 21: ...n any track The data that was previously at the copy destination will be erased and overwritten by the copy source data 1 While the main screen is shown press the SONG UTILITY TUNER key The display will show the song number 2 Press the right PARAMETER VALUE key once to bring up the indication tr Edit track edit on the display Then press the ENTER YES key The first item of the track edit menu appea...

Page 22: ... Track number V take number ERASE T1 1 NOTE YES NO 105560 103560 Reference Track Editing ZOOM MRS 4 43 5 If necessary specify the track number and V take number and press the ENTER YES key Use the left right PARAMETER VALUE keys to move the flashing section and use the up down PARAMETER VALUE keys to change the number You can also specify a V take that is currently not selected for the track When ...

Page 23: ...hing section and use the up down PARAMETER VALUE keys to change the number You can also specify a V take that is currently not selected for the track When you press the ENTER YES key the display changes as follows 6 To execute the erase process press the ENTER YES key While erasing is in progress the remaining time is shown on the display as a percentage such as doinG90 When the copy is complete t...

Page 24: ...ity depends on the selected recording grade 2 To return to the song menu press the EXIT NO key NOTE 802000 Checking the remaining recording time SONG CAPACITY Song number SEL 01 Reading in an existing song SONG SELECT NOTE YES NO Creating a new song SONG NEW Reference Song Functions ZOOM MRS 4 47 Song menu basic functions The song menu that appears when you press the SONG UTILITY TUNER key lets yo...

Page 25: ...rade HINT Selecting the recording grade SONG GRADE PRT ON PRT OFF Protecting a song SONG PROTECT Reference Song Functions ZOOM MRS 4 49 To copy the entire contents of the currently selected song into an empty song number proceed as follows 1 Select SnGCopy on the song menu and press the ENTER YES key 2 Use the up down PARAMETER VALUE keys to select the destination song number Only empty song numbe...

Page 26: ...e a matching setting should be used For information on how to make metronome settings see page 50 4 Return to the start position of the MRS 4 song and start playback When the precount is finished a start message is sent to the external device and the device operates in sync with the MRS 4 When the song is stopped at the MRS 4 the external device is also stopped When the song is stopped midway a so...

Page 27: ...ner The MRS 4 has a built in chromatic tuner that can be used when tuning an instrument connected to the INPUT 1 INPUT 2 jacks To use the tuner proceed as follows 1 Connect the instrument to the INPUT 1 INPUT 2 jack and set the appropriate ON OFF key 1 2 to ON 2 While the main screen is shown press the SONG UTILITY TUNER key The number of the currently selected song is shown 3 Use the left right P...

Page 28: ... If you synchronize operation of the MRS 4 and the rhythm machine you can mix the rhythm machine sound with the playback sound from tracks 1 4 for bounce mixdown The rhythm machine mix ratio can be adjusted with the INPUT LEVEL control 1 2 You can also apply the send return effect and mixdown effect to the rhythm machine sound p 21 25 Rhythm machine MRS 4 MIDI OUT MIDI IN LINE OUT INPUT 1 2 MRS 4 ...

Page 29: ...ife 5 hours or more with alkaline batteries Supplied accessory SmartMedia card 32 MB 0 dB 0 775 Vrms Design and specifications subject to change without notice ZOOM MRS 4 Specifications 56 Specifications MRS 4 file configuration The MRS 4 stores the following file types on the SmartMedia card xx yz aud This file contains the audio data recorded on a V take The number of such files on the SmartMedi...

Page 30: ...recorder first Other problems Problems with MIDI Problems with effects No sound or very low volume Check the connections to your monitor system and the volume of your monitor system Make sure that the status keys 1 4 are lit in green If a key is not lit press the key to make it light in green Make sure that the track faders 1 4 and the MASTER fader are raised Make sure that a SmartMedia card is in...

Page 31: ... 1 Recognized Messages None 2 Transmitted Messages Status 1st 2nd Description F2H sl sh Song Position Pointer shsl song position F8H Timing Clock FAH Start FBH Continue FCH Stop MIDI Implementation SNG FUL The SmartMedia card already contains 15 songs Therefore a new song cannot be created Erase unneeded songs NOCARD NOCARD1 No SmartMedia card is inserted otherwise the card you inserted is not sup...

Page 32: ...g clock 51 Top panel 6 Track 40 Copying 40 Copying all data 41 Erasing all data 43 Erasing specified data segment 42 Exchanging 44 Track mixer 5 Track number 28 Track parameters 5 19 TRACK PARAMETER key 19 Transport keys 16 Tuner 52 V V take 4 20 28 V TAKE indicator 28 V take number 28 Z ZERO U key 16 Index ZOOM MRS 4 63 DISPLAY BOOST BOOST 26 BOUNCE BOUNCE 29 CAB BC CAB BC 13 CAB CO CAB CO 13 CAB...

Page 33: ...ZOOM CORPORATION NOAH Bldg 2 10 2 Miyanishi cho Fuchu shi Tokyo 183 0022 Japan PHONE 81 42 369 7116 FAX 81 42 369 7115 Web Site http www zoom co jp Printed in Japan MRS 4 5000 2 ...

Reviews: