4
General Installation Instructions
GEN II-R
Controller
1. Install the
GEN II-R
controller on an interior wall where the ambient temperature is between 32°-
120°F (0°- 48°C) non-condensing. This controller is to be installed in an accessible interior
area; not in attics or above ceilings.
2. The controller is to be powered by a
dedicated
24vac 40va transformer.
VA based on damper
The transformer secondary is wired to
TR1 TR2
on the controller
(B).
The secondary voltage to the controller must be 24 to 28vac.
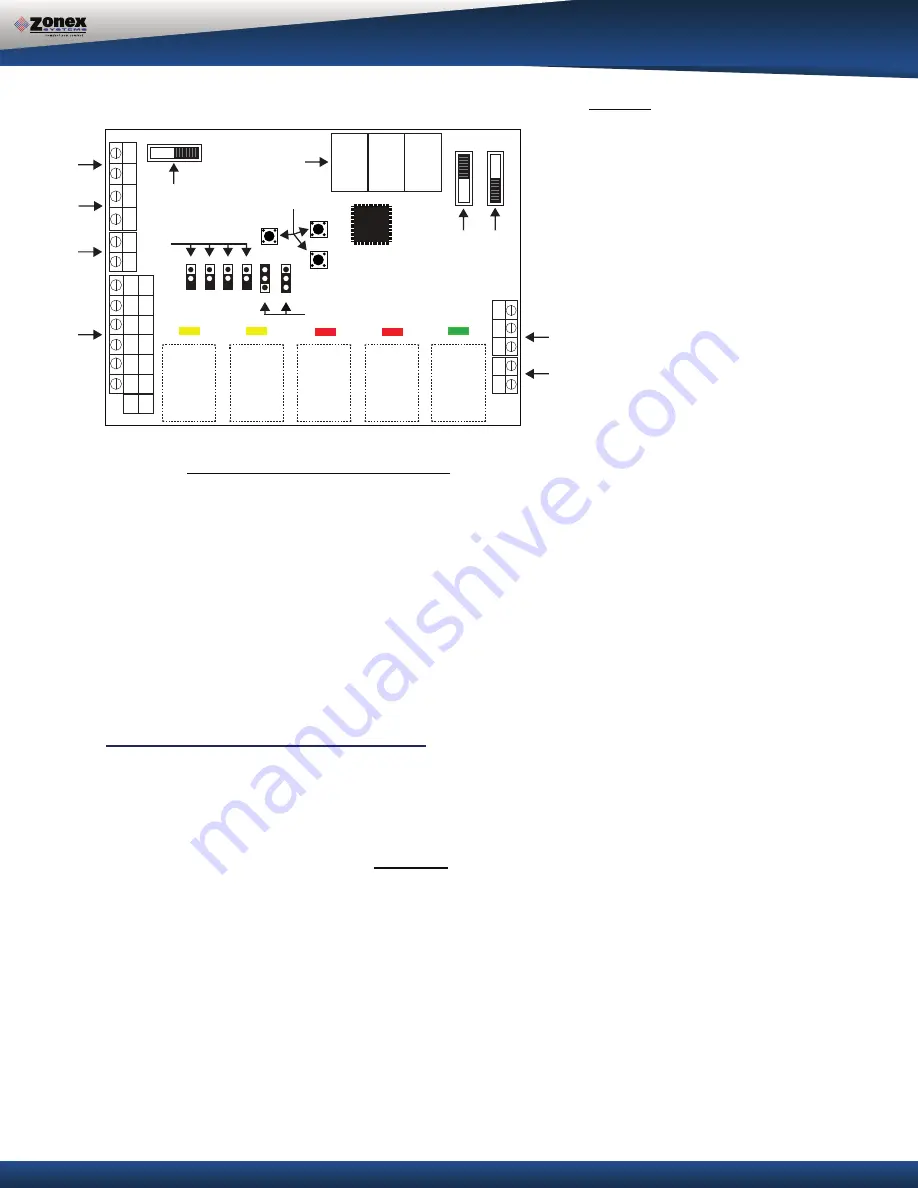
LEGEND
A
B
TR1 & TR2 24-Volt Transformer
C
Not Used
D
Unit Terminals
E
On / Off Switch
F
Priority Jumper
(Not Used)
H/P Jumper
(Jump for Heat Pump
Operation)
O/B Jumper
(Heat Pump Only –
Reversing Valve Operation)
EH Jumper
(Set Up Fan Operation for
Electric Heat)
G
Digital Display (Leaving Air Temperature
and configuration)
H
Up / Down / Set Buttons (High Limit, Low
Limit, Set)
I
Fan Jumper
(Continuous or Auto)
Staging Strategy
(Time / Temperature or
Time Only)
J
Not Used
K
Not Used
L
M
S S Terminals – Leaving Air Sensor (LAT)
TERMINAL FUNCTIONS / CONNECTIONS
S S – Leaving / Supply Air Sensor Input
G – Fan Output
W2 –
W1 –
Y2 – Stage 2 Cool Output
Y1 – Stage 1 Cool Output
R – 24vac from Unit Transformer
TC / TC – Not Used
TR1 / TR2 – 24vac Power Input / Common
A / B - Data Transmit / Receive
TR1 & TR2 Power out to Dampers R & C
(18 ga thermostat wire)
TR1 / TR2 - Damper Power Daisy Chain
Damper to Damper (18GA Thermostat wire)
GAS ELECTRIC OPERATION
GEN II-R
7 2
SET
DN
UP
S
S
GND
B
ON
AUTO
TIME/TMP
TIME
EH
O/B
HP
PRI
NIGHT
DA
Y
UNLOCK LOCK
OFF ON
G
W2
W1
Y2
Y1
TC
TC
TR1
TR2
TR1
TR2
Y1
Y2
W1
W2
G
R
HP
GE
O/B
R
Y1
Y2
G
W2
A
A
B
C
D
E
F
G
H
I
J
K
L
M
OUT
IN
A / B / GND Communications Wire
Stage 1 Heat Input
Stage 2 Heat Input
3. Install the leaving air sensor (LAT) in the supply air, ahead of the bypass take-off. Sensor wires
are connected to the
S S
terminals on the controller
(M).
The LAT sensor leads may be
extended using standard 18/2 thermostat wire.
4. The leaving air sensor (LAT) is calibrated to the controller at the factory. However, the
calibration should be checked as part of the system setup procedure. If adjustments are
required, use the Blue potentiometer labeled R44 located in the upper right hand corner of the
GEN II-R
controller. Screw the pot clockwise to lower the display temperature and counter -
clockwise to raise the temperature.
NOTE
: The display will update every 10 seconds.
5. Confirm you have daisy chained the
A
and
B
communication wires and
R
and
C
from the
damper control boards to the GEN II-R controller (
A & L
),
A
=(TR1, TR2),
L
=(A, B). (Communi-
cation wire maximum is 4,000 ft. from the GEN II-R controller to the farthest damper).
6. Connect the output wires from the controller to the HVAC system using standard 18 GA
thermostat wire.
style and quantity.


