


10
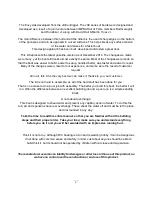
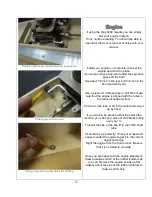
Tub in jig.
Use a 1/8 inch spacer under the square.
Note location of shaft hole in bottom.
Now is the time to use your tub jig. If you don’t
have the ability to make an aluminum jig, use a
pair of straight, thick wooden sticks. Leave these
clamped to the sides while gluing the aft bottom
in place.
Put a layer of waxed paper over the jig.
Put the tub aft bottom in the jig and set the tub
onto it.
Make sure that the oval shaft hole in the bottom
sheet ends up in the middle compartment as
shown.
Slip the tub frame into the jig.
Check all around to make sure that the tub fits
properly on the bottom sheet.
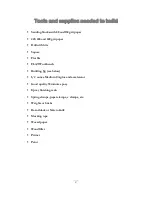
Remove the tub from the jig in preparation for
gluing.
Using epoxy, glue the tub aft bottom in place.
Make sure that the bottom extends to the front
bulkhead. It should cover the full 1/4 inch
bulkhead and be flush with the front.
If necessary, adjust or “rack” the tub frame so
that it aligns perfectly with the front of the bottom
sheet. The front of bulkhead 1 should be
perfectly flush with the bottom sheet as shown.
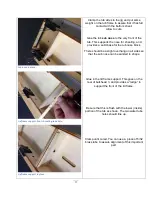
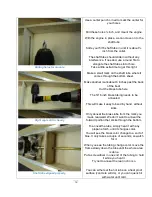
Epoxy the transom assembly in place at the rear.
Make sure the transom is square and straight.
Use scrap 1/8 ply or use TD as a base for the
square to check the transom.
Check to be sure that no waxed paper is
between the bottom and side by pulling up on the
paper all around.
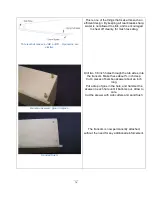
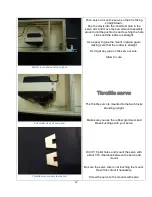
If you use anything other than aluminum angle,
make sure that the bottom sheet doesn’t move
sideways while it cures.
This can occur if you use angle iron, or some
other angle that doesn’t have a sharp angle.
It may be a good idea to draw a line on the
bottom, along the inside of the tub, to be sure the
bottom sheet has not moved.