background image

11 

6.  POWER ON/OFF GIMBAL

To turn the gimbal on or off, press and hold 
the power button (2) for a few seconds.

7.  POWER ON/OFF REMOTE CONTROL

To turn the remote control on or off, press 
and hold the remote control power button 
(10) for a few seconds.

8.   REMOTE CONTROL BLUETOOTH PAIRING

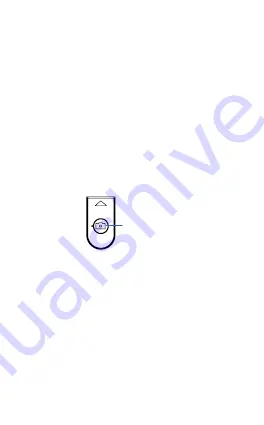
1.  Turn on the remote control by holding 

down the remote control power button 
(10) for 3 seconds until the blue LED light 
begins to flash.

2.  Turn on the Bluetooth settings in your 

smartphone and follow the prompts to 
connect to the ZX-G0.

3.  The gimbal is now paired to your 

smartphone.

9.  GIMBAL SET-UP

1.  Unfold the gimbal and tighten the rotation 

lock.

2.  Open the phone clip and place your 

smartphone in the holder.

Press for 3 

seconds

Summary of Contents for ZX-G0

Page 1: ...USER MANUAL ZX G0...

Page 2: ......

Page 3: ...l 7 5 Remote Control Battery Installation 8 6 Power On Off Gimbal 11 7 Power On Off Remote Control 11 8 Remote Control Bluetooth Pairing 11 9 Gimbal Set Up 11 10 Gimbal Mode 12 11 Portrait And Landsca...

Page 4: ...o malfunction The gimbal is not water resistant Do not use any liquid cleansers to clean it Use only a soft dry cloth to wipe clean the gimbal Ensure that nothing is obstructing the gimbal when it is...

Page 5: ...if the ambient temperature is below 10 C or above 45 C Always use the supplied charger and observe manufacturer s charging requirements Battery performance is best when it is within normal room temper...

Page 6: ...0 9 3 2 1 4 5 1 Gimbal status indicator 2 Gimbal power button 3 Pole extender 4 Bluetooth remote control indicator 5 Tripod grip 6 Phone clip 7 Micro USB charging port 8 Positioning bead 9 Rotation lo...

Page 7: ...L Use the supplied Micro USB cable and plug it into the Micro USB charging port to charge the gimbal Once charging is complete the light on the gimbal status indicator will change from red to green Mi...

Page 8: ...8 5 REMOTE CONTROL BATTERY INSTALLATION Please refer to the illustrations with regard to the following instructions 1 Extend the pole extender 2 Remove the remote control by pushing it up...

Page 9: ...9 3 Unscrew the battery compartment and slide it out in the direction of the arrow indicator 4 Insert a button battery CR1620 into the battery compartment...

Page 10: ...10 5 Replace the battery compartment cover and fixing screw 6 Re install the remote control onto the gimbal stem 7 Retract the pole extender...

Page 11: ...NTROL BLUETOOTH PAIRING 1 Turn on the remote control by holding down the remote control power button 10 for 3 seconds until the blue LED light begins to flash 2 Turn on the Bluetooth settings in your...

Page 12: ...used with or without gimbal mode To turn on gimbal mode rotate the gimbal clockwise so that it moves freely and is not latched to the positioning bead Press the gimbal power button 2 for 3 seconds to...

Page 13: ...IONS The gimbal can be used as a selfie stick or smartphone tripod To use the gimbal as a selfie stick please turn off the gimbal mode function SELFIE STICK FUNCTION Place your smartphone in the holde...

Page 14: ...dimensions 190mm x 70mm x 40mm Extended length 600mm 14 TROUBLESHOOTING Q My remote control is not working A The remote control will go into sleep mode if there is no input from the user after 10 minu...

Page 15: ...alia Pty Ltd Directed Electronics warrants that this product is free from defects in material and workmanship for a period of 12 months from the date of purchase or for the period stated on the packag...

Page 16: ...ies losses costs and expenses including reasonable legal fees including but not limited to claims alleging negligence invasion of privacy copyright infringement and or trademark infringement against Z...

Page 17: ...X including third party content that any defects in the Zero X will be corrected or that the Zero X products or Zero X services will be compatible with any other specific hardware or service Further...

Page 18: ...ns with you not Zero X Other than the above product warranty for the Zero X its suppliers disclaim all warranties of any kind whether express implied or statutory regarding the Zero X services includi...

Page 19: ...pursuant to the Australian Consumer Law cannot be excluded LIMITATIONS OF ZERO X LIABILITY Under no circumstances will Zero X be liable in any way for any content including but not limited to the los...

Page 20: ...on and limitation of liability will also not apply to claims for damages arising out of loss of life bodily injury or health impacts for which Zero X may be liable or for non contractual liability Som...

Page 21: ...21 16 NOTES...

Page 22: ...22...

Page 23: ......

Page 24: ...ation and Content are Copyright 2023 Directed Electronics Australia Pty Ltd All Rights Reserved V1 0 www zero x com au www zero x co nz ANOTHER DIRECTED BRAND Capture the Action www directed com au ww...

Reviews: