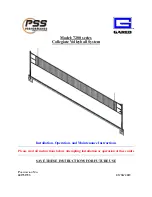
36
IT IS RECOMMENDED THAT THE NET BE REPLACED ON A YEARLY BASIS UNDER NORMAL USE, EVEN
IF IT DOES NOT SHOW ANY VISIBLE SIGNS OF DAMAGE.
How to Inspect the Trampoline Net for Structural Integrity
Always check the entire enclosure netting for signs of UV damage, deterioration, brittleness, cracking, and
tearing every time before using the trampoline and enclosure.
Step 1 - Inspect the enclosure netting before
EACH
use for wear or tear by pinching and pulling a section of
the netting between fingers and pulling downward. Please see diagram below.
If it produces any tear or cracking or ripping sound, then the net is unsafe and MUST be taken down
immediately.
STOP USING THE TRAMPOLINE ENCLOSURE IF YOU FIND ANY SIGNS OF WEAR OR
TEARING ON THE NETTING.
It is recommended that you replace the trampoline enclosure net and pad every 12 months. Replace the
enclosure net and pad earlier if there are any signs of wear, tear, brittleness, cracking, stretching or any
other signs of weakness. New enclosure netting and pads can be purchased through Zero Gravity
Trampolines customer service or on our website www.zerogravitytrampolines.com
1 to 3 Months
3 to 6 Months
6 to 12 Months
Inspect the enclosure (net,
net hanger, and straps) prior
to every use.
Thorough inspection for UV
damage and prior to every
use for net, net hanger and
straps.
Thorough inspection before
every use on net, net hanger,
straps, zippers, ties and
strings. Replace after 12
months or earlier if
necessary.
Summary of Contents for Ultima 4
Page 12: ...11 Assembly Instructions STEP 1...
Page 13: ...12 STEP 2...
Page 14: ...13 STEP 3...
Page 15: ...14 STEP 4...
Page 16: ...15 STEP 5...
Page 17: ...16 STEP 6...
Page 18: ...17 STEP 7...
Page 19: ...18 STEP 8 4 1 13 15 1 13 37 25 1 5th 6th 4th 3rd 2nd 1st...
Page 20: ...19 STEP 9...
Page 21: ...20 STEP 10...
Page 22: ...21 STEP 11 C C C C D G C C C D...
Page 23: ...22 STEP 12 A H E H C H J 16...
Page 24: ...23 STEP 13...
Page 25: ...24 STEP 14...
Page 26: ...25 STEP 15...
Page 27: ...26 STEP 16 L 7 L 6 L 5 L 4 L 3 L 1 L 6 L 8 L 8...
Page 28: ...27 STEP 17 1 L 10...
Page 29: ...28 STEP 17 2 Finish Assembly...
Page 31: ...30 Lowering the Trampoline Enclosure Step 1...
Page 32: ...31 STEP 2...
Page 33: ...32 STEP 3...
Page 34: ...33 STEP 4...